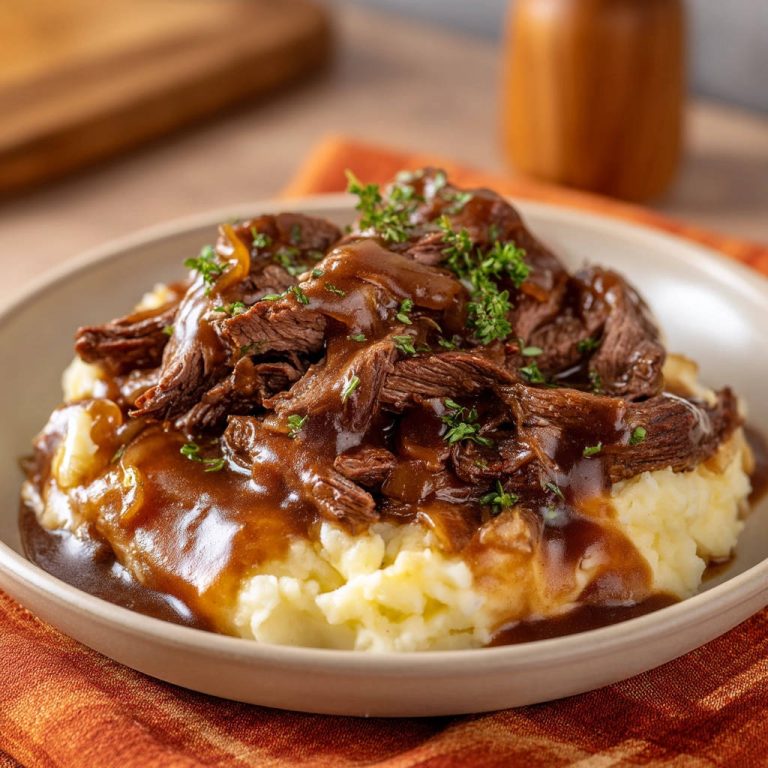
Have you ever tried making a classic steak and cheese sub at home, only for it to fall a little flat? Maybe the cheese was melty and the roll was perfect, but the meat itself just tasted… well, a bit bland? It’s a common struggle, isn’t it? We pile on the veggies and cheese, hoping it makes up for less-than-flavorful steak. But what if I told you there’s a simple, game-changing trick to ensure your Ultimate Steak and Cheese Subs are bursting with savory flavor from the very first bite?
I used to face the same disappointment. My homemade steak subs were okay, but never reached that craveable level of deliciousness. Then I discovered a technique that infuses seasoning into the meat as it cooks, rather than just sprinkling it on top at the end. This isn’t some fancy restaurant secret; it’s incredibly easy, and it completely transformed my homemade steak and cheese game. Forget bland meat forever – this recipe guarantees flavor!
Why You’ll Crave These Ultimate Steak and Cheese Subs
There are so many reasons to fall in love with this recipe, beyond just solving the blandness problem. These aren’t just any steak subs; they’re the kind you dream about!
- Unmatched Flavor: That simple seasoning trick makes all the difference, ensuring every single piece of steak is deeply savory.
- Perfect Texture: The combination of tender steak, caramelized vegetables, and gooey melted cheese is pure comfort.
- Quick & Easy: Clocking in at just 35 minutes total time, this recipe is perfect for a weeknight dinner or a quick weekend treat.
- Fully Customizable: While delicious as is, the base recipe is simple enough to adapt with your favorite toppings or variations.
- Better Than Takeout: Honestly, once you master this, you might never order steak subs out again! It’s more affordable and tastes fresher.
Get ready to experience the steak and cheese sub the way it was always meant to be – incredibly flavorful, satisfying, and easy to make at home.
Gathering Your Ingredients for Amazing Steak Subs
Creating truly flavorful steak and cheese subs starts with selecting the right components. While the steps are crucial, having quality ingredients sets you up for success. We’re aiming for a harmonious blend of savory beef, sweet and tender vegetables, and wonderfully gooey cheese, all held together by a perfect roll.
Here’s what you’ll need to round up, with a few notes on why each ingredient plays a vital role:
- Thinly Sliced Beef (1 pound): The heart of our sub! Ribeye or sirloin are fantastic choices here because they offer great flavor and tenderness when cooked quickly. The key is that it must be very thinly sliced. You can ask your butcher to do this for you (sometimes called “sandwich steak” or “shaved steak”) or partially freeze a steak at home for about 30-45 minutes, which makes it much easier to slice wafer-thin against the grain with a sharp knife. Thin slices cook rapidly and absorb seasoning better.
- Vegetable Oil or Olive Oil (1 tablespoon): Our cooking medium. A neutral vegetable oil or a light olive oil works well. It helps the vegetables soften and brown and prevents the steak from sticking, while also aiding in heat transfer for quick cooking.
- Large Onion, thinly sliced (1): Onions add a foundational sweetness and savory depth when caramelized. Thin slices ensure they cook down evenly and quickly blend into the steak mixture.
- Bell Peppers, thinly sliced (1 red, 1 green, 1 yellow): The vibrant trio! Red, green, and yellow bell peppers bring color, a touch of sweetness, and a slight earthy flavor that complements the beef beautifully. Slicing them thinly ensures they soften alongside the onions.
- Salt (1/2 teaspoon) & Black Pepper (1/4 teaspoon): These seem basic, but their application method in this recipe is the secret weapon! They enhance the natural flavors of the beef and vegetables. The specific amounts listed are a starting point; feel free to adjust to your taste, but don’t skip the generous application while cooking the meat.
- White Cheese Slices (8 slices): Provolone is the classic choice for a reason – it melts beautifully and has a mild, slightly tangy flavor that pairs wonderfully with steak. However, feel free to use a blend that melts well, like Monterey Jack, white cheddar, or even American cheese for ultimate gooiness. You’ll need 2 slices per sub.
- Long Sub Rolls (4): The vessel! A good sub roll is crucial. Look for rolls that are soft but sturdy enough to hold the generous filling without falling apart. Some people prefer a slightly crustier roll, while others like them soft and pillowy. Choose your favorite!
Having everything prepped and ready to go before you start cooking will make the process incredibly smooth, which is key for a quick-cooking recipe like this one.
Crafting Your Ultimate Steak and Cheese Subs: Step-by-Step
Alright, let’s get cooking! This process is straightforward, but paying attention to a couple of key moments is what takes these steak and cheese subs from good to absolutely phenomenal. Remember, the goal is maximum flavor and perfect texture in minimal time.
- Heat Your Skillet: Start by placing your large skillet or griddle over medium-high heat. Add the tablespoon of vegetable or olive oil. You want the pan hot enough that a drop of water sizzles and evaporates quickly. Getting the pan hot ensures the vegetables caramelize nicely and the meat sears instead of steaming.
- Sauté the Veggies: Carefully add the thinly sliced onions and bell peppers to the hot skillet. Use your spatula or tongs to stir them around occasionally. You’re looking for them to soften and start getting some lovely browned edges. This usually takes about 8 to 10 minutes. Don’t rush this step; those caramelized bits add incredible flavor to the finished subs! Once they’re tender and lightly browned, scoop them out of the skillet and set them aside in a bowl. Leave any oil or flavorful bits behind in the pan – that’s extra flavor for the meat!
- Cook the Steak: Now, add your very thinly sliced beef directly into the hot skillet. It should start cooking and changing color immediately. Use your spatula to break up the slices as they cook. Thin steak cooks incredibly fast, so keep an eye on it.
- The Flavor Secret – Season as You Cook: THIS is the moment that prevents bland meat! As the beef cooks and you’re breaking it up, generously sprinkle it with the salt and black pepper right in the pan. Continue to cook, stirring and chopping with your spatula, ensuring the seasoning coats the meat as it browns. Cooking the salt and pepper with the meat helps the flavors penetrate deep into the fibers, creating that wonderfully savory taste throughout the entire filling. Keep cooking until the meat is mostly browned through.
- Combine and Conquer: Bring those cooked onions and peppers back into the skillet with the beef. Give everything a good stir, mixing the vegetables and meat together thoroughly. If you prefer a finer chop for your sub filling, this is the time to use your spatula to chop the mixture a bit more as you stir. Let it all cook together for just another minute or two. This brief cooking time allows the flavors of the steak and vegetables to meld together beautifully.
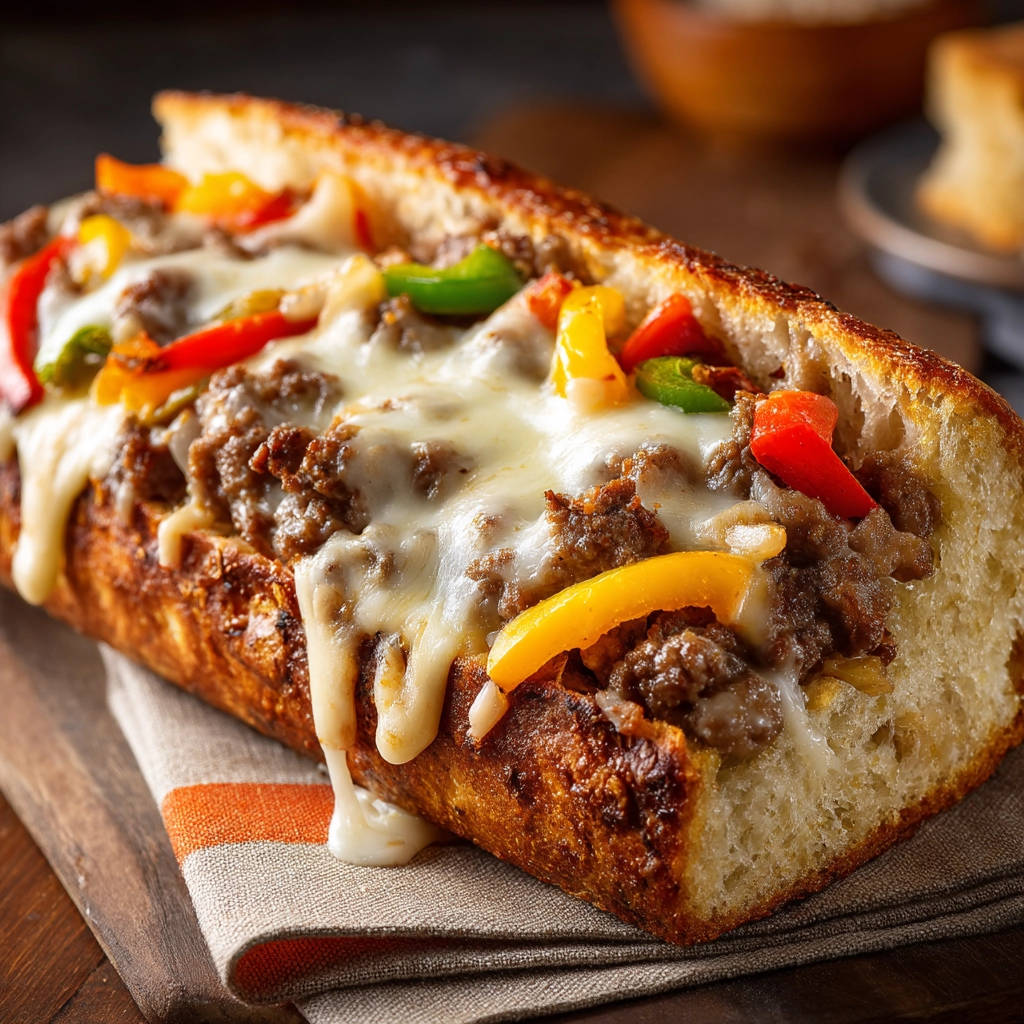
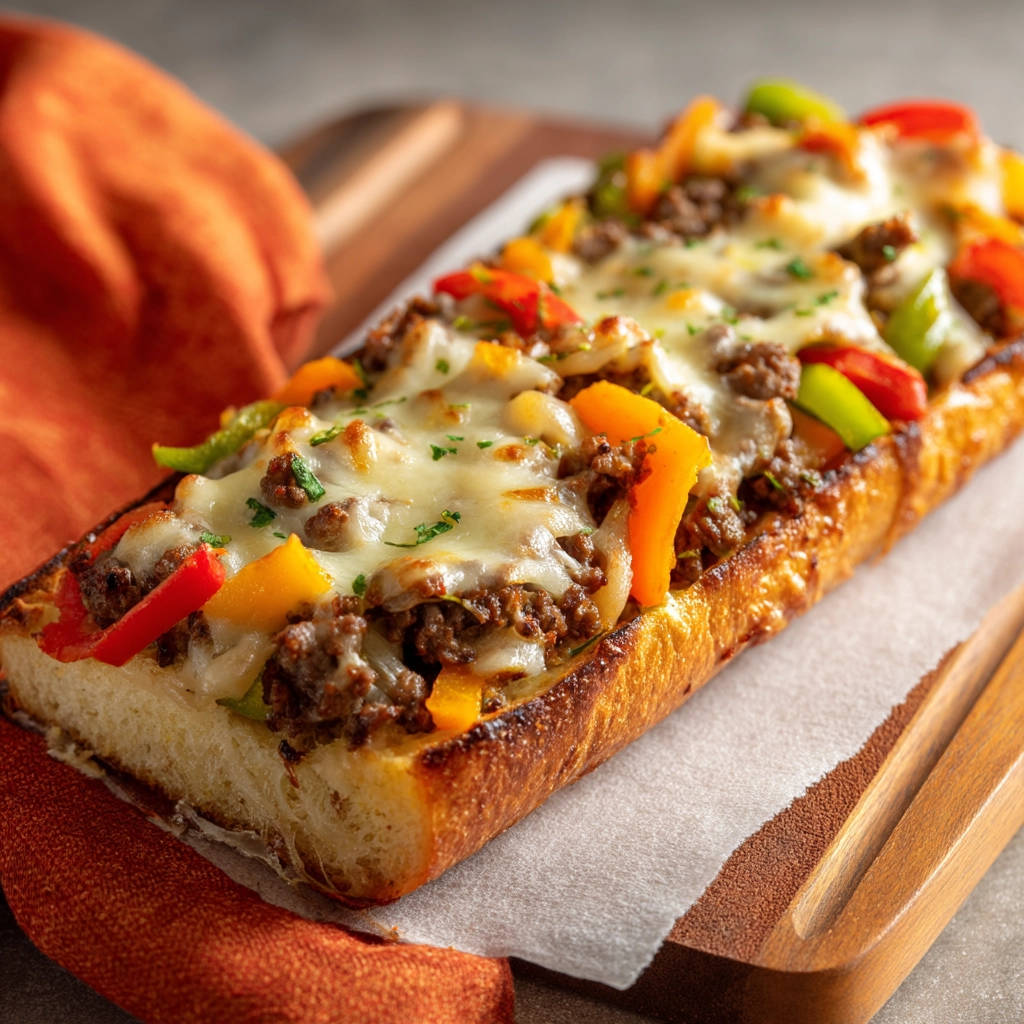
- Cheese Time: Once the filling is hot and well-mixed, divide it visually into four equal portions right there in the skillet. Place two slices of your chosen white cheese over the top of each portion.
- Melt That Gooey Goodness: To get that perfect melted cheese, you have a couple of options. The easiest is to cover the skillet. A lid works great, or you can even use a baking sheet placed directly over the pan. The trapped heat will quickly melt the cheese. If you don’t have a cover that fits, just let the skillet sit for a minute or two off the direct heat; the residual heat from the filling and pan will still melt the cheese, though perhaps a little slower.
- Prep the Rolls: While the cheese is melting, take this moment to prepare your sub rolls. Slice them open lengthwise (if they aren’t already) and, if you like a little extra texture and protection against a soggy bottom, lightly toast the insides under a broiler or in a separate pan. This adds a lovely warmth and slight crispness.
- Assemble and Serve: Now for the best part! Using a spatula (a large, flat one works well), carefully scoop one gooey, cheesy portion of the steak and vegetable mixture directly into each prepared sub roll. Gently press the filling into the roll if needed. Serve these sensational steak and cheese subs immediately while they are hot and the cheese is perfectly melty!
See? No complicated techniques, just a simple shift in when you season the meat, and the result is miles ahead of a bland sandwich.
Tips for Perfect Ultimate Steak and Cheese Subs Every Time
While the core recipe is simple, a few extra tips can elevate your homemade steak and cheese subs even further. These little tricks help ensure consistency and allow you to customize to your liking.
- Thin Slicing is Non-Negotiable: I can’t stress this enough. If the steak slices are too thick, they won’t cook quickly and evenly, and the seasoning won’t penetrate as well. Thin slices mean tenderness and maximum flavor absorption. If you’re slicing at home, partially freezing the steak first is your best friend for getting those paper-thin cuts.
- Hot Pan is Key: Starting with a properly preheated skillet is essential for searing the vegetables and the meat, developing those crucial browned bits (fond) on the bottom of the pan that contribute immense flavor to the whole dish.
- Don’t Overcrowd the Pan: If you’re cooking more than a pound of meat or using a smaller skillet, you might need to cook the meat in batches. Overcrowding the pan lowers the temperature, causing the meat to steam rather than sear, which means less flavor development.
- Experiment with Cheese: Provolone is classic, but don’t be afraid to try other melting cheeses. A mix of provolone and mozzarella is lovely, or sharp white cheddar for a tangier bite. For ultimate richness, some people even add a bit of cheese sauce, though slices are traditional and easier.
- Add Other Veggies: While the recipe calls for onion and bell peppers, you can easily add thinly sliced mushrooms (sauté them with the peppers and onions), or even a pinch of garlic powder when seasoning the meat for an extra layer of flavor.
- Consider the Roll: The bread can make or break a sub. Choose a roll you genuinely enjoy. Toasting the inside is a simple step that prevents the roll from getting soggy from the hot filling and adds a nice textural contrast. Some like a soft Italian roll, others prefer a crusty baguette-style roll for extra chew.
- Spice it Up: If you like a little heat, a pinch of red pepper flakes added when you add the salt and pepper can give it a nice kick.
What to Serve With Your Ultimate Steak and Cheese Subs
A hearty steak and cheese sub is practically a meal in itself, but a few classic sides can make it a complete feast. Thinking about what pairs well? Crispy, salty, or fresh are usually good routes to take.
French fries are a natural companion. Whether you prefer classic cuts or something with a little extra flavor, like our Crispy Garlic Fries with Parmesan Sauce, they’re always a crowd-pleaser. Potato chips or even crispy potato wedges are easy alternatives.
For something lighter to balance the richness, a simple green salad works wonderfully. A fresh arugula salad with a light vinaigrette, perhaps like the elements in our Arugula Pomegranate Salad (hold the pomegranate for a simpler green salad), can cut through the richness. Creamy coleslaw or a pasta salad are also popular choices.
If you’re looking for other beef recipes, exploring different cooking methods like in our guide to Pan Seared Steak can be helpful for mastering techniques that yield tender, flavorful results.
Your Steak and Cheese Sub Questions Answered (FAQ)
Got questions about making the best steak and cheese subs at home? Here are some common ones:
What’s the best cut of beef for steak and cheese subs?
Ribeye or sirloin are generally considered the best due to their flavor and tenderness when thinly sliced and quickly cooked. Filet mignon is too lean and expensive for this application, and tougher cuts like flank or skirt steak would need marinating and still might not be as tender when sliced thin.
Can I use pre-sliced “shaved” steak?
Absolutely! Many grocery stores sell beef specifically labeled as “shaved steak” or “sandwich steak.” This is perfect because it’s already sliced to the ideal thinness, saving you a step and ensuring great results. Just make sure it’s 100% beef with no added marinades or flavorings.
I don’t have provolone. What other cheese can I use?
Any good melting white cheese will work! Monterey Jack, white cheddar, or even American cheese slices are great alternatives. You could also use a cheese blend designed for melting. Avoid hard cheeses like Parmesan or crumbly cheeses like feta, as they won’t give you that signature gooey texture.
Can I add other toppings besides peppers and onions?
Yes, definitely! Sautéed mushrooms are a very popular addition and can be cooked right alongside the peppers and onions. You could also add chopped jalapeños for heat, or even a touch of steak sauce or hot sauce after cooking, though the recipe is designed to be flavorful without extra sauces if you prefer.
Can I make the filling ahead of time?
You can cook the meat and vegetable mixture ahead of time and store it in the refrigerator for 3-4 days. However, the texture and flavor are best when it’s freshly cooked and immediately combined with the melted cheese. If you do make it ahead, reheat it gently in a skillet, then add the cheese slices to melt just before assembling the subs.
How do I store and reheat leftovers?
Store any leftover filling separately from the rolls in an airtight container in the refrigerator for up to 3-4 days. Reheat the filling gently in a skillet over medium heat until hot. Then, assemble fresh subs with rolls and, if desired, add a fresh slice of cheese on top of the hot filling in the pan to melt before scooping.
Time to Enjoy Your Incredible Sub!
Making your own Ultimate Steak and Cheese Subs at home doesn’t have to mean settling for bland meat. By simply adjusting when and how you season the beef, you unlock a whole new level of flavor that will have you coming back for more.
These subs are perfect for a casual dinner, game day, or whenever you’re craving something hearty and delicious. They’re surprisingly fast and easy, proving that incredible flavor is well within reach in your own kitchen.
Give this recipe a try and taste the difference that simple seasoning trick makes! Let me know in the comments how yours turned out and what your favorite toppings are. Happy cooking!
Ultimate Steak and Cheese Sub

Ingredients
- 1 pound thinly sliced beef (like ribeye or sirloin, sliced very thin)
- 1 tablespoon vegetable oil or olive oil
- 1 large onion, thinly sliced
- 1 red bell pepper, thinly sliced
- 1 green bell pepper, thinly sliced
- 1 yellow bell pepper, thinly sliced
- 1/2 teaspoon salt
- 1/4 teaspoon black pepper
- 8 slices white cheese (like provolone or a blend that melts well)
- 4 long sub rolls
Directions
- Heat the oil in a large skillet or griddle over medium-high heat.
- Add the sliced onions and peppers to the hot skillet. Cook, stirring occasionally, until softened and lightly browned, about 8-10 minutes. Remove the vegetables from the skillet and set aside, leaving any remaining oil or bits in the pan.
- Add the thinly sliced beef to the hot skillet. Break up the slices with your spatula as it cooks.
- This is the key step for flavor: As the meat cooks, generously sprinkle it with the salt and pepper. Continue to cook and break up the meat until it’s mostly browned.
- Return the cooked onions and peppers to the skillet with the beef. Stir everything together, chopping the meat finer with your spatula as you mix if desired, so the flavors meld together beautifully. Cook for another 1-2 minutes, making sure the meat is cooked through and mixed well with the vegetables.
- Divide the meat and vegetable mixture into four equal portions in the skillet. Place 2 slices of cheese over each portion.
- Cover the skillet briefly (a lid or even a baking sheet will work) or let sit for a minute to allow the cheese to melt over the hot filling.
- While the cheese melts, lightly toast the insides of the sub rolls if desired.
- Carefully scoop one portion of the cheesy meat and vegetable mixture into each sub roll using a spatula. Serve immediately.