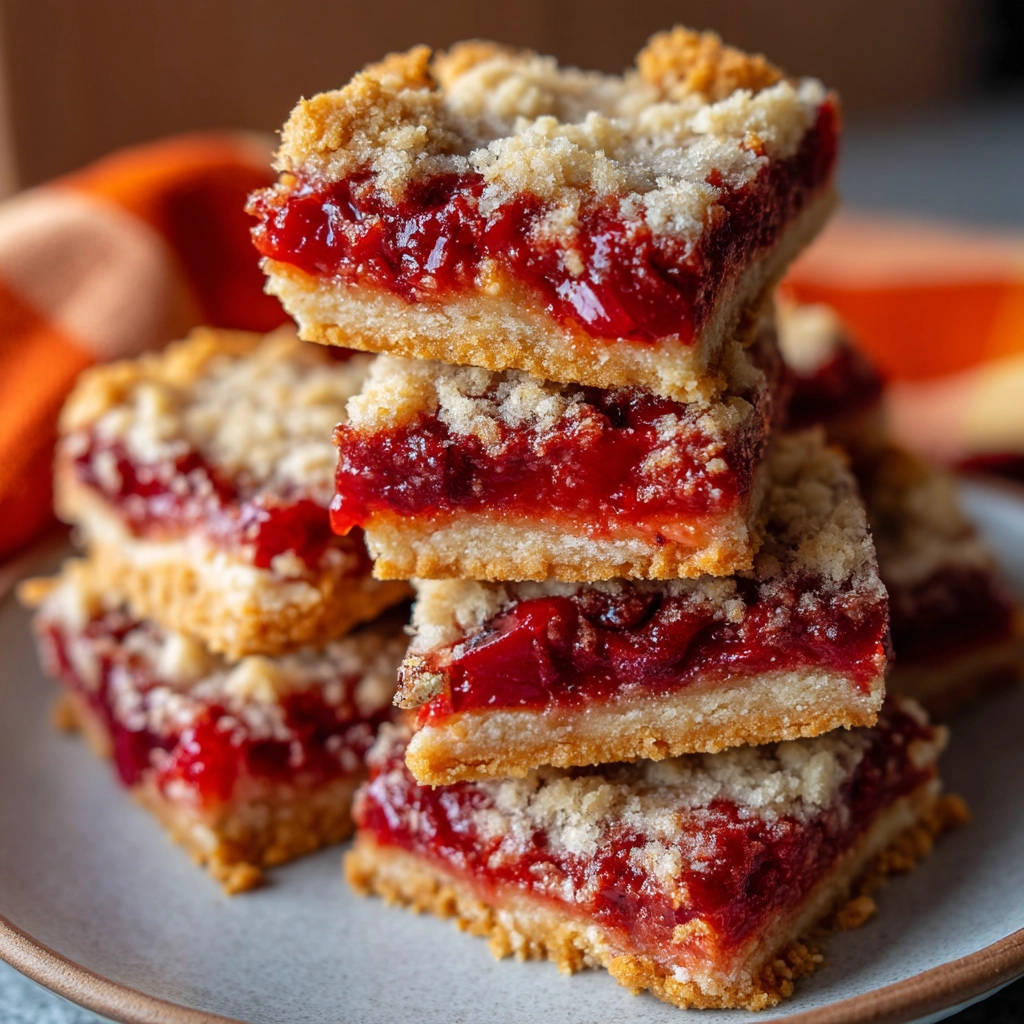
Is there anything more frustrating than biting into a seemingly perfect cherry bar only to have the filling squish out the sides? I’ve been there, and I know exactly how disappointing it is. But fear not! I’ve cracked the code to creating classic cherry crumble bars with a perfectly set filling that stays put, slice after slice. These bars are bursting with sweet and tart cherry flavor, nestled between a buttery, crumbly crust and topping. Get ready to bake up a batch of picture-perfect, easy-to-serve cherry goodness!
Why You’ll Love These Cherry Crumble Bars
These aren’t just any cherry bars; they’re the best cherry bars! Here’s why you’ll be making them again and again:
- No More Oozy Filling: Say goodbye to messy bars! The secret is in the pre-cooking of the cherry filling.
- Perfectly Portable: These bars are sturdy enough to pack for picnics, potlucks, or lunchboxes.
- Sweet & Tart Balance: The combination of sweet crumble and tart cherries is simply irresistible.
- Easy to Make: With just a few simple steps, you’ll have a pan of these beauties ready in no time.
- Freezer-Friendly: Make a batch ahead of time and freeze for a future treat.
Gathering Your Ingredients for Classic Cherry Crumble Bars
Before we dive into the baking process, let’s talk about the ingredients that make these cherry crumble bars so special. The recipe features two distinct components: a buttery crust and crumble topping and a luscious cherry filling. The crust and crumble offer a comforting, slightly sweet foundation, while the cherry filling delivers a burst of fruity goodness with a hint of tartness.
Here’s a breakdown of what you’ll need:
For the Buttery Crust and Crumble:
- All-Purpose Flour: The foundation of our crust and crumble. I recommend using unbleached all-purpose flour for the best texture.
- Granulated Sugar: For sweetness, of course! It also helps create a tender crust and a crisp crumble.
- Baking Powder: A touch of baking powder gives the crust a little lift and prevents it from being too dense.
- Salt: Enhances the flavors of all the other ingredients and balances the sweetness.
- Cold Unsalted Butter: This is key! Cold butter creates pockets of air in the dough, resulting in a flaky crust and a delightfully crumbly topping. Make sure it’s very cold and cut into cubes for easy incorporation.
For the Luscious Cherry Filling:
- Pitted Fresh or Frozen Cherries: Fresh cherries are fantastic when they’re in season, but frozen cherries work just as well and are available year-round. If using frozen, no need to thaw them first.
- Granulated Sugar: To sweeten the cherries and create a syrupy sauce.
- Cornstarch: This is the secret weapon for preventing an oozy filling! Cornstarch thickens the cherry juices and creates a stable gel.
- Lemon Juice: A touch of acidity brightens the cherry flavor and balances the sweetness. Freshly squeezed is always best!
- Vanilla Extract: Enhances the overall flavor and adds a touch of warmth. Use pure vanilla extract for the best results.
Crafting Your Classic Cherry Crumble Bars: Step-by-Step
Ready to get baking? Follow these simple steps, and you’ll be enjoying delicious cherry crumble bars in no time! Remember, the key to success is the pre-cooked filling and the complete cooling time. Don’t skip those steps!
- Preheat and Prep: Start by preheating your oven to 375 degrees F (190 degrees C). While the oven warms up, grease and flour a 9×13 inch baking pan. This prevents the bars from sticking and makes them easier to remove once cooled.
- Make the Crust and Crumble Base: In a large bowl, whisk together the flour, sugar, baking powder, and salt. Whisking ensures the dry ingredients are evenly distributed for a consistent texture. Then, cut in the cold butter using a pastry blender or your fingers. The goal is to create a mixture that resembles coarse crumbs with some pea-sized pieces of butter remaining. These bits of butter will melt during baking, creating flaky layers in the crust and a delightfully crumbly topping.
- Reserve Crumble Topping, Press Crust, and Pre-Bake: Reserve about 1 1/2 cups of the flour mixture for the crumble topping. Then, press the remaining mixture evenly into the bottom of the prepared baking pan to form the crust. Use the bottom of a measuring cup to help you get an even, compact crust. Bake the crust for 15-18 minutes, or until it’s lightly golden around the edges. Pre-baking the crust ensures it’s sturdy enough to support the cherry filling.
- Prepare the Cherry Filling: While the crust is baking, prepare the cherry filling. In a medium saucepan, combine the pitted cherries, sugar, cornstarch, and lemon juice. Stir well to ensure the cornstarch is evenly distributed. This is crucial to prevent lumps in the filling.
- Cook the Cherry Filling (The Secret Step!): Cook the cherry mixture over medium heat, stirring constantly. At first, the mixture will release juice, but as it heats, it will start to thicken. This is where the magic happens! Continue to cook and stir for 2-3 minutes after it begins to bubble and thicken visibly. This extra cooking time allows the cornstarch to fully activate and create a stable gel that will prevent the filling from becoming oozy. Trust me, this step is worth it!
- Add Vanilla: Remove the cherry filling from the heat and stir in the vanilla extract. The heat will help release the vanilla’s aroma and flavor.
- Assemble the Bars: Pour the cooked cherry filling evenly over the hot, pre-baked crust in the pan. Then, crumble the reserved flour mixture evenly over the top of the cherry filling.
- Bake Again: Bake for another 25-30 minutes, or until the crumble topping is golden brown and the filling is bubbling slightly around the edges. Keep an eye on the bars to prevent the topping from burning. If it starts to brown too quickly, you can tent the pan with aluminum foil.
- Cool Completely (This is Key!): Let the bars cool completely in the pan on a wire rack before cutting. This can take 2-3 hours or more. This is not optional! Cooling allows the filling to fully set and prevents it from oozing out when you slice. For the cleanest cuts, you can even chill them in the refrigerator after cooling.
- Slice and Enjoy: Once completely cool and set, cut the bars into squares using a sharp knife. Serve and enjoy your perfectly set cherry crumble bars!
Tips for Perfect Cherry Crumble Bars Every Time
Want to ensure your cherry crumble bars are a smashing success? Here are a few extra tips and tricks:
- Keep the Butter Cold: Cold butter is essential for a flaky crust and a crumbly topping. If your butter starts to soften while you’re working with it, pop it back in the refrigerator for a few minutes.
- Don’t Overmix: Overmixing the dough can develop the gluten in the flour, resulting in a tough crust. Mix just until the ingredients are combined.
- Use Parchment Paper for Easy Removal: Line the baking pan with parchment paper, leaving an overhang on the sides. This makes it easy to lift the bars out of the pan once they’re cool.
- Add Nuts to the Crumble: For extra crunch and flavor, add chopped nuts (like pecans or walnuts) to the crumble topping.
- Experiment with Other Fruits: While this recipe is for cherry bars, you can easily adapt it to use other fruits like blueberries, raspberries, or apples.
- Gluten-Free Option: For a gluten-free version, substitute the all-purpose flour with a gluten-free all-purpose flour blend.
- Storage: Store leftover cherry crumble bars in an airtight container at room temperature for up to 3 days or in the refrigerator for up to 5 days. You can also freeze them for up to 2 months.
What to Serve With Cherry Crumble Bars
These cherry crumble bars are delicious on their own, but they’re even better when paired with a complementary treat. For a truly decadent experience, consider serving them with a scoop of vanilla ice cream or a dollop of whipped cream. A warm beverage like coffee or tea is also a perfect accompaniment. For something a bit lighter, try pairing them with a refreshing fruit salad. If you’re looking for a simple and delicious dessert idea, check out our recipe for easy caramel nut dessert jars!
Your Cherry Crumble Bars Questions Answered (FAQ)
Why is my cherry filling still runny after baking?
The most common reason for a runny cherry filling is not cooking it long enough on the stovetop. It’s crucial to cook the filling for the specified 2-3 minutes after it begins to bubble and thicken visibly. This allows the cornstarch to fully activate and create a stable gel. Another reason could be using too much liquid in the filling. If using frozen cherries, make sure to drain off any excess liquid before cooking.
Can I use canned cherry pie filling instead of making my own?
While you can use canned cherry pie filling in a pinch, I highly recommend making your own. Homemade filling tastes much fresher and allows you to control the sweetness and consistency. Plus, you’ll avoid the artificial flavors and preservatives often found in canned fillings. If you’re short on time, you can prep the cherry filling a day in advance and store it in the refrigerator.
Can I freeze cherry crumble bars?
Yes, cherry crumble bars freeze beautifully! To freeze, let the bars cool completely, then cut them into squares. Wrap each square individually in plastic wrap, then place them in a freezer-safe container or bag. Freeze for up to 2 months. To thaw, simply remove the desired number of bars from the freezer and let them thaw at room temperature for about 30 minutes.
My crust is too dry. What did I do wrong?
A dry crust can be caused by several factors. The most common culprit is using too much flour. Make sure to measure the flour accurately using the spoon and level method (spoon the flour into a measuring cup, then level off the top with a knife). Another reason could be overbaking the crust. Keep a close eye on it and remove it from the oven as soon as it’s lightly golden around the edges. Adding a tablespoon or two of cold water to the dough can also help create a more moist crust.
Enjoy Your Homemade Classic Cherry Crumble Bars!
There you have it – a foolproof recipe for classic cherry crumble bars with a perfectly set filling every time. These bars are a delightful treat for any occasion, from casual get-togethers to holiday celebrations. So gather your ingredients, preheat your oven, and get ready to bake up a batch of sweet and tart happiness. Don’t forget to leave a comment below and let me know how your bars turned out! And if you loved this recipe, be sure to share it with your friends and family!
Classic Cherry Crumble Bars (No More Oozy Filling!)

Ingredients
- For the Crust and Crumble:
- 2 1/2 cups all-purpose flour
- 3/4 cup granulated sugar
- 1 teaspoon baking powder
- 1/4 teaspoon salt
- 1 cup (2 sticks) cold unsalted butter, cut into cubes
- For the Cherry Filling:
- 4 cups pitted fresh or frozen cherries (if frozen, no need to thaw)
- 1/2 cup granulated sugar
- 1/4 cup cornstarch
- 1 tablespoon lemon juice
- 1 teaspoon vanilla extract
Directions
- Preheat oven to 375 degrees F (190 degrees C). Grease and flour a 9×13 inch baking pan.
- Make the crust and crumble: In a large bowl, whisk together the flour, sugar, baking powder, and salt. Cut in the cold butter using a pastry blender or your fingers until the mixture resembles coarse crumbs with some pea-sized pieces of butter remaining.
- Reserve about 1 1/2 cups of this mixture for the crumble topping. Press the remaining mixture evenly into the bottom of the prepared baking pan to form the crust. Bake the crust for 15-18 minutes, or until lightly golden around the edges.
- While the crust is baking, prepare the cherry filling. In a medium saucepan, combine the pitted cherries, sugar, cornstarch, and lemon juice.
- Cook the cherry mixture over medium heat, stirring constantly. The mixture will start to release juice, then thicken as it heats. **This is the crucial step to prevent oozy filling! Continue to cook and stir for 2-3 minutes after it begins to bubble and thicken visibly.** The cornstarch needs time to activate and create a stable gel.
- Remove from heat and stir in the vanilla extract.
- Pour the cooked cherry filling evenly over the hot, pre-baked crust in the pan.
- Crumble the reserved flour mixture evenly over the top of the cherry filling.
- Bake for another 25-30 minutes, or until the crumble topping is golden brown and the filling is bubbling slightly around the edges.
- **This is key! Let the bars cool completely in the pan on a wire rack before cutting.** This allows the filling to fully set and prevents it from oozing out when you slice. This can take 2-3 hours or more. For cleanest cuts, you can even chill them in the refrigerator after cooling.
- Once completely cool and set, cut into squares using a sharp knife.