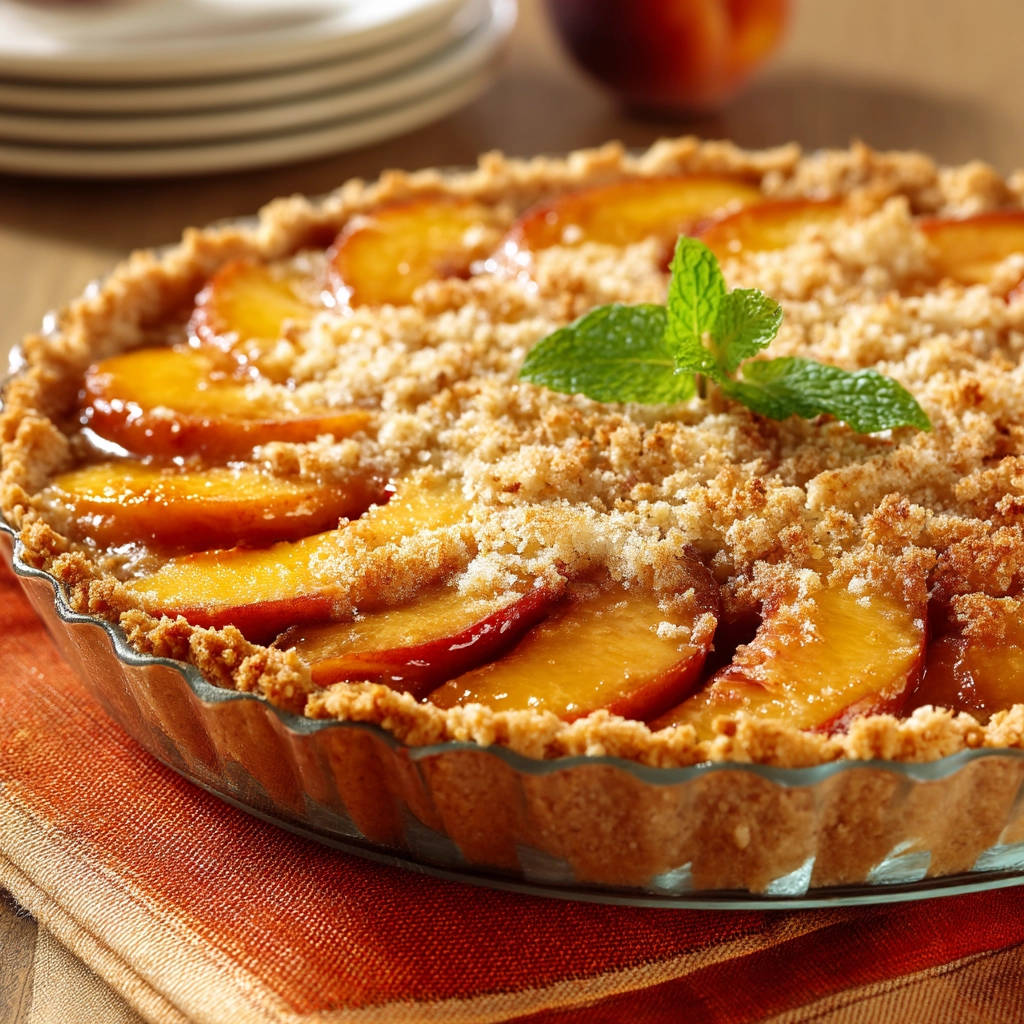
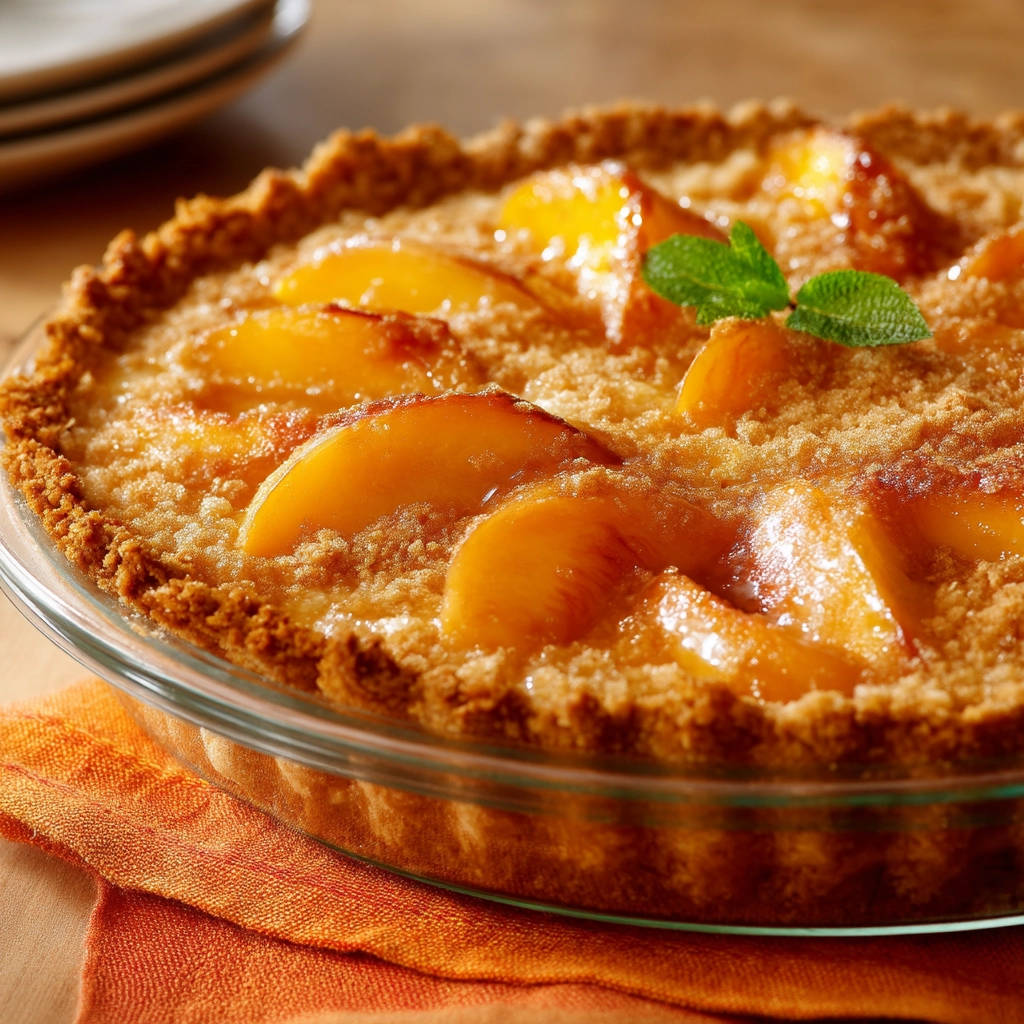
Is there anything more delightful than biting into a warm peach tart, bursting with sweet, juicy flavor and topped with a buttery crumble? Probably not! But the quest for the perfect peach tart can often end in disappointment, with a soggy crust that ruins the whole experience. Fear not, because this recipe is your secret weapon against the dreaded soggy bottom! We’re sharing a simple trick to guarantee a crisp, golden crust every single time, so you can enjoy perfect slices of this classic peach crumble tart.
Why You’ll Love This Peach Crumble Tart
This isn’t just another peach tart recipe; it’s a game-changer. Here’s why you’ll fall in love with it:
- Crisp Crust, Guaranteed: Say goodbye to soggy crusts forever! Our secret technique ensures a perfectly crisp base that can stand up to even the juiciest peaches.
- Simple & Straightforward: No fancy ingredients or complicated techniques here. This recipe uses simple ingredients and easy-to-follow instructions.
- Bursting with Peach Flavor: We use plenty of ripe, juicy peaches to create a filling that’s intensely flavorful and perfectly sweet.
- That Irresistible Crumble: The buttery, golden crumble topping adds the perfect amount of texture and sweetness to complement the peaches.
- Perfect for Any Occasion: Whether it’s a summer picnic, a family gathering, or just a special treat for yourself, this peach crumble tart is always a hit.
Gathering Your Ingredients for Classic Peach Crumble Tart
Before we dive into baking, let’s talk about the ingredients that make this peach crumble tart so special. This recipe is built around three key components: the flaky crust, the juicy peach filling, and the irresistible crumble topping. Each ingredient plays a crucial role in achieving the perfect balance of textures and flavors.
Here’s what you’ll need, broken down by each component:
For the Perfectly Crisp Crust:
- All-Purpose Flour: The foundation of our crust. We’re using all-purpose flour for its versatility and ability to create a tender yet sturdy crust. Make sure to measure it accurately!
- Granulated Sugar: Adds a touch of sweetness to the crust and helps with browning.
- Salt: Enhances the flavors of all the other ingredients and balances the sweetness.
- Cold Unsalted Butter: This is key to a flaky crust! The cold butter creates pockets of steam as it bakes, resulting in layers of flaky goodness. Make sure it’s very cold and cut into small cubes for easy incorporation.
- Ice Water: The magic ingredient that brings the dough together. Use ice water to keep the butter cold and prevent the gluten from developing too much, which can lead to a tough crust. Add it gradually, just until the dough comes together.
For the Juicy Peach Filling:
- Ripe Peaches: The star of the show! Look for peaches that are fragrant, slightly soft to the touch, and have a vibrant color. The riper the peaches, the sweeter and more flavorful the filling will be. You’ll need about 4 to 5 large peaches, peeled, pitted, and sliced.
- Granulated Sugar: Adds sweetness to the filling and helps to draw out the juices from the peaches.
- Cornstarch: This is our secret weapon against a watery filling! Cornstarch thickens the juices as the tart bakes, preventing a soggy crust and creating a luscious, jam-like consistency.
- Salt: Just a pinch to enhance the flavors of the peaches.
For the Buttery Crumble Topping:
- All-Purpose Flour: Provides structure to the crumble topping.
- Granulated Sugar: Adds sweetness and helps the crumble to brown beautifully.
- Cold Unsalted Butter: Just like with the crust, cold butter is key to a tender and crumbly topping. Cut it into small cubes and work it into the flour and sugar until the mixture resembles coarse crumbs.
Crafting Your Classic Peach Crumble Tart: Step-by-Step
Ready to bake the perfect peach crumble tart? Don’t worry, it’s easier than you think! Just follow these step-by-step instructions, and you’ll be enjoying a slice of warm, deliciousness in no time. The secret to our “never soggy bottom” technique lies in a key baking step that we’ll highlight along the way.
- Preheat and Prepare: Start by preheating your oven to 375 degrees F (190 degrees C). This ensures even baking and a perfectly golden crust and topping.
- Making the Crust – The Dry Mix: In a medium bowl, whisk together the all-purpose flour, granulated sugar, and salt. Whisking ensures everything is evenly distributed, preventing pockets of saltiness or sweetness.
- Cutting in the Butter: Add the cold, cubed butter to the flour mixture. Use a pastry blender (or your fingers) to cut the butter into the flour until the mixture resembles coarse crumbs with some pea-sized pieces of butter remaining. The goal is to keep the butter cold and create small pockets that will create flakiness.
- Adding the Ice Water: Gradually add the ice water, one tablespoon at a time, mixing until the dough just comes together. Be careful not to overmix! Overmixing develops the gluten in the flour, resulting in a tough crust. The dough should be slightly shaggy but hold together when pressed.
- Chilling the Dough: Flatten the dough into a disk, wrap it in plastic wrap, and chill for at least 30 minutes. This allows the gluten to relax, making the dough easier to roll out, and it also helps the butter to stay cold, which is essential for flakiness.
- Rolling and Shaping the Crust: On a lightly floured surface, roll out the chilled dough into a circle about 12 inches in diameter. Carefully transfer the dough to a 9-inch tart pan with a removable bottom. Press the dough into the bottom and up the sides, trimming any excess. Crimp the edges if desired for a pretty presentation.
- The Secret to No Soggy Bottoms: Blind Baking is Key!: Lightly prick the bottom of the tart shell all over with a fork. This prevents the crust from puffing up during baking. Then, line the crust with parchment paper or aluminum foil and fill with pie weights, dried beans, or rice. This step prevents the crust from puffing up and helps it bake evenly and set before the wet filling goes in, creating that essential barrier against moisture.
- Blind Baking, Part 1: Bake the crust for 15 minutes with the weights. This sets the structure of the crust.
- Blind Baking, Part 2: Carefully remove the weights and parchment paper. Return the crust to the oven and bake for another 5 to 7 minutes, until the bottom looks dry and lightly golden. This ensures the crust is fully baked and can withstand the juicy filling. Remove from oven and let cool slightly.
- Prepping the Filling: While the crust is blind baking, prepare the filling. In a large bowl, gently toss the sliced peaches with the sugar, cornstarch, and salt. The cornstarch will help thicken the juices as the tart bakes, preventing a watery filling and further protecting the crust.
- Making the Crumble: In a small bowl, combine the flour and sugar for the crumble topping. Cut in the cold butter using a pastry blender or your fingers until the mixture is crumbly. You can also incorporate a pinch of cinnamon for some extra flavor.
- Assembling the Tart: Pour the peach filling into the partially baked and cooled tart shell, spreading it evenly.
- Topping it Off: Sprinkle the crumble topping evenly over the peaches. Make sure to cover the entire surface for a beautiful golden-brown finish.
- Baking to Perfection: Bake the tart for 35 to 45 minutes, or until the crumble topping is golden brown and the filling is bubbly. Keep an eye on it towards the end of baking to prevent the topping from burning.
- Cooling is Crucial: Let the tart cool on a wire rack for at least 30 minutes before slicing. This allows the filling to set properly and prevents it from being too runny. Serve warm or at room temperature.
Tips for Perfect Peach Crumble Tart Every Time
Want to ensure your peach crumble tart is a resounding success? Here are a few extra tips to keep in mind:
- Use Ripe, But Not Overripe Peaches: The best peaches for this tart are ripe but still slightly firm. Overripe peaches can become mushy during baking.
- Don’t Overmix the Dough: Overmixing the crust dough develops the gluten, resulting in a tough crust. Mix just until the dough comes together.
- Keep Everything Cold: Cold butter is essential for both the crust and the crumble topping. Keep the butter cold throughout the process, and chill the dough before rolling it out.
- Adjust Baking Time as Needed: Ovens can vary, so keep an eye on the tart during baking and adjust the baking time as needed. The crumble topping should be golden brown and the filling should be bubbly.
- Let it Cool Completely (Almost!): As tempting as it may be, resist the urge to slice into the tart while it’s still piping hot. Allowing it to cool slightly allows the filling to set and prevents it from being too runny.
What to Serve With Peach Crumble Tart
This peach crumble tart is delicious all on its own, but it’s even better when paired with a few complementary flavors. Consider serving it with a scoop of vanilla ice cream or a dollop of whipped cream. The cool, creamy texture of the ice cream or whipped cream provides a delightful contrast to the warm, sweet tart. Alternatively, you might like to try a custard on the side. For a complete dessert experience, consider serving alongside a batch of easy caramel nut dessert jars – the crunchy, sweet caramel complements the fruity tart beautifully.
If you like serving tart with some sides, you might also enjoy a bowl of creamy spiced potatoes.
Your Peach Crumble Tart Questions Answered (FAQ)
Can I use frozen peaches for this recipe?
While fresh peaches are ideal, you can use frozen peaches in a pinch. Just make sure to thaw them completely and drain off any excess liquid before using them in the filling. You may also need to increase the amount of cornstarch slightly to compensate for the extra moisture.
Can I make this tart ahead of time?
Yes, you can make the tart ahead of time. The baked tart can be stored at room temperature for up to 2 days or in the refrigerator for up to 4 days. You can also make the crust dough ahead of time and store it in the refrigerator for up to 2 days or in the freezer for up to 1 month.
Can I substitute the all-purpose flour with another type of flour?
Yes, you can substitute the all-purpose flour with gluten-free all purpose flour if you want to make it gluten-free dessert.
How do I prevent the crumble topping from burning?
If you notice the crumble topping is browning too quickly, you can tent the tart with aluminum foil during the last 15-20 minutes of baking. This will protect the topping from burning while allowing the filling to continue baking.
My tart crust shrunk during baking. What did I do wrong?
Tart crusts shrinking during baking can happen for a few reasons. Firstly, ensure that you’re chilling the dough for the recommended time, as this allows the gluten to relax. Secondly, when pressing the dough into the tart pan, avoid stretching it, which can cause it to shrink back during baking. Finally, ensure your oven temperature is accurate.
Enjoy Your Homemade Classic Peach Crumble Tart!
Congratulations! You’ve just created a beautiful and delicious peach crumble tart that’s guaranteed to impress. The combination of the crisp, buttery crust, the juicy, sweet peach filling, and the golden-brown crumble topping is simply irresistible. So go ahead, slice yourself a piece (or two!), and savor the taste of summer. And don’t forget to share your baking success with us in the comments below – we’d love to hear how it turned out!