Have you ever tried to make those adorable, portable Japanese rice balls, only for them to completely fall apart in your hands? It feels like you need some kind of secret ninja skill to get them to stick together, right? Trust me, you are not alone! It’s one of the most frustrating things when you’re looking forward to a delicious, handheld snack or lunch, and it ends up being just… a pile of rice.
But what if I told you there’s a simple trick, a game-changer, that will make your homemade easy chicken onigiri hold its shape beautifully every single time? No more crumbling messes, no more feeling defeated by sticky rice. This recipe isn’t just about flavorful, tender glazed chicken wrapped in perfect rice; it’s about mastering the technique so you can confidently shape those delightful triangles (or circles!) like a pro.
Get ready to unlock the secret to perfect onigiri and add this fantastic, versatile snack or light meal to your repertoire!
Why You’ll Absolutely Love This Easy Chicken Onigiri Recipe
Beyond the fact that it solves the dreaded crumbling issue, there are so many reasons this easy chicken onigiri will become a favorite:
- Perfectly Portable: They are the ultimate grab-and-go food, ideal for lunchboxes, picnics, road trips, or just snacking on the couch.
- Kid-Friendly Favorite: Most kids adore rice, chicken, and seaweed. The fun shape makes them extra appealing!
- Customizable Filling: While this recipe features a delicious sweet and savory chicken glaze, the rice ball itself is a blank canvas for endless filling possibilities.
- Quick to Make: Once you have the rice cooked, the assembly comes together surprisingly fast.
- Satisfying & Balanced: A good mix of carbs, protein, and flavor makes for a satisfying bite.
- Holds Its Shape: Yes, I had to mention it again! This recipe guarantees rice balls that stay together.
Gathering Your Ingredients for Delicious Chicken Rice Balls
Making these flavorful easy chicken onigiri requires just a handful of simple ingredients, many of which you might already have in your pantry. The magic is in how they come together to create a balanced and delicious bite.
Here’s what you’ll need:
- Cooked Short-Grain Rice, Still Slightly Warm: This is non-negotiable! Short-grain rice, like Japanese sushi rice, has the perfect starch content to bind together. Using it slightly warm is key because the warmth helps the starches become pliable and stick together without needing excessive pressure that could mush the rice. Avoid using long-grain rice, like Basmati or Jasmine, as they simply won’t hold their shape properly.
- Boneless, Skinless Chicken Breast or Thigh: You can use either! Chicken breast is lean and cooks quickly, while chicken thighs offer a little more moisture and richness. Cut it into small, bite-sized pieces so it’s easy to tuck inside the rice ball and doesn’t cause it to burst.
- Soy Sauce: The foundation of our savory glaze. Use a good quality soy sauce for the best flavor.
- Sugar or Honey: Adds sweetness to balance the salty soy sauce and helps create that lovely sticky glaze on the chicken. Use whichever you prefer!
- Vegetable Oil: Just a little needed for cooking the chicken until it’s nicely browned.
- Pinch of Salt: A tiny bit of salt is crucial for seasoning your hands when shaping. It adds a subtle flavor to the exterior of the rice.
- Nori (Seaweed), Cut into Strips or Pieces: Nori not only adds that classic onigiri flavor and a slightly chewy texture, but the strip on the bottom also serves a practical purpose – it gives you a clean spot to hold the rice ball without getting sticky hands!
- Furikake Seasoning (Sesame Seed and Seaweed Mix): This adds an extra layer of flavor and texture to the outside of the onigiri. There are many varieties of furikake available, from basic sesame and seaweed to mixes including dried fish flakes, vegetables, and even wasabi. Choose one you love!
Having everything prepped and ready to go before you start shaping is a great way to make the process smooth and enjoyable.
Crafting Your Onigiri: A Detailed Step-by-Step Guide
Making these easy chicken onigiri is a process broken down into simple, manageable steps. Let’s walk through it together, focusing on the details that make all the difference.
-
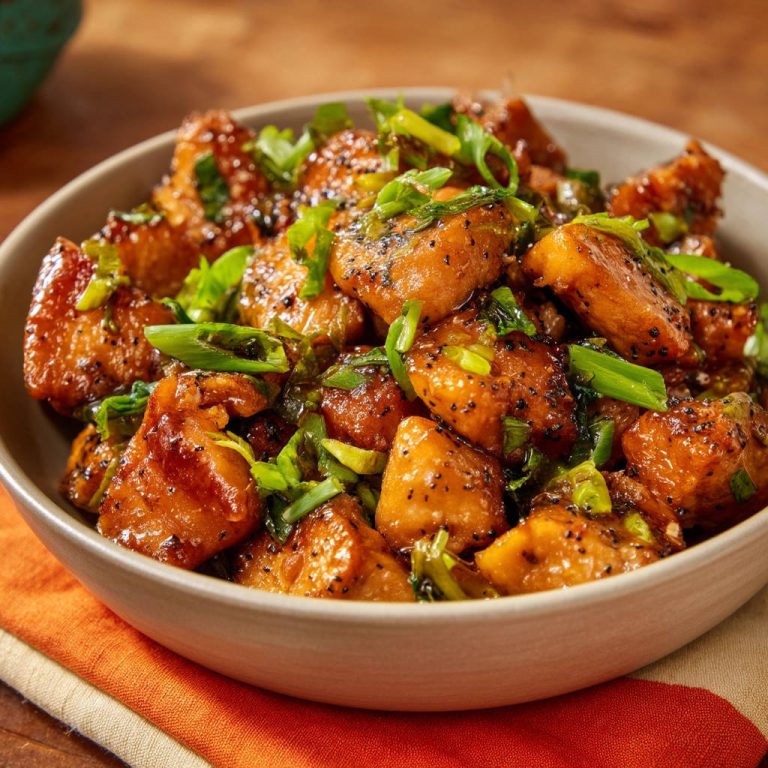
Get the Chicken Ready: Start by preparing your flavorful chicken filling. Heat a small amount of vegetable oil in a pan over medium heat. While the oil warms, take your boneless, skinless chicken breast or thigh and cut it into small, uniform, bite-sized pieces. Aim for pieces small enough to fit comfortably inside a rice ball without making it bulky. Add the chicken to the hot pan and cook, stirring occasionally, until it’s nicely browned on all sides and completely cooked through. This usually takes around 5 to 7 minutes. Make sure there’s no pink remaining in the center.
-
Create the Delicious Glaze: While your chicken is cooking away, whisk together the soy sauce and your choice of sugar or honey in a small bowl. This is going to be the sweet and savory coating for the chicken. Once the chicken is fully cooked and browned, pour this glaze mixture directly over the chicken in the pan. Stir everything together well, making sure each piece of chicken gets coated. Continue to cook for just another 1-2 minutes. You’ll notice the sauce will thicken slightly as it heats and reduces, clinging beautifully to the chicken pieces. Once it’s thick and glossy, remove the pan from the heat and set the chicken aside. This allows it to cool slightly before filling.
-
Prepare Your Workspace for Shaping – The Secret Step!: This step is the absolute key to making onigiri that holds its shape perfectly without sticking to your hands or turning into a mushy mess. Place your slightly warm cooked short-grain rice in a medium bowl. Next to your rice bowl, have a small bowl filled with fresh water and a pinch of salt stirred into it. Dip your hands lightly into the salted water. You don’t want them dripping, just lightly moistened. Then, sprinkle a tiny pinch of salt onto your palms. The water acts as a barrier, preventing the sticky rice from adhering to your skin, while the salt seasons the outer layer of the rice, adding a traditional touch of flavor.
-
Shape Those Perfect Onigiri (Pain Point Solved!): With your hands lightly wet and salted, scoop up about half a cup of the warm rice. Cup it gently in one hand. Use your thumb to create a small indentation in the center of the rice mound – this is where your delicious filling will go! Place one or two pieces of the glazed chicken filling into this indentation. Don’t overfill, or it will be difficult to seal. Now, take another small amount of rice and place it on top of the filling, completely covering it. Bring your hands together, gently cupping the rice ball. Apply light but firm pressure to start forming your desired shape. The classic shape is a triangle, which is easy to achieve by rotating the rice ball in your hands and gently pressing on the sides to form the points and flatten the base. The warmth of the rice and the lightly wet, salted hands work together beautifully; the warmth helps the rice stick to itself, and the water/salt prevents it from sticking to you. Remember, use gentle, even pressure – you want the grains to adhere, not be crushed.
-
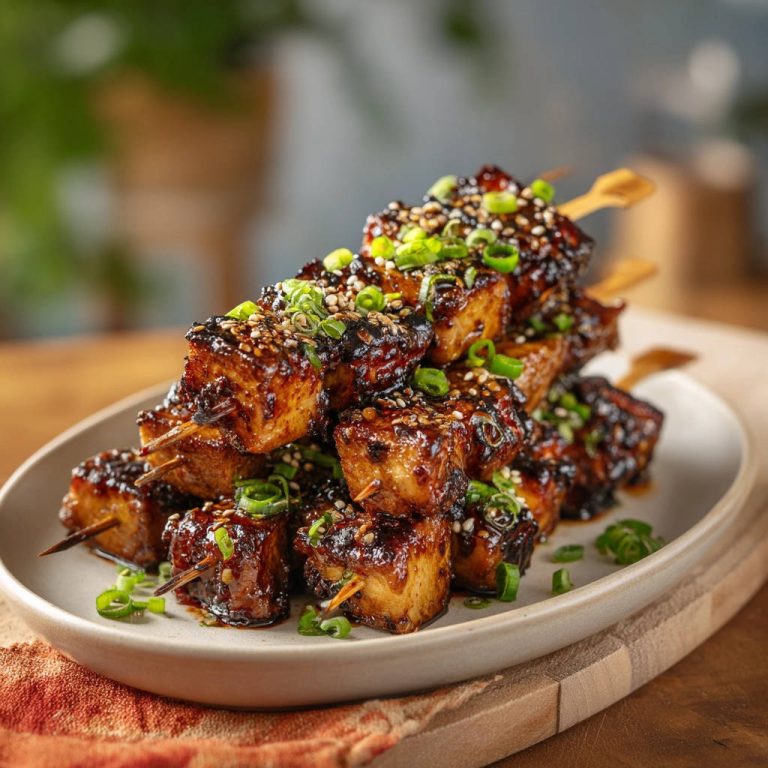
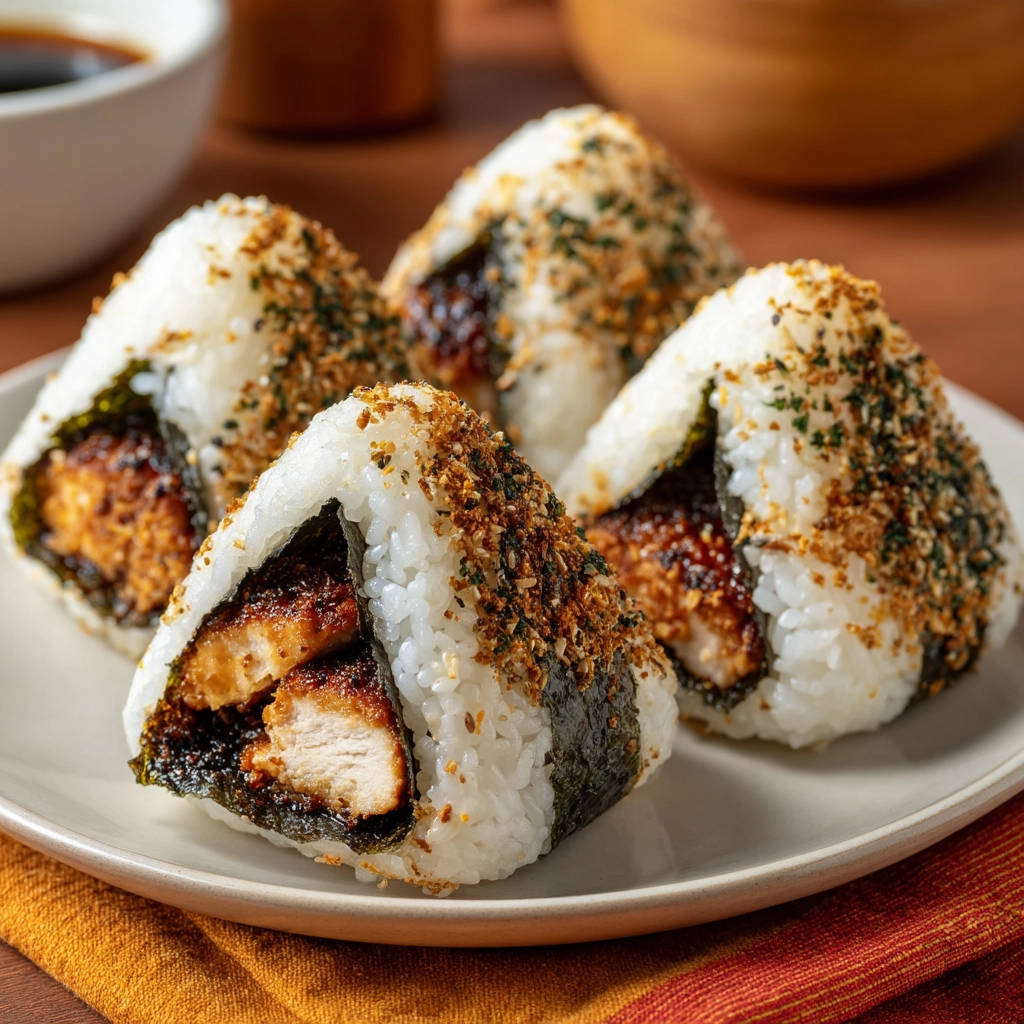
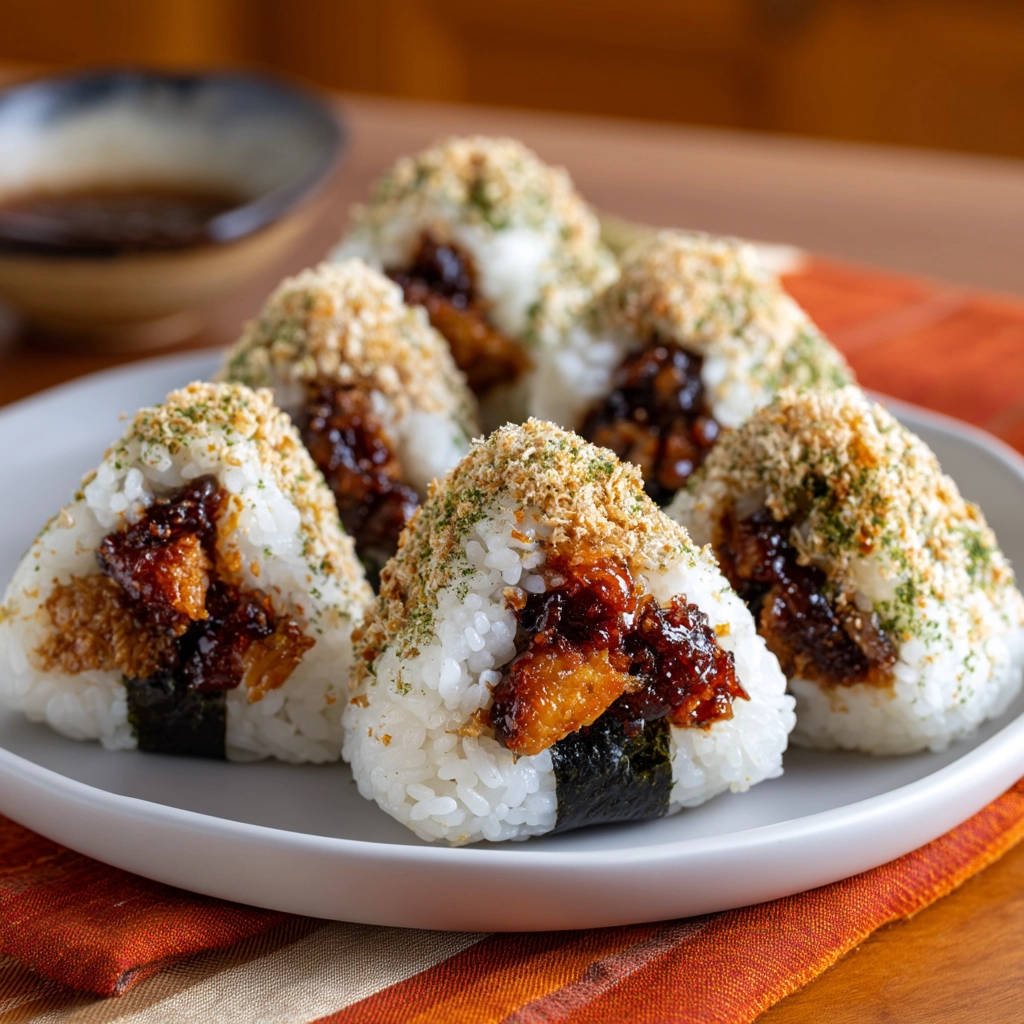
Add the Finishing Touches: Once your onigiri is perfectly shaped, it’s time to add the seaweed. Take one of your cut strips or pieces of nori and press it onto the bottom edge of the rice ball. The natural moisture from the warm rice will help it stick firmly. For extra flavor and visual appeal, you can scatter some furikake seasoning on a plate and gently press the top and sides of the onigiri into it, coating the exterior. This step is optional but highly recommended for that authentic onigiri experience.
-
Repeat and Enjoy!: Continue steps 3 through 5 with the remaining rice and chicken filling until you’ve used it all up. You’ll get faster and more confident with each one! These are best enjoyed immediately while the rice is still soft, but they are also fantastic wrapped individually for later. They make a wonderful addition to a packed lunch alongside a fresh salad or some crispy parmesan green beans.
Tips for Perfect Easy Chicken Onigiri Every Time
While the core technique is simple, a few extra tips can elevate your onigiri game and ensure success:
- Rice is King: Seriously, use short-grain Japanese rice. Calrose rice is a readily available option that works well if Japanese sushi rice is hard to find. Rinse the rice thoroughly before cooking to remove excess starch, which helps prevent it from being too sticky in a bad way.
- Warmth Matters: Don’t let your rice cool completely. Warm rice is pliable rice. If your rice has cooled too much, you can gently warm it in the microwave for 30-60 seconds before shaping.
- Hand Moisture is Crucial: Keep that small bowl of salted water nearby and re-moisten your hands as needed between shaping each onigiri. If your hands start feeling sticky, it’s time for another quick dip.
- Don’t Over-Squeeze: Gentle but firm pressure is the goal. Too much force will compact the rice and make it dense and unpleasant to eat.
- Filling Size: Ensure your filling pieces are small. Large chunks will make shaping difficult and can cause the rice ball to break apart.
- Experiment with Fillings: Once you’ve mastered the chicken, try other fillings! Cooked tuna mixed with mayonnaise, pickled plums (umeboshi), salted salmon, or even just seasoned vegetables are popular choices. Get creative!
- Storage: To store onigiri, wrap each one individually tightly in plastic wrap to prevent the rice from drying out. They are best eaten within 1-2 days when stored in the refrigerator.
- Serving Temperature: Onigiri is traditionally eaten at room temperature, which is why they are so popular for bento boxes. Refrigerating them can make the rice a little hard; letting them sit out for 20-30 minutes before eating can help soften them slightly.
What to Serve With Your Chicken Onigiri
Easy Chicken Onigiri is a meal in itself, but they also pair wonderfully with other simple Japanese-inspired or complementary dishes. A light soup, like miso soup, is classic. A simple side salad with a ginger or sesame dressing, or some quick pickled vegetables, adds freshness. If you’re making a larger meal, they can be served alongside crispy chicken katsu or even simple grilled fish. For another great chicken and rice pairing, you might also enjoy our juicy chicken and rice bowl.
Your Easy Chicken Onigiri Questions Answered (FAQ)
Let’s address some common questions that might pop up when you’re making homemade onigiri.
What kind of rice is best for onigiri?
You absolutely must use short-grain Japanese rice. This rice variety has the correct starch content that becomes slightly sticky when cooked, allowing the grains to adhere to each other when molded. Medium-grain rice, like Calrose, is a decent substitute if Japanese short-grain is unavailable, but long-grain varieties like Basmati or Jasmine are unsuitable as they won’t bind properly.
Can I use leftover chicken for the filling?
Yes, absolutely! This recipe is perfect for using up leftover cooked chicken. Simply shred or dice the chicken into small pieces and toss it in a quick glaze made from soy sauce and sugar/honey in a pan over low heat, just long enough to coat and warm through. This is a great way to make quick and easy chicken onigiri with minimal effort.
How do I prevent the onigiri from falling apart?
The secret lies in two main things: using warm, cooked short-grain rice and keeping your hands lightly wet with salted water during shaping. The warmth of the rice makes it pliable, and the water prevents sticking while you apply gentle, even pressure to mold the shape. Don’t skip the salted water step!
How much filling should I put inside?
A common mistake is overfilling. Use only 1-2 small pieces of chicken filling per onigiri. You need enough rice to completely enclose the filling and still have a good ratio of rice to filling. Too much filling will make the rice ball difficult to seal and prone to breaking.
How long can I store homemade onigiri?
When wrapped tightly in plastic wrap and stored in the refrigerator, homemade chicken onigiri is best consumed within 1-2 days. The rice can dry out and harden over time.
Can I freeze onigiri?
Yes, you can freeze onigiri! Wrap each shaped rice ball tightly in plastic wrap, then place them in a freezer-safe bag or container. They can be frozen for up to 1 month. To reheat, remove the plastic wrap and microwave on low power until heated through. Be aware that the texture of the rice may change slightly after freezing and thawing, sometimes becoming a bit firmer.
Do I have to add the nori?
While traditional, the nori is technically optional if you truly dislike it. However, it serves a practical purpose by providing a non-sticky spot to hold the onigiri, in addition to its flavor and texture contributions. If you omit it, your hands might get a bit stickier while eating.
Enjoy Your Homemade Easy Chicken Onigiri!
Making these easy chicken onigiri is such a rewarding experience. They are simple, delicious, and incredibly versatile. Now that you know the trick to getting them to hold their shape, you can confidently whip up a batch for lunches, snacks, or even a fun party appetizer!
Give this recipe a try and discover the joy of perfectly shaped, flavorful rice balls. Let me know how they turn out in the comments below! Happy shaping!
Easy Chicken Onigiri

Ingredients
- 2 cups cooked short-grain rice, still slightly warm
- 1 boneless, skinless chicken breast or thigh
- 2 tablespoons soy sauce
- 1 tablespoon sugar or honey
- 1 teaspoon vegetable oil
- Pinch of salt
- 2 sheets nori (seaweed), cut into strips or pieces
- 2 tablespoons furikake seasoning (sesame seed and seaweed mix)
Directions
- Cook the chicken: Heat the vegetable oil in a small pan over medium heat. Cut the chicken into small, bite-sized pieces. Add chicken to the pan and cook until browned on all sides and cooked through, about 5-7 minutes.
- Make the glaze: While the chicken cooks, whisk together the soy sauce and sugar or honey in a small bowl. Once the chicken is cooked, pour the glaze over the chicken in the pan and stir to coat. Cook for another 1-2 minutes until the sauce has thickened slightly and coats the chicken. Remove from heat and set aside.
- Prepare for shaping: Place the slightly warm cooked rice in a bowl. Have a small bowl of water and a pinch of salt ready nearby. This is the key! Wet your hands lightly with water and sprinkle a tiny bit of salt on your palms. The water prevents sticking, and the salt seasons the outside of the rice.
- Shape the Onigiri (Pain Point Solved!): Take about half a cup of the warm rice into one wet, salted hand. Gently make an indentation in the center with your thumb. Place about 1-2 pieces of the glazed chicken filling into the indentation. Add another small amount of rice on top to cover the filling. Now, bring your hands together and gently cup the rice, applying light but firm pressure to form a triangle shape. Rotate the rice ball in your hands, pressing gently on the sides to refine the triangle shape. The warmth of the rice and the lightly wet hands help the grains adhere without mushing them or making them fall apart. Don’t squeeze too hard; gentle, even pressure is all you need.
- Finish the Onigiri: Once shaped, press one strip or piece of nori onto the bottom edge of the rice ball. The moisture from the rice will help it stick. You can also press the onigiri into furikake seasoning scattered on a plate to coat the top and sides, as shown in the image.
- Repeat with remaining rice and filling. Serve immediately or wrap for later.