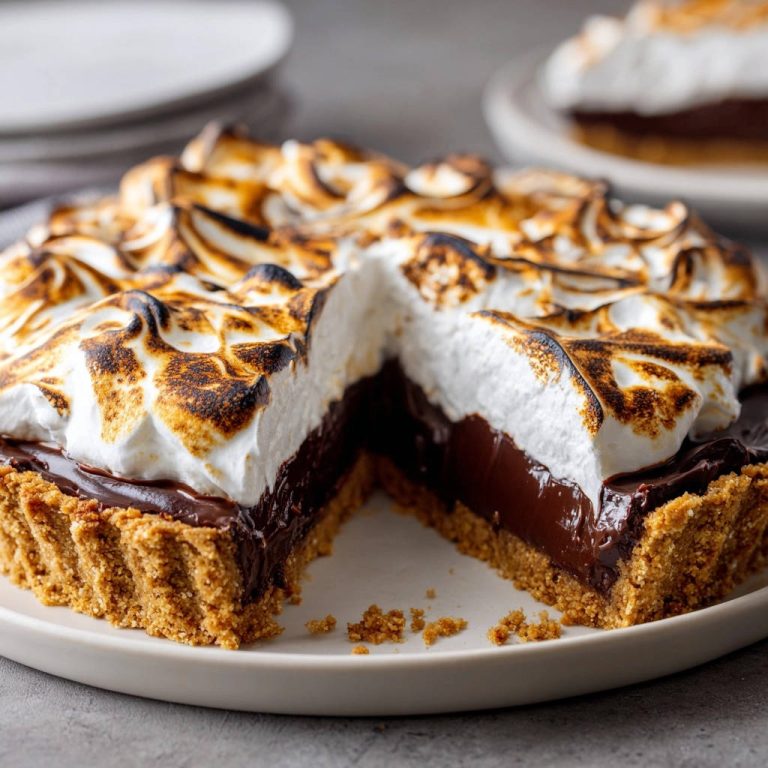
Oh, the dreaded soggy bottom! If you’ve ever put your heart into making a beautiful quiche or tart only to slice into it and find a sad, wet crust underneath, you know the disappointment. It feels like a culinary crime! I’ve been there more times than I’d like to admit.
But what if I told you there’s a simple, game-changing secret to achieving a perfectly flaky, crisp crust every single time, even when filled with delicious, moist vegetables? It’s true! And today, I’m sharing that secret with you in this recipe for the most delightful Mini Veggie Tarts. Get ready to say goodbye to soggy crusts forever!
Why These Mini Veggie Tarts Are a Keeper
These aren’t just any mini tarts; they are designed for success and maximum enjoyment. Here’s why you’ll absolutely adore adding this recipe to your repertoire:
- Flaky Crust, Guaranteed: Thanks to a simple technique, your crust will be golden and crisp, providing the perfect contrast to the creamy filling.
- Perfectly Portioned: Making individual tarts means easy serving, whether for a brunch, a light lunch, a picnic, or even an elegant appetizer spread.
- Packed with Flavor: Sautéed mushrooms and wilted spinach provide a hearty, earthy base, complemented by sweet cherry tomatoes and savory cheese.
- Quick & Easy: Using store-bought pastry streamlines the process, making these feel much fancier than the effort they require.
- Versatile Veggies: While this recipe features a classic combination, it’s incredibly adaptable to whatever vegetables you have on hand.
Gathering Your Ingredients for Flaky Mini Veggie Tarts
Creating these little bites of perfection starts with selecting quality ingredients. The beauty of this recipe lies in its simplicity, allowing the fresh flavors of the vegetables and the richness of the egg custard to shine. We’ll combine tender mushrooms and vibrant spinach with a creamy, cheesy filling, all nestled inside a crisp pastry shell.
Here’s what you’ll need to bring these delectable tarts to life, with a few notes on selecting and preparing them:
- Pastry Power: One sheet of puff pastry or pie crust, thawed. Both work beautifully, offering slightly different textures. Puff pastry provides airy layers, while a good pie crust offers a more classic, tender bite. Ensure it’s properly thawed according to package directions – too cold and it’s hard to work with, too warm and it becomes sticky.
- The Sauté Star: 2 tablespoons of olive oil. This is our medium for bringing out the deep, savory flavor of the mushrooms and wilting the spinach.
- Earthy Goodness: 8 ounces of cremini mushrooms, sliced. Cremini mushrooms, also known as baby bellas, offer more flavor than white button mushrooms. Slicing them helps them cook down evenly and integrate nicely into the filling. You could also use a mix of your favorite mushrooms!
- Green Vibrance: 4 cups of fresh spinach. Fresh spinach wilts down significantly, packing in a good amount of green goodness without overwhelming the tart. Make sure to rinse it well!
- The Custard Base: 3 large eggs. Eggs are the essential binder, creating the creamy, set filling that holds everything together.
- For Creaminess: 1/2 cup of milk (dairy or non-dairy). Whole milk provides the richest custard, but any milk you have on hand will work. Choose a plain, unsweetened variety if using non-dairy.
- Cheesy Delight: 1/4 cup of shredded cheese (cheddar or Gruyere work well). Cheddar offers a familiar sharpness, while Gruyere lends a nutty, sophisticated flavor. Feel free to experiment with other good melting cheeses like Monterey Jack or even a blend.
- Simple Seasoning: 1/4 teaspoon of salt and 1/8 teaspoon of black pepper. These basic seasonings enhance all the other flavors without overpowering them. You can adjust them to your taste or add a pinch of garlic powder or a dash of nutmeg for a different twist.
- A Pop of Color & Sweetness: 1/2 cup of cherry tomatoes, halved. These little bursts of sweetness added to the top provide lovely color and a fresh counterpoint to the rich filling.
Crafting Your Tarts: Step-by-Step to a Flaky Finish
Ready to banish soggy bottoms from your kitchen forever? Follow these steps, paying close attention to the crucial techniques, and you’ll be rewarded with beautiful, delicious mini veggie tarts!
- Oven Prep is Key: Start by preheating your oven. We begin at a relatively hot temperature, 400 degrees F (200 degrees C). This initial heat is important for our secret crust technique. Position an oven rack in the center.
- Shape Your Pastry Shells: Unroll your thawed pastry sheet onto a surface that’s been lightly dusted with flour to prevent sticking. You’ll need to cut this into four pieces large enough to create individual tart shells. You can cut equal squares or circles, depending on your preference. To form the shells, you have a couple of options: gently press each piece into the cavity of a standard muffin tin (this helps them hold a perfect shape), or for a more rustic look, place them on a baking sheet lined with parchment paper and simply fold up the edges slightly to form a freeform border. Whichever method you choose, use a fork to generously prick the bottom of each crust multiple times. This is vital because it allows steam to escape, preventing the crust from puffing up excessively and helping it bake evenly.
- The Secret Step: Blind Baking! This is the magic moment for preventing that soggy crust. Place your prepared crusts (either in the muffin tin or on the baking sheet) into the preheated 400°F (200°C) oven. Bake them for about 10-12 minutes. What you’re looking for here is for the crusts to look lightly golden and slightly puffed. This step is called blind baking – you’re partially baking the crust before adding the wet filling. This sets the structure and creates a barrier against moisture. Don’t skip it!
- Prep the Veggie Filling & Remove Moisture: While your tart shells are undergoing their crucial blind bake, move over to your stovetop. Heat the olive oil in a skillet over medium heat. Add your sliced cremini mushrooms and cook them down. Mushrooms release a lot of moisture as they cook; continue cooking them for about 5-7 minutes until that moisture has evaporated and they start to brown slightly. This browning adds depth of flavor! Next, add the fresh spinach to the skillet and cook, stirring, just until it’s wilted. Remove the skillet from the heat and let the vegetables cool slightly. This next part is just as important as blind baking for preventing a watery filling: firmly squeeze out any excess liquid from the cooked mushroom and spinach mixture. You can do this by pressing it against the side of the skillet with a spoon, or even transferring it to a fine-mesh sieve and pressing down. Excess liquid here is a prime culprit for soggy fillings and, subsequently, soggy crusts.
- Mix the Custard: In a medium bowl, take your whisk and combine the eggs, milk (dairy or non-dairy), shredded cheese, salt, and pepper. Whisk until everything is well combined and the cheese is distributed. Once your cooked mushroom and spinach mixture has cooled slightly and you’ve squeezed out the excess liquid, stir it into the egg and cheese mixture. Make sure the vegetables are evenly distributed.
- Transitioning Ovens: Carefully remove the partially baked crusts from the oven – they will be hot! At this point, reduce your oven temperature down to 375 degrees F (190 degrees C). A slightly lower temperature is better for baking the custard filling gently without overcooking the crust edges.
- Fill the Shells: Now it’s time to fill your pre-baked pastry shells. Spoon the egg and vegetable mixture evenly into each one. Don’t overfill them, as the egg mixture will puff slightly as it bakes. Once the filling is in, scatter the halved cherry tomatoes over the top of each tart. They’ll look pretty and taste great once roasted.
- The Final Bake: Place the tarts back into the oven (now at the reduced temperature). Bake for another 20-25 minutes. You’ll know they’re done when the filling looks set and the crust is golden brown around the edges. Gently jiggle one of the tarts; the center should look firm and set, not liquidy or wobbly in the middle.
- Cool Before Enjoying: Remove the baked tarts from the oven and let them cool slightly before serving. Allowing them to cool helps the filling finish setting up, making them easier to handle and ensuring the textures are just right. Plus, they’ll be less likely to burn your tongue!
Tips for Perfect Mini Veggie Tarts Every Time
Achieving tart perfection is easy with a few key pointers. Keep these in mind as you bake:
- Blind Baking is Non-Negotiable: Seriously, this is the #1 tip for preventing a soggy bottom. Don’t skip or rush this step! Bake until the crust is lightly golden.
- Squeeze Those Veggies: Cooked mushrooms and spinach hold onto a surprising amount of water. Taking the time to squeeze it out before adding them to the egg mixture makes a huge difference in preventing a watery filling.
- Don’t Overfill: Leave a little room at the top of your pastry shell when adding the filling. This accounts for the slight puff the egg mixture will have as it bakes and prevents overflow.
- Chill Your Pastry: Working with cold pastry (after thawing) makes it much easier to handle and shape. If it gets too warm, pop it back in the fridge for a few minutes.
- Creative Veggie Combos: Feel free to swap out the mushrooms and spinach. Cooked and well-drained broccoli florets, sautéed bell peppers and onions, or even roasted zucchini work well. Just remember the rule: cook them first and remove excess moisture!
- Cheese Swaps: Any good melting cheese will work! Consider a sharp white cheddar, provolone, or even a sprinkle of crumbled feta for a tangy twist.
What to Serve With Your Mini Veggie Tarts
These mini tarts are incredibly versatile. They can be the star of a light meal or a perfect accompaniment. For a lovely brunch or lunch, serve them alongside a fresh green salad. We love pairing them with something simple like our Easy Kale Salad or a creamy Creamy Broccoli Salad. They are also wonderful with a light soup or some fresh fruit. If you’re serving them as an appetizer, they are substantial enough on their own but could be paired with other finger foods.
Your Mini Veggie Tart Questions Answered (FAQ)
Got questions about whipping up these fantastic tarts? Here are some common ones:
Can I use a different type of pastry?
Yes, the recipe specifically mentions puff pastry or pie crust. Both work because the blind baking technique is effective for setting either type. If you’re feeling ambitious, you could even try making your own crust, but store-bought is a great shortcut here! The technique is similar to how we tackle crusts in recipes like our Perfected Fruit Tart (No More Soggy Crust).
What if I don’t have a muffin tin?
No problem! The recipe includes instructions for making freeform tarts on a baking sheet lined with parchment paper. You just fold up the edges slightly to create a border. They’ll look a little more rustic but will bake up just as beautifully.
Can I make these tarts ahead of time?
Absolutely! You can blind bake the crusts and cook the vegetable filling a day in advance. Store them separately in the refrigerator. When ready to bake, assemble the tarts with the egg mixture and fresh tomatoes, then bake as directed. You can also bake the tarts completely and reheat them gently in the oven at a lower temperature (around 325°F or 160°C) until warmed through.
My crust still looks a little pale on the bottom after blind baking. What should I do?
Ovens vary! If after 10-12 minutes your crusts aren’t lightly golden, give them another few minutes. Keep a close eye on them so they don’t burn. The goal is to see some color development, which indicates the crust is starting to set and dry out.
Can I add meat to these tarts?
While this recipe focuses on veggies, you could certainly add cooked meat like crumbled sausage or chicken. Ensure any meat is fully cooked and any excess grease is drained off before adding it to the filling mixture to avoid making the filling too wet or greasy. We have many other savory options like our Easy Chicken Wraps or Sausage and Cheese Balls if you’re looking for meat-centric snacks.
How long do leftovers last?
Leftover mini veggie tarts can be stored in an airtight container in the refrigerator for 3-4 days. Reheat gently in the oven for the best texture.
Enjoy Your Homemade Mini Veggie Tarts!
There you have it! The secret is out, and now you possess the power to create perfect Mini Veggie Tarts with flaky, glorious crusts every single time. These little tarts are such a joy to make and even more enjoyable to eat. They’re proof that simple ingredients and a clever technique can result in something truly special.
Whether you’re hosting a brunch, packing a lunch, or just craving a delicious savory bite, these mini tarts are sure to impress. Give this recipe a try and let me know how much you love the crispy crust!
Happy Baking!
Mini Veggie Tarts
Ingredients
- 1 sheet puff pastry or pie crust, thawed
- 2 tablespoons olive oil
- 8 ounces cremini mushrooms, sliced
- 4 cups fresh spinach
- 3 large eggs
- 1/2 cup milk (dairy or non-dairy)
- 1/4 cup shredded cheese (cheddar or Gruyere work well)
- 1/4 teaspoon salt
- 1/8 teaspoon black pepper
- 1/2 cup cherry tomatoes, halved
Directions
- Preheat your oven to 400 degrees F (200 degrees C).
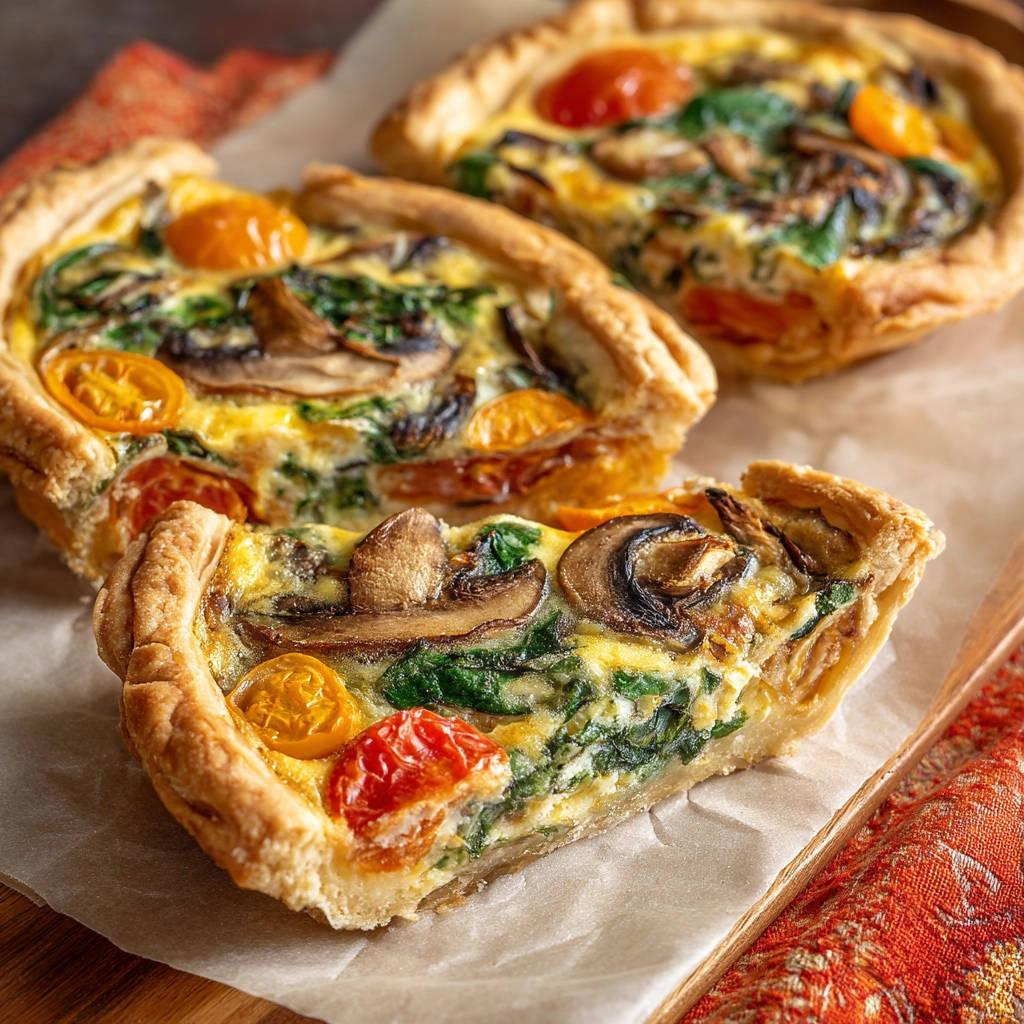
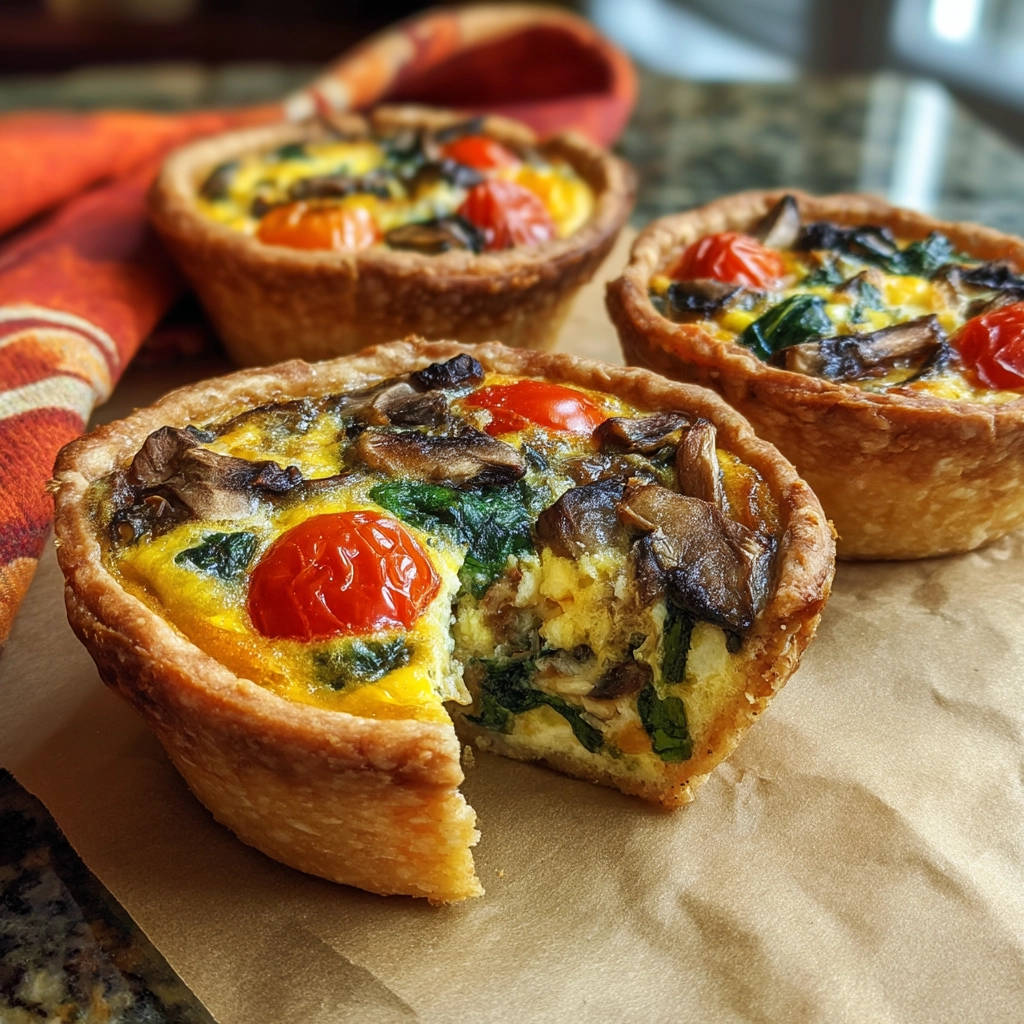
- Unroll the pastry sheet onto a lightly floured surface. Cut into four equal squares or circles large enough to form individual tart shells. Gently press each piece into a standard muffin tin cavity or place on a baking sheet lined with parchment paper and fold up the edges slightly to create a border, forming freeform tarts like in the image. Prick the bottom of each crust multiple times with a fork.
- This is the key step for a non-soggy crust: Bake the crusts in the preheated oven for 10-12 minutes, or until they are lightly golden and puffed. This step is called blind baking and helps set the crust before the wet filling goes in.
- While the crusts are blind baking, heat the olive oil in a skillet over medium heat. Add the sliced mushrooms and cook until they release their moisture and start to brown, about 5-7 minutes. Add the spinach and cook, stirring, until wilted. Remove from heat and let cool slightly. Squeeze out any excess liquid from the spinach and mushrooms. This also helps prevent a watery filling which can contribute to a soggy crust.
- In a medium bowl, whisk together the eggs, milk, cheese, salt, and pepper. Stir in the cooked mushroom and spinach mixture.
- Carefully remove the partially baked crusts from the oven. Reduce the oven temperature to 375 degrees F (190 degrees C).
- Spoon the egg and vegetable mixture evenly into the pre-baked crusts. Scatter the halved cherry tomatoes over the top of each tart.
- Bake for another 20-25 minutes, or until the filling is set and the crust is golden brown. The center should look firm, not liquidy.
- Let the tarts cool slightly before serving.

