Oh, bundt cakes! They look so beautiful, don’t they? That elegant shape, just waiting for a dusting of powdered sugar or a drizzle of glaze. But let’s be honest, who hasn’t experienced the utter disappointment of slicing into a stunning bundt only to find it… dry? It’s happened to me more times than I care to admit!
For the longest time, I thought bundt cakes were just destined to be a little on the dry side. But I was determined to crack the code. After much testing (and a few less-than-perfect cakes), I finally landed on a simple, game-changing secret that guarantees a perfectly moist coconut bundt cake every single time. And today, I’m sharing that secret with you!
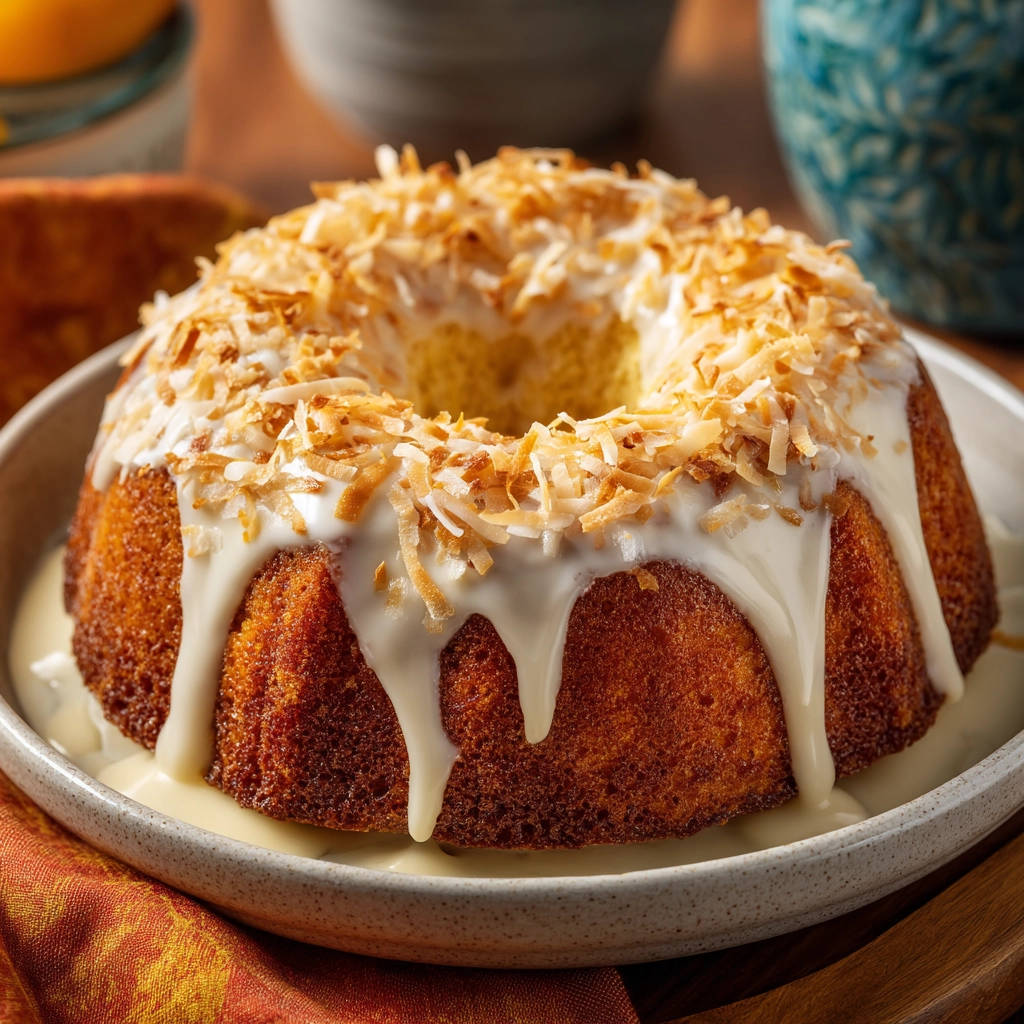
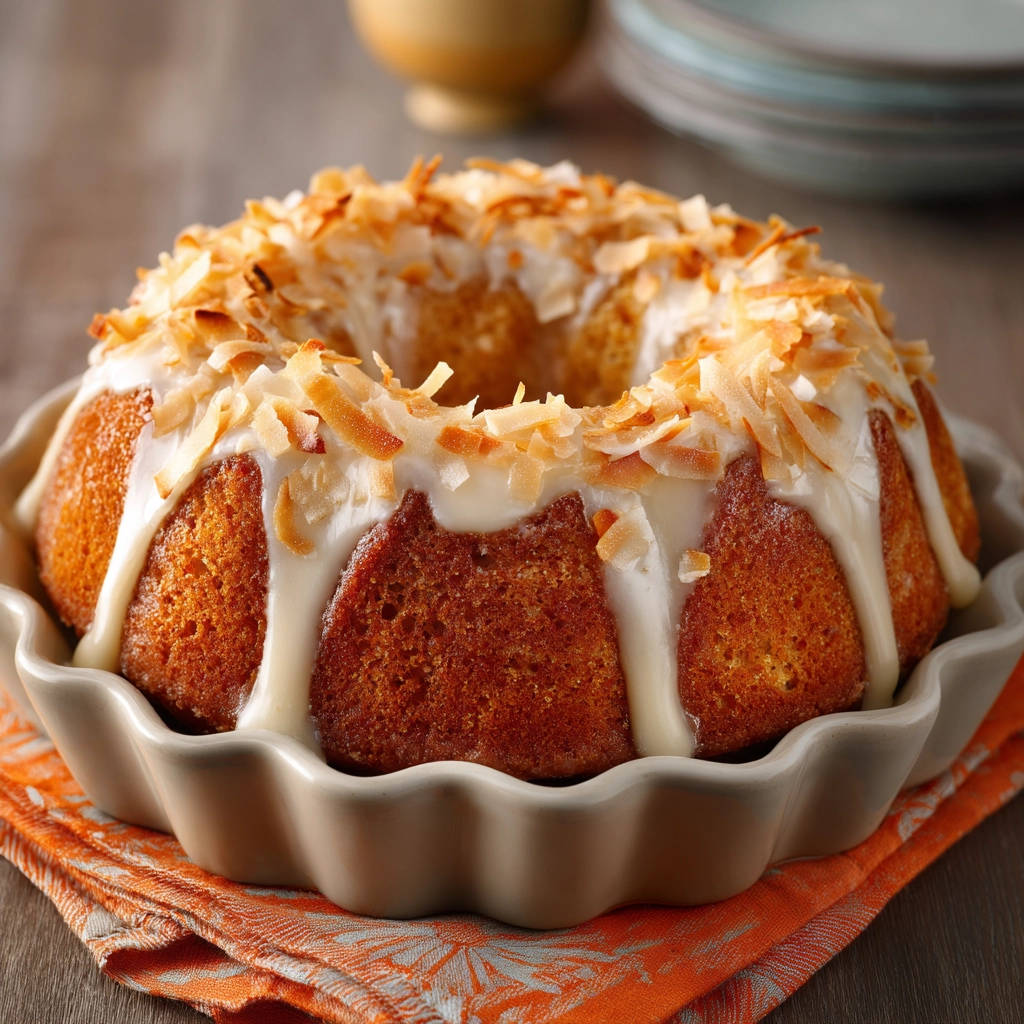
This isn’t just any coconut cake; it’s a tender, flavorful Easy Coconut Bundt Cake that stays moist for days. Get ready to ditch those dry cake blues and bake a bundt that will have everyone asking for the recipe.
Why You’ll Love This Easy Coconut Bundt Cake
Aside from solving the dry cake dilemma, this recipe is a winner for several reasons:
-
Incredible Moisture: The secret technique ensures a cake that is unbelievably tender and moist from the first slice to the last crumb.
-
Fantastic Coconut Flavor: We use shredded coconut and optional coconut extract to pack a tropical punch without being overwhelming.
-
Simple Ingredients: You likely have most of these pantry staples on hand right now.
-
Beautiful Presentation: A bundt cake is inherently elegant and perfect for any occasion, from a casual Sunday brunch to a special celebration.
-
Easy to Make: Despite its impressive look, the process is straightforward and beginner-friendly.
Gathering Your Ingredients for Moist Coconut Bundt Cake
Creating this wonderfully moist coconut bundt cake starts with understanding the role each ingredient plays. We’re building a cake that’s rich, tender, and full of tropical flavor. Using room temperature ingredients is key to achieving a smooth, emulsified batter that bakes up beautifully.
Here’s what you’ll need, with a little insight into their purpose:
- All-Purpose Flour: Provides the structure for our cake. Measuring it correctly (spooned into the cup and leveled off) is crucial – too much flour is a common culprit for dry cakes!
- Baking Powder & Baking Soda: Our leavening agents. Baking powder gives the cake lift, while baking soda reacts with the acidic buttermilk to add tenderness and helps with browning.
- Salt: Essential for balancing the sweetness and enhancing all the other flavors. Don’t skip it!
- Unsalted Butter, Softened: Butter adds richness and flavor. Ensuring it’s properly softened (press your finger into it – it should indent easily but not be greasy) is vital for successful creaming with the sugar.
- Granulated Sugar: Sweetens the cake and, when creamed with butter, creates tiny air pockets that contribute to the cake’s texture. We use a generous amount here which also helps with moisture.
- Large Eggs: Provide structure, richness, and help bind the ingredients together. Like butter, having them at room temperature helps them incorporate smoothly into the batter.
- Vanilla Extract: A classic flavor enhancer that pairs beautifully with coconut.
- Coconut Extract (Optional): If you want to boost that coconut flavor even further, a little extract goes a long way.
- Buttermilk: This is a magic ingredient for moisture and tenderness in cakes! Its acidity breaks down gluten, resulting in a softer crumb. It also reacts with the baking soda to help the cake rise.
- Unsweetened Shredded Coconut: We stir this directly into the batter for little pockets of chewy coconut goodness and a natural coconut flavor throughout the cake. Make sure it’s unsweetened so you control the sugar level.
- Additional Shredded Coconut (for topping): We’ll toast this for a golden, crunchy finish that adds another layer of texture and flavor.
And for that luscious glaze, which plays a crucial role in our moisture secret:
- Powdered Sugar: Forms the base of the glaze, dissolving easily for a smooth finish.
- Milk or Coconut Milk: Thins the glaze. Using coconut milk here can amplify the coconut flavor even more!
- Vanilla Extract: A touch of vanilla rounds out the glaze flavor.
Crafting Your Moist Coconut Bundt Cake: Step-by-Step
Baking this cake is a joyful process! Follow these steps carefully, and you’ll be rewarded with a truly spectacular dessert. Remember, the “secret” to ultimate moisture comes in step 11!
-
Prepare Your Pan and Oven: First things first, get your oven ready! Preheat it to 350 degrees F (175 degrees C). Bundt cakes are notorious for sticking if the pan isn’t prepared properly. Take the time to thoroughly grease your 10 or 12 cup bundt pan. I recommend using a baking spray that contains flour, or generously coating the inside with softened butter or shortening, and then dusting it liberally with flour, tapping out the excess. Get into all those nooks and crannies!
-
Combine Dry Ingredients: In a medium bowl, whisk together your all-purpose flour, baking powder, baking soda, and salt. Whisking ensures these leavening agents and salt are evenly distributed throughout the flour, which is essential for an even rise and flavor. Set this bowl aside for a moment.
-
Cream the Butter and Sugar: Now, grab your large mixing bowl and your softened unsalted butter and granulated sugar. Cream these together using an electric mixer on medium speed for about 3 to 5 minutes. You’re looking for a change in texture here – the mixture should become visibly lighter in color and fluffy in consistency. This process whips air into the batter, contributing to a tender cake crumb.
-
Add the Eggs and Extracts: Add the large eggs to the creamed butter and sugar, one at a time. Mix well after each addition, scraping down the sides of the bowl as needed. Adding them one by one helps them incorporate properly without curdling the mixture. Finally, stir in the vanilla extract and the optional coconut extract if you’re using it, mixing until just combined.
-
Prepare the Buttermilk Mixture: In a separate small bowl, whisk together the buttermilk and the 1/2 cup of shredded coconut. This ensures the coconut is evenly dispersed and hydrates slightly before being added to the main batter.
-
Combine Wet and Dry Ingredients Alternately: This is a standard cake technique that helps develop the gluten just enough while keeping the batter smooth. Add about a third of the dry ingredient mixture to the wet ingredients in the large bowl and mix on low speed until just combined. Then, add about half of the buttermilk-coconut mixture and mix until just combined. Repeat, adding another third of the dry ingredients, then the remaining buttermilk-coconut mixture, and finally the remaining dry ingredients. Mix only until no dry streaks of flour are visible. Overmixing at this stage can lead to a tough cake!
-
Fill the Pan: Carefully pour the batter evenly into your meticulously prepared bundt pan. Use a spatula to gently spread the batter and smooth the top if necessary. Give the pan a couple of gentle taps on the counter to help settle the batter and release any large air bubbles.
-
Bake Until Done: Place the bundt pan in your preheated oven. Bake for 45 to 55 minutes. The baking time can vary depending on your oven, so start checking around the 45-minute mark. You’ll know it’s done when a wooden skewer or toothpick inserted into the deepest part of the cake comes out clean, perhaps with a few moist crumbs attached, but no wet batter.
-
Initial Cooling (Important!): This step is critical for the cake’s structure and preventing it from sticking. Let the cake cool in the bundt pan for 10 to 15 minutes on a wire rack. This allows the cake to firm up slightly before you attempt to remove it. While it’s cooling in the pan, it’s the perfect time to make your glaze!
-
Make the Glaze: In a small bowl, whisk together the powdered sugar, milk (or coconut milk), and vanilla extract until you have a smooth, pourable consistency. If it seems too thick, add milk just a tiny bit at a time (like half a teaspoon) until it’s just right. You don’t want it too thin, or it will all run off the cake.
-
The Moistness Secret! Glaze While Warm: This is it! The trick to a truly moist bundt cake. After its initial rest in the pan, carefully invert the warm cake onto a wire rack. Place the wire rack over a baking sheet (to catch drips). While the cake is still warm to the touch (but out of the pan), immediately pour about half of your prepared glaze evenly over the cake. The warmth of the cake helps it absorb this first layer of glaze, infusing moisture directly into the crumb as it cools. It makes a huge difference!
-
Cool Completely: Let the cake cool completely on the wire rack. This allows the glaze to fully absorb and the cake to finish setting. Be patient! Cooling properly is important for the cake’s texture.
-
Apply the Second Glaze Layer: Once the cake is completely cool, whisk the remaining glaze again if it has thickened. Pour the rest of the glaze over the cake, letting it cascade down the sides and pool slightly at the base. This second layer provides that classic, beautiful glazed finish.
-
Toast the Coconut Topping: While the second glaze layer is setting, toast the extra shredded coconut. Use a dry skillet over medium heat and add the coconut. Stir frequently! Shredded coconut can go from perfectly golden to burnt very quickly. It usually only takes a few minutes. Remove it from the pan as soon as it’s fragrant and golden brown to stop the cooking.
-
Finish and Serve: Sprinkle the toasted coconut over the glaze on top of the cake. Let the glaze set for a little longer before slicing into your wonderfully moist and delicious coconut bundt cake. Enjoy!
Tips for a Perfect Coconut Bundt Cake Every Time
Even with the best recipe, a few simple tips can elevate your baking game and ensure your coconut bundt cake turns out beautifully:
- Room Temperature Ingredients: This is worth repeating! Softened butter and room temperature eggs and buttermilk cream together much more smoothly, creating a consistent batter that bakes evenly.
- Measure Flour Accurately: Spoon the flour into your measuring cup and level it off with a straight edge. Scooping directly from the bag can compact the flour, leading to too much flour and a dry cake.
- Don’t Overmix: Once you start adding the dry and wet ingredients alternately, mix only until just combined. Overmixing develops the gluten too much, resulting in a tough cake.
- Properly Prepare the Pan: As mentioned in the steps, this is key to preventing sticking. Don’t rush this part!
- Test for Doneness: Use a wooden skewer or toothpick and insert it into the thickest part of the cake. It should come out clean. An instant-read thermometer inserted into the center should register around 205-210°F (96-99°C).
- Don’t Skip the Warm Glaze Step: This is THE secret to the cake’s incredible moisture. Glazing while warm allows the cake to absorb the liquid as it cools, keeping it tender.
- Toasting Coconut: Keep a close eye on it! It toasts very quickly, and burnt coconut isn’t tasty. Toasting it enhances its flavor and adds a lovely crunchy texture.
- Storage: Store leftover cake at room temperature, covered tightly, for up to 3-4 days. The moisture secret helps it stay fresh longer!
Serving Suggestions for Your Easy Coconut Bundt Cake
This Easy Coconut Bundt Cake is wonderful all on its own, perhaps with just a cup of tea or coffee. However, if you want to make it a bit more of a dessert experience, consider pairing it with:
- A scoop of vanilla bean ice cream
- Fresh berries, like raspberries or strawberries
- A dollop of whipped cream
- A light fruit sauce, like a raspberry or mango coulis
It’s also fantastic for brunch! Alongside savory items, a slice of this cake is a delightful treat. If you’re hosting a brunch, you might also consider adding some Classic Blueberry Scones or Oatmeal Blueberry Muffins to your spread.
Your Easy Coconut Bundt Cake Questions Answered (FAQ)
Let’s tackle some common questions you might have while baking this delightful coconut bundt cake.
Can I use sweetened shredded coconut?
You can, but be aware the cake will be sweeter. The recipe uses unsweetened coconut to control the overall sweetness level, relying on the sugar in the cake batter and glaze. If you use sweetened, you might consider slightly reducing the sugar in the cake batter, but this can affect the cake’s structure and moisture, so it’s best to stick to unsweetened if possible.
What if I don’t have buttermilk?
You can make a quick buttermilk substitute at home! For 1 cup of buttermilk, measure out 1 cup of milk (dairy or non-dairy works) and stir in 1 tablespoon of white vinegar or lemon juice. Let it sit for 5-10 minutes until it looks slightly curdled. This acidity will react with the baking soda just like true buttermilk.
How do I prevent my bundt cake from sticking to the pan?
Thorough pan preparation is key! Use a high-quality non-stick bundt pan if possible. Generously grease every crevice with softened butter or baking spray with flour. Then, dust with flour, rotating the pan and tapping out all excess. For chocolate cakes, using cocoa powder instead of flour can avoid a white dusting. Make sure to let the cake cool in the pan for the recommended 10-15 minutes before inverting – this allows the cake to pull away from the sides slightly.
Can I make this cake ahead?
Yes! This cake is fantastic made a day in advance. The glaze has time to really soak in and make it even more moist. Store it tightly covered at room temperature.
Can I freeze Coconut Bundt Cake?
Absolutely. Let the cake cool completely and omit the glaze and toasted coconut. Wrap the cake tightly in plastic wrap, then in foil. Freeze for up to 2-3 months. Thaw overnight in the refrigerator, then bring to room temperature before preparing and adding the glaze and toasted coconut just before serving.
My cake is browning too quickly on top!
Ovens can vary. If you notice the top getting too dark before the inside is cooked, you can loosely tent the pan with aluminum foil for the remainder of the baking time.
Enjoy Your Homemade Easy Coconut Bundt Cake!
Say goodbye to dry bundt cakes forever! This Easy Coconut Bundt Cake recipe, with its simple secret to moisture, is sure to become a favorite in your home. The tropical flavor, combined with the tender, moist crumb and sweet glaze, is simply irresistible.
Give this recipe a try and experience the difference a little glaze while warm can make! Don’t forget to share your baking success in the comments below. Happy baking!
Easy Coconut Bundt Cake

Ingredients
- 2 1/2 cups all purpose flour
- 1 1/2 teaspoons baking powder
- 1/2 teaspoon baking soda
- 1/2 teaspoon salt
- 1 cup unsalted butter, softened
- 1 3/4 cups granulated sugar
- 3 large eggs
- 1 teaspoon vanilla extract
- 1/2 teaspoon coconut extract (optional)
- 1 cup buttermilk
- 1/2 cup unsweetened shredded coconut, plus more for topping
- For the Glaze:
- 2 cups powdered sugar
- 1/4 cup milk or coconut milk
- 1 teaspoon vanilla extract
Directions
- Preheat oven to 350 degrees F (175 degrees C). Thoroughly grease and flour a 10 or 12 cup bundt pan. Ensure every crevice is coated to prevent sticking.
- In a medium bowl, whisk together the flour, baking powder, baking soda, and salt. Set aside.
- In a large bowl, cream together the softened butter and granulated sugar until light and fluffy, about 3-5 minutes.
- Beat in the eggs one at a time, mixing well after each addition. Stir in the vanilla extract and coconut extract (if using).
- In a small bowl, whisk together the buttermilk and 1/2 cup shredded coconut.
- Alternately add the dry ingredients and the buttermilk mixture to the wet ingredients, beginning and ending with the dry ingredients. Mix until just combined after each addition. Do not overmix.
- Pour the batter evenly into the prepared bundt pan. Smooth the top if needed.
- Bake for 45-55 minutes, or until a wooden skewer inserted into the center comes out clean.
- Let the cake cool in the pan for 10-15 minutes. This is a crucial step! While the cake cools in the pan, prepare the glaze.
- In a small bowl, whisk together the powdered sugar, milk, and vanilla extract until smooth. If it seems too thick, add a tiny bit more milk, a teaspoon at a time.
- Now for the secret to a moist cake! Carefully invert the warm cake onto a wire rack set over a baking sheet. While the cake is still warm, immediately pour about half of the glaze evenly over the cake, allowing it to soak in. This helps the cake absorb moisture as it cools.
- Let the cake cool completely on the wire rack, allowing the glaze to fully absorb and set slightly.
- Once cool, pour the remaining glaze over the cake, allowing it to drip down the sides.
- Lightly toast the additional shredded coconut in a dry skillet over medium heat, stirring frequently, until golden brown. This happens quickly, so watch it!
- Sprinkle the toasted coconut over the glaze on the cake. Let the glaze set before slicing and serving. The glaze soaked into the warm cake keeps it incredibly moist!