There’s something uniquely comforting and satisfying about a perfectly grilled sandwich. The crisp edges, the warm, flavorful filling, and of course, the glorious, abundant cheese pull. But let’s be honest, achieving that ultimate gooey melt can sometimes feel like trying to catch a unicorn. You stack the sandwich high, you grill it golden brown, but cut it open and… sigh. The cheese is either still firm in the middle, or it hasn’t quite wrapped itself lovingly around every delicious morsel inside.
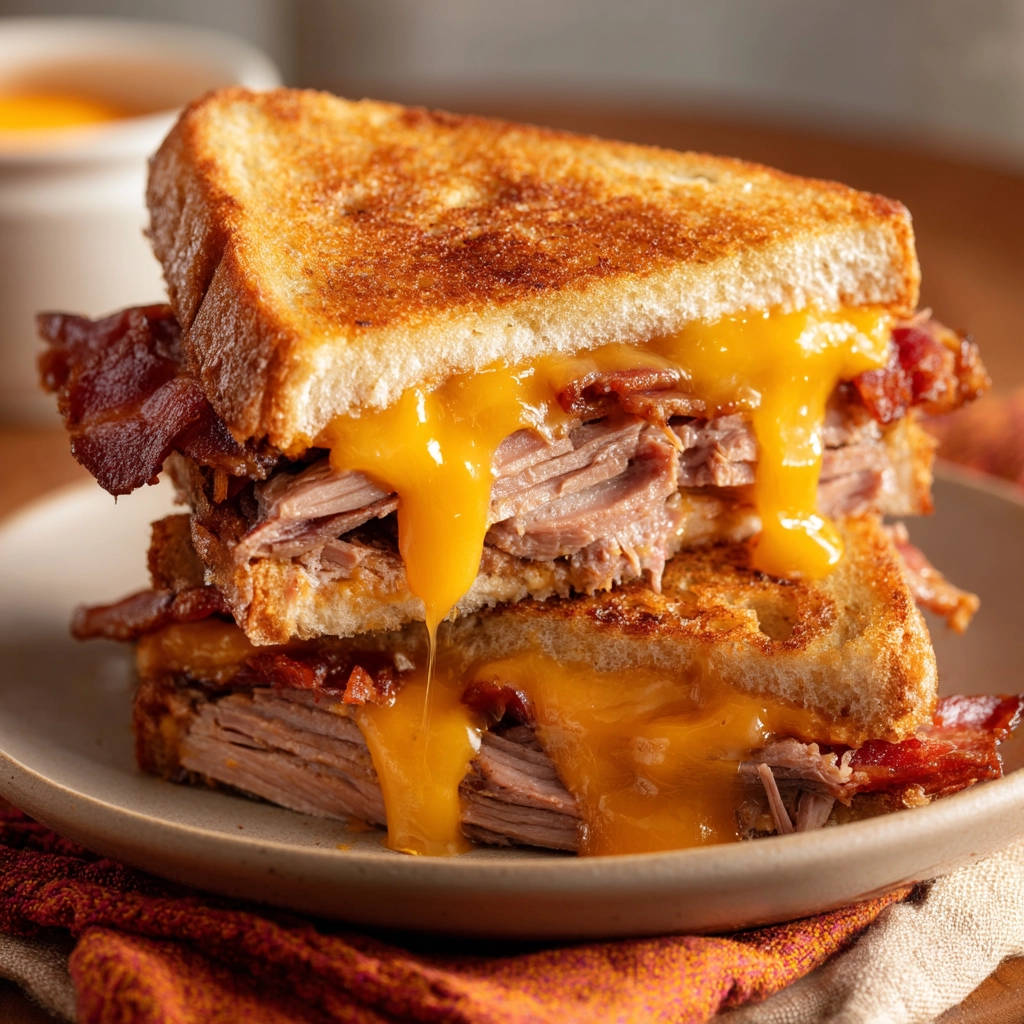
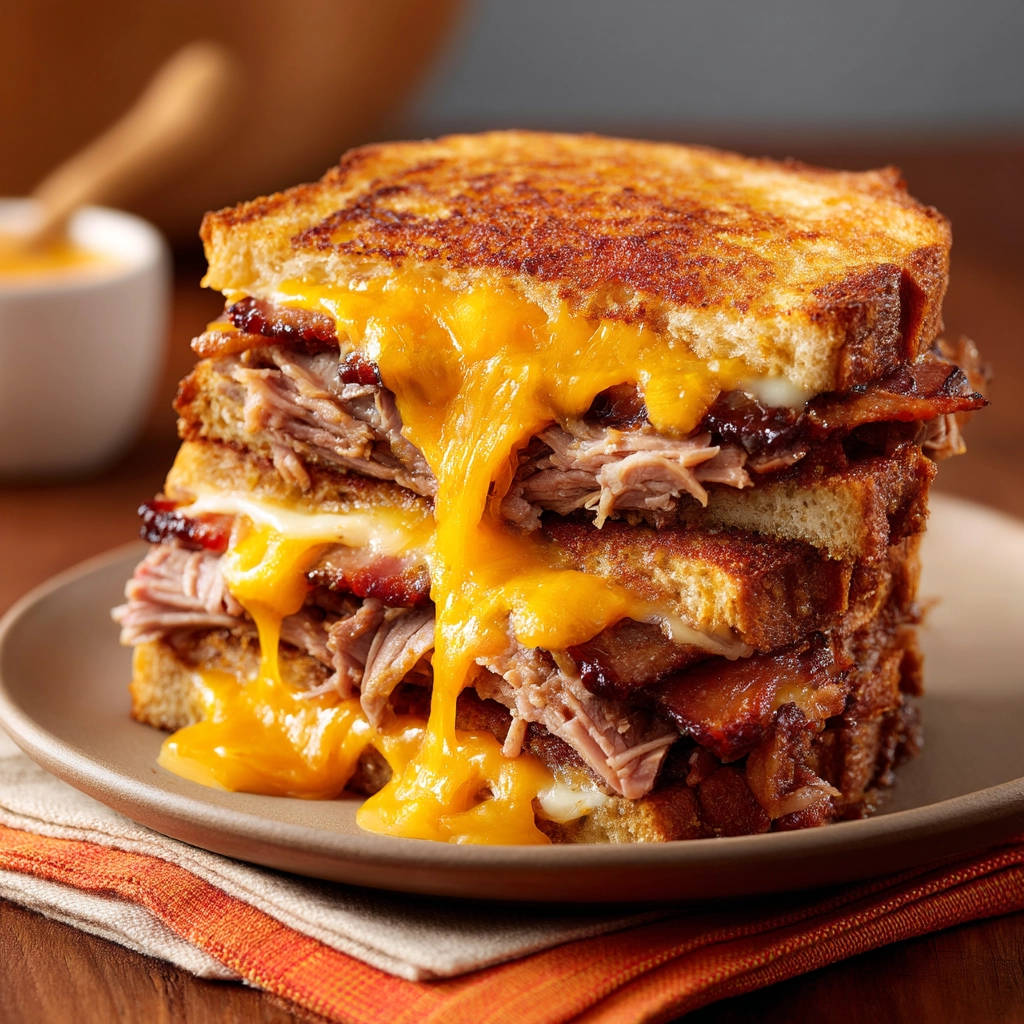
I’ve been there! After countless grilled sandwiches that were good but not transcendent, I finally cracked the code. It’s a simple trick, a little tweak to the process, that guarantees an incredible, gooey, pull-apart cheese experience every single time, even with a thick, generously filled sandwich like this Loaded Beef & Cheddar Melt. This isn’t just any sandwich; it’s a handheld feast of savory shredded beef and crispy bacon, bound together by a river of perfectly melted cheddar.
Trust me, once you discover this method, your grilled sandwich game will be forever changed. Get ready for golden-brown bread, tender beef, crunchy bacon, and a cheese melt so good, it’ll make you weak at the knees!
Why You’ll Love This Loaded Beef & Cheddar Melt
Besides the promise of an epic cheese pull, there are so many reasons this particular sandwich deserves a spot in your regular rotation:
- Ultimate Comfort Food: It hits all the right notes – warm, savory, cheesy, and substantial. It’s the perfect meal for a cozy night in or a quick, satisfying lunch.
- Quick & Easy: With just 10 minutes of prep (assuming your beef and bacon are ready!) and 15 minutes of cooking, you can have this masterpiece on your plate in under half an hour. Perfect for busy days!
- Uses Leftovers Beautifully: This recipe is a fantastic way to repurpose leftover cooked beef. Got some roast beef or pot roast? Shred it up! This gives the beef a new, exciting life. If you need a great starting point for your beef, try our recipe for Perfect Juicy Roast Beef Guaranteed.
- That Perfect Texture Combo: You get the crisp exterior of the bread, the tender shredded beef, the salty crunch of bacon, and the stretchy, gooey goodness of the melted cheese. It’s a symphony of textures.
- Foolproof Gooey Cheese: Thanks to the simple technique we’ll cover, you’ll achieve that desirable melt without any guesswork.
Gathering Your Ingredients for the Ultimate Melt
Building the perfect Loaded Beef & Cheddar Melt starts with selecting the right components. While the list is simple, each ingredient plays a crucial role in flavor and texture, especially when it comes to achieving that signature gooey cheese pull and crispy exterior.
Here’s what you’ll need, with a little insight into why each one matters:
- 2 slices sturdy bread: This is your foundation! You need bread that can stand up to the generous filling without getting soggy or falling apart. Think sourdough, Texas toast, country white, or a good quality artisanal loaf. Avoid thin sandwich bread. The structure of sturdier bread is essential for a good grilled sandwich.
- 2 tablespoons unsalted butter, softened, or mayonnaise: This is what gives your sandwich its beautiful golden-brown crust. Softened butter spreads more easily, ensuring even coverage for uniform browning. Mayonnaise, surprisingly, works just as well, if not better for some people! It has a higher smoke point than butter, which can help prevent burning, and it still delivers fantastic flavor and color. Choose your champion!
- 4 ounces shredded cooked beef: This is the “loaded” part! Using pre-cooked shredded beef makes this a speedy meal. Leftover pot roast, roast beef, or even slow-cooked beef works wonderfully. Ensure it’s shredded or pulled into relatively small pieces so it distributes evenly and heats through quickly. For another great way to use beef leftovers, consider making Comforting Beef and Noodles.
- 2 slices cooked bacon: Because everything is better with bacon, right? Cook it until it’s nice and crispy. The crispness provides a lovely textural contrast to the soft beef and gooey cheese.
- 4 ounces shredded cheddar cheese (or your favorite melty cheese blend): Now for the star of the melt! Cheddar is a classic choice for its sharp flavor and excellent melting properties. Four ounces per sandwich might seem like a lot, but trust me, for a loaded melt, you want plenty to create that luxurious, gooey interior. Feel free to use a blend of cheeses – Monterey Jack, Colby, or a good melting Swiss can also be fantastic additions or substitutions. Just make sure they are cheeses known for melting well. Grating the cheese yourself from a block melts much better and more evenly than pre-shredded cheese, which often contains anti-caking agents.
Having all your ingredients prepped and ready before you start cooking is key to a smooth process and a perfectly timed melt.
Crafting Your Loaded Beef & Cheddar Melt: Step-by-Step
Alright, let’s build this beautiful sandwich! The process is straightforward, but paying attention to a couple of key steps will make all the difference in achieving that perfect golden crust and, of course, the ultimate gooey cheese melt. We’re not just slapping ingredients together; we’re orchestrating a symphony of flavor and texture!
-
Prep Everything First: Before you even think about the skillet, get all your components ready to go. If your beef isn’t already cooked and shredded, do that now. Cook your bacon until it’s satisfyingly crispy – you want that crunch! And, importantly, grate your cheese. Having everything prepped means you can assemble and cook smoothly without distractions, ensuring the heat is applied correctly from the start.
-
Butter or Mayo the Bread: Take one slice of bread and spread a generous, even layer of softened butter or mayonnaise all the way to the edges on one side. Repeat with the second slice. This coated side is what will hit the pan and become your gorgeous, crispy crust. Don’t be shy here; good coverage equals good browning.
-
Start in a Cold Skillet: Here’s a crucial technique for grilled cheese success, especially with a thick sandwich like this. Place one slice of bread, buttered or mayo-ed side down, in a cold non-stick skillet or griddle. Starting cold allows the bread to heat up gradually along with the pan, promoting even browning and preventing the outside from burning before the inside is warm and the cheese starts melting. It sets the stage for success.
-
Layer the First Half of the Cheese: Now, over the bread slice that’s sitting in the cold pan, sprinkle half of your shredded cheese. Distribute it evenly across the entire surface of the bread. Placing cheese directly on the bottom slice helps “glue” everything together and kickstarts the melting process right against the bread.
-
Pile on the Beef and Bacon: Next, evenly distribute your shredded cooked beef over the layer of cheese. Try to keep the beef within the bounds of the bread slice. Then, arrange the crispy bacon slices on top of the beef. This layering ensures you get all the flavors in each bite.
-
Top with the Remaining Cheese: Sprinkle the second half of the shredded cheese generously over the beef and bacon. This second layer of cheese is key to encasing the filling and creating that fantastic gooey bond that holds the sandwich together and yields those epic cheese pulls.
-
Complete the Sandwich: Place the second slice of bread on top of the cheese layer, with the buttered or mayo-ed side facing up. Press down gently to compact the sandwich slightly. You’ve now built your loaded masterpiece, ready for its transformation.
-
Apply Gentle Heat: Now, place the skillet over medium-low heat. This is another critical step for the perfect melt! High heat will brown or burn the bread too quickly, leaving the cheese in the center cold and unmelted. Medium-low heat allows the heat to penetrate slowly and evenly, giving the cheese ample time to melt and become gloriously gooey before the bread overcooks. Patience is key here.
-
Cook and Introduce the Secret Weapon: Let the sandwich cook on the first side for about 6-8 minutes. You’ll know it’s time to flip when the bottom is golden brown and the cheese around the edges is starting to look melty. Flip the sandwich carefully using a good spatula. Here’s where the magic happens for that perfect gooey melt: immediately after flipping, cover the skillet with a lid or even an inverted bowl. This traps the heat and steam rising from the pan, creating a warm, steamy environment around the sandwich. This trapped heat is incredibly effective at melting the cheese surrounding the meat and bacon evenly and completely, ensuring no unmelted pockets remain.
-
Finish Cooking: Continue cooking the second side, still covered, for another 6-8 minutes. Keep an eye on the heat to ensure it stays medium-low and the bread doesn’t burn. You’ll know it’s done when the second side is also a beautiful golden brown and, most importantly, the cheese is visibly melted and gooey, likely oozing slightly out the sides.
-
Serve Immediately for Peak Gooeyness: Carefully slide the finished sandwich out of the skillet. The moment of truth! Slice it in half – a sharp knife is your friend here – and behold the glorious layers and that irresistible cheese pull. Serve it immediately while the cheese is at its peak melty, gooey perfection. This sandwich waits for no one!
Following these steps, especially the cold pan start and the covered cooking after flipping, will elevate your Loaded Beef & Cheddar Melt from good to absolutely unforgettable.
Tips for the Perfect Gooey Melt Every Time
While the steps above lay out the core process, a few extra tips can help ensure your Loaded Beef & Cheddar Melt is consistently spectacular, boasting that desirable gooey center and crispy exterior.
- Master the Heat: We mentioned medium-low heat, but your stovetop might differ. The goal is a slow, steady cook. If your bread is browning too quickly, reduce the heat further. If it’s taking forever, slightly increase it. Find the sweet spot where the bread takes a good 6-8 minutes per side to turn golden. This pacing is key to the cheese melting inside.
- Don’t Skip the Cover: Seriously, the lid/inverted bowl after flipping is the secret weapon. It creates a mini-steam oven that melts the cheese from the top and middle down. Without it, the top cheese might struggle to melt fully before the bottom burns, especially with such a thick filling.
- Use Room Temperature Ingredients (Mostly): While not strictly necessary, having your shredded beef and cheese closer to room temperature (not fridge cold) can help them heat up and melt faster and more evenly once in the sandwich.
- Know When It’s Ready: Besides the golden-brown bread, look for tell-tale signs of a good melt. You might see a bit of cheese starting to ooze out the sides, and if you gently lift an edge with your spatula, you should see the cheese stretching. The sandwich will also feel slightly less rigid once the internal cheese matrix has formed.
- Consider Your Cheese Blend: While cheddar is classic, experimenting with other melty cheeses can be fun! A mix of sharp cheddar and a milder Monterey Jack gives great flavor and stretch. For a richer melt, you could even incorporate a little shredded Gruyère or Fontina. Remember to grate your own cheese for the best results! For another cheesy favorite, check out our Creamy Mac and Cheese.
- Even Filling Distribution: Try to spread the beef and bacon relatively evenly across the bread before adding the top layer of cheese and bread. This prevents areas with too much filling (where cheese struggles to melt) or areas with too little (where it might melt and burn).
- Let It Rest (Briefly!): While you want to serve it hot for the gooey pull, letting the sandwich sit for 30-60 seconds after taking it off the heat can help the cheese set slightly and make slicing easier, leading to a cleaner cut and less cheese loss.
Serving Suggestions: What to Pair with Your Loaded Melt
A sandwich this satisfying can certainly stand alone, but it also pairs wonderfully with a few classic sides to make a complete meal. Think about complementary textures and flavors.
Crispy sides are a natural fit. Potato chips, of course, are a no-brainer. Or elevate your side dish game with homemade options like Easy Crispy Oven Potato Wedges or Crispy Garlic Fries with Parmesan Sauce. The crunch provides a lovely contrast to the soft, gooey sandwich.
For a lighter, fresher contrast, a simple side salad works beautifully. A classic coleslaw or a crisp green salad with a tangy vinaigrette can cut through the richness of the beef, bacon, and cheese. Our Easy Kale Salad offers a healthy, flavorful option.
A warm bowl of soup is also a traditional partner for grilled sandwiches. A creamy tomato soup or a hearty vegetable soup would be delicious alongside this melt.
Your Loaded Beef & Cheddar Melt Questions Answered (FAQ)
Got questions about making the best Loaded Beef & Cheddar Melt? Here are some common ones and their answers to help you out:
What kind of cooked beef should I use?
The beauty of this recipe is its versatility! Leftover shredded roast beef, pot roast, brisket, or even shredded steak (like from a Philly cheesesteak or grilled beef skewers) all work wonderfully. The key is that it’s already cooked and tender enough to shred easily.
Can I use different types of cheese?
Absolutely! While cheddar is a classic for a reason, feel free to experiment. Good melty cheeses include Monterey Jack, Colby, Provolone, Gruyère, Fontina, or a blend of any of these. Avoid crumbly cheeses like feta or hard grating cheeses like Parmesan as the primary cheese, as they won’t give you that desired gooey pull. Make sure you are using shredded cheese for the best melt.
Is mayonnaise on the outside really better than butter?
It’s a matter of personal preference! Mayonnaise gives a fantastic, even golden-brown crust and some people find it easier to spread, especially straight from the fridge. It also has a slightly higher smoke point than butter, which can be more forgiving on the heat. Butter offers a classic rich flavor. Try both and see which you prefer!
How do I prevent the bread from burning?
The two main keys are starting the sandwich in a cold skillet and cooking over medium-low heat. This allows the heat to distribute slowly and evenly. If you notice your bread browning too quickly at any point, immediately reduce the heat.
Can I make more than one sandwich at a time?
Yes, if you have a large enough griddle or a second skillet. Just ensure you don’t overcrowd the pan, as this can lower the temperature and affect browning and melting. Cook them side-by-side, managing the heat for each.
How do I reheat a leftover Loaded Beef & Cheddar Melt?
For the best results, reheat it in a skillet over medium-low heat, just like you cooked it originally. Cover the pan to help the cheese re-melt without drying out the bread. Microwaving is not recommended, as it will make the bread soggy and the cheese rubbery.
Enjoy Your Homemade Loaded Beef & Cheddar Melt!
There you have it – the secrets to a truly exceptional Loaded Beef & Cheddar Melt. This recipe proves that sometimes, the simplest adjustments to technique can make all the difference between a good meal and an unforgettable one. The combination of savory beef, crispy bacon, sturdy bread, and that unbelievably gooey, perfectly melted cheese is pure comfort food bliss.
Now that you’re armed with the knowledge for achieving the ultimate melt, it’s time to get cooking! Whip up this Loaded Beef & Cheddar Melt for lunch, dinner, or whenever that comfort food craving strikes. Don’t forget to pull it apart slowly to fully appreciate that cheese stretch!
Did you try this recipe? How did your cheese melt turn out? Share your experience or any variations you tried in the comments below! We love hearing from you.
Loaded Beef & Cheddar Melt

Ingredients
- 2 slices sturdy bread
- 2 tablespoons unsalted butter, softened, or mayonnaise
- 4 ounces shredded cooked beef
- 2 slices cooked bacon
- 4 ounces shredded cheddar cheese (or your favorite melty cheese blend)
Directions
- Prepare your ingredients. Cook and shred the beef if not already done. Cook the bacon until crispy. Grate the cheese.
- Butter or spread mayonnaise evenly on one side of each slice of bread. This buttered side will be the outside of your sandwich.
- Lay one slice of bread, buttered side down, in a cold non-stick skillet or griddle.
- Layer half of the shredded cheese evenly over the bread in the skillet.
- Add the shredded beef over the cheese. Arrange the bacon slices over the beef.
- Sprinkle the remaining half of the shredded cheese over the meat and bacon.
- Place the second slice of bread on top, buttered side up.
- Place the skillet over medium-low heat. This gentle heat is key to allowing the cheese to melt completely before the bread burns.
- Cook for about 6-8 minutes per side. Here is the most important part for that perfect melt: After flipping the sandwich the first time, cover the skillet with a lid or an inverted bowl for the remaining cook time. This traps heat and steam, helping the cheese surrounding the meat melt evenly and completely.
- Cook until both sides are golden brown and the cheese is fully melted and gooey.
- Carefully remove the sandwich from the skillet, slice in half, and serve immediately while the cheese is still perfectly melted.