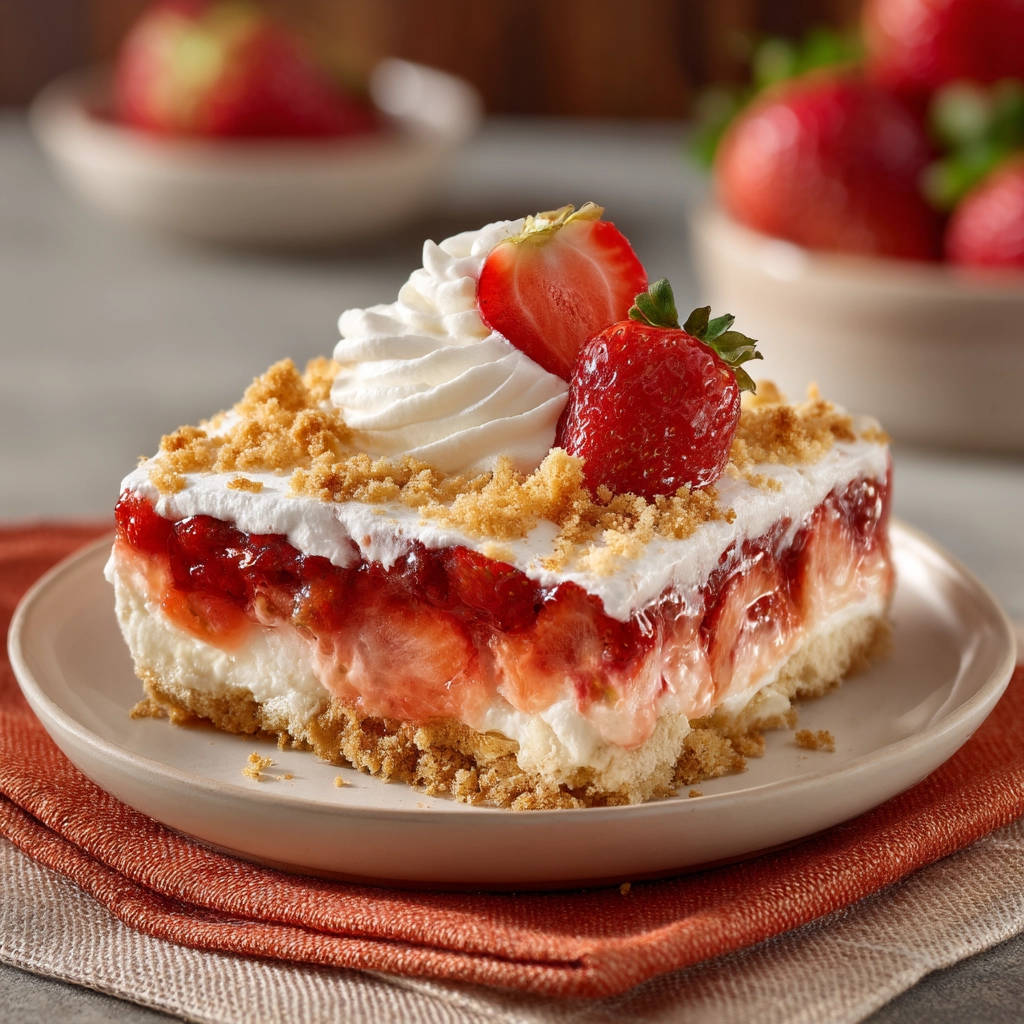
Have you ever excitedly sliced into a beautiful, layered no-bake dessert, only to find the bottom crust has turned into a sad, mushy layer? It’s truly disappointing! The contrast of textures is so crucial to a great dessert, and a soggy crust completely ruins the experience. For years, I struggled with this very problem, but I finally cracked the code. This easy no-bake strawberry dessert recipe is not only incredibly simple to make, but it includes crucial steps and tips that guarantee a perfectly firm and delicious crust every single time. Say goodbye to soggy disappointment and hello to layers of creamy, fruity bliss anchored by a wonderfully crisp base!
Why You’ll Adore This No-Bake Strawberry Delight
Beyond the absolute win of banishing soggy crusts forever, there are so many reasons why this no-bake strawberry dessert will become your go-to treat, especially during warmer months or whenever you crave something sweet without turning on the oven.
- Effortless Elegance: No baking required! This recipe is incredibly straightforward, making it perfect for beginner cooks or seasoned pros looking for a quick win.
- Texture Perfection: We tackle the soggy crust issue head-on with simple, effective techniques that ensure a stable, crisp foundation.
- Fresh Flavor: Layers of sweet, juicy strawberries and smooth, creamy filling are a match made in dessert heaven.
- Crowd-Pleaser: It’s a universally loved combination of flavors and textures that appeals to almost everyone.
- Quick Prep: With only 25 minutes of active preparation, you can have this chilling in the fridge in no time.
Gathering Your Delicious Ingredients
One of the beauties of this easy no-bake strawberry dessert is its simple ingredient list. You likely have many of these staples in your pantry and fridge already! Each component plays a vital role in creating the perfect balance of flavors and textures.
For the foundation of our dessert, the crust, we rely on the classic combination that provides sweetness and structure. The creamy, dreamy middle layer is where richness and smooth texture come in, and finally, the star of the show – the fresh, vibrant strawberries – bring sweetness and a touch of delightful juiciness.
- 1 and 1/2 cups graham cracker crumbs (you’ll need about 10 full graham crackers, easily crushed in a food processor or by hand in a bag)
- 1/2 cup unsalted butter, melted (using unsalted butter gives you control over the sweetness)
- 1/4 cup granulated sugar (adds just the right amount of sweetness to the crust)
- 1 (8 ounce) package cream cheese, softened (ensure it’s fully softened at room temperature for a smooth, lump-free filling, much like you would for a classic baked cheesecake)
- 1/2 cup powdered sugar (also known as confectioners’ sugar, it mixes smoothly into the cream cheese)
- 1 teaspoon vanilla extract (enhances all the sweet flavors)
- 1 cup whipped topping (like Cool Whip) or fresh homemade whipped cream (whipped topping provides stability, while homemade whipped cream offers a richer flavor)
- 4 cups fresh strawberries, sliced or halved (use ripe, sweet berries for the best result)
- 2 tablespoons granulated sugar (optional, for tossing with strawberries to enhance sweetness and draw out a little juice)
- 1 tablespoon cornstarch (optional, for briefly cooking with strawberries to create a slightly thickened, less watery layer – a fantastic trick for preventing that soggy crust!)
Having your ingredients measured and ready before you start makes the assembly process even quicker. Remember to let that cream cheese soften properly – it makes a huge difference in the texture of your creamy layer!
Crafting Your Perfect No-Bake Strawberry Dessert: Step-by-Step
Ready to assemble this showstopper? The process is straightforward, focusing on building layers correctly to ensure that delightful non-soggy crust we’ve been talking about. Pay close attention to the chilling times – they are key to success!
-
Initiate the Crust Creation: In a medium-sized mixing bowl, combine the graham cracker crumbs, the quarter cup of granulated sugar, and the melted unsalted butter. Use a spoon or spatula to stir everything together thoroughly. You want every single crumb coated in that buttery sweetness. The mixture should resemble wet sand – clumping together easily when you pinch a bit between your fingers.
-
Form the Solid Foundation: Pour the entire crumb mixture into an 8×8 inch baking dish. This is perhaps the single most important step for avoiding a soggy bottom! Use the bottom of a sturdy glass, a flat-bottomed measuring cup, or even your clean hands (though a flat tool is better for even pressure) to press the crumbs down very firmly and uniformly across the base of the dish. Extend the crumbs slightly up the sides of the dish as well, creating a lip. Pressing creates a dense, compact barrier that makes it harder for moisture from the filling and fruit to penetrate. The harder you press, the more robust your barrier will be!
-
Chill for Structure: Once the crust is pressed firmly into place, transfer the baking dish to the refrigerator. Let it chill for at least 30 minutes. This chilling time is absolutely critical! It allows the melted butter to solidify within the crushed graham crackers, effectively “setting” the crust and turning it into a strong, solid base capable of supporting the creamy and fruity layers that will follow without becoming mushy. Don’t rush this step!
-
Whip Up the Creamy Center: While the crust is chilling, prepare the luxurious creamy layer. In a large bowl, place the softened cream cheese, powdered sugar, and vanilla extract. Using an electric mixer (handheld or stand mixer), beat these ingredients together until the mixture is completely smooth, creamy, and free of any lumps. Scrape down the sides of the bowl as needed to ensure everything is incorporated.
-
Lighten and Fold: Now, take your whipped topping (or homemade whipped cream) and gently fold it into the cream cheese mixture. Use a spatula and a gentle hand for this step. You want to maintain the airy lightness of the whipped topping, so avoid overmixing. Just fold until the whipped topping is just combined and you have a uniform, smooth, and fluffy creamy filling.
-
Create the Creamy Barrier: Retrieve your chilled crust from the refrigerator. Carefully spread the prepared cream cheese mixture evenly over the surface of the firm crust. Use an offset spatula or the back of a spoon to ensure the filling goes all the way to the edges, completely covering the graham cracker layer. This creamy layer acts as a second line of defense, creating a protective barrier between the moist strawberry layer and the crust below. A complete, edge-to-edge layer is important here.
-
Prepare the Juicy Strawberry Layer: This step offers a crucial option for moisture control. In a small bowl, gently toss the sliced strawberries with the optional 2 tablespoons of granulated sugar. The sugar will help draw out some of the berries’ natural juices, concentrating their flavor. Now, here’s the pro move for ultimate non-soggy success: for added stability and to help absorb excess moisture, you can briefly heat the sugared strawberries with a tablespoon of cornstarch in a small saucepan over medium heat. Stir constantly for just a minute or two until the juices surrounding the berries start to thicken slightly. This creates a light glaze and significantly reduces the amount of free liquid that could seep into the creamy layer and crust. If you choose this optional heating step, make sure the strawberry mixture cools completely before proceeding. If you skip the cornstarch/heating, just toss the berries with sugar and drain off any excessive liquid that accumulates after a few minutes.
-
Top with Berries: Once the strawberries are prepared (and cooled, if heated), spoon them carefully over the creamy layer in the baking dish. Spread them out evenly across the surface, trying to distribute the berries and any thickened juices (if you did the optional step) uniformly.
-
The Final Chill: Cover the dish loosely with plastic wrap. Place the assembled dessert back into the refrigerator to chill. This final chill is essential for everything to set properly and for the flavors to meld beautifully. Refrigerate for at least 4 hours, but preferably overnight. The longer it chills, the firmer the creamy layer will become, and the more the flavors will deepen.
-
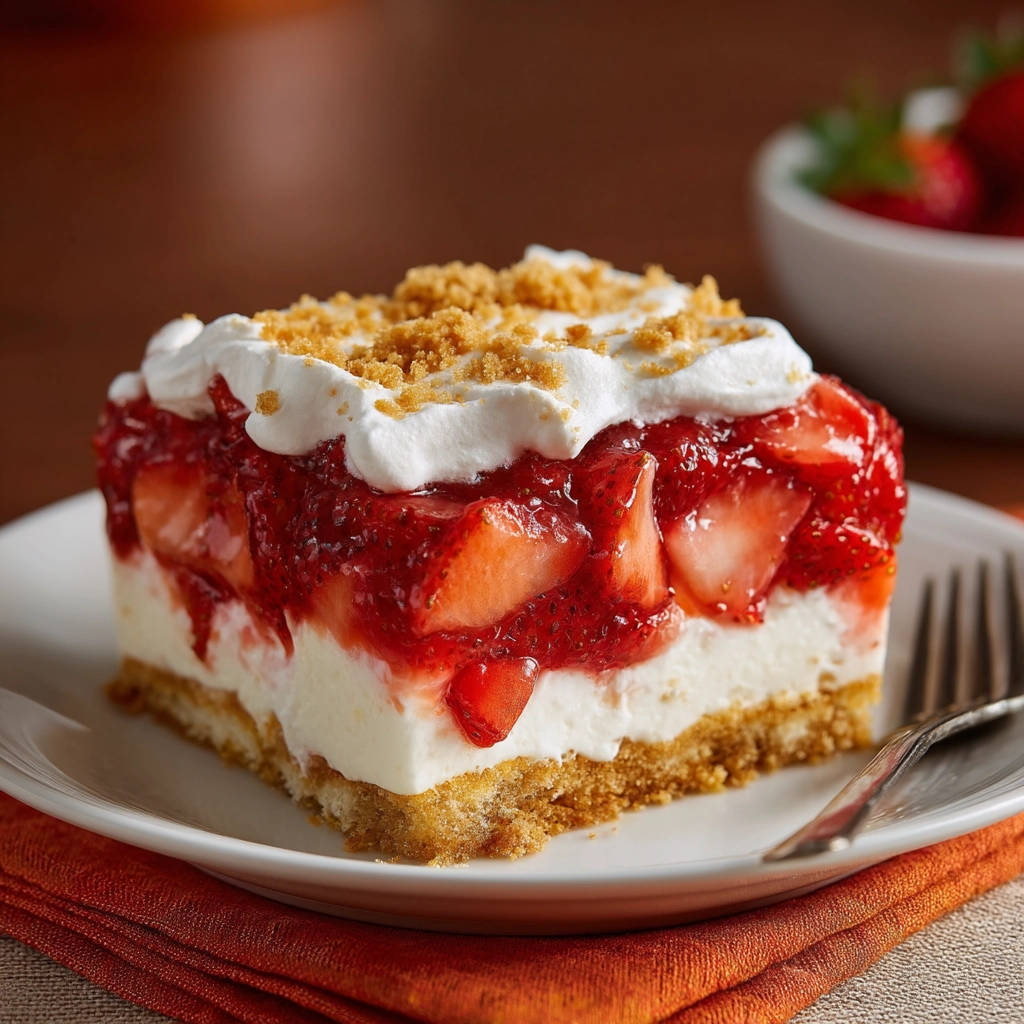
Slice and Enjoy: When you’re ready to serve, use a sharp knife to cut the chilled dessert into squares. For neat slices, you can run the knife under hot water and wipe it clean between cuts. Garnish each square, if desired, with a dollop of additional whipped topping, a few extra fresh strawberry slices, or a sprinkle of reserved graham cracker crumbs. Take a bite and revel in the perfect layers and that wonderfully non-soggy crust!
Tips for Perfecting Your No-Bake Strawberry Dessert
Achieving no-bake perfection is easy with a few key tips. These pointers will help ensure your dessert turns out beautifully every time, solidifying your status as a no-bake expert!
- Soften Cream Cheese Properly: Cold cream cheese will result in a lumpy filling. Ensure your cream cheese is at room temperature and truly softened before you begin beating it. Take it out of the fridge at least an hour or two in advance.
- Crumb Consistency Matters: If crushing whole graham crackers, make sure they are finely and evenly ground. Large pieces can make the crust less compact and more prone to crumbling or uneven texture. A food processor works wonders for this, but a zip-top bag and a rolling pin or the bottom of a glass also do the job.
- Press, Press, Press!: We can’t stress this enough! The firmness of your crust is the number one defense against sogginess. Use significant pressure when pressing the crumbs into the dish. Imagine you’re trying to compact it into a solid cookie.
- Don’t Skimp on Chill Time: Both chilling steps are non-negotiable. The initial chill sets the butter in the crust, and the final chill allows the creamy layer to firm up and the flavors to meld. Rushing this will compromise the texture and stability of your dessert.
- Consider the Strawberry Moisture: Strawberries vary in juiciness. If your berries seem particularly watery, definitely consider the optional step of briefly heating them with cornstarch. This simple technique captures the excess moisture in a light glaze instead of letting it seep into your creamy layer and crust. Ensure they cool completely if you heat them!
Variations to Explore
While the classic strawberry and cream cheese combination is divine, feel free to get creative with this recipe! Just remember to consider the moisture content of any substitutions.
- Berry Swap: Swap out strawberries for other berries like raspberries, blueberries, or a mix of summer berries. Just be mindful that softer berries like raspberries can release a lot of liquid, so the cornstarch step is highly recommended.
- Different Crust: Not a graham cracker fan? Try using vanilla wafers, shortbread cookies, or even crushed Oreos (use the whole cookie, filling and all, and reduce the added sugar slightly).
- Add Some Citrus Zest: Grate a little lemon or orange zest into the cream cheese mixture for a bright, fresh pop of flavor that pairs beautifully with the strawberries.
- Chocolate Layer: Add a thin layer of melted chocolate or a chocolate ganache over the chilled crust before adding the cream cheese layer for a chocolatey surprise. Or, if you enjoy chocolate no-bake treats, you might also love our no-bake chocolate layer bars.
What to Serve With Your Strawberry Masterpiece
This no-bake strawberry dessert is truly a complete treat on its own, but sometimes a little something extra can elevate the occasion. Since it’s a sweet and creamy dessert, pairing it with something simple and complementary works best.
A light, refreshing beverage is always a good idea. Think iced tea, lemonade, or even a sparkling water with a squeeze of lime. If you’re looking for another easy recipe to accompany a spread, perhaps something savory to balance the sweetness, you could explore options like a simple kale salad or light savory bites. Keep it simple and let the dessert shine!
Your No-Bake Strawberry Dessert Questions Answered (FAQ)
Let’s address some common questions that might pop up as you prepare to make this delightful no-bake strawberry dessert.
Can I use frozen strawberries instead of fresh?
While fresh strawberries are highly recommended for the best texture and flavor in this recipe, you can use frozen strawberries if necessary. However, they release significantly more liquid when thawed. If using frozen, thaw them completely and drain off all the excess liquid. You will definitely want to use the optional step of tossing them with sugar and cornstarch and briefly heating them to thicken the juices, ensuring your creamy layer and crust remain perfect.
How far in advance can I make this dessert?
This dessert needs a minimum of 4 hours to chill and set, but it’s actually fantastic when made a day ahead. Making it the day before serving allows all the layers to firm up beautifully and gives the flavors plenty of time to meld. It will keep well, covered in the refrigerator, for 3-4 days.
Can I make this in a different size dish?
Yes, you can adjust the pan size, but keep in mind it will affect the thickness of your layers and potentially the chilling time needed. An 8×8 inch dish yields nice, thick layers. A 9×13 inch dish will result in thinner layers, which might require slightly less chilling time but still needs to be fully set. You may also need to slightly adjust the ingredient quantities to achieve desired thickness.
What is the best way to store leftovers?
Simply cover the baking dish tightly with plastic wrap. Store leftovers in the refrigerator for up to 3-4 days. The crust, thanks to our non-soggy techniques, should remain firm for a couple of days, though eventually, any moisture will start to affect it.
Can I use light cream cheese or sugar substitutes?
Using light cream cheese is generally okay, but the texture might be slightly less rich. When it comes to sugar substitutes, they can sometimes affect the texture and how ingredients dissolve or set. Granulated and powdered sugar are standard for their structure and ability to create a smooth filling and crisp crust. If you substitute, results may vary, particularly with the creamy layer’s texture and stability.
Why is my creamy layer not setting up firmly?
There are a few reasons this might happen. Ensure your cream cheese was fully softened before beating. Make sure you used the correct type and amount of whipped topping or that your homemade whipped cream was whipped to firm peaks before folding it in. Also, adequate chilling time is crucial – ensure you are chilling it for at least 4 hours, or preferably overnight.
Enjoy Your Perfectly Layered, Non-Soggy Treat!
There you have it! The secret to a truly delightful no-bake strawberry dessert that holds its beautiful layers and, most importantly, boasts a perfectly crisp, non-soggy crust. This recipe is simple, requires no oven time, and is guaranteed to be a hit whether you’re making it for a casual weeknight dessert or a special gathering. The combination of sweet graham cracker crust, rich and creamy filling, and bright, fresh strawberries is simply irresistible.
Give this recipe a try and say farewell to soggy crusts forever! We’d love to hear how yours turns out. Leave a comment below and let us know what you thought or if you made any fun variations. Happy dessert making!
No-Bake Strawberry Dessert

Ingredients
- 1 and 1/2 cups graham cracker crumbs (about 10 full graham crackers)
- 1/2 cup melted unsalted butter
- 1/4 cup granulated sugar
- 1 (8 ounce) package cream cheese softened
- 1/2 cup powdered sugar
- 1 teaspoon vanilla extract
- 1 cup whipped topping or homemade whipped cream
- 4 cups fresh strawberries sliced or halved
- 2 tablespoons granulated sugar (optional for strawberries)
- 1 tablespoon cornstarch (optional for strawberries)
Directions
- Make the crust: In a medium bowl, combine graham cracker crumbs granulated sugar and melted butter. Stir until the crumbs are evenly coated and resemble wet sand.
- Press the crust firmly: Pour the crumb mixture into an 8×8 inch baking dish. Use the bottom of a glass or a flat measuring cup to press the crumbs down very firmly and evenly across the bottom of the dish and slightly up the sides. This is a key step for preventing sogginess as it creates a dense barrier.
- Chill the crust: Place the pressed crust in the refrigerator for at least 30 minutes to chill and firm up. This chilling time is crucial to help the butter solidify and create a strong base before adding wet layers.
- Prepare the creamy layer: In a large bowl, beat the softened cream cheese with powdered sugar and vanilla extract until smooth and creamy. Gently fold in the whipped topping or whipped cream until just combined.
- Add the creamy barrier: Spread the cream cheese mixture evenly over the chilled crust. Make sure it covers the entire crust surface edge to edge to form a protective layer against the moisture from the strawberries.
- Prepare the strawberry layer: In a small bowl, toss the sliced strawberries with 2 tablespoons granulated sugar if desired. For added stability and to help absorb excess moisture, you can briefly heat the strawberries with a tablespoon of cornstarch in a saucepan over medium heat stirring constantly until slightly thickened this is optional but helps keep the layer from being too watery. Let cool completely if heated.
- Layer the strawberries: Spoon the prepared strawberries over the cream cheese layer, spreading them out evenly.
- Chill the dessert: Cover the dish loosely with plastic wrap and refrigerate for at least 4 hours or preferably overnight. This allows the layers to set and the flavors to meld.
- Serve: Cut the dessert into squares. Garnish with additional whipped topping fresh strawberries and leftover graham cracker crumbs if desired before serving. Enjoy your perfectly layered dessert with a non-soggy crust!