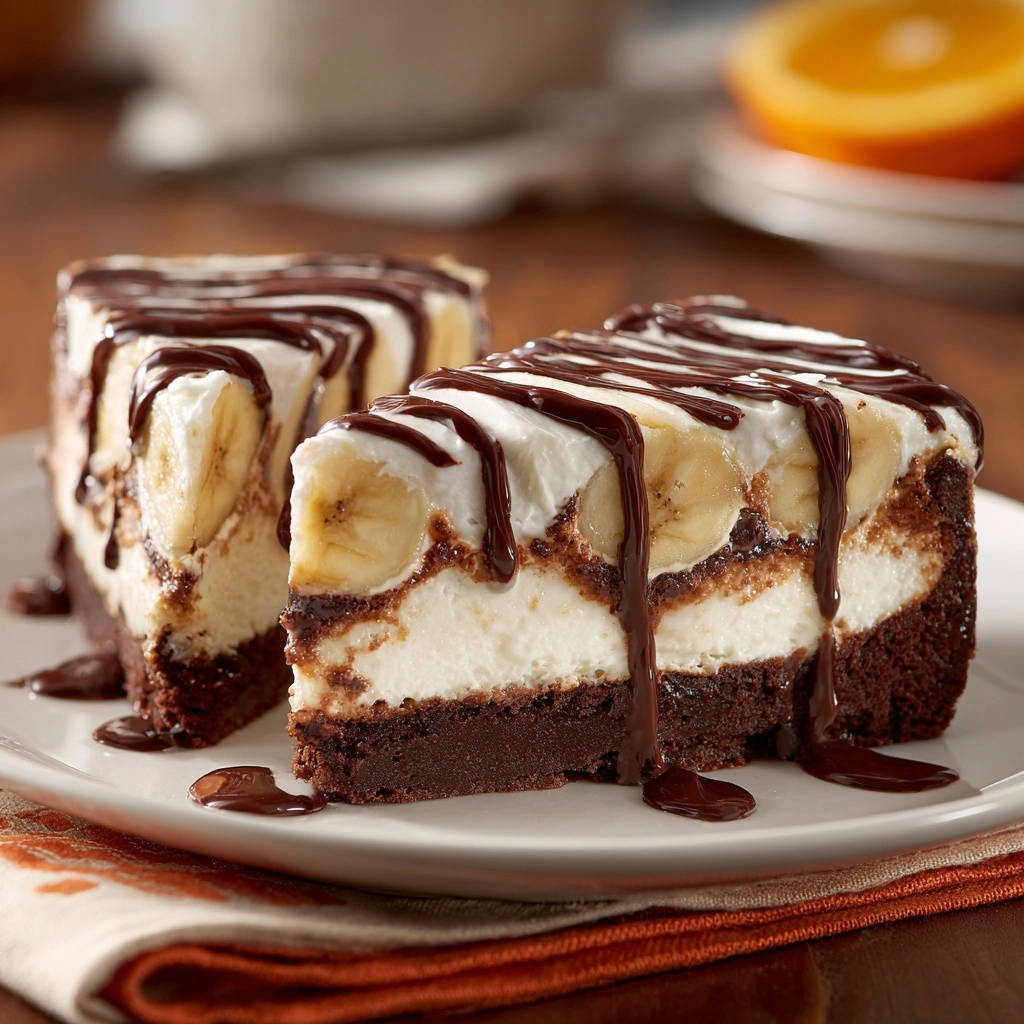
There’s nothing quite like a luscious layered dessert, but for years, I struggled with the dreaded soggy bottom. That disappointment, especially with fruit and cream layers, used to ruin my efforts. Through countless trials, I discovered a simple, brilliant trick that guarantees your Decadent Banana Chocolate Dessert stays perfectly firm and delicious, holding its shape beautifully every single time.
The Game-Changing Trick: Bidding Farewell to Soggy Layers
Layered desserts often fall prey to moisture migration. The creamy fillings and juicy fruit layers can seep into a cake base, turning it into an unappetizing, mushy mess. This problem is especially common with fruit-forward treats.
Our secret weapon for this recipe is a thin, firm chocolate barrier. This simple layer, applied after the chocolate base cools, acts as an impenetrable shield. It locks in the moisture from the creamy filling and bananas, ensuring your base remains perfectly tender and intact.
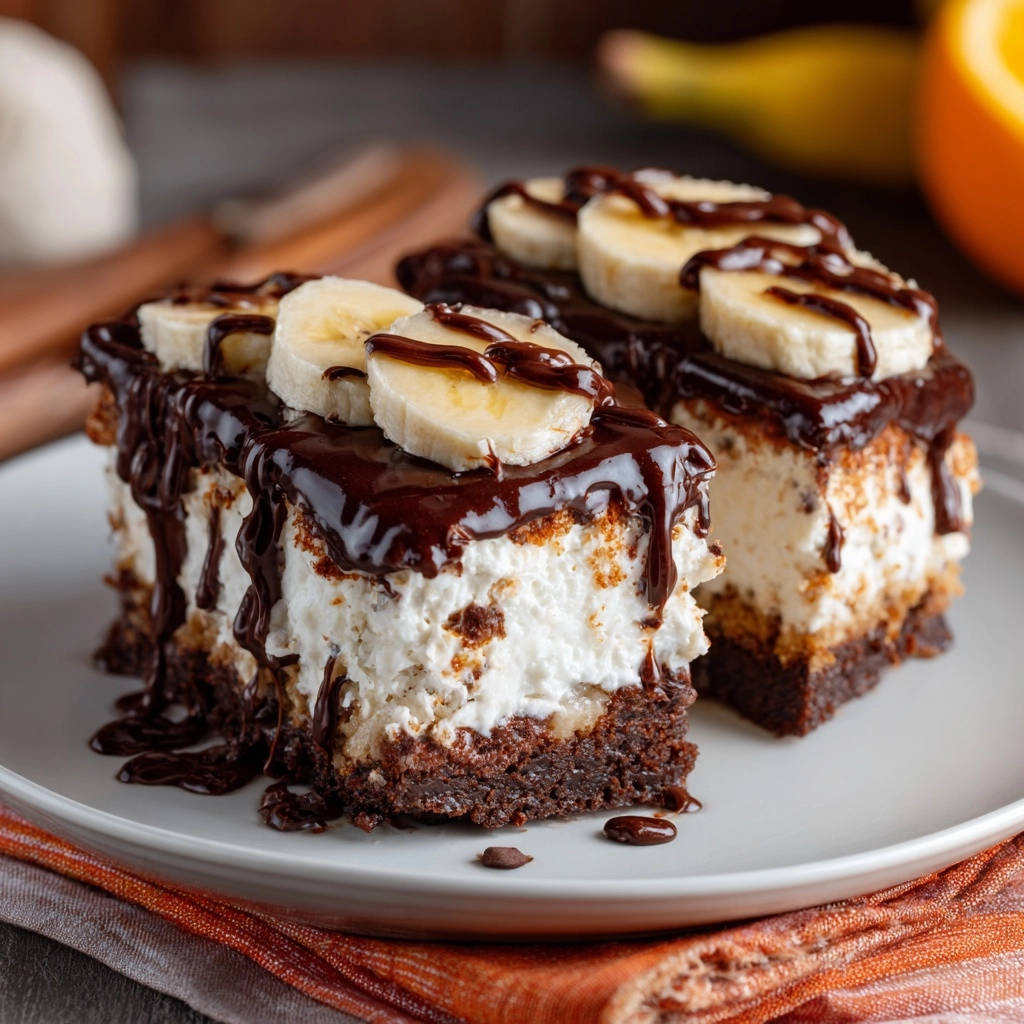
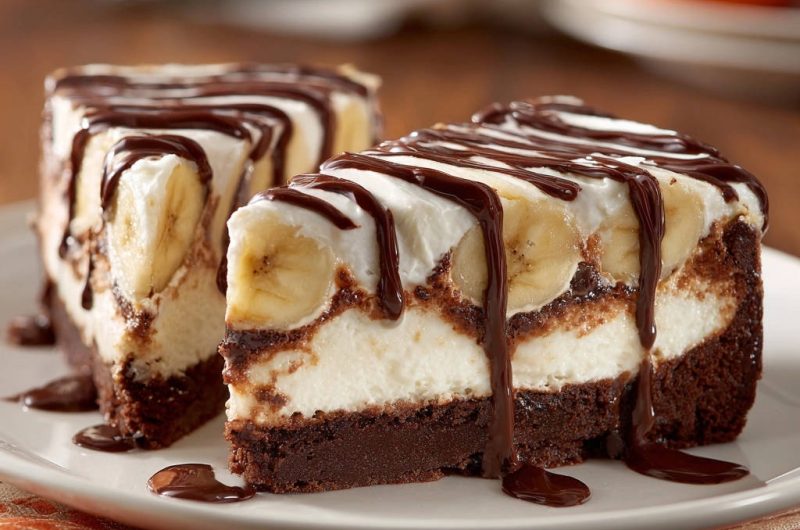
The result? Every bite of this stunning layered chocolate banana dessert offers a delightful contrast of textures. You’ll enjoy a robust, flavorful foundation, creamy filling, and fresh fruit, all beautifully presented and never soggy.
The Flavor Foundation: What You’ll Need for This Decadent Treat
For the Rich Chocolate Base
This forms the indulgent foundation of our easy banana dessert. Using quality unsweetened cocoa powder is essential for a deep, true chocolate flavor, not just a hint.
Melted butter adds richness and moisture, while eggs provide structure and bind the ingredients. A touch of vanilla extract enhances the overall aroma and flavor of this fudgy layer.
The Moisture Barrier: Your Secret Ingredient
This is where the magic happens for your no-soggy banana treat. Semi-sweet chocolate chips provide the core of this protective layer.
A small amount of coconut oil (or unsalted butter) helps the chocolate melt smoothly and spread easily. It also ensures the barrier sets firmly, creating a true seal against moisture.
Creamy, Dreamy Filling Essentials
Our luxurious filling requires softened cream cheese for a perfectly smooth, lump-free texture. Powdered sugar sweetens it without any grainy residue.
Vanilla extract adds warmth to the creamy notes. Cold heavy cream is critical here; it whips up to create the light, airy body of the filling, ensuring it’s stable and holds its shape beautifully.
Sweet Banana Notes
Choose ripe, but not overly soft, bananas for the best flavor and texture. Their natural sweetness is a perfect complement to the rich chocolate.
A little lemon juice is an optional but highly recommended addition. It prevents the banana slices from browning, keeping your dessert looking fresh and vibrant.
Cloud-Like Whipped Topping
For an ethereal finish, you’ll need very cold heavy cream. This ensures maximum volume and stability when whipped.
Powdered sugar adds sweetness, dissolving easily for a smooth topping. Vanilla extract once again brightens the flavors, tying all the creamy elements together.
Final Flourish: The Chocolate Drizzle
This simple garnish elevates the visual appeal and adds an extra layer of chocolatey goodness. Semi-sweet chocolate chips melt down with a touch of heavy cream.
This creates a smooth, glossy ganache that drizzles beautifully, providing a stunning contrast against the light whipped topping.
Essential Tools for Layered Dessert Success
Baking Essentials
A 9-inch round springform pan is indispensable for this impressive dessert. Its removable sides allow for effortless demolding, preserving the beautiful layers.
You’ll also need standard mixing bowls, a whisk for dry ingredients, and a flexible spatula for spreading batters and fillings evenly.
Electric Mixer & Whipping Bowls
An electric mixer, either stand or hand-held, will be your best friend. It makes quick work of beating the cream cheese and whipping the heavy cream to perfection.
Using a cold metal bowl for whipping cream is a game-changer. The chill helps the cream achieve stiff peaks faster and maintain its volume.
Measuring Tools & Cooling Rack
Accurate measuring cups and spoons are crucial for consistent results in baking and dessert making. Precision ensures the right balance of flavors and textures.
A wire cooling rack is vital for the chocolate base. It allows air circulation, ensuring the cake cools completely and preventing condensation that could compromise your anti-soggy barrier.
Your Path to Perfection: Crafting Each Decadent Layer
Step 1: Preparing the Chocolate Base
Preheat your oven to 350°F (175°C). Properly grease and flour your 9-inch springform pan; this prevents sticking and ensures a clean release.
In a medium bowl, whisk melted butter with granulated sugar until smooth. Incorporate eggs one at a time, then stir in vanilla.
In a separate small bowl, combine flour, cocoa powder, baking powder, and salt. Gradually add these dry ingredients to the wet mixture, mixing just until combined. Do not overmix, as this can lead to a tough cake.
Pour the batter into the prepared pan and spread evenly. Bake for 20-25 minutes, or until a toothpick inserted into the center comes out with moist crumbs. This indicates it’s perfectly cooked, not overbaked. Allow the base to cool completely on a wire rack in the pan before proceeding.
Step 2: Creating the Anti-Soggy Barrier (The Crucial Step!)
Once your chocolate base is absolutely cool, combine semi-sweet chocolate chips and coconut oil in a microwave-safe bowl. Microwave in short 30-second bursts, stirring well after each interval, until the mixture is completely melted and smooth. For more tips on achieving perfectly melted chocolate, explore our guide on easy white chocolate pecan clusters.
Pour this glossy melted chocolate mixture over the cooled chocolate base. Using a spatula, spread it into a thin, even layer across the entire surface. This is your essential moisture barrier.
Refrigerate the pan for at least 15-20 minutes, or until the chocolate barrier is completely firm to the touch. This firm layer is key to preventing a soggy bottom.
Step 3: Mastering the Creamy Filling
In a large bowl, beat softened cream cheese, powdered sugar, and vanilla extract with an electric mixer until the mixture is utterly smooth and creamy. Ensure there are no lumps.
In a separate, cold bowl, whip the cold heavy cream until stiff peaks form. The cold temperature helps the cream whip up quickly and maintain its structure.
Gently fold the whipped cream into the cream cheese mixture until just combined. Be careful not to deflate the air you’ve incorporated, preserving the filling’s light texture.
Step 4: Assembling Your Delicious Layers
Retrieve the pan from the refrigerator once the chocolate barrier is firm. Carefully and evenly spread the creamy filling over the set chocolate layer, extending it to the edges of the pan.
If you’re using lemon juice, lightly toss your 1/4-inch thick banana slices with it immediately after cutting to prevent browning. Arrange the banana slices in a single layer over the creamy filling, ensuring even coverage.
Step 5: Whipping Up the Final Topping
In a chilled bowl, whip the 1 1/2 cups of cold heavy cream with 1/4 cup powdered sugar and 1/2 teaspoon vanilla extract. Beat until firm, stiff peaks form, creating a light and airy topping.
Gently spread this whipped topping over the banana layer. You can create soft swirls with your spatula for an appealing finish.
Step 6: The Essential Chill Time
This step is critical for the stability and flavor of your layered chocolate banana dessert. Loosely cover the springform pan with plastic wrap.
Refrigerate for a minimum of 4 hours, or ideally, overnight. This prolonged chilling time allows all the layers to set completely and the flavors to meld beautifully.
Step 7: The Drizzling Flourish
Once thoroughly chilled, carefully remove the sides of the springform pan. In a small microwave-safe bowl, combine 1/4 cup semi-sweet chocolate chips and 2 tablespoons heavy cream.
Microwave in 15-second intervals, stirring well after each, until the mixture is completely melted and smooth. Let it cool slightly for a few minutes; this allows it to thicken to a perfect drizzling consistency.
Artfully drizzle the chocolate mixture over the top of the chilled dessert just before serving. Slice your magnificent Decadent Banana Chocolate Dessert and prepare for smiles!
Chef’s Secrets for Your Best Decadent Banana Chocolate Dessert Yet
Ingredient Temperature Matters
Ensure your cream cheese is softened to room temperature before beating. This prevents lumps and yields a truly smooth, creamy filling.
Conversely, heavy cream for whipping must be ice cold. Cold cream whips faster and achieves greater volume and stability, preventing a runny topping.
Don’t Overmix the Base
When preparing the chocolate base, mix the dry and wet ingredients only until they are just combined. Overmixing develops gluten, which can result in a tough, dense, and less tender cake layer.
The Toothpick Test for Perfection
For the chocolate base, insert a toothpick into the center. It should come out with moist crumbs attached, not wet batter. This indicates the cake is fully baked without being dry or overdone.
Chilling is Key!
Resist the temptation to cut corners on the chilling time. The minimum 4 hours, and preferably overnight, is essential for the layers to fully set and firm up.
Proper chilling ensures clean slices and allows the flavors of this impressive dessert to deepen and harmonize, resulting in a truly delicious experience.
Perfect Banana Preservation
Bananas brown rapidly once sliced due to oxidation. To prevent this, toss them with a small amount of lemon juice immediately after slicing.
Then, assemble the banana layer quickly. This ensures your Decadent Banana Chocolate Dessert looks as fresh and appealing as it tastes.
Decoding Dessert Disasters: Common Fixes for Layered Treats
My Chocolate Base is Dry/Crumbly!
This is most often a sign of overbaking. Every oven is different, so watch your cake closely and rely on the moist crumb toothpick test, not just the timer.
Ensure accurate measurements of flour and liquid. Too much flour or too little moisture can also contribute to a dry base.
The Anti-Soggy Barrier Isn’t Setting.
The chocolate base must be completely cool before the barrier is applied. Warmth will prevent the chocolate from firming up properly.
Ensure you’ve used enough coconut oil for smooth melting, but not so much that the chocolate can’t set. Most importantly, give it ample refrigeration time until it’s completely firm.
My Creamy Filling or Whipped Topping is Too Runny.
Warm ingredients are the primary culprit. Your cream cheese must be softened but not warm, and your heavy cream needs to be ice cold.
Ensure you’re whipping the heavy cream to stiff peaks before gently folding. Overfolding can deflate the cream, leading to a runny consistency. For more stable dessert inspiration, consider our Decadent Chocolate Cake recipe, which prioritizes perfect textures.
My Bananas Are Turning Brown!
Bananas naturally oxidize when exposed to air. The best defense is to prepare them just before assembly.
Toss them immediately with a little lemon juice, and then quickly layer them onto the creamy filling. Swift chilling after assembly also helps slow the browning process.
Your Top Questions About This Layered Banana Chocolate Dessert, Answered
Can I Make This Decadent Banana Chocolate Dessert Ahead?
Absolutely! This dessert is an ideal make-ahead option. Preparing it the day before allows the flavors to deepen and the layers to firm up perfectly.
Overnight chilling truly enhances the overall texture and taste, making it even more enjoyable.
How Do I Store Leftovers?
Store any leftover Decadent Banana Chocolate Dessert tightly covered with plastic wrap or in an airtight container in the refrigerator.
It will remain fresh and delicious for up to 3-4 days. An airtight seal prevents any odors from affecting the delicate flavors.
Can I Make This Dessert Dairy-Free or Gluten-Free?
For a dairy-free version, use plant-based butter, dairy-free chocolate chips, and full-fat canned coconut milk (chilled, scoop out only the thick cream) for the whipping components.
For gluten-free, substitute a 1:1 gluten-free all-purpose flour blend in the chocolate base. The rest of the recipe is naturally gluten-free.
What’s the Best Way to Slice This Layered Dessert?
For beautifully clean slices, use a sharp, thin knife. For each cut, run the knife under hot water, wipe it completely dry, and then slice straight down.
Cleaning the knife between each slice will ensure neat, professional-looking portions of your impressive banana chocolate treat.
Can I Use Different Fruits?
While bananas are classic, you can certainly experiment! Sliced fresh strawberries or raspberries make wonderful substitutions, offering a bright, tart contrast.
Be mindful of the moisture content of other fruits. If a fruit is very juicy, you might want to pat it dry before layering to prevent excess moisture from seeping into the cream.
Presentation & Pairings: Serving Your Decadent Creation
Elegant Serving Suggestions
Present individual slices of your Decadent Banana Chocolate Dessert on small dessert plates. The distinct layers and chocolate drizzle create a stunning visual.
For an extra touch of elegance, consider garnishing each slice with a light dusting of cocoa powder, a few chocolate shavings, or a delicate sprig of fresh mint.
Complementary Drink Pairings
This rich and satisfying dessert pairs beautifully with a strong, freshly brewed coffee or a bold espresso. The bitterness cuts through the sweetness wonderfully.
For a lighter option, a cold glass of milk complements the classic banana and chocolate flavors. A sparkling water with a hint of citrus can also offer a refreshing contrast.
Ready to Impress? Share Your Decadent Banana Chocolate Dessert Masterpiece!
Mastering this Decadent Banana Chocolate Dessert means saying goodbye to soggy bottoms forever and hello to rave reviews. This recipe truly transforms a classic into a foolproof showstopper.
Don’t hesitate to make this impressive treat for your next gathering or simply to satisfy a serious sweet craving. Share your creations and let us know how your perfect layers turn out!
Decadent Banana Chocolate Dessert
Course: DessertCuisine: American CuisineDifficulty: easy8
servings45
minutes25
minutes240
minutesAmerican Cuisine
Ingredients
For the Chocolate Base:
1/2 cup (1 stick) unsalted butter, melted
1 cup granulated sugar
2 large eggs
1 teaspoon vanilla extract
1/2 cup all-purpose flour
1/2 cup unsweetened cocoa powder
1/4 teaspoon baking powder
1/4 teaspoon salt
For the Anti-Soggy Barrier:
1/2 cup semi-sweet chocolate chips
1 tablespoon coconut oil (or unsalted butter)
For the Creamy Filling:
8 ounces cream cheese, softened
1/2 cup powdered sugar
1 teaspoon vanilla extract
1 cup heavy cream, cold
For the Banana Layer:
3 ripe bananas, sliced 1/4-inch thick
1 tablespoon lemon juice (optional, to prevent browning)
For the Whipped Topping:
1 1/2 cups heavy cream, cold
1/4 cup powdered sugar
1/2 teaspoon vanilla extract
For the Chocolate Drizzle:
1/4 cup semi-sweet chocolate chips
2 tablespoons heavy cream
Directions
- Prepare the Chocolate Base: Preheat oven to 350°F (175°C). Grease and flour a 9-inch round springform pan. In a medium bowl, whisk together melted butter and granulated sugar. Whisk in eggs one at a time, then stir in vanilla extract. In a separate small bowl, whisk together flour, cocoa powder, baking powder, and salt. Gradually add the dry ingredients to the wet ingredients, mixing until just combined. Pour batter into the prepared springform pan and spread evenly. Bake for 20-25 minutes, or until a toothpick inserted into the center comes out with moist crumbs. Do not overbake. Let cool completely in the pan on a wire rack.
- Create the Anti-Soggy Barrier (The Key Step!): Once the chocolate base is completely cool, combine 1/2 cup semi-sweet chocolate chips and coconut oil in a microwave-safe bowl. Microwave in 30-second intervals, stirring in between, until completely melted and smooth. Pour this melted chocolate mixture over the cooled chocolate base in the springform pan and spread it into a thin, even layer using a spatula. This creates a protective barrier against moisture. Refrigerate for at least 15-20 minutes, or until the chocolate barrier is firm.
- Make the Creamy Filling: In a large bowl, beat softened cream cheese, 1/2 cup powdered sugar, and 1 teaspoon vanilla extract with an electric mixer until smooth and creamy. In a separate cold bowl, whip 1 cup cold heavy cream until stiff peaks form. Gently fold the whipped cream into the cream cheese mixture until just combined.
- Assemble the Dessert: Remove the pan from the refrigerator. Carefully spread the creamy filling evenly over the set chocolate barrier. If using, lightly toss the sliced bananas with lemon juice to prevent browning, then arrange the banana slices in a single layer over the creamy filling.
- Prepare and Add Whipped Topping: In a cold bowl, whip 1 1/2 cups cold heavy cream, 1/4 cup powdered sugar, and 1/2 teaspoon vanilla extract until stiff peaks form. Gently spread the whipped topping over the banana layer.
- Chill and Drizzle: Cover the springform pan loosely with plastic wrap and refrigerate for at least 4 hours, or preferably overnight, to allow the dessert to set completely. This chilling time is crucial for stability.
- Finish with Chocolate Drizzle: Once chilled, gently remove the sides of the springform pan. In a small microwave-safe bowl, combine 1/4 cup semi-sweet chocolate chips and 2 tablespoons heavy cream. Microwave in 15-second intervals, stirring after each, until melted and smooth. Let cool slightly for a few minutes to thicken. Drizzle the chocolate mixture over the top of the chilled dessert before serving. Slice and enjoy!
Notes
- The anti-soggy chocolate barrier is key for a perfectly firm base.