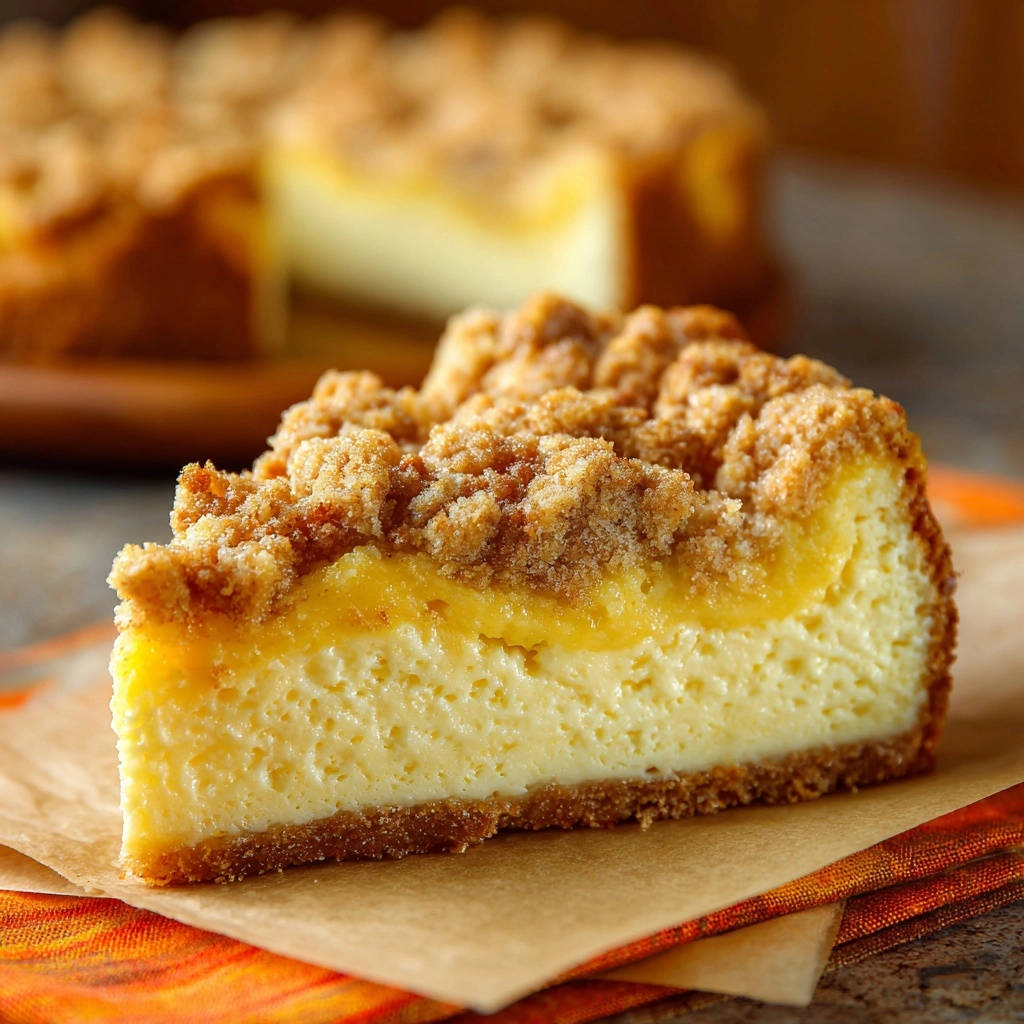
For years, I faced the common baker’s heartache: a beautiful cheesecake ruined by unsightly cracks. But I’ve finally perfected the method for a consistently smooth, creamy top that makes this Lemon Streusel Cheesecake truly special. This recipe combines the bright zest of lemon with a delightful crumbly streusel, promising a show-stopping dessert for any occasion.
Why This Lemon Streusel Cheesecake Is Your New Favorite
The “No-Crack” Secret Unveiled: Perfectly Smooth Tops Every Time
Many bakers dread the moment a cheesecake emerges from the oven, only to crack as it cools. This recipe employs a simple, yet highly effective, gradual cooling technique right inside the oven. This method completely eliminates temperature shock, ensuring your Lemon Streusel Cheesecake consistently boasts a flawless, smooth surface, perfect for impressing guests.
That Luscious Lemon Layer: A Zesty Surprise
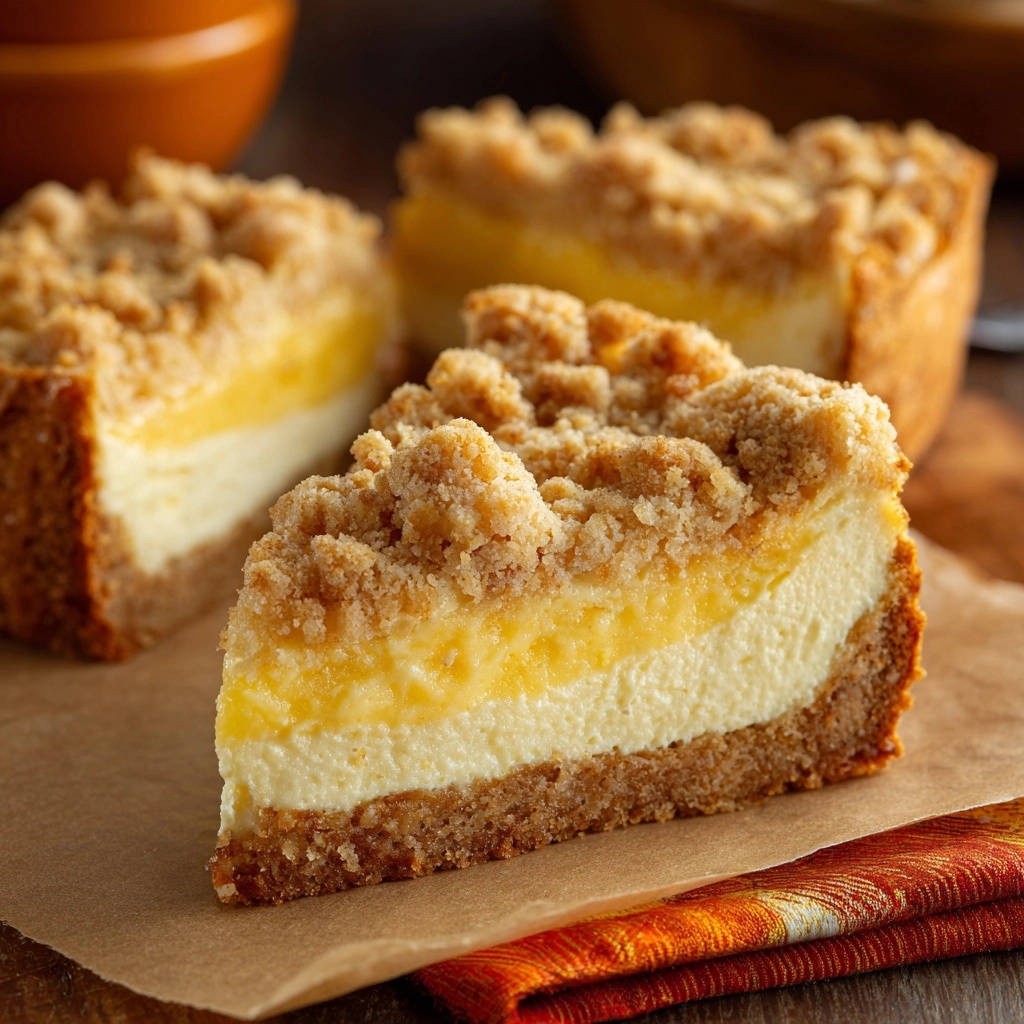
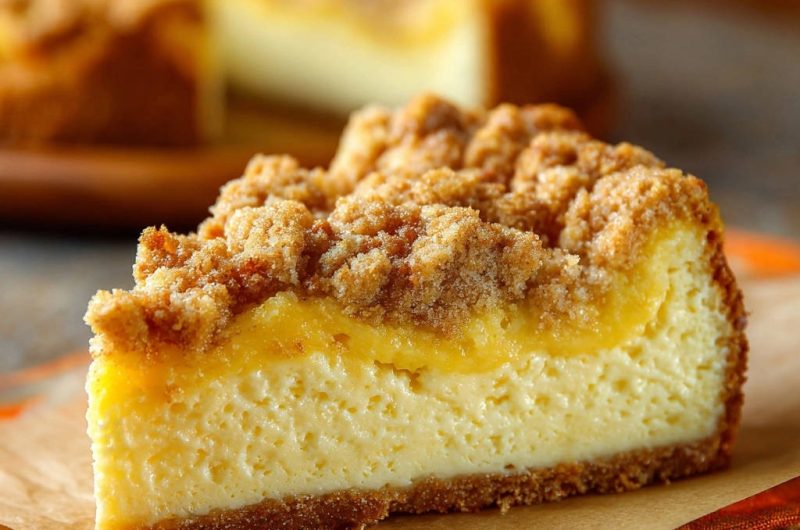
Beyond its creamy texture, this cheesecake features a vibrant layer of lemon curd nestled within the filling. This zesty addition cuts through the richness of the cheesecake, providing a bright, tangy counterpoint. It’s an unexpected burst of citrus that elevates the entire flavor profile.
Irresistible Streusel: Texture You’ll Crave
The buttery, spiced streusel topping is not just decorative; it adds a crucial textural contrast. Its crisp, sweet crumb provides a delightful crunch against the silky-smooth cheesecake. This topping transforms a classic dessert into a multifaceted sensory experience.
Achieving Velvety Creaminess: The Key to Sublime Texture
The specific mixing techniques outlined in this recipe are designed to minimize air incorporation, which is vital for a dense yet airy cheesecake. We focus on low-speed blending and gentle handling. The result is a cheesecake with an incredibly smooth, velvety texture that melts in your mouth without being overly heavy.
The Essential Ingredients for Your Best Lemon Streusel Cheesecake
Quality ingredients are the foundation of any outstanding dessert. Here’s what you’ll need, with notes on why each matters for your Lemon Streusel Cheesecake.
For the Golden Graham Crust
Graham Cracker Crumbs: These form the classic, subtly sweet base. Ensure they are finely crushed for a cohesive crust.
Granulated Sugar: A touch of sugar enhances the sweetness of the crust and helps with caramelization.
Unsalted Butter, Melted: The melted butter binds the crumbs together, creating a firm yet tender foundation.
Crafting the Creamy Cheesecake Core
Cream Cheese, Softened: This is non-negotiable for a lump-free, smooth batter. Use full-fat brick cream cheese for the best texture and flavor.
Granulated Sugar: Provides sweetness to the rich cream cheese base.
Large Eggs, at Room Temperature: Room temperature eggs incorporate more evenly into the batter, preventing lumps and ensuring a smooth, consistent texture.
Vanilla Extract: A classic flavor enhancer that complements the lemon and cream cheese beautifully.
Sour Cream, at Room Temperature: Adds a subtle tang and contributes significantly to the cheesecake’s characteristic creamy, rich texture.
The Zesty Lemon Curd Addition
Lemon Curd: A shortcut to intense lemon flavor. You can use a high-quality store-bought curd or easily prepare your own if you prefer. For another delightful lemon-infused dessert, consider my recipe for easy lemon crumb pudding.
Building the Perfect Streusel Topping
All-Purpose Flour: Forms the base of the streusel, giving it structure.
Packed Light Brown Sugar: Adds moisture and a deeper, caramel-like sweetness to the streusel.
Granulated Sugar: Contributes to the crispness of the streusel.
Ground Cinnamon: A warm spice that perfectly complements the tart lemon and rich cheesecake, adding depth.
Unsalted Butter, Cold and Cubed: Critical for a crumbly streusel. Cold butter, when cut in, creates pockets of steam during baking, resulting in a perfectly crisp, coarse texture.
Ingredient Spotlight: Why Temperature Matters!
Using room temperature cream cheese, eggs, and sour cream is paramount for the cheesecake filling. Cold ingredients don’t emulsify well, leading to a lumpy batter or requiring excessive mixing, which introduces unwanted air. Excess air can cause your cheesecake to puff up, then crack and sink.
Conversely, the butter for the streusel must be cold and cubed. This prevents it from fully incorporating into the dry ingredients, ensuring that signature crumbly texture rather than a doughy one. The cold butter melts slowly, creating steam that yields a wonderfully crisp streusel.
Essential Tools for Cheesecake Mastery
Having the right equipment makes all the difference in achieving a perfect Lemon Streusel Cheesecake.
Must-Have Baking Equipment
9-inch Springform Pan: This is essential for achieving the cheesecake’s signature tall, elegant sides and for incredibly easy release. The removable sides mean no inverted cakes or struggling to get it out.
Mixing Bowls (Medium & Large): You’ll need separate bowls for the crust, streusel, and cheesecake filling to keep components distinct and organized.
Electric Mixer: A handheld or stand mixer is indispensable for effortlessly creaming the cheese and sugars, ensuring a smooth, uniform batter.
Helpful Gadgets for a Smooth Process
Pastry Blender: While your fingers work, a pastry blender is ideal for efficiently cutting the cold butter into the streusel ingredients, ensuring perfectly coarse crumbs.
Rubber Spatula: This versatile tool is crucial for scraping down the sides of your mixing bowl, ensuring all ingredients are fully incorporated without overmixing.
Wire Rack: Necessary for cooling the cheesecake completely at room temperature, allowing air circulation underneath to prevent condensation.
Wooden Spoon/Oven Mitt: This simple item is your secret weapon for propping the oven door open, enabling the crucial slow-cooling process for a crack-free cheesecake.
Step-by-Step: Crafting Your Lemon Streusel Cheesecake Masterpiece
- Prepping Your Pan and Oven:
Preheat your oven to 325°F (160°C). Lightly grease a 9-inch springform pan to ensure your cheesecake releases easily once it’s time to serve. This initial prep sets the stage for success.
- The Foundation: A Perfect Graham Cracker Crust:
In a medium bowl, combine graham cracker crumbs, 1/4 cup granulated sugar, and melted butter. Use the bottom of a glass or your fingers to press this mixture firmly into the bottom of the prepared springform pan, creating an even layer. Bake for 10 minutes to set and slightly crisp the crust, then remove and set aside to cool slightly while you prepare the other components.
- Assembling the Crumble: Your Streusel Topping:
In a separate bowl, combine flour, brown sugar, granulated sugar, and cinnamon. Add the cold, cubed butter. Cut the butter into the dry ingredients using a pastry blender or your fingertips, working quickly until the mixture resembles coarse crumbs. Avoid overworking, which can melt the butter. Set this perfectly crumbly mixture aside; it will be sprinkled on top later for that irresistible texture.
- Whipping Up the Velvety Cheesecake Batter (No Overmixing!):
In a large mixing bowl, beat the softened cream cheese with 1 1/4 cups granulated sugar on low speed until smooth and creamy. It is crucial not to overmix at this stage; we want to incorporate the ingredients without adding too much air, which can cause cracking. Scrape down the sides of the bowl frequently to ensure all ingredients are evenly blended.
- Incorporating Eggs and Sour Cream:
Add the eggs one at a time, mixing on low speed until just combined after each addition. Finally, mix in the vanilla extract and room temperature sour cream until the batter is just smooth. Again, resist the urge to overmix, which can introduce excess air and compromise the final texture of your Lemon Streusel Cheesecake.
- Layering for Flavor: Curd, Cream, and Crumble:
Pour exactly half of the cheesecake batter over the baked crust in the springform pan, spreading it gently. Carefully spoon the lemon curd over this layer, spreading it gently to cover without disturbing the first batter layer. Pour the remaining cheesecake batter over the lemon curd, gently spreading it out to create a smooth, even top layer. Finish by sprinkling the prepared streusel topping evenly over the entire surface of the cheesecake batter, covering it completely.
- Baking to Perfection: The Jiggle Test is Key:
Place the springform pan on a baking sheet to catch any potential drips, ensuring a clean oven. Bake for 60-75 minutes, or until the edges are set and lightly golden. The center should still jiggle slightly when gently shaken; this slight movement indicates it is perfectly cooked, preventing dryness and ensuring that signature creamy texture. Remember, overbaking is a common cause of cracks.
- The Crack-Free Cooling Method: Your Golden Rule:
Once baking is complete, turn off the oven. This is the secret to preventing cracks! Prop the oven door open slightly (about 3-4 inches) with a wooden spoon or oven mitt. Allow the cheesecake to cool slowly inside the oven for at least 1 hour. This gradual cooling prevents sudden temperature shock, which is a major cause of unsightly cracks in cheesecakes.
- The Final Chill: Patience for Perfection:
After 1 hour of cooling in the oven, remove the Lemon Streusel Cheesecake and transfer it to a wire rack to cool completely at room temperature. Once fully cooled (this can take another hour or two), cover the cheesecake loosely with plastic wrap and refrigerate for at least 4 hours, or preferably overnight. This crucial chilling time helps the cheesecake set properly, firm up its texture for clean slicing, and intensifies its delightful flavor profile.
- Serving Your Magnificent Creation:
When you’re ready to serve, carefully run a thin knife around the edge of the pan before releasing and removing the springform side. Slice and enjoy your perfectly crack-free Lemon Streusel Cheesecake! For comparison, you might also enjoy these delightful easy creamy berry crumble cheesecake bars.
Expert Tips for Lemon Streusel Cheesecake Success
Achieving That Perfectly Smooth Batter: Always use softened, room-temperature cream cheese and sour cream. This ensures they blend seamlessly without lumps and allows for minimal mixing, which prevents incorporating too much air. Lumpy batter means more mixing, which leads to cracks.
Mastering the “Jiggle” for Ideal Doneness: The slight jiggle in the center is your best indicator that the cheesecake is perfectly cooked. It means the edges are set, but the center is still delicate and will continue to set as it cools, resulting in a supremely creamy texture. Overbaking eliminates this jiggle and leads to dry, cracked cheesecake.
Why Gradual Cooling Prevents Cracks: The slow temperature decrease in the oven allows the cheesecake to contract gently and evenly as it cools. This prevents the sudden shock of a drastic temperature change, which is the primary culprit behind unsightly cracks on the surface.
The Importance of Chilling Time: Don’t rush it! Adequate chilling not only sets the cheesecake firmly for clean, elegant slicing but also deeply melds all the flavors together. This results in a much richer, more satisfying taste experience. Overnight chilling truly yields the best results.
Customizing Your Cheesecake: Zest, Spices, and More: For an extra burst of lemon brightness, add 1-2 tablespoons of finely grated lemon zest directly to the cheesecake batter along with the vanilla. You can also lightly toast the flour for the streusel before mixing for a nuttier flavor, or add a pinch of nutmeg or cardamom to the streusel for added warmth and complexity.
Troubleshooting Common Cheesecake Woes
“Why Did My Cheesecake Crack?” (Even After The Secret!)
While the gradual cooling method is highly effective, cracks can still occur if the cheesecake was significantly overbaked, if your oven temperature was too high (even with a good method), or if it experienced too rapid a temperature change after the controlled oven cooling but before it reached room temperature. Always double-check your oven temperature with a thermometer, stick to the visual jiggle test for doneness, and ensure it cools fully on the wire rack before refrigerating.
“My Crust is Soggy!”
A soggy crust typically means the crust wasn’t fully baked before the filling was added, or moisture from the filling seeped into it during baking. Ensure your graham cracker crust bakes until it’s light golden and firm to the touch before adding any filling. To create an extra moisture barrier, you can brush a thin layer of lightly beaten egg white over the baked crust and bake for another 2-3 minutes before adding the filling. This creates a seal.
“Cheesecake Sunk in the Middle!”
Sinking often indicates that too much air was incorporated into the batter, usually from overmixing, especially after eggs are added. This air expands during baking, then collapses upon cooling, causing the cheesecake to fall. Ensure you beat on low speed and mix only until ingredients are just combined after each addition. Overbaking can also cause excessive puffing, leading to subsequent sinking.
“Too Much Lemon or Not Enough?”
The amount of lemon curd in this Lemon Streusel Cheesecake recipe is balanced for a noticeable but not overwhelming lemon flavor. If you desire an even more intense lemon punch, consider adding 1-2 teaspoons of fresh lemon zest to the cheesecake filling itself along with the vanilla extract. If you found it too strong, you might slightly reduce the lemon curd layer next time, though this is rarely an issue with this recipe.
Serving, Storing, and Enjoying Your Cheesecake for Days
The Best Way to Slice and Serve
For clean, perfect slices, always use a long, sharp knife. For the neatest cuts, dip the knife in hot water and wipe it dry between each slice. This warms the blade slightly, allowing it to glide smoothly through the creamy cheesecake and streusel without dragging.
Serve your Lemon Streusel Cheesecake chilled, ideally straight from the refrigerator. It’s delightful on its own, but a simple dollop of freshly whipped cream or a few fresh berries can beautifully complement the zesty lemon flavor and rich creaminess.
How to Store Leftovers for Peak Freshness
Store any leftover Lemon Streusel Cheesecake tightly covered with plastic wrap or in an airtight container. Refrigerate promptly, and it will maintain its delicious flavor and texture for up to 5 days. Ensure it’s well-sealed to prevent it from absorbing any unwanted odors from other foods in your refrigerator.
Can You Make Lemon Streusel Cheesecake Ahead?
Absolutely! This cheesecake is an excellent make-ahead dessert, making it perfect for entertaining or meal prepping. While it requires a minimum of 4 hours of chilling, it is truly at its best when made the day before you plan to serve it and allowed to chill overnight. This extended chilling time allows the flavors to meld and deepen beautifully, and the texture to fully set, resulting in an even more sublime dessert.
Your Lemon Streusel Cheesecake Questions Answered
Can I Use Store-Bought Lemon Curd?
Yes, the recipe specifically assumes and is balanced for the use of store-bought lemon curd for convenience. Ensure you select a good quality brand, as its flavor will directly impact the overall taste of your Lemon Streusel Cheesecake. If you’re an experienced baker looking for a deeper flavor, homemade lemon curd can certainly elevate this dessert even further.
What If I Don’t Have a Springform Pan?
While a springform pan is highly recommended for its ease of release and the clean presentation it provides, you can use a regular 9-inch round cake pan. Line the pan with parchment paper, leaving an overhang on the sides. This overhang will act as “handles” to help you lift the cheesecake out once it’s fully chilled. However, slicing and overall presentation might be slightly more challenging than with a springform pan.
Can I Freeze Lemon Streusel Cheesecake?
Yes, cheesecake freezes remarkably well, making it a great dessert to prepare in advance. After it’s completely chilled and set, you can wrap individual slices or the entire cheesecake (without the streusel if possible, as it can get slightly softer upon thawing) tightly in plastic wrap, then in a layer of aluminum foil. It can be frozen for up to 1-2 months. Thaw frozen cheesecake overnight in the refrigerator before serving to ensure the best texture.
Are There Gluten-Free Alternatives for the Crust or Streusel?
Absolutely! To make a gluten-free crust, simply substitute the regular graham cracker crumbs with gluten-free graham cracker crumbs. For the streusel, replace the all-purpose flour with a 1:1 gluten-free baking flour blend. Always ensure that any other ingredients, particularly the lemon curd, are certified gluten-free if you are catering to strict dietary needs.
Ready to Bake? Share Your Lemon Streusel Cheesecake Journey!
Now that you’re armed with the secrets to a crack-free, lusciously creamy Lemon Streusel Cheesecake, it’s time to put your skills to the test. This recipe promises not only a show-stopping dessert that will impress everyone but also a genuinely delightful and rewarding baking experience.
We’d absolutely love to see your creations! Share your Lemon Streusel Cheesecake triumphs with us on social media, or leave a comment below to tell us how it turned out and what you loved most about it. Happy baking!
Lemon Streusel Cheesecake
Course: DessertCuisine: American CuisineDifficulty: easy12
servings45
minutes1
hour300
minutesAmerican Cuisine
Ingredients
For the Crust:
1 1/2 cups graham cracker crumbs
1/4 cup granulated sugar
1/2 cup unsalted butter, melted
For the Cheesecake Filling:
3 (8 ounce) packages cream cheese, softened
1 1/4 cups granulated sugar
3 large eggs, at room temperature
1 teaspoon vanilla extract
1/2 cup sour cream, at room temperature
For the Lemon Layer:
1 cup lemon curd
For the Streusel Topping:
1 cup all-purpose flour
1/2 cup packed light brown sugar
1/4 cup granulated sugar
1/2 teaspoon ground cinnamon
1/2 cup unsalted butter, cold and cubed
Directions
- Preheat your oven to 325 degrees F (160 degrees C). Grease a 9-inch springform pan.
- Prepare the crust: In a medium bowl, combine graham cracker crumbs, 1/4 cup granulated sugar, and melted butter. Press firmly into the bottom of the prepared springform pan. Bake for 10 minutes. Remove from oven and set aside.
- Prepare the streusel topping: In a separate bowl, combine flour, brown sugar, granulated sugar, and cinnamon. Cut in the cold, cubed butter with a pastry blender or your fingers until the mixture resembles coarse crumbs. Set aside.
- Prepare the cheesecake filling: In a large mixing bowl, beat the softened cream cheese with 1 1/4 cups granulated sugar on low speed until smooth. It is crucial not to overmix here; we want to incorporate the ingredients without adding too much air. Scrape down the sides of the bowl often.
- Add the eggs one at a time, mixing on low speed until just combined after each addition. Mix in the vanilla extract and sour cream until just smooth. Again, avoid overmixing.
- Pour half of the cheesecake batter over the baked crust in the springform pan.
- Carefully spoon the lemon curd over the cheesecake layer, spreading it gently to cover.
- Pour the remaining cheesecake batter over the lemon curd, gently spreading it evenly.
- Sprinkle the prepared streusel topping evenly over the top of the cheesecake batter.
- Place the springform pan on a baking sheet to catch any potential drips. Bake for 60-75 minutes, or until the edges are set and lightly golden, but the center still jiggles slightly when gently shaken. This slight jiggle is key; it means it’s cooked enough but not overbaked.
- This is the secret to no cracks! Once baking is complete, turn off the oven. Prop the oven door open slightly (about 3-4 inches) with a wooden spoon or oven mitt. Allow the cheesecake to cool slowly inside the oven for at least 1 hour. This gradual cooling prevents temperature shock, which is a major cause of cracks.
- After 1 hour, remove the cheesecake from the oven and transfer it to a wire rack to cool completely at room temperature.
- Once cooled, cover the cheesecake loosely with plastic wrap and refrigerate for at least 4 hours, or preferably overnight, before serving. This chilling time helps the cheesecake set properly and intensifies its flavor.
- When ready to serve, carefully run a thin knife around the edge of the pan before removing the springform side. Slice and enjoy your perfectly crack-free cheesecake!
Notes
- Includes a secret cooling technique to prevent cracks.