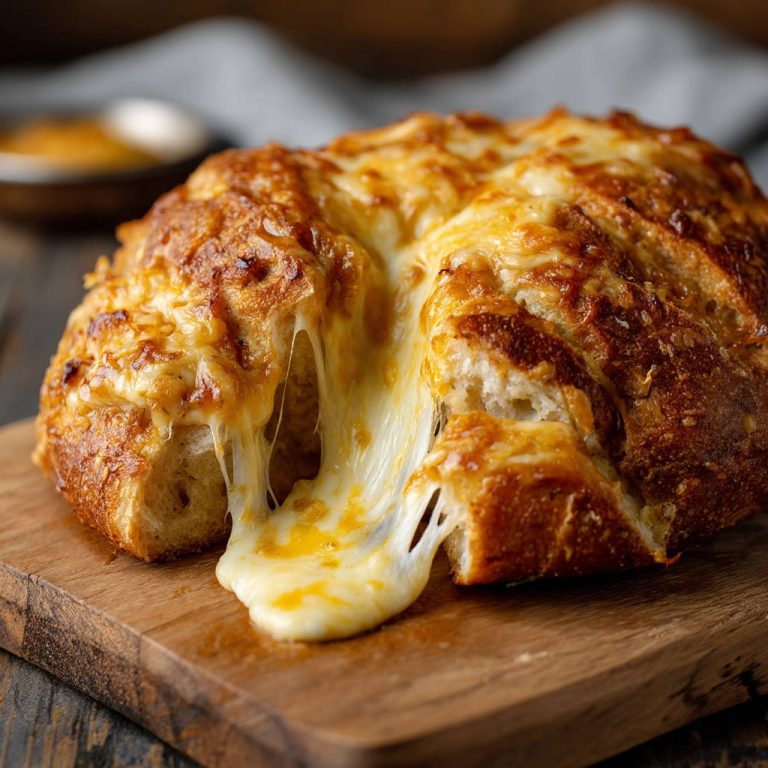
Ever made an open-faced sandwich only to find the bread turning soggy before you could truly savor it? That disappointment is real, and it’s why I obsessed over creating the perfect solution. My recipe for Mini Meatball Melts ensures every bite is a delightful crunch, thanks to a simple, genius technique that guarantees perfectly crisp toast beneath all that cheesy, meaty goodness.
This isn’t just another snack; it’s a game-changer for quick lunches, easy dinners, or crowd-pleasing appetizers that promise consistent texture and incredible flavor every single time.
The “No Soggy Bread” Promise: Why You Need These Mini Meatball Melts
The beauty of these Mini Meatball Melts lies in their thoughtful construction, designed to prevent the common pitfalls of similar dishes. You get all the flavor of a classic meatball sub, miniaturized and perfected for effortless enjoyment.
Say Goodbye to Soggy Bottoms: Our Crispy Toast Method Revealed
The absolute worst part of a meatball melt can be soggy bread. We tackle this head-on with a simple yet critical step: pre-broiling the bread with a touch of olive oil.
This creates a golden, slightly toasted barrier that moisture from the meatballs and cheese simply cannot penetrate, ensuring your foundation stays crisp from the first bite to the last.
Quick, Easy, and Family-Friendly Mealtime Wins
Beyond their amazing crispness, these Mini Meatball Melts are incredibly practical. With just 15 minutes of prep and 20 minutes of cook time, you can have a hearty, satisfying meal on the table in under 40 minutes.

They’re a hit with both kids and adults, making them an ideal choice for busy weeknights or a fun, interactive weekend treat.
Gather Your Ingredients: Crafting Irresistible Mini Meatball Melts
Quality ingredients lay the foundation for outstanding flavor. Choosing wisely ensures your melts are not just crispy, but delicious through and through.
For the Flavorful Mini Patties
For the meatballs, choose lean ground beef. This minimizes excess grease, which is crucial for preventing soggy bread and ensuring tender, flavorful patties.
Garlic powder, onion powder, salt, and black pepper are your allies here, providing a well-rounded, savory base without overwhelming the beef’s natural taste. These simple seasonings elevate the patties.
The Foundation: Sturdy Bread and Essential Toppings
The bread is paramount; opt for sturdy slices like a wide baguette or Italian bread. These varieties hold up well to broiling and provide a stable base for your toppings.
Olive oil is essential for achieving that golden, crispy toast, acting as a protective layer against moisture. Freshly sliced tomato adds a bright, juicy counterpoint to the rich meat and cheese, while a blend of shredded mozzarella and cheddar delivers the ultimate gooey, savory melt.
Essential Tools for Your Mini Meatball Melts Masterpiece
Having the right tools makes the preparation process smooth and efficient, ensuring perfect results every time.
Medium Bowl: For combining and mixing your ground beef and seasonings.
Large Skillet: Ideal for browning your mini beef patties evenly.
Paper Towels: Crucial for draining excess grease from the cooked patties, a key step to prevent sogginess.
Baking Sheet: Necessary for toasting your bread under the broiler and for the final assembly and melt.
Step-by-Step Perfection: Assembling Your Mini Meatball Melts
Follow these precise steps to create Mini Meatball Melts that are crispy, cheesy, and utterly delicious.
-
Preparing the Mini Beef Patties
In a medium bowl, combine the lean ground beef, garlic powder, onion powder, salt, and black pepper. Mix these ingredients gently; overmixing can lead to tough patties.
Divide the seasoned mixture into eight small, flattened patties. Aim for a size that will fit neatly onto your bread slices once cooked.
-
Cooking the Flavorful Patties
Heat 1 tablespoon of olive oil in a large skillet over medium heat until shimmering. Carefully add the beef patties to the hot skillet, ensuring they have enough space to cook evenly.
Cook the patties for 4-5 minutes per side, or until they are thoroughly browned and cooked through. Once done, remove them from the skillet and transfer them to a plate lined with a paper towel. This crucial step helps drain any excess grease, which is vital for preventing your bread from becoming soggy later.
-
The Crispy Foundation: Toasting Your Bread
To achieve that essential crisp foundation, preheat your oven broiler to high. Arrange the bread slices on a baking sheet in a single layer, ensuring they don’t overlap.
Drizzle the remaining 1 tablespoon of olive oil evenly over each bread slice. Broil the bread for 1-2 minutes, watching it very closely, until it turns golden brown and slightly crisp. This golden barrier is your secret weapon, stopping the bread from absorbing moisture from the toppings.
-
Assembling and Melting to Perfection
Carefully remove the baking sheet with the toasted bread from the oven. Place one cooked beef patty on top of each perfectly toasted bread slice.
Next, add a thinly sliced tomato piece on top of each patty. Finish by generously sprinkling the shredded mozzarella and cheddar cheese blend over the tomato and beef, ensuring good coverage for an even melt.
-
The Final Broil for Bubbly Goodness
Return the baking sheet to the oven, placing it back under the broiler. Broil for an additional 2-3 minutes, keeping a watchful eye on them. The cheese should become beautifully melted, bubbly, and lightly browned on top.
Broiler intensities can vary significantly, so monitoring closely prevents any burning and ensures that perfect gooey texture.
-
Serving Your Irresistible Melts
Once the cheese is perfectly melted and bubbly, immediately remove the Mini Meatball Melts from the oven. Serve them warm to enjoy their crispy, cheesy, and utterly delicious goodness at its best.
Chef’s Secrets & Pro Tips for Perfect Mini Meatball Melts
Elevate your Mini Meatball Melts with these expert tips, ensuring every batch is a success.
-
Mastering the “No Soggy Bread” Technique
The pre-broiling of the bread is non-negotiable for crispness. Ensure the bread is truly golden and slightly firm before adding toppings, as this creates the necessary barrier. A generous drizzle of olive oil before broiling helps achieve that beautiful golden crisp.
-
Perfectly Cooked Patties Every Time
Avoid overmixing the ground beef, which can lead to tough patties. Gently combine the ingredients until just incorporated. Ensure patties are uniformly flattened for even cooking, and always drain them thoroughly on paper towels after cooking to remove excess grease.
-
Cheese Melting Mastery
For an even melt, sprinkle the cheese generously and evenly over the patties and tomato. Position your baking sheet at the right distance from the broiler element – usually 4-6 inches – to allow the cheese to melt and bubble without scorching. Keep a close eye, as broilers can go from perfect to burnt in seconds.
-
Customizing Your Melts: Flavor Variations
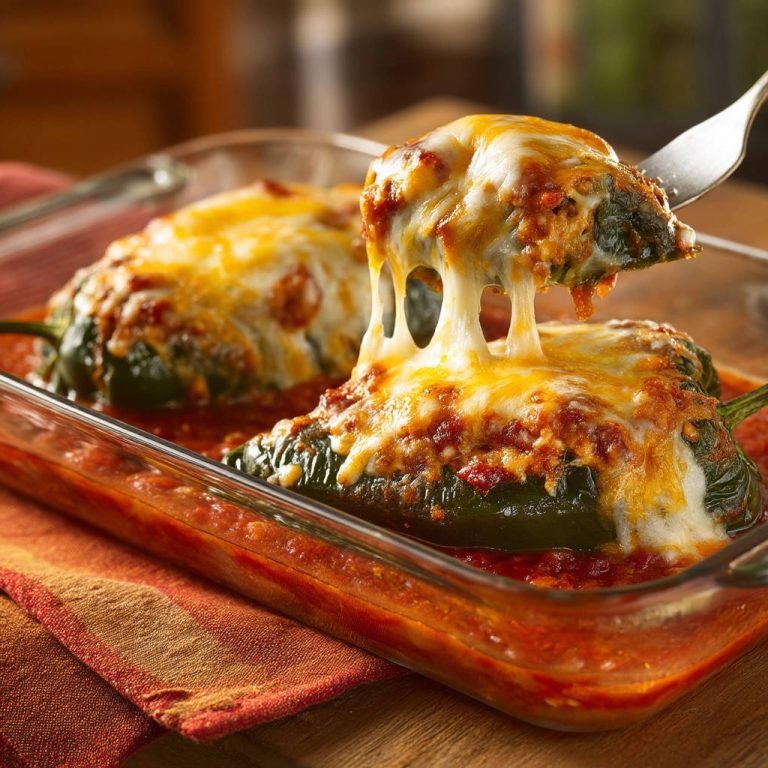
Feel free to experiment with seasonings in the beef; a pinch of dried oregano or basil can add an Italian flair. For a different twist, consider adding a thin slice of a mild onion or a sprinkle of chopped fresh parsley before broiling. You can also explore different cheese combinations like provolone, Monterey Jack, or even a spicy pepper jack for a kick. These melts are wonderfully versatile, much like a hearty loaded beef cheddar melt.
Common Questions & Troubleshooting for Your Melts
Even seasoned home cooks encounter challenges. Here’s how to troubleshoot common issues with your Mini Meatball Melts.
Why Did My Bread Get Soggy?
The most common culprit is skipping or rushing the initial broiling of the bread with olive oil. This step creates the essential moisture barrier. Another reason could be insufficient draining of the beef patties, leaving too much grease that soaks into the toast. Always ensure patties are well-drained and bread is truly golden and crisp before assembly.
My Patties Are Dry!
Dry patties usually result from overcooking or using extremely lean ground beef without enough fat content to keep them moist. Cook until just done (internal temperature 160°F), and if you opt for very lean beef, consider adding a tablespoon of finely grated onion or a splash of water/broth to the mixture to help retain moisture during cooking.
The Cheese Isn’t Melting or Browning Evenly.
This often happens if the baking sheet is too far from the broiler element, or if your cheese blend isn’t ideal for melting. Ensure your rack is in the top third of your oven. If one side seems to brown faster, rotate the baking sheet halfway through the broiling time. Using a good quality shredded cheese blend specifically designed for melting can also help.
Beyond the Plate: Perfect Pairings for Your Mini Meatball Melts
Complete your meal with these delicious and complementary side dishes, turning your Mini Meatball Melts into a full feast.
Simple Green Salad: A light, crisp mixed green salad with a vinaigrette dressing offers a refreshing contrast to the richness of the melts.
Homemade Chips or Fries: Crispy potato chips or perfectly golden French fries make a classic, satisfying accompaniment.
Creamy Coleslaw: The tangy, creamy crunch of coleslaw provides a lovely balance to the savory meat and cheese.
Vegetable Sticks with Dip: For a lighter, healthier side, offer carrot sticks, cucumber slices, and bell pepper strips with a ranch or creamy homemade hummus.
Classic Macaroni and Cheese: For ultimate comfort, pair these melts with a side of creamy stovetop mac and cheese.
Storing & Reheating Your Delicious Mini Meatball Melts
Proper storage and reheating ensure your leftovers are just as enjoyable as the fresh batch.
How to Store Leftovers
Allow any leftover Mini Meatball Melts to cool completely before storing. Place them in an airtight container, separating layers with parchment paper if stacking, to prevent them from sticking together. Store in the refrigerator for up to 3-4 days.
Reheating for Optimal Crispy Enjoyment
To preserve the crispness of the bread, avoid reheating in a microwave. The best methods are in a conventional oven or an air fryer. Preheat your oven to 350°F (175°C) or air fryer to 325°F (160°C). Place the melts directly on a baking sheet or in the air fryer basket and heat for 5-10 minutes, or until warmed through and the cheese is re-melted and bubbly. Keep a close watch to prevent burning.
Mini Meatball Melts FAQs: Your Questions Answered
Can I Use Different Kinds of Bread?
Yes, while a sturdy baguette or Italian bread is recommended for maximum crispness, you can experiment with other types like sourdough, Texas toast, or even thick-cut sandwich bread. Just ensure it’s robust enough to hold up to the toppings and broiling.
What About Other Cheese Blends?
Absolutely! The mozzarella and cheddar blend is a classic, but feel free to get creative. Provolone, Monterey Jack, Colby, or even a smoked gouda can add wonderful depth. Just ensure your chosen cheese melts well for that satisfying gooey factor.
Can I Make the Mini Meatball Patties Ahead of Time?
Yes, you can prepare the seasoned ground beef patties up to 24 hours in advance. Form them, then cover and refrigerate until ready to cook. This is a great time-saver for busy days, or for other versatile ground beef dishes like juicy shredded beef and cheese sliders.
Is There a Gluten-Free Option for These Melts?
Yes, simply substitute the regular bread with your favorite gluten-free bread. Ensure it’s a sturdy variety that can hold up to broiling and the weight of the toppings. The rest of the ingredients are naturally gluten-free.
Can I Freeze Cooked Mini Meatball Melts?
While best enjoyed fresh, you can freeze cooked mini meatball melts for later. Allow them to cool completely, then wrap each melt individually in plastic wrap and then foil. Store in a freezer-safe bag for up to 1 month. Reheat from frozen in a preheated oven or air fryer until warmed through and crisp, though the texture of the bread may not be as perfect as fresh.
Ready to Create Your Own Mini Meatball Melts Masterpiece?
Now that you have all the secrets to crafting the ultimate crispy, cheesy Mini Meatball Melts, it’s time to get cooking! This recipe is a testament to how simple techniques can transform everyday ingredients into something truly extraordinary. Imagine the delight on your family’s faces as they bite into perfectly crisp bread, tender meatballs, and gooey melted cheese.
Don’t just take my word for it-try these Mini Meatball Melts tonight and experience the magic yourself. Share your creations and let me know how they turn out!

Mini Meatball Melts
Course: Main CourseCuisine: American CuisineDifficulty: easy4
servings15
minutes20
minutes35
minutesAmerican Cuisine
Ingredients
1 pound lean ground beef
1 teaspoon garlic powder
1/2 teaspoon onion powder
1/2 teaspoon salt
1/4 teaspoon black pepper
8 slices sturdy bread, such as a wide baguette or Italian bread
2 tablespoons olive oil, divided
1 medium tomato, thinly sliced
1 cup shredded mozzarella and cheddar cheese blend
Directions
- In a medium bowl, combine the ground beef, garlic powder, onion powder, salt, and black pepper. Mix gently until just combined. Divide the mixture into 8 small, flattened patties, sized to fit your bread slices.
- Heat 1 tablespoon of olive oil in a large skillet over medium heat. Add the beef patties and cook for 4-5 minutes per side, or until thoroughly browned and cooked through. Remove patties from the skillet and set aside on a plate lined with a paper towel to drain any excess grease. This helps prevent sogginess.
- To ensure your toast stays perfectly crispy, preheat your oven broiler to high. Arrange the bread slices on a baking sheet. Drizzle the remaining 1 tablespoon of olive oil evenly over the bread slices. Broil for 1-2 minutes until golden brown and slightly crisp. Keep a close eye on it to prevent burning. This golden barrier is key to stopping the bread from absorbing moisture.
- Carefully remove the baking sheet from the oven. Place one cooked beef patty on each toasted bread slice. Top each patty with a slice of tomato, then generously sprinkle with the shredded cheese blend.
- Return the baking sheet to the oven under the broiler. Broil for another 2-3 minutes, or until the cheese is melted, bubbly, and lightly browned. Watch carefully as broilers can vary in intensity.
- Serve immediately and enjoy your perfectly crispy, cheesy melts!