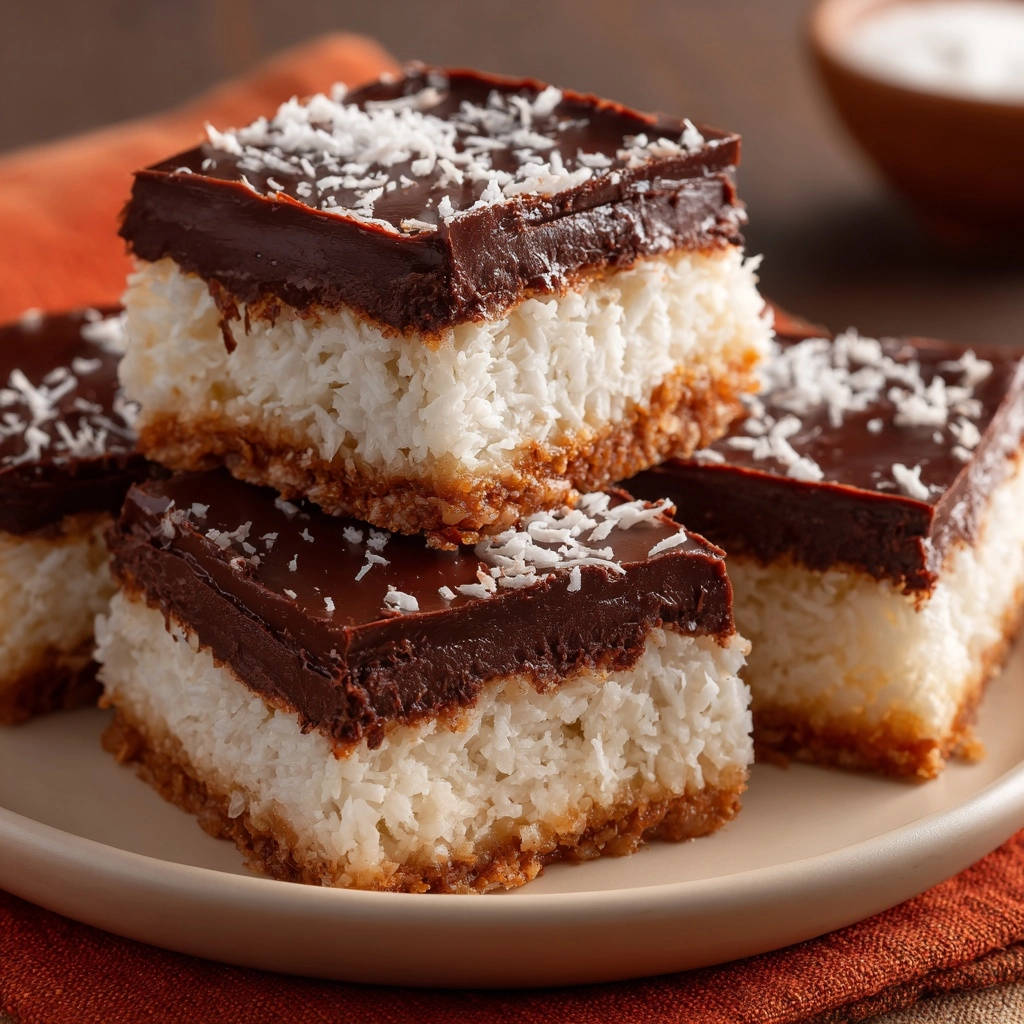
If you’ve ever been disappointed by a dry, crumbly coconut layer in your homemade bars, you understand my quest for the perfect treat. My journey led to these Dreamy Chocolate Coconut Bars, a recipe born from a simple warming technique that guarantees an incredibly moist and chewy texture every single time.
These bars aren’t just easy to make; they deliver a rich, satisfying indulgence that will have everyone asking for the recipe.
Why These Dreamy Chocolate Coconut Bars Will Be Your New Favorite
The Secret to That Irresistibly Moist Coconut Layer
The standout feature of this recipe is the ingenious step of gently warming the shredded coconut with sweetened condensed milk. This seemingly small detail is paramount to success.
This process allows the coconut to fully absorb the milk, locking in moisture and ensuring a wonderfully chewy, never-dry texture that sets these bars apart.
Effortless Elegance: Simple Steps, Stunning Results
Don’t let the beautiful layers intimidate you. This recipe breaks down into straightforward steps, making it accessible for bakers of all skill levels.
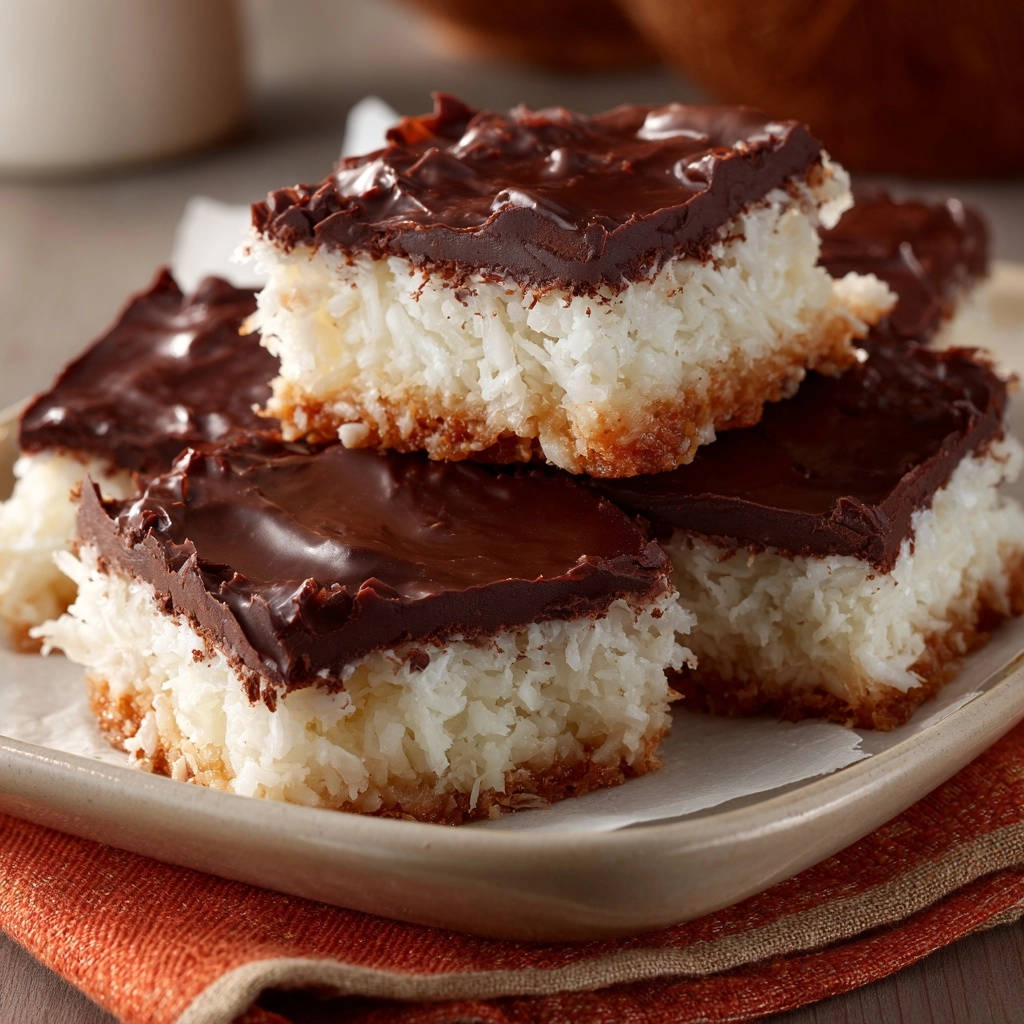
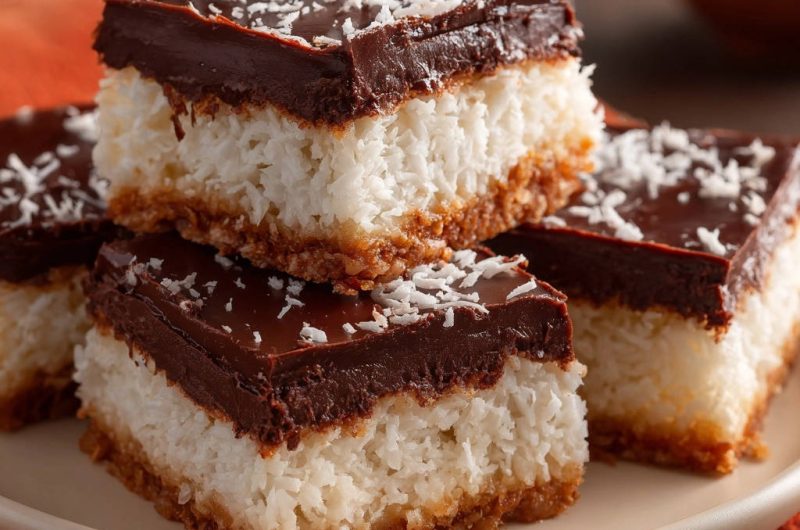
The result is a visually appealing, multi-layered dessert that looks impressive but comes together with surprising ease.
Crowd-Pleasing Perfection for Any Occasion
Whether you’re hosting a potluck, preparing for a family gathering, or simply craving a comforting treat, these Dreamy Chocolate Coconut Bars are universally adored.
Their delightful combination of flavors and textures makes them a guaranteed hit, perfect for any occasion. These versatile treats are perfect for any gathering, serving equally well as a stunning dessert alongside a platter of vibrant blueberry crumble bars or simply as a satisfying personal indulgence.
Gathering Your Dreamy Chocolate Coconut Bars Essentials
For the Golden Graham Cracker Crust
Graham cracker crumbs form the essential base, providing a subtle crunch and a hint of honeyed flavor that complements the richness of the coconut.
Granulated sugar adds a touch of sweetness, while melted unsalted butter acts as the crucial binder, ensuring your crust is firm and holds together perfectly.
Crafting the Signature Chewy Coconut Filling
Sweetened shredded coconut is the star of this layer, offering its characteristic flavor and texture. Opt for good quality, fresh coconut for the best results.
Sweetened condensed milk is indispensable. It not only provides intense sweetness but, more importantly, delivers the moisture and stickiness needed for that perfectly chewy, irresistible filling.
Vanilla extract enhances all the flavors, adding a warm, aromatic depth to the coconut layer.
The Rich, Smooth Chocolate Topping
Semi-sweet chocolate chips create a balanced, not-too-sweet topping that melts beautifully. Choose a brand you enjoy eating on its own.
A small amount of unsalted butter melted with the chocolate chips ensures a glossy, smooth finish that sets up beautifully.
Essential Tools for Baking Dreamy Chocolate Coconut Bars
9×9 Inch Baking Pan: The perfect size for achieving ideal bar thickness.
Parchment Paper: Crucial for easy removal and clean-up.
Saucepan for Coconut Mixture: Essential for the key warming step.
Microwave-Safe Bowl or Double Boiler: For melting chocolate smoothly.
Mixing Bowls, Spatulas, Whisk: Standard baking implements for preparation.
Baking Your Dreamy Chocolate Coconut Bars: A Detailed Guide
Prepping Your Pan and Perfecting the Crust
Preheat your oven to 350°F (175°C) and meticulously line a 9×9 inch baking pan with parchment paper, ensuring a generous overhang on the sides. This foresight creates “handles” that make lifting the finished bars out incredibly easy, preventing any sticking.
In a medium bowl, combine graham cracker crumbs, granulated sugar, and melted butter. Mix thoroughly until the crumbs are evenly moistened, resembling wet sand. Press this mixture very firmly into the bottom of the prepared pan, using the back of a spoon or a flat bottomed glass to create a compact, even crust. Bake for 8 to 10 minutes until lightly golden, then remove and cool slightly.
The Game-Changing Coconut Layer Technique
While the crust cools, prepare the coconut layer. In a large saucepan over low heat, combine the sweetened shredded coconut, sweetened condensed milk, and vanilla extract. Gently stir constantly for 3 to 5 minutes, focusing on even heating.
This gentle warming process is the secret to a perfectly moist and chewy texture. As you stir, the coconut will begin to look translucent and sticky, indicating it’s thoroughly absorbing the milk, which prevents a dry, crumbly layer.
Baking to Golden Perfection (and Avoiding Dryness!)
Remove the warm coconut mixture from the heat and immediately spread it evenly over the cooled crust in the baking pan, pressing down gently with a spatula or the back of a spoon to create a uniform layer. This ensures a cohesive bar.
Bake for 15 to 18 minutes, or until the edges are lightly golden and the coconut layer is just set. Crucially, avoid overbaking, as this is a primary culprit for dryness. The center should still appear somewhat soft; it will firm up as it cools. Remove from oven and cool completely in the pan on a wire rack.
Creating the Silky Chocolate Finish
Once the bars are completely cool to the touch, prepare the chocolate topping. In a microwave-safe bowl, combine the chocolate chips and butter. Microwave on medium power in 30-second intervals, stirring thoroughly after each, until the chocolate is melted and perfectly smooth. Alternatively, melt over a double boiler for even gentler heat.
Pour the melted chocolate evenly over the cooled coconut layer and spread with an offset spatula for a professional, smooth finish. Sprinkle with the additional shredded coconut for an attractive garnish and an extra hint of coconut flavor.
Chill, Cut, and Serve!
Refrigerate the bars for at least 2 hours, or until the chocolate topping is completely set and firm. This chilling process is vital for ensuring clean, crisp cuts and preventing the chocolate from smearing.
Once firm, use the parchment paper overhang to lift the entire slab out of the pan onto a cutting board. Cut into uniform squares using a sharp knife that has been warmed by running it under hot water and wiping it clean between each cut. Serve and enjoy your homemade Dreamy Chocolate Coconut Bars! Store any leftover bars in an airtight container in the refrigerator to maintain freshness.
Chef’s Secrets: Elevate Your Dreamy Chocolate Coconut Bars
Don’t Skip the Coconut Warming Step: This is the MOST critical part for a moist, tender bar. Low heat and constant stirring prevent scorching while ensuring maximum moisture absorption. It’s the key differentiator for perfectly chewy bars.
Press the Crust Firmly: A well-packed crust prevents crumbling and creates a sturdy base for your bars. Use a flat-bottomed glass or the back of a measuring cup to apply even pressure.
Patience with Cooling: Resist the urge to cut warm bars. Complete cooling is essential for a clean set of all layers and prevents the chocolate and coconut from melding messily.
Warm Your Knife for Clean Cuts: For perfect squares, dip your knife in hot water and wipe it clean between each cut. This creates smooth, professional edges, especially through the chocolate topping.
Common Questions & Troubleshooting for Your Dreamy Chocolate Coconut Bars
Why Is My Coconut Layer Dry or Crumbly?
This is often due to skipping or rushing the gentle warming step with the condensed milk. Ensure you stir on low heat until the coconut is translucent and sticky, allowing it to fully absorb the moisture.
Overbaking can also cause dryness. Keep a close eye on the edges; they should be lightly golden, and the center should still look somewhat soft. Pull them from the oven promptly.
My Chocolate Topping Isn’t Setting Firmly.
Ensure your bars were completely cool before applying the chocolate. Warm bars will prevent the chocolate from setting properly. Also, ensure you refrigerate for the full recommended time of at least 2 hours.
The type of chocolate chips can also play a role. Semi-sweet chocolate chips typically set well. Avoid using chocolate syrups or very low-quality chocolate that may contain ingredients preventing proper solidification.
The Crust Is Too Hard or Too Soft.
A crust that’s too hard might be overbaked, so reduce your baking time slightly next time. A softer crust might not have been pressed firmly enough into the pan before baking, or perhaps not enough melted butter was used to bind the crumbs properly.
Your Dreamy Chocolate Coconut Bars FAQs Answered
Can I Make These Gluten-Free?
Yes, absolutely! You can easily substitute gluten-free graham cracker crumbs for the regular ones. Ensure all other ingredients, like sweetened condensed milk and chocolate chips, are certified gluten-free if cross-contamination is a concern for severe allergies.
How Long Do These Bars Last?
When stored in an airtight container in the refrigerator, these Dreamy Chocolate Coconut Bars will stay fresh and delicious for up to 5-7 days. Their flavor often deepens slightly over time, becoming even more rich.
Can I Freeze These Bars?
Yes, these bars freeze beautifully! Once completely set, cut them into squares and arrange them in a single layer in an airtight freezer-safe container, separated by parchment paper to prevent sticking. They can be frozen for up to 2-3 months. Thaw them gradually in the refrigerator before serving for the best texture.
What If I Don’t Have Graham Crackers?
You can substitute other plain, crunchy cookies like digestive biscuits, vanilla wafers, or even shortbread cookies. While the flavor profile of the crust will vary slightly, the texture will remain similar when combined with sugar and butter. Ensure the quantity of crumbs remains the same.
For another delightful coconut-infused treat that promises exceptional chewiness, explore our recipe for guaranteed chewy coconut macaroons.
Share Your Dreamy Chocolate Coconut Bars Masterpiece!
There’s immense satisfaction in creating something truly delicious from scratch, especially when it turns out perfectly moist and tender every time. These Dreamy Chocolate Coconut Bars are more than just a dessert; they’re a testament to simple techniques yielding extraordinary results.
We encourage you to try this recipe and experience the magic of that chewy, dreamy coconut layer for yourself. Don’t forget to share your creations with us! Tag us on social media or leave a comment below to let us know how your bars turned out. Happy baking!
Dreamy Chocolate Coconut Bars
Course: DessertCuisine: American CuisineDifficulty: easy16
bars20
minutes25
minutes45
minutesAmerican Cuisine
Ingredients
For the Crust:
1 1/2 cups graham cracker crumbs
1/4 cup granulated sugar
1/4 cup unsalted butter, melted
For the Coconut Layer:
3 1/2 cups sweetened shredded coconut
1 (14-ounce) can sweetened condensed milk
1 teaspoon vanilla extract
For the Chocolate Topping:
1 1/2 cups semi-sweet chocolate chips
2 tablespoons unsalted butter
For Garnish:
2 tablespoons sweetened shredded coconut
Directions
- Preheat your oven to 350 degrees Fahrenheit. Line a 9×9 inch baking pan with parchment paper, leaving an overhang on the sides to easily lift the bars out later. Lightly grease the parchment paper.
- In a medium bowl, combine the graham cracker crumbs, granulated sugar, and melted butter. Mix until the crumbs are evenly moistened. Press this mixture firmly into the bottom of the prepared baking pan to form an even crust. Bake for 8 to 10 minutes, until lightly golden. Remove from oven and let cool slightly.
- While the crust cools, prepare the coconut layer. In a large saucepan over low heat, combine the sweetened shredded coconut, sweetened condensed milk, and vanilla extract. Gently stir constantly for 3 to 5 minutes, until the mixture is warm and the coconut is thoroughly coated and begins to look translucent and sticky. This gentle warming step helps the coconut absorb the milk more completely, which is key to a perfectly moist and chewy texture.
- Remove the coconut mixture from the heat and immediately spread it evenly over the cooled crust in the baking pan, pressing down gently with a spatula or the back of a spoon.
- Bake for 15 to 18 minutes, or until the edges are lightly golden and the coconut layer is just set. Be careful not to overbake, as this can lead to a dry texture. The center should still look soft. Remove from oven and let cool completely in the pan on a wire rack.
- Once the bars are completely cool, prepare the chocolate topping. In a microwave-safe bowl, combine the chocolate chips and butter. Microwave on medium power in 30-second intervals, stirring after each, until the chocolate is melted and smooth. Alternatively, melt over a double boiler.
- Pour the melted chocolate mixture over the cooled coconut layer and spread evenly with an offset spatula. Sprinkle with the additional shredded coconut for garnish.
- Refrigerate for at least 2 hours, or until the chocolate topping is completely set. Once firm, use the parchment paper overhang to lift the entire slab out of the pan. Cut into squares and serve. Store any leftover bars in an airtight container in the refrigerator.
Notes
- Refrigeration for at least 2 hours is essential for setting the chocolate. Store leftover bars in an airtight container in the refrigerator.