There’s a common frustration many home bakers face: trying to make delicate dessert bites, only for them to crumble or stick to everything. I’ve been there, but through extensive testing, I’ve perfected these gorgeous Irresistible Strawberry Bliss Bites that consistently hold their shape and are a delight to handle.
My secret? A crucial chilling step that transforms the texture from sticky to perfectly firm, making all the difference. Get ready to create stunning, flavorful treats that are truly foolproof and deliciously addictive.
Beyond the Bake: Why You’ll Adore These Strawberry Bliss Bites
The “No-Fail, No-Stick” Promise: Our Secret Weapon
The primary advantage of these `Irresistible Strawberry Bliss Bites` is their incredible ease of handling. The deliberate chilling phase eliminates common issues like crumbling or excessive stickiness, ensuring each bite is perfectly formed and mess-free.
A Burst of Berry: Flavor That Delights
Unlike recipes relying on artificial flavors, these bites derive their vibrant taste from concentrated freeze-dried strawberries. This method delivers an intense, authentic berry flavor that truly shines through, making every mouthful a delightful experience.
Effortless Elegance: Quick & Easy Assembly
As a no-bake recipe, these `Irresistible Strawberry Bliss Bites` simplify dessert creation without compromising on presentation. They require minimal kitchen effort and come together quickly, making them ideal for last-minute treats or elegant entertaining.
Unpacking the Deliciousness: Key Ingredients for Bliss
Crafting the perfect texture and flavor for these bites begins with understanding each ingredient’s role.
The Foundation: Crushed Vanilla Wafers
Vanilla wafers provide the essential structure for these `Irresistible Strawberry Bliss Bites`. Their fine crumbs create a stable base, easily absorbing moisture to form a cohesive, flavorful dough.
Strawberry’s Star Role: Freeze-Dried Magic
Freeze-dried strawberries are paramount for an authentic, intense flavor without adding unwanted moisture. When pulverized, they infuse the bites with vibrant color and a concentrated berry essence that fresh berries simply cannot achieve in this format.
Binders & Balance: The Wet Ingredients
Softened unsalted butter lends richness and acts as a crucial binding agent, ensuring the mixture holds together beautifully. Milk (dairy or non-dairy) provides essential moisture for the right dough consistency, while vanilla extract enhances the overall aroma and balances the sweetness.
The Sweet Finishes: Coating & Glaze Elements
Powdered sugar is the base for our smooth, pourable glaze, adding a delicate sweetness and professional finish. Optionally, granulated sugar for coating provides a delightful textural contrast and helps reduce any residual stickiness, creating a pleasant crunch.
Your Kitchen Arsenal: Tools for Perfect Bites
Gathering the right tools before you begin ensures a smooth and efficient process for creating your `Irresistible Strawberry Bliss Bites`.
Food Processor: This is indispensable for achieving finely crushed vanilla wafers and pulverizing the freeze-dried strawberries into a consistent powder. A blender might work, but a food processor offers better control for fine crumbs.
Mixing Bowls: You’ll need at least one medium bowl for the dry ingredients and a smaller bowl for the wet mixture. This allows for proper separate preparation before combining.
Electric Mixer (Optional but Recommended): While not strictly necessary, an electric mixer makes creaming the butter and wet ingredients much faster and ensures a smoother consistency.
Measuring Cups and Spoons: Accurate measurements are crucial for the right texture and flavor balance in any no-bake recipe.
Plastic Wrap: Essential for covering the mixture during its critical chilling phase, preventing it from drying out.
Shallow Dish: Perfect for rolling the formed bites in granulated sugar, if you choose to add the optional coating for extra texture and reduced stickiness.
From Mix to Masterpiece: A Guided Creation
Follow these precise steps to ensure your `Irresistible Strawberry Bliss Bites` come out perfect every time, with that coveted non-sticky finish.
-
Step 1-2: Building the Flavor Core
Start by crushing your vanilla wafer cookies. A food processor is ideal here to get them into very fine, uniform crumbs; this consistency is key for a smooth bite texture that holds together well without being gritty.
Next, pulverize your freeze-dried strawberries into a fine powder in the same food processor. This ensures maximum flavor infusion and vibrant color distribution throughout your `Irresistible Strawberry Bliss Bites`.
-
Step 3-4: Bringing it All Together
In a separate bowl, cream together the softened butter, milk, and vanilla extract until beautifully smooth. Softened butter is crucial here for easy blending and to prevent lumps in your final mixture.
Gradually add the wet mixture to your dry ingredients. Mix thoroughly with a spoon or your hands until a cohesive dough forms. The mixture should be moist enough to hold its shape when pressed, but not overly sticky.
If your mixture feels too dry, add milk half a teaspoon at a time until the right consistency is reached. Conversely, if it seems too wet, incorporate a tablespoon more crushed vanilla wafers until it firms up.
-
Step 5: The Chill Factor – A Game Changer!
This is the absolute secret to non-sticky, perfectly shapeable `Irresistible Strawberry Bliss Bites` – do NOT skip this step! Cover your bowl tightly with plastic wrap and refrigerate the mixture for at least 1 hour.
Chilling allows the butter and other ingredients to firm up significantly. This solidification prevents stickiness during rolling and ensures your bites maintain their perfect spherical shape, making them a joy to handle and eat.
-
Step 6-7: Shaping and Coating for Perfection
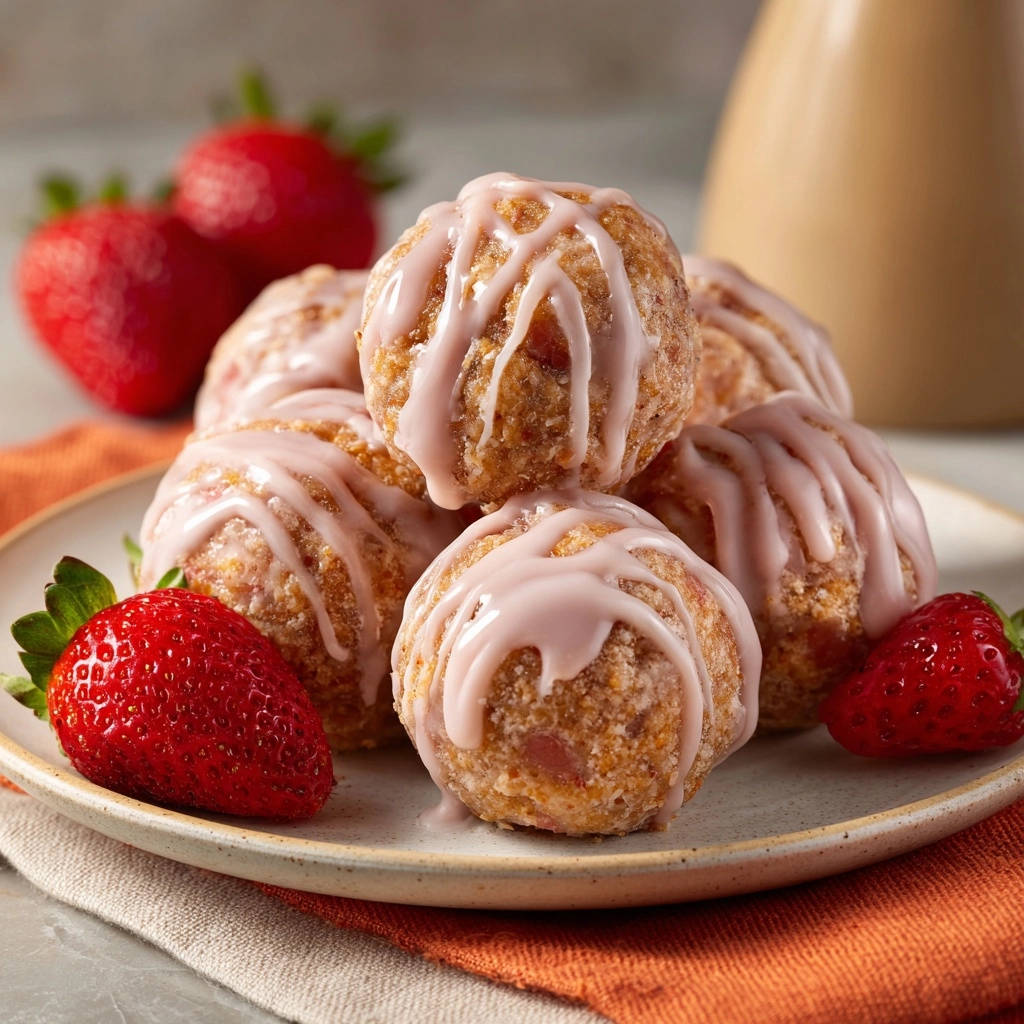
Once thoroughly chilled, remove the firm mixture from the fridge. Take small portions, about 1 tablespoon each, and gently roll them between your palms into tight, uniform balls.
If you desire extra crunch and a less sticky exterior, gently roll each formed bite in a shallow dish of granulated sugar. This step also adds a delightful sparkle and enhances the overall texture of your `Irresistible Strawberry Bliss Bites`.
-
Step 8-9: The Irresistible Glaze & Final Touch
Prepare the glaze by whisking together powdered sugar, milk, and vanilla extract in a small bowl until smooth and pourable. Adjust the consistency as needed: a few drops more milk if too thick, or a small amount of powdered sugar if too thin.
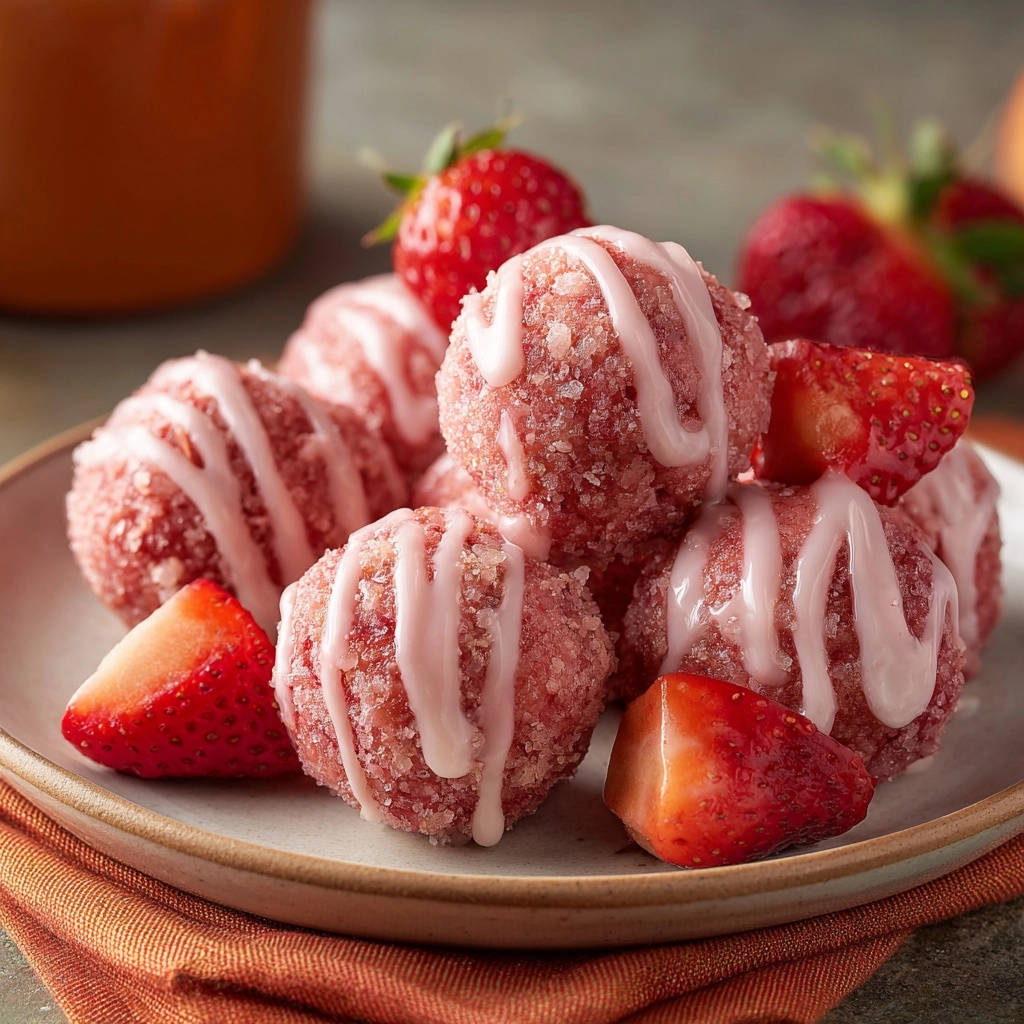
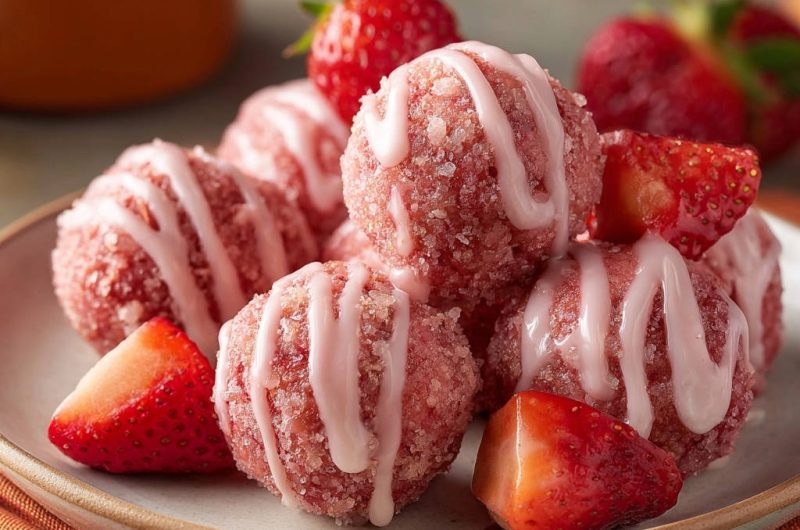
Arrange your coated `Irresistible Strawberry Bliss Bites` on a serving plate and drizzle them generously with the prepared glaze. For a final flourish and a touch of freshness, garnish with thinly sliced fresh strawberries.
Elevate Your Bites: Chef’s Secrets Revealed
Take your `Irresistible Strawberry Bliss Bites` from great to extraordinary with these expert tips.
-
Achieving the Perfect Dough Consistency
The ideal dough consistency is crucial for easy rolling and perfect shape. It should feel like firm play-dough – pliable but not sticky. If it feels too dry, add milk in tiny increments (1/2 teaspoon at a time), mixing well after each addition. If too wet, incorporate more crushed vanilla wafer crumbs, a tablespoon at a time, until the desired firmness is achieved.
-
Maximizing the Chill for Non-Stick Success
While 1 hour is the minimum, don’t hesitate to chill your mixture longer, even overnight. A colder, firmer mixture is always easier to handle, especially if your kitchen is warm. This extended chill guarantees your `Irresistible Strawberry Bliss Bites` will be perfectly non-sticky.
-
Customizing Flavors & Textures
Feel free to experiment with flavor variations. A tiny pinch of lemon zest can brighten the strawberry flavor, or a few drops of almond extract could add a delicate nutty note. For extra texture, try folding in a tablespoon of finely chopped white chocolate chips before chilling, or rolling the finished bites in shredded coconut instead of sugar.
-
Presentation Pointers: Making Them Shine
For a professional look, ensure all your bites are uniformly sized by using a small cookie scoop or measuring spoon for portioning. Drizzle the glaze artfully, or consider dipping the tops for a fully coated look. Arranging them in mini paper cupcake liners on a pretty platter elevates their appeal, especially when garnished with fresh strawberry slices or a tiny mint sprig. For more vibrant fruit ideas, consider exploring a delightful fresh fruit salsa.
Bliss Bites Bumps? Quick Fixes for Common Challenges
Even with the best recipes, sometimes things don’t go exactly as planned. Here are solutions to common issues you might encounter with your `Irresistible Strawberry Bliss Bites`.
Why is My Mixture Too Wet or Dry?
If your mixture feels overly wet and sticky, add more finely crushed vanilla wafers, one tablespoon at a time, until it reaches a firm, manageable consistency. If it’s too dry and crumbly, slowly add milk (dairy or non-dairy) in half-teaspoon increments, mixing thoroughly after each addition until it becomes pliable.
Help! My Bites Aren’t Holding Shape!
This is almost always due to insufficient chilling. If your `Irresistible Strawberry Bliss Bites` are crumbling or sticking to your hands, place the mixture back in the refrigerator for at least another 30 minutes, or even an hour. A properly chilled mixture will be firm and easy to roll into neat, stable balls.
Glaze Not Right? Adjusting Consistency
If your glaze is too thick and won’t drizzle smoothly, add a few drops of milk at a time, whisking well until it reaches your desired pourable consistency. Conversely, if the glaze is too runny, gradually whisk in more powdered sugar, a teaspoon at a time, until it thickens sufficiently.
Freshness & Convenience: Storing and Planning Ahead
Optimal Storage for Lasting Freshness
To keep your `Irresistible Strawberry Bliss Bites` at their best, store them in an airtight container in the refrigerator. This prevents them from drying out and helps maintain their firm texture. They will remain fresh and delicious for up to 5-7 days.
Prepping Your Bites in Advance
You can easily prepare the mixture for these bites a day or two in advance. Simply complete all steps up to the chilling phase, then store the covered bowl in the refrigerator. When you’re ready to serve, just roll, coat (if desired), and glaze the chilled mixture.
Your Questions Answered: Strawberry Bliss Bites Edition
Can I substitute fresh strawberries?
No, fresh strawberries contain too much moisture, which would significantly alter the texture of these no-bake bites, making them wet and preventing them from holding their shape. Freeze-dried strawberries are essential for their concentrated flavor and dry, powdery form.
Are there dietary modifications possible?
Yes, you can easily adapt this recipe for certain dietary needs. Use gluten-free vanilla wafer cookies for a gluten-free option. For a dairy-free version, use unsalted plant-based butter and a non-dairy milk alternative like almond or oat milk.
What’s the shelf life of these bites?
When stored properly in an airtight container in the refrigerator, these `Irresistible Strawberry Bliss Bites` will remain fresh and enjoyable for up to one week. For the absolute best taste and texture, aim to consume them within 3-4 days of making them.
Share Your Strawberry Bliss: A Delicious Invitation!
Now that you have all the secrets to creating perfectly non-sticky, utterly delightful `Irresistible Strawberry Bliss Bites`, it’s your turn to experience the magic! These treats are ideal for parties, homemade gifts, or simply a sweet moment of self-indulgence.
Don’t hesitate to share your creations and experiences with us! And if you’re craving more effortless, fruit-forward desserts, be sure to explore our popular recipe for an easy no-bake strawberry pie – another fantastic way to enjoy the fresh taste of berries with minimal fuss.
Irresistible Strawberry Bliss Bites
Course: DessertCuisine: American CuisineDifficulty: easy12
bites20
minutes60
minutesAmerican Cuisine
Ingredients
1 ½ cups vanilla wafer cookies, finely crushed (about 40-50 cookies)
½ cup freeze-dried strawberries, pulverized into a powder
¼ cup granulated sugar (for the mixture)
¼ cup unsalted butter, softened
2 tablespoons milk (or non-dairy milk)
1 teaspoon vanilla extract
Fresh strawberries, for garnish
For the Coating:
¼ cup granulated sugar (optional, for rolling)
For the Glaze:
1 cup powdered sugar
2 tablespoons milk (or non-dairy milk)
¼ teaspoon vanilla extract
Directions
- Prepare the Base: In a food processor, finely crush the vanilla wafer cookies until they resemble fine crumbs. Transfer to a medium bowl.
- Add Flavor: In the same food processor, pulverize the freeze-dried strawberries into a fine powder. Add this strawberry powder to the cookie crumbs, along with ¼ cup granulated sugar. Stir well to combine.
- Combine Wet Ingredients: In a separate small bowl, cream together the softened butter, 2 tablespoons milk, and 1 teaspoon vanilla extract until smooth.
- Form the Mixture: Add the wet ingredient mixture to the dry ingredients. Mix with a spoon or your hands until everything is thoroughly combined and a dough forms. The mixture should be moist enough to hold together when pressed, but not overly wet. If it seems too dry, add milk half a teaspoon at a time. If too wet, add a tablespoon more crushed cookies.
- Chill for Success (The Key to Non-Sticky Bites!): This is the crucial step! Cover the bowl tightly with plastic wrap and refrigerate the mixture for at least 1 hour. This chilling time is absolutely essential to firm up the mixture, making it easy to roll and preventing any stickiness or crumbling. Do not skip this step!
- Roll the Bites: Once thoroughly chilled, remove the mixture from the fridge. Take small portions (about 1 tablespoon) and roll them gently between your palms into uniform, tight balls. The chilled mixture will be firm and easy to handle, ensuring they hold their shape perfectly without sticking to your hands.
- Coat the Bites (Optional): If desired for extra crunch and a less sticky exterior, place ¼ cup granulated sugar in a shallow dish. Gently roll each formed bite in the sugar to coat evenly. This also helps reduce any residual stickiness and adds a delightful texture.
- Make the Glaze: In a small bowl, whisk together the powdered sugar, 2 tablespoons milk, and ¼ teaspoon vanilla extract until a smooth, pourable glaze forms. Add more milk a few drops at a time if too thick, or more powdered sugar if too thin.
- Drizzle and Serve: Arrange the coated strawberry bites on a serving plate. Drizzle generously with the prepared glaze. Garnish with fresh strawberry slices. Store in an airtight container in the refrigerator.
Notes
- Chilling the mixture for at least 1 hour is essential for firm, non-sticky bites.