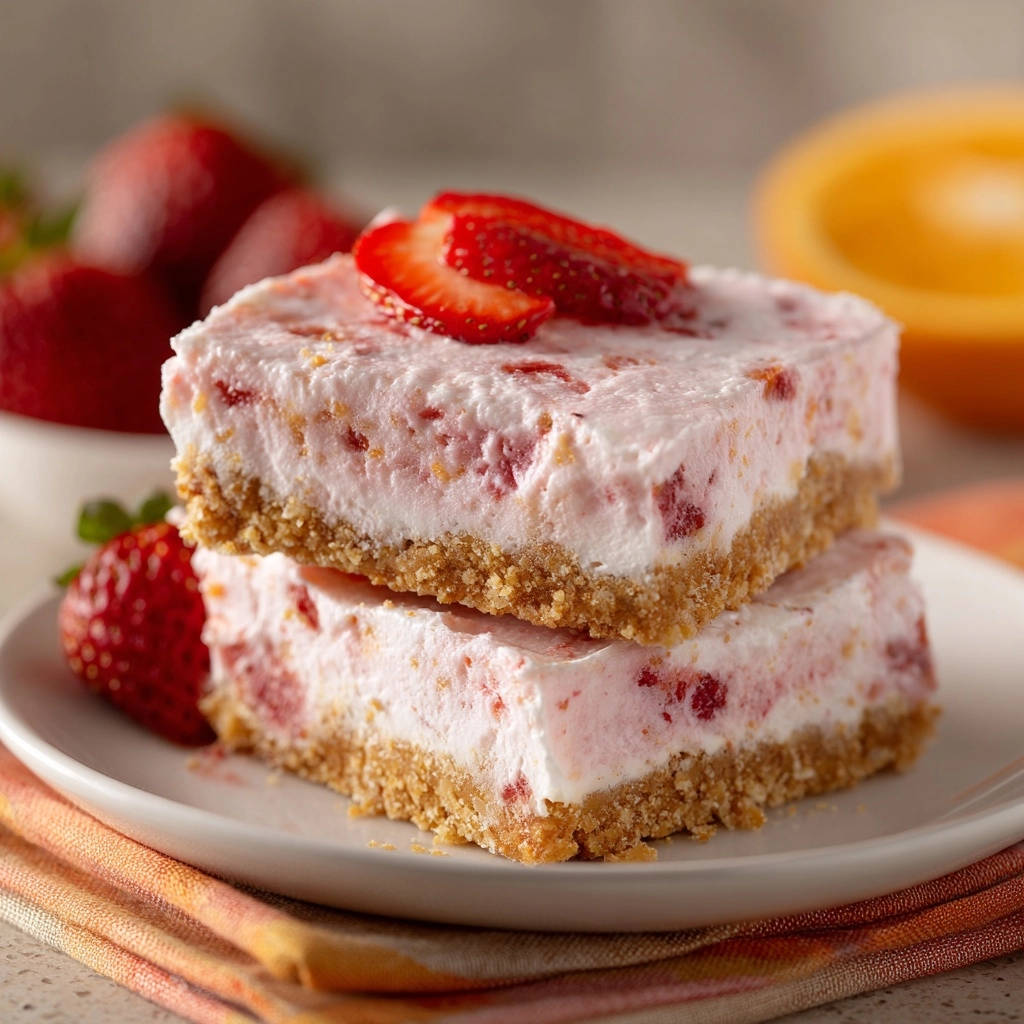
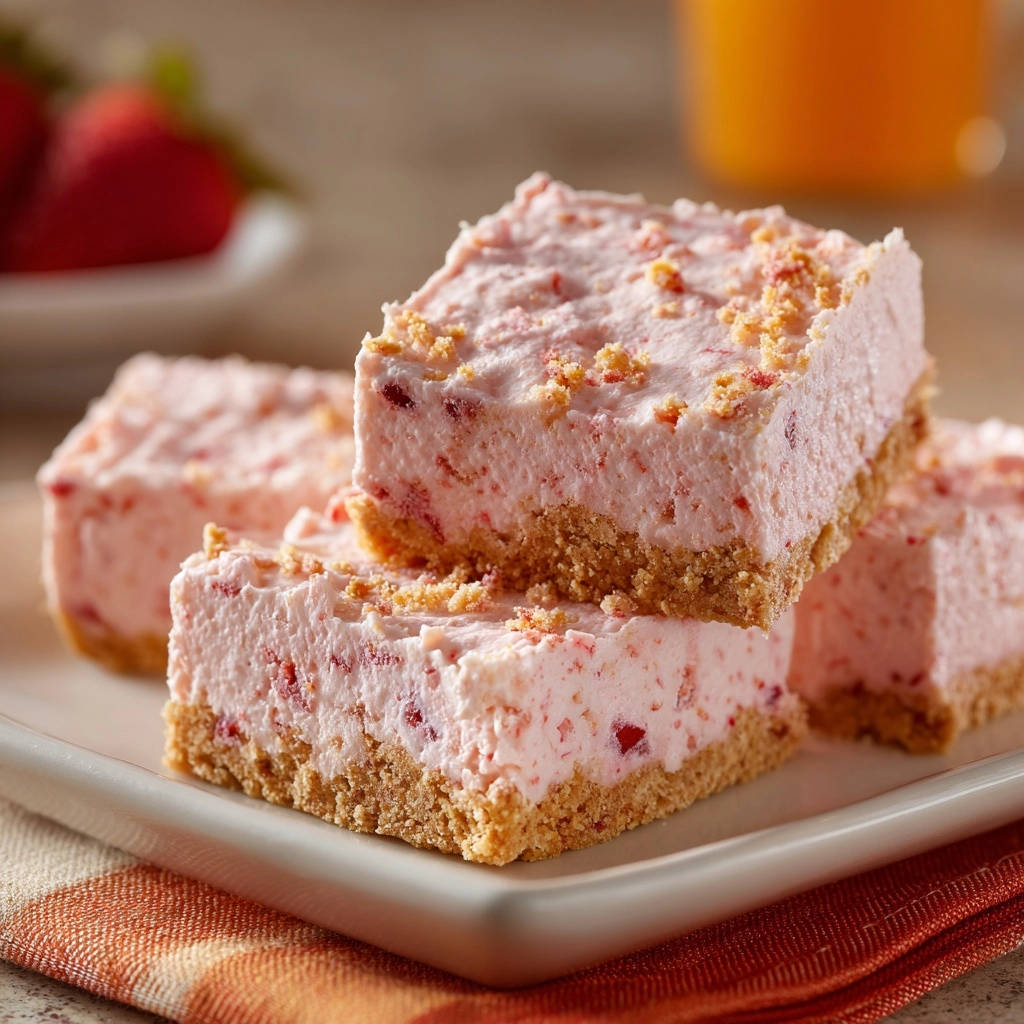
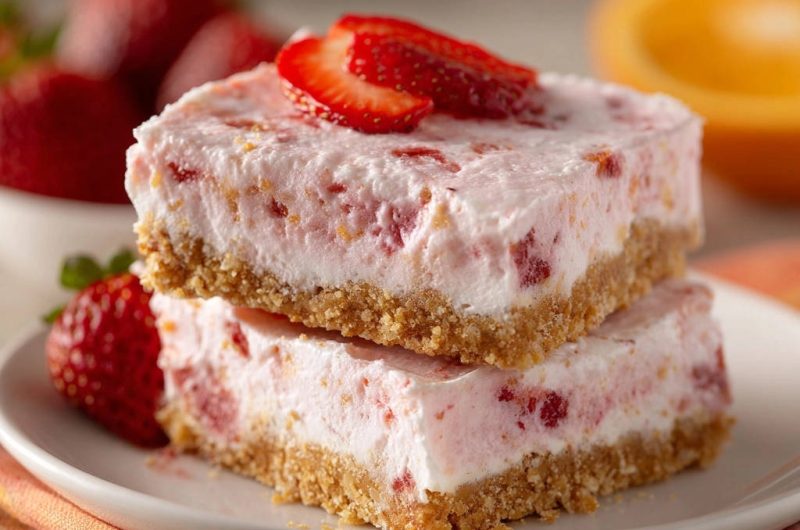
Ever pulled a no-bake dessert from the fridge, only for it to squish into a delicious but messy pile when you try to slice it? I certainly have, which is why I perfected these No-Bake Strawberry Cream Bars. This recipe guarantees perfectly firm, beautifully sliced treats every single time, thanks to a few clever techniques.
Beyond the Basic No-Bake: Why These Bars Stand Out
The “No Squish, Perfect Slice” Secret Revealed
The common frustration with no-bake bars is their tendency to crumble or squish when cut. My method combats this through specific chilling protocols and a simple, yet highly effective, warm knife technique.
You’ll achieve clean, sharp edges on every single slice, elevating the presentation of this already delightful dessert.
Effortless Elegance: Dessert Made Simple
Despite their elegant appearance, these No-Bake Strawberry Cream Bars require no oven time, making them incredibly simple to assemble. The active prep time is minimal, leaving the refrigerator to do most of the work.
This recipe delivers a light, creamy, and visually appealing dessert with minimal fuss, perfect for any occasion.
Who Will Adore These Strawberry Cream Bars?
These refreshing bars are a crowd-pleaser for many reasons and occasions.
Summer Gatherings: Their cool, fruity profile makes them ideal for warm weather picnics, barbecues, or backyard parties.
Busy Home Cooks: When time is short but you crave a homemade treat, the no-bake aspect is a lifesaver.
Strawberry Lovers: If you adore the sweet, vibrant flavor of fresh strawberries, this dessert puts them front and center.
Potlucks & Picnics: They transport beautifully once chilled, making them a perfect shareable dessert.
Crafting the Dream: Essential Ingredients for Your Strawberry Bars
The quality of your ingredients directly impacts the taste and texture of your No-Bake Strawberry Cream Bars. Choosing wisely ensures a truly exceptional dessert.
The Unsung Hero: Graham Cracker Crust Essentials
The crust forms the stable foundation for these cream bars, making ingredient selection and preparation crucial.
Graham Cracker Crumbs: Use finely crushed crumbs for a uniform and compact crust. Pre-crushed crumbs save time, or you can easily make them from whole graham cracker sheets.
Granulated Sugar: A small amount of sugar enhances the sweetness of the crust without making it overly sugary. It complements the graham crackers perfectly.
Unsalted Butter, Melted: Butter acts as the binding agent, holding the crumbs together firmly. Using unsalted butter allows you to control the overall saltiness of the dessert.
Pillowy Perfection: The Creamy Filling Components
The filling is where the magic happens, offering a light, airy, and rich texture. Each component plays a vital role.
Cream Cheese, Softened: Softened cream cheese is essential for achieving a smooth, lump-free base when beaten. It provides the signature tangy richness and structure to the filling.
Powdered Sugar: This fine sugar dissolves seamlessly into the cream cheese, contributing sweetness without grittiness. It also aids in achieving a light, fluffy texture.
Vanilla Extract: A splash of vanilla enhances all the other flavors, adding warmth and depth to the creamy filling.
Heavy Cream, Very Cold: This is critical for whipped cream success. Very cold cream whips up faster and holds stiff peaks, which are necessary for the filling’s firm set and airy consistency.
Flavor Boosters: Zest, Juice, and Fresh Berries
These ingredients infuse the bars with vibrant, natural flavors that truly make them shine.
Fresh Orange Juice & Zest: The citrus notes from fresh orange juice and zest brighten the entire dessert. They provide a subtle tang that beautifully complements the sweetness of the strawberries.
Fresh Strawberries, Diced: Use ripe, fragrant strawberries for the best flavor and natural sweetness. Dicing them finely ensures they integrate well into the creamy filling without creating large, wet pockets.
Your Kitchen Arsenal: Tools for No-Bake Success
Having the right tools simplifies the process and helps ensure your No-Bake Strawberry Cream Bars turn out perfectly.
Essential Baking Pan & Lining Tips
The right pan is key for easy removal and clean slices.
An 8×8 inch baking pan is ideal for the specified thickness of these bars. Lining it with parchment paper, leaving an overhang on two sides, is crucial for effortless lifting and serving.
Mixing & Whipping Gear for Fluffy Results
Achieving the right consistency for the filling requires specific equipment.
An electric mixer is indispensable for beating the cream cheese until smooth and whipping the heavy cream to stiff peaks. Ensure you have large mixing bowls, especially one that can be chilled for the cream.
A flexible spatula will be useful for scraping down bowls and gently folding ingredients.
Precision Tools for Perfect Slicing
For those picture-perfect slices, a couple of simple tools are all you need.
A sharp knife is a must-have for clean cuts. You’ll also need a cutting board and a source of warm water for the signature “warm knife” technique.
Your Step-by-Step Guide to No-Bake Strawberry Cream Bars Perfection
Step 1: The Foundation – Perfecting Your Crust
Combine the graham cracker crumbs, granulated sugar, and melted butter in a medium bowl until evenly moistened. Ensure every crumb is coated to create a uniform and stable base for your bars.
Step 2: Pressing & Initial Chill for Stability
Press the mixture firmly into an 8×8 inch baking pan lined with parchment paper, leaving an overhang on two sides for easy removal. Use the bottom of a glass to pack it tightly and evenly, ensuring a solid, non-crumbly crust.
Chill the crust in the refrigerator for at least 15 minutes while you prepare the filling. This initial chill helps the butter set, creating a firm foundation.
Step 3: Whipping Up the Dreamy Cream Cheese Base
In a large bowl, beat softened cream cheese with an electric mixer until smooth and creamy. Softened cream cheese ensures a lump-free, silky base.
Add powdered sugar, vanilla extract, fresh orange juice, and orange zest. Continue beating until the mixture is light and fluffy, scraping down the sides of the bowl as needed to incorporate everything fully.
Step 4: The Cold Truth – Mastering Whipped Cream
In a separate, very cold bowl (chilling the bowl and beaters in the freezer for 10 minutes beforehand is highly recommended), beat very cold heavy cream on medium-high speed until stiff peaks form. This means the cream will hold its shape firmly when the beater is lifted.
This is crucial for ensuring the filling sets firmly and holds its shape, preventing a runny or collapsed bar.
Step 5: Gentle Folding for Airy Texture
Gently fold about one-third of the whipped cream into the cream cheese mixture to lighten it, then carefully fold in the remaining whipped cream until just combined and no streaks remain. The key is to be gentle to avoid deflating the airy whipped cream.
Finally, gently fold in the finely diced fresh strawberries. Over-mixing here can release too much moisture from the berries, so mix just until evenly distributed.
Step 6: Assembling Your Layers with Ease
Pour the strawberry cream mixture evenly over the chilled graham cracker crust in the pan. Use a spatula to spread it smoothly to the edges.
Step 7: The Critical Chill – Patience for Perfect Slices
Cover the pan loosely with plastic wrap and refrigerate for a minimum of 4 hours, or preferably overnight. This extended chill time is the true secret to their perfect structure and makes them much easier to slice without squishing.
The longer the bars chill, the firmer and more stable they will become, ensuring a flawless presentation.
Step 8: The Warm Knife Trick for Flawless Cuts
Once thoroughly chilled and firm, lift the No-Bake Strawberry Cream Bars out of the pan using the parchment paper overhang. Place them on a cutting board.
For the absolute cleanest slices, dip a sharp knife in very warm water, wipe it clean, and make each cut in one smooth motion. Repeat dipping and wiping the knife for each slice to ensure beautifully neat edges on every bar.
Step 9: Garnish, Serve, and Savor!
Garnish with additional fresh strawberry slices before serving for a beautiful presentation. These bars are best enjoyed immediately after slicing.
Beyond the Recipe: Expert Tips for Next-Level Strawberry Cream Bars
Achieving the Ultimate Firm Set
The consistency of your No-Bake Strawberry Cream Bars is paramount for that perfect slice.
Master the Cold: Always ensure your heavy cream, mixing bowl, and beaters are very cold before whipping. This is paramount for achieving and maintaining stiff peaks, which are essential for a firm filling.
Patience is Key for Chill: While 4 hours is the minimum chilling time, an overnight chill truly guarantees the firmest, most stable bars that slice like a dream. Plan ahead for best results.
Flavor Customization & Variations
Don’t be afraid to experiment with the flavors in your No-Bake Strawberry Cream Bars!
Berry Swaps: Experiment with other fresh berries like raspberries, blueberries, or a mix for different flavor profiles. For a similar no-bake experience, you might also enjoy these delightful Blueberry Crumble Bars.
Citrus Zest Magic: While orange zest brightens these bars, lemon or lime zest can also provide a wonderfully bright, complementary flavor. Choose based on your preference.
Crust Creations: Instead of graham crackers, try vanilla wafers, shortbread cookies, or even chocolate cookies for the crust. Each offers a unique flavor and texture profile.
Mastering the Clean Slice Technique
This is the secret weapon for pristine presentation.
The Warm Knife Ritual: Don’t skip dipping your sharp knife in hot water and wiping it clean before each cut. This creates a clean, non-sticky blade that glides through the bars effortlessly.
Single, Smooth Motion: Aim for one decisive cut per bar to prevent tearing or dragging the filling. This ensures a clean break and a professional-looking edge.
Solved! Common Questions & Troubleshooting for Your No-Bake Bars
Why is my crust crumbly or too hard?
If your crust is too crumbly, you might need a touch more melted butter to bind the crumbs. If it’s too hard, ensure you’ve pressed it firmly and evenly but not compacted it excessively, which can make it brick-like.
My filling isn’t firm enough. What went wrong?
This is often due to under-whipped heavy cream (it needs stiff peaks!) or not chilling the bars long enough. Ensure your cream and bowl are extremely cold before whipping, and extend the refrigeration time, preferably overnight.
How do I prevent “soupy” strawberries?
Finely dicing the strawberries helps minimize excess moisture. Also, make sure to fold them gently and just at the end to prevent them from breaking down too much and releasing liquid into the filling.
My bars are squishing when I cut them!
The most common reason for squishing is insufficient chilling time; the bars need to be thoroughly firm. Always use the warm knife trick described in the directions – it makes a dramatic difference in clean cuts.
Prepping Ahead & Storing Your Delicious No-Bake Treats
Optimal Storage for Freshness
Store any leftover No-Bake Strawberry Cream Bars in an airtight container in the refrigerator. This keeps them fresh, prevents them from absorbing other fridge odors, and maintains their delightful texture.
Can I Make These Ahead for a Party?
Absolutely! These bars are ideal for making ahead. Prepare them a day in advance, as the overnight chill time ensures the best possible firm set and flavor development, making party prep a breeze.
Freezing Instructions (and caveats)
While these bars are best fresh, you can freeze them for longer storage. Wrap individual bars tightly in plastic wrap, then place them in an airtight freezer-safe container for up to 1 month. Thaw in the refrigerator before serving to maintain texture.
Your Top Questions About No-Bake Strawberry Cream Bars Answered
Can I use frozen strawberries?
While fresh strawberries are highly recommended for the best texture and flavor, you can use frozen. Make sure to thaw and drain them thoroughly to avoid excess moisture, which can make your filling watery.
Is there a dairy-free option for the cream cheese or cream?
Yes, many brands offer plant-based cream cheese and dairy-free heavy whipping cream alternatives that can be used. Be aware that the texture and flavor might vary slightly, but it’s a viable substitution for those with dietary restrictions.
What if I don’t have an 8×8 inch pan?
You can use a 9×9 inch pan for slightly thinner bars, or a 9×13 inch pan for much thinner bars (you might want to scale up the recipe by 1.5x for a good height in a 9×13). Adjust chilling time accordingly, as thinner bars may set faster.
How long are these bars good for?
When stored properly in an airtight container in the refrigerator, No-Bake Strawberry Cream Bars are typically best enjoyed within 3-4 days for optimal freshness and texture.
Can I reduce the sugar in the recipe?
You can slightly reduce the granulated sugar in the crust and the powdered sugar in the filling if you prefer a less sweet dessert. However, be cautious not to reduce too much, as sugar contributes to both flavor and the overall texture and stability of the bars.
Your No-Bake Strawberry Cream Bars Masterpiece Awaits!
There’s a special kind of joy that comes from sharing a dessert that looks as good as it tastes, especially when it solves a common kitchen dilemma. These No-Bake Strawberry Cream Bars are more than just a sweet treat; they’re a testament to simple techniques delivering flawless results. You’ve now unlocked the secrets to perfectly sliced, no-squish bars that will undoubtedly become a favorite in your household. For another delightful no-bake dessert that sets beautifully, consider trying this fantastic Easy No-Bake Strawberry Pie.
Share Your Success & Connect With Us!
We absolutely love seeing your culinary creations! Once you’ve whipped up your own batch of these beautiful No-Bake Strawberry Cream Bars, snap a photo and share it with us on social media. Don’t forget to tag us and use #NoBakeStrawberryBars – we can’t wait to celebrate your delicious success!
No-Bake Strawberry Cream Bars
Course: DessertCuisine: American CuisineDifficulty: easy9
servings25
minutes240
minutesAmerican Cuisine
Ingredients
For the Crust:
1 1/2 cups graham cracker crumbs (about 10-12 full graham cracker sheets)
1/4 cup granulated sugar
1/2 cup unsalted butter, melted
For the Filling:
8 ounces cream cheese, softened
1/2 cup powdered sugar
1 teaspoon vanilla extract
1 tablespoon fresh orange juice (from image background)
1 teaspoon orange zest (from image background)
1 1/2 cups heavy cream, very cold
1 1/2 cups fresh strawberries, hulled and finely diced, plus more for garnish
Directions
- Prepare the Crust: In a medium bowl, combine the graham cracker crumbs, granulated sugar, and melted butter. Mix until well combined and the crumbs are evenly moistened.
- Press the Crust: Press the mixture firmly into the bottom of an 8×8 inch baking pan lined with parchment paper, leaving an overhang on two sides for easy removal. Use the bottom of a glass or your knuckles to ensure it is packed tightly and evenly. Place the crust in the refrigerator to chill for at least 15 minutes while you prepare the filling.
- Make the Cream Cheese Base: In a large bowl, beat the softened cream cheese with an electric mixer until smooth and creamy. Add the powdered sugar, vanilla extract, orange juice, and orange zest. Beat until light and fluffy, scraping down the sides of the bowl as needed. Set aside.
- Whip the Cream: In a separate, very cold bowl (you can chill the bowl and beaters in the freezer for 10 minutes beforehand), beat the very cold heavy cream on medium-high speed until stiff peaks form. This is crucial for a firm set; the cream should hold its shape when the beater is lifted.
- Combine Filling Ingredients: Gently fold about one-third of the whipped cream into the cream cheese mixture to lighten it. Then, carefully fold in the remaining whipped cream until just combined and no streaks remain. Be careful not to deflate the whipped cream. Gently fold in the finely diced strawberries.
- Assemble the Bars: Pour the strawberry cream mixture over the chilled graham cracker crust in the pan. Spread evenly with a spatula.
- Chill Thoroughly for the Firm Set: Cover the pan loosely with plastic wrap and refrigerate for a minimum of 4 hours, or preferably overnight. The longer it chills, the firmer and more stable the bars will become, making them much easier to slice without squishing. This extended chill time is the secret to their perfect structure.
- Slice Cleanly: Once thoroughly chilled and firm, lift the bars out of the pan using the parchment paper overhang. Place them on a cutting board. For the absolute cleanest slices, dip a sharp knife in very warm water, wipe it clean, and make each cut in one smooth motion. Repeat dipping and wiping the knife for each slice. This technique ensures a beautifully neat edge on every bar.
- Garnish and Serve: Garnish with fresh strawberry slices before serving. Store any leftover bars in an airtight container in the refrigerator.
Notes
- Extended chilling time (at least 4 hours, preferably overnight) is crucial for a firm set and easy, clean slicing. Use a warm, clean knife for neat edges.