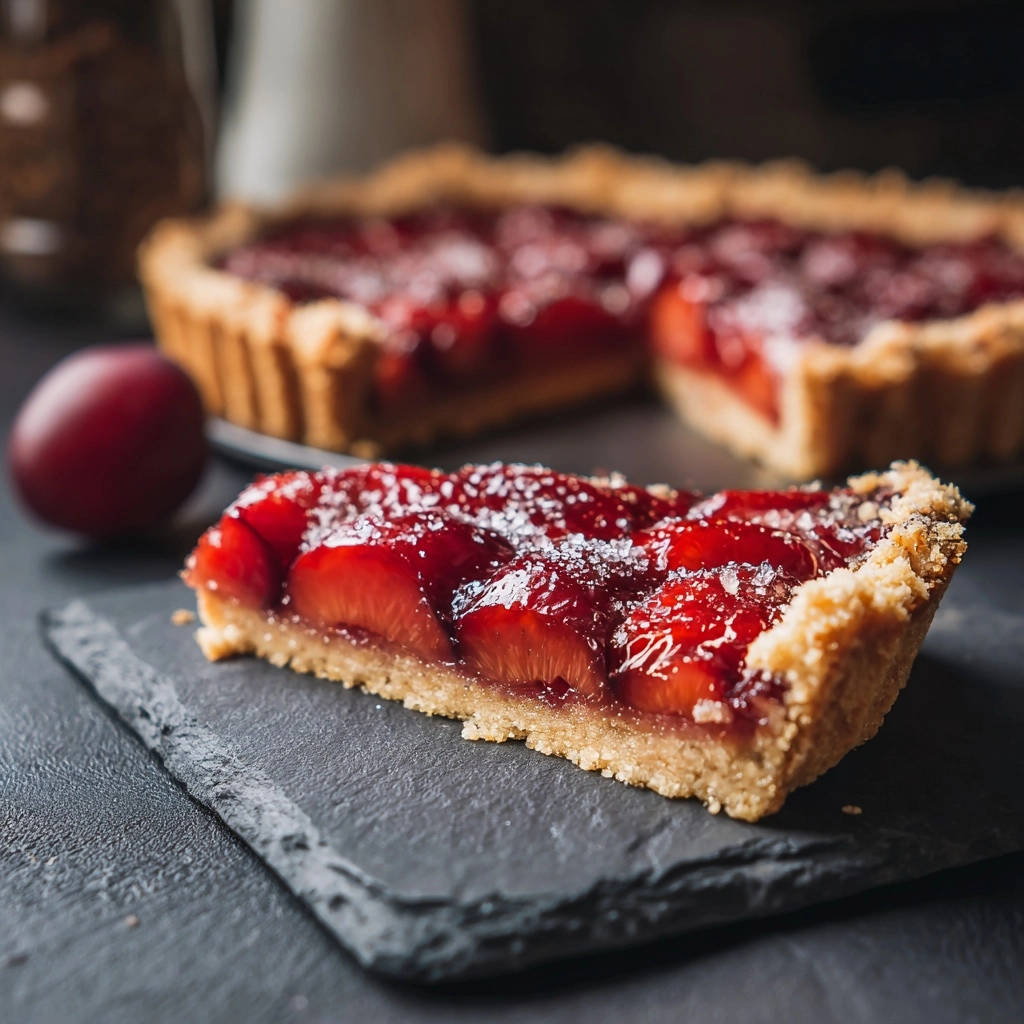
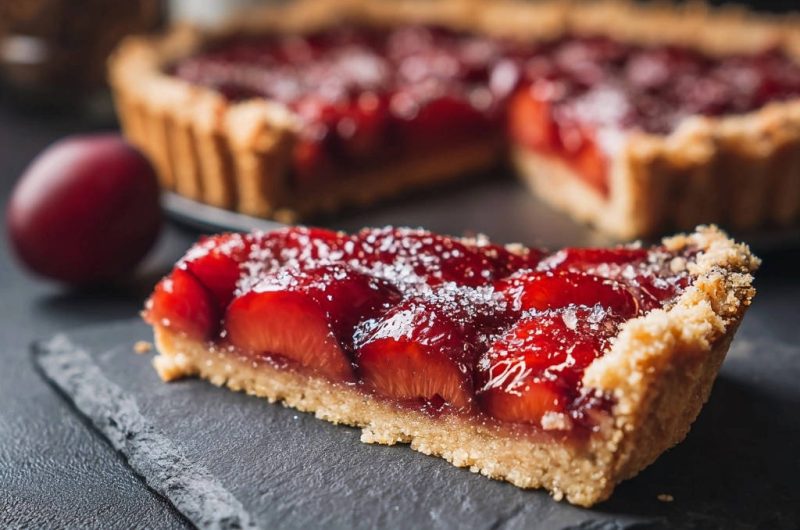
There’s nothing more frustrating than putting all that effort into a beautiful fruit tart, only to find the bottom crust turns out soggy and disappointing. I’ve been there, and I’ve cracked the code on keeping that crust wonderfully crisp, even with juicy fillings. This specific Plum Tart recipe isn’t just about delicious plums; it’s your foolproof guide to a perfectly crisp crust every single time.
Why This Plum Tart Will Change Your Baking Game
This isn’t just another dessert; it’s a testament to intelligent baking. The techniques used here address the age-old problem of a soft, unappealing tart base head-on. Prepare to impress everyone with a dessert that looks as good as it tastes, boasting a truly stable foundation.
The Genius Behind a Perfectly Crisp Crust
The secret lies in a meticulously executed blind-baking method. This crucial step pre-bakes the crust, forming a barrier that prevents the fruit’s natural moisture from seeping in and making it soggy. It’s the foundation for a truly exceptional fruit pie or tart.
Effortless Elegance: Beyond the Baking
Despite its sophisticated appearance, this Plum Tart is surprisingly straightforward. It’s perfect for both seasoned bakers and confident beginners looking to elevate their dessert game. Serve it at a dinner party or enjoy a slice on a quiet afternoon; its charm is universal.
Balanced Flavors: Sweet, Tart, and Aromatic
The interplay of ripe, sweet plums with a hint of tart lemon juice creates a vibrant filling. The optional touch of cinnamon adds a subtle warmth, complementing the fruit beautifully. Every bite offers a delightful balance of sweetness and fresh fruit flavor.
Crafting Perfection: Essential Ingredients for Your Plum Tart
Quality ingredients are the cornerstone of any great recipe. For this Plum Tart, each component plays a vital role in achieving that sought-after flaky crust and juicy, flavorful filling.
For the Flaky Foundation: Your Crust Components
The crust is the unsung hero, providing structure and flavor. Using the right ingredients ensures it bakes up crisp and tender.
All-Purpose Flour: Provides the structure for your crust. Measure it correctly to avoid a dense dough.
Cold Unsalted Butter: Cut into small cubes, cold butter creates pockets of steam during baking, leading to flakiness. Unsalted butter gives you control over the overall saltiness.
Granulated Sugar: Adds a touch of sweetness to the crust, enhancing its flavor and contributing to browning.
Salt: A pinch of salt balances the sweetness and enhances all the flavors in the crust.
Large Egg Yolk: Contributes richness and helps bind the dough, making it more tender and less likely to shrink.
Ice Water: Crucial for keeping the butter cold and preventing gluten development, which results in a tender, not tough, crust.
Juicy Heart: The Plum Filling Essentials
The filling is where the plums truly shine. Selecting the right fruit and using the proper thickener are key for a luscious result.
Medium Plums, Ripe but Firm: Choose plums that yield slightly when pressed but aren’t mushy. This ensures they hold their shape and offer a pleasant texture after baking.
Granulated Sugar: Sweetens the tart plums, creating a harmonious balance. Adjust to your plums’ natural sweetness.
Cornstarch: This is your secret weapon for a perfectly set, non-runny filling. It thickens the plum juices as they bake, preventing a watery bottom.
Lemon Juice: Brightens the flavor of the plums, adding a crucial tart counterpoint to the sweetness. It prevents the filling from tasting flat.
Ground Cinnamon (Optional): A warm, aromatic spice that beautifully complements the plums. Add it if you enjoy that classic fruit and spice combination.
Finishing Touches: Glaze & Garnish
These final elements add both visual appeal and a layer of subtle flavor, making the tart truly complete.
Red Currant Jelly or Apricot Jam: When melted with hot water, this creates a beautiful, glossy glaze. It adds a lovely sheen and a subtle fruitiness to the top of your Plum Tart.
Powdered Sugar: A dusting of powdered sugar is a simple yet elegant garnish. It adds a final touch of sweetness and enhances the tart’s visual appeal.
Tools of the Trade: Equipping Your Tart Kitchen
Having the right tools makes the baking process smoother and more enjoyable. These essentials will help you create a picture-perfect Plum Tart.
Must-Have Bakeware for Success
Specific bakeware is crucial for achieving the tart’s signature shape and crisp crust.
9-inch Tart Pan with Removable Bottom: This is non-negotiable for a tart. The removable bottom allows for easy and clean removal of your baked tart without damaging the delicate crust.
Parchment Paper or Aluminum Foil: Used to line the tart shell during blind baking, preventing the crust from puffing up and ensuring even baking.
Pie Weights, Dried Beans, or Rice: Essential for blind baking. They weigh down the parchment or foil, keeping the crust from bubbling and maintaining its shape during the initial bake.
Handy Utensils and Prep Essentials
Beyond the specialized bakeware, a few general kitchen tools will be indispensable.
Large Bowl and Small Bowl: For mixing crust ingredients and whisking liquids separately.
Pastry Blender or Your Fingertips: For cutting cold butter into the flour. A pastry blender is efficient, but fingertips can work if you’re quick to avoid warming the butter.
Whisk: For combining dry ingredients and mixing the glaze.
Rolling Pin: For rolling out the tart dough evenly.
Fork: For pricking the bottom of the crust to prevent air bubbles.
Wire Rack: For cooling the baked tart, allowing air circulation to prevent condensation and keep the bottom crisp.
Step-by-Step Success: Assembling Your Perfect Plum Tart
Follow these detailed steps carefully, paying attention to the ‘why’ behind each instruction. This precision will ensure your Plum Tart turns out beautifully, with that coveted crisp crust.
- The Foundation: Preparing Your Tart Dough
Begin by whisking together the flour, granulated sugar, and salt in a large bowl. This ensures these dry ingredients are evenly distributed for consistent flavor.
Next, cut in the cold unsalted butter. Use a pastry blender or your fingertips, working quickly to incorporate the butter until the mixture resembles coarse crumbs with some pea-sized pieces of butter remaining. These small butter pieces are crucial for creating flakiness in the baked crust.
In a separate small bowl, whisk the egg yolk with the ice water. Gradually add this liquid mixture to your flour mixture, mixing just until the dough comes together. Overmixing develops too much gluten, which can lead to a tough crust, so stop as soon as it’s combined.
Flatten the dough into a disc, wrap it tightly in plastic wrap, and refrigerate for at least 30 minutes. Chilling allows the gluten to relax and the butter to firm up, making the dough easier to roll and preventing shrinkage during baking.
- The Game-Changer: Blind Baking for Crispness
On a lightly floured surface, roll out your chilled dough into a 12-inch circle. Work gently to avoid tearing the dough. Carefully transfer the rolled dough to your 9-inch tart pan with a removable bottom, pressing it gently into the bottom and up the sides. Trim any excess dough from the edges.
Prick the bottom of the crust all over with a fork. This allows steam to escape during baking, preventing the crust from puffing up. Place the tart shell in the freezer for 15 minutes; this quick chill further firms the butter, helping the crust hold its shape during blind baking.
Preheat your oven to 375°F (190°C) while the tart shell chills. Line the frozen tart shell with parchment paper or aluminum foil, ensuring it extends over the edges to protect them from over-browning. Fill the liner with pie weights, dried beans, or rice; these weights are critical for keeping the crust from shrinking or bubbling excessively.
Bake for 20 minutes with the weights, then carefully remove the parchment paper and weights. Continue baking for another 10-15 minutes, or until the crust is lightly golden, appearing dry and set. This step is the crux of preventing a soggy bottom, as it creates a sturdy, pre-baked barrier. For extra insurance against moisture, you can lightly brush the bottom of the par-baked crust with a thin layer of egg white and return it to the oven for 2-3 minutes to create an even stronger seal before adding the filling.
- Sweet & Tangy: Crafting the Plum Filling
While your crust is blind baking, prepare the filling. In a medium bowl, gently toss the sliced plums with granulated sugar, cornstarch, and lemon juice. If you’re using cinnamon, add it now too.
Toss gently until the plums are evenly coated. The cornstarch is vital here; it will absorb the excess moisture from the juicy plums during baking, ensuring your filling thickens beautifully and doesn’t make your crisp crust soggy. The lemon juice balances the sweetness of the plums and sugar, adding a bright, fresh note.
- Bringing It All Together: Final Bake
Once your crust is blind-baked and ready, arrange the prepared plum slices evenly in the par-baked tart crust. Spread them out to ensure even cooking and presentation.
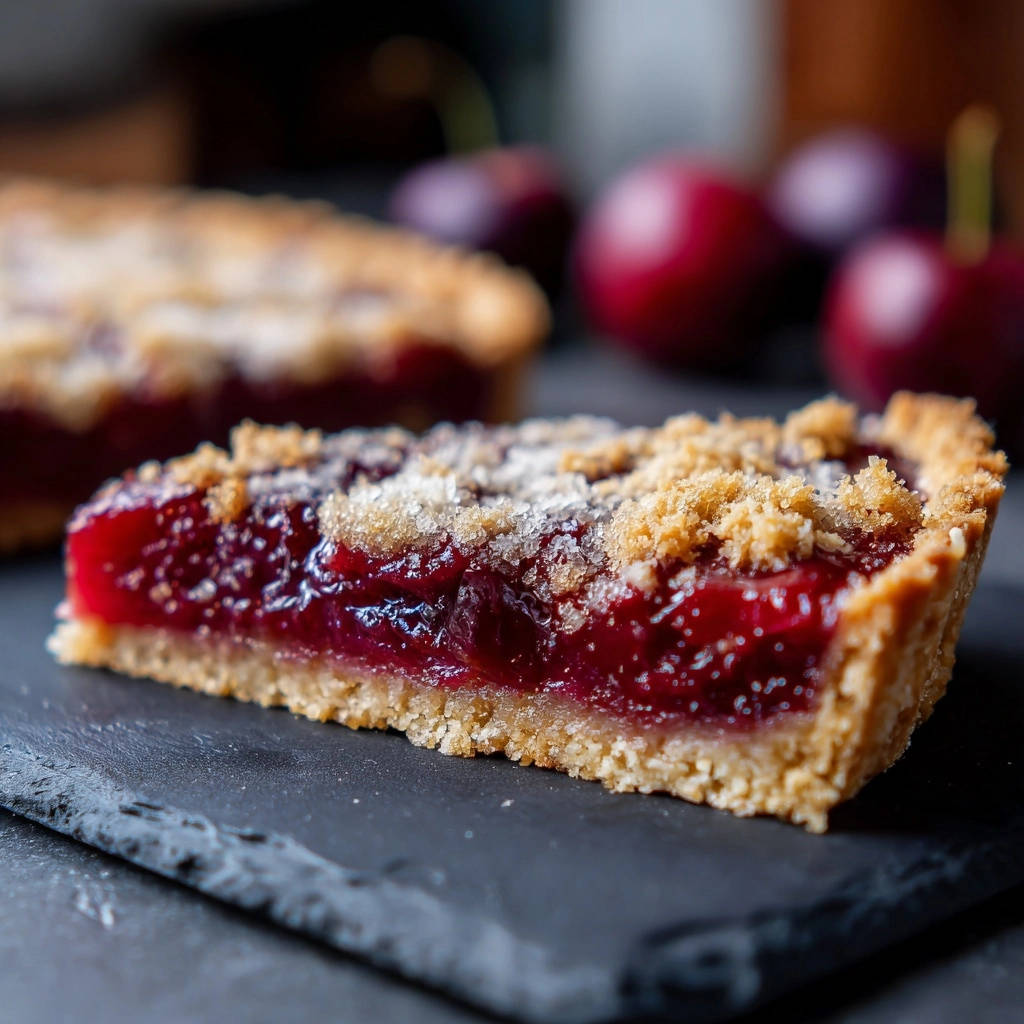
Bake for 20-25 minutes, or until the filling is visibly bubbly, indicating it’s hot and thickened, and the plums are tender. The crust should also be a beautiful golden brown around the edges, showing it’s perfectly done.
- Shine On: Glazing and Finishing
While the tart is still warm from the oven, prepare your glaze. In a small bowl, whisk together the red currant jelly or apricot jam with hot water until it’s smooth and easily pourable. The hot water helps the jelly or jam melt and become a brushable consistency.
Lightly brush this warm glaze over the plums. This step adds a gorgeous, professional-looking shine to your Plum Tart and a subtle fruity enhancement.
- Cool and Serve: The Final Touch
After glazing, let the tart cool completely on a wire rack before attempting to remove it from the pan. This step is absolutely crucial for the filling to fully set and solidify. Trying to remove or slice the tart too early will result in a messy, unset filling and potentially broken slices.
Once completely cool, carefully remove the tart from the pan, using the removable bottom to assist. Just before serving, dust lightly with powdered sugar for a final elegant touch. This Plum Tart is best enjoyed at room temperature, but also delicious slightly chilled.
Unlock Pro Secrets: Elevate Your Plum Tart
Mastering a tart goes beyond the recipe steps. These expert tips will help you achieve perfection and even customize your Plum Tart further.
Dough Handling Do’s and Don’ts: Always work with cold dough. If it becomes too warm and sticky while rolling, pop it back into the refrigerator for 10-15 minutes. Avoid overworking the dough, which develops gluten and can lead to a tough crust instead of a tender one.
Blind Baking Wisdom: Ensure your pie weights evenly distribute pressure across the crust; don’t just pile them in the center. If crust edges start browning too quickly during the second blind-baking phase, loosely tent them with aluminum foil. The crust is truly “set” when it feels firm to the touch and looks dry, not merely lightly colored.
Flavor Boosters & Variations: Consider adding a teaspoon of almond extract to the plum filling for a nuanced flavor profile that pairs wonderfully with plums. A touch of orange zest in the crust or filling can also add a bright, aromatic lift. For a rustic touch, you could swap some of the white sugar in the filling for brown sugar.
Perfect Plum Selection: Different plum varieties offer unique qualities. Stanley plums, Italian prune plums, or Greengage plums are excellent choices as they tend to hold their shape well during baking and offer a good balance of sweetness and tartness. Avoid overly soft or bruised plums.
Cutting for Success: For clean, beautiful slices, use a sharp, thin-bladed knife. Wipe the knife clean between each slice, especially after the first cut, to prevent dragging the filling and creating a messy appearance.
Common Plum Tart Questions & Quick Fixes
Even with the best instructions, sometimes things go awry. Here are solutions to common Plum Tart dilemmas.
Why is my tart crust soggy, even after blind baking?
This usually indicates insufficient blind baking time or not enough weight. Ensure you bake the crust until it’s truly dry and lightly golden, not just set. The optional egg white wash after removing the weights creates an extra moisture barrier that can be very helpful.
Also, make sure your pie weights adequately cover the entire bottom of the crust, preventing any areas from puffing up or remaining underbaked.
My plum filling is too runny. What went wrong?
A runny filling can happen if your plums were overly ripe and watery, or if not enough cornstarch was used. Ensure your plums are firm, and measure the cornstarch accurately. Underbaking can also contribute, so ensure the filling is visibly bubbling and thickened before removing the tart from the oven.
The crust edges are burning before the tart is done.
This is a common issue! Loosely tent the edges of the tart with a ring of aluminum foil early in the baking process, once the crust has started to set but before it browns too much. This protects the edges while allowing the center and filling to continue baking.
My plums aren’t tender enough after baking.
This suggests the plums were either under-ripe or the tart needed a bit more baking time. Ensure you’re using ripe but firm plums, and consider adding an extra 5-10 minutes to the final baking time if they still feel too firm when tested with a fork.
Enjoying Your Creation: Serving & Storage Tips
Once your beautiful Plum Tart is baked and cooled, knowing how to serve and store it properly ensures every bite is as delicious as the first.
Optimal Serving Suggestions
This Plum Tart is wonderfully versatile. Serve it slightly warm for a comforting treat, perhaps with a scoop of vanilla bean ice cream or a dollop of freshly whipped cream. The warm plums and crisp crust are an unbeatable combination with a cool, creamy accompaniment.
It’s also fantastic chilled, making it an excellent make-ahead dessert for entertaining. A simple dusting of powdered sugar is always a classic and elegant presentation.
Storing Leftovers Like a Pro
To store your Plum Tart, cover it loosely with plastic wrap or aluminum foil. It can be kept at room temperature for up to 2 days. For longer storage, refrigerate for up to 3-4 days. If refrigerated, let it come closer to room temperature before serving for the best flavor and texture.
For reheating, a quick warm-up in a 300°F (150°C) oven for 10-15 minutes can bring back some of that lovely crispness, especially if it’s been refrigerated.
Planning Ahead: Make-Ahead Tips
You can prepare the tart dough in advance. Wrap the disc of dough tightly in plastic wrap and refrigerate for up to 2 days, or freeze for up to 1 month. Thaw in the refrigerator overnight before rolling.
You can also blind-bake the crust entirely a day in advance. Let it cool completely, then store it loosely covered at room temperature until ready to fill and bake with the plums. This streamlines your baking day significantly.
Your Plum Tart Questions Answered
Here are some common questions about baking this delightful Plum Tart.
Can I use different fruits in this recipe?
Absolutely! This recipe’s structure works well with other stone fruits like peaches, nectarines, or apricots. Berries (strawberries, blueberries, raspberries) can also work, but be mindful of their moisture content; you might need to slightly increase the cornstarch if using very juicy berries to maintain that crisp crust.
Is blind baking always necessary for fruit tarts?
For tarts with very juicy fruit fillings, like this Plum Tart, blind baking is highly recommended to prevent a soggy bottom. For less moist fillings, such as cream-based or chocolate tarts, it might be optional, or a partial blind bake might suffice. For this specific recipe, it’s the key to success.
How do I know when the Plum Tart is perfectly done?
Look for visual cues: the crust should be deeply golden brown, and the filling should be bubbling around the edges and appear thickened. The plums themselves should be tender when gently pierced with a knife or fork. Trust your oven and these signs over strict timing, as oven temperatures can vary.
Can I make this recipe gluten-free or dairy-free?
You can often adapt this recipe for dietary needs. For gluten-free, substitute the all-purpose flour with a high-quality gluten-free all-purpose baking blend (ensure it contains xanthan gum). For dairy-free, use a plant-based butter substitute in the crust that is specifically designed for baking. Be aware that texture and flavor might slightly vary with substitutions.
What are the best plums for baking?
For baking, it’s best to use plums that are ripe but still firm. Varieties like Italian prune plums, Mirabelle plums, or even firm Black Splendor plums hold their shape well and offer a good balance of sweetness and tartness. Avoid very soft or overripe plums, as they can become mushy and release too much moisture during baking.
Share Your Masterpiece: The Joy of Homemade Plum Tart
There’s immense satisfaction in pulling a perfectly golden, crisp-crusted Plum Tart from your oven. This recipe empowers you to create a dessert that’s both beautiful and delicious, eliminating the common frustrations of soggy crusts.
I encourage you to try this recipe and experience the joy of a truly fantastic Plum Tart. Gather your ingredients, embrace the blind-baking magic, and prepare to delight yourself and your loved ones with every perfect slice. Happy baking!
Plum Tart
Course: DessertCuisine: American CuisineDifficulty: easy8
servings30
minutes50
minutes60
minutesAmerican Cuisine
Ingredients
For the Crust:
1 1/4 cups all-purpose flour
1/2 cup cold unsalted butter, cut into cubes
1/4 cup granulated sugar
1/4 teaspoon salt
1 large egg yolk
2 tablespoons ice water (or more, if needed)
For the Filling:
5 medium plums, ripe but firm, pitted and sliced 1/4-inch thick
1/2 cup granulated sugar
2 tablespoons cornstarch
1 tablespoon lemon juice
1/4 teaspoon ground cinnamon (optional)
For the Glaze:
2 tablespoons red currant jelly or apricot jam
1 tablespoon hot water
For Garnish:
1 tablespoon powdered sugar
Directions
- Make the Tart Crust: In a large bowl, whisk together the flour, granulated sugar, and salt. Cut in the cold butter using a pastry blender or your fingertips until the mixture resembles coarse crumbs with some pea-sized pieces of butter remaining. In a small bowl, whisk the egg yolk with the ice water. Gradually add the egg mixture to the flour mixture, mixing until just combined and a dough forms. Do not overmix. Flatten the dough into a disc, wrap tightly in plastic wrap, and refrigerate for at least 30 minutes.
- Prepare for Blind Baking (The Anti-Soggy Bottom Step): On a lightly floured surface, roll out the chilled dough into a 12-inch circle. Carefully transfer the dough to a 9-inch tart pan with a removable bottom. Press the dough gently into the bottom and up the sides of the pan, trimming any excess. Prick the bottom of the crust all over with a fork. Place the tart shell in the freezer for 15 minutes to firm up. Preheat your oven to 375°F (190°C).
- Blind Bake the Crust (The Anti-Soggy Bottom Solution): Line the frozen tart shell with parchment paper or aluminum foil, making sure it covers the edges to prevent burning. Fill the liner with pie weights, dried beans, or rice. Bake for 20 minutes, then carefully remove the parchment paper and weights. Continue baking for another 10-15 minutes, or until the crust is lightly golden and appears dry and set. This crucial step creates a barrier that prevents moisture from the fruit filling from seeping in. If desired for extra protection, lightly brush the bottom of the par-baked crust with a thin layer of egg white and return to the oven for 2-3 minutes to seal before adding the filling.
- Prepare the Filling: While the crust is blind baking, in a medium bowl, gently toss the sliced plums with granulated sugar, cornstarch, lemon juice, and cinnamon (if using) until the plums are evenly coated. The cornstarch is key to thickening the fruit juices and preventing a watery filling.
- Assemble and Bake: Arrange the prepared plum slices evenly in the par-baked tart crust. Bake for 20-25 minutes, or until the filling is bubbly and the plums are tender, and the crust is golden brown.
- Glaze and Finish: While the tart is still warm, prepare the glaze. In a small bowl, whisk together the red currant jelly or apricot jam with hot water until smooth and pourable. Lightly brush the warm glaze over the plums for that beautiful shine.
- Cool and Serve: Let the tart cool completely on a wire rack before removing it from the pan and dusting with powdered sugar. Cooling completely allows the filling to fully set, ensuring perfect slices.
Notes
- Features a unique blind baking technique to prevent soggy crusts and ensure a crisp bottom.