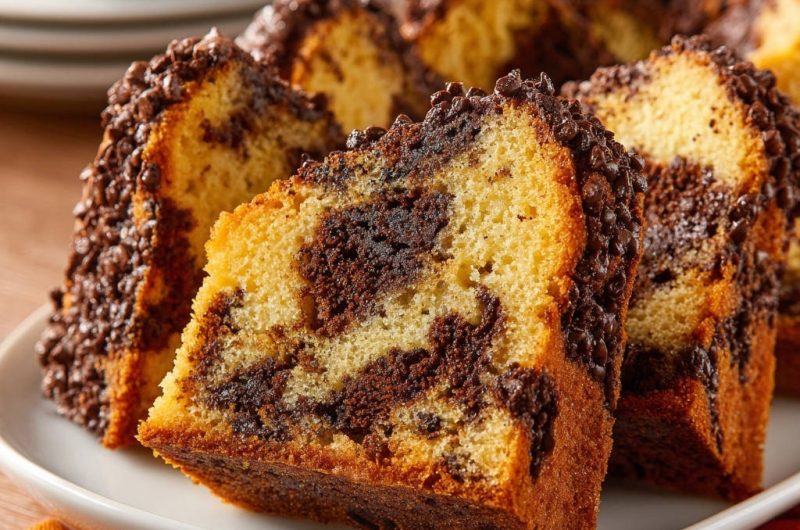
Who else has been there: dreaming of a perfectly moist slice of Classic Marble Bundt Cake, only to end up with something a little dry or crumbly? It used to be my biggest baking frustration!
After years of tweaking, I found the secret to a Bundt cake that’s always tender, rich, and melts in your mouth. Get ready to bake a Classic Marble Bundt Cake that turns out beautifully, every single time!
Why This Classic Marble Bundt Cake Belongs in Your Recipe Box
The Secret to a Consistently Tender and Moist Crumb
This recipe focuses on meticulous steps like proper creaming of butter and sugar, and careful mixing of dry and wet ingredients. These techniques are precisely why your Classic Marble Bundt Cake will achieve that enviable melt-in-your-mouth texture.
You’ll enjoy a consistently tender and moist crumb, ensuring every slice is as delightful as the last, banishing dry cake woes forever.
Achieve Perfect Marbling Every Time
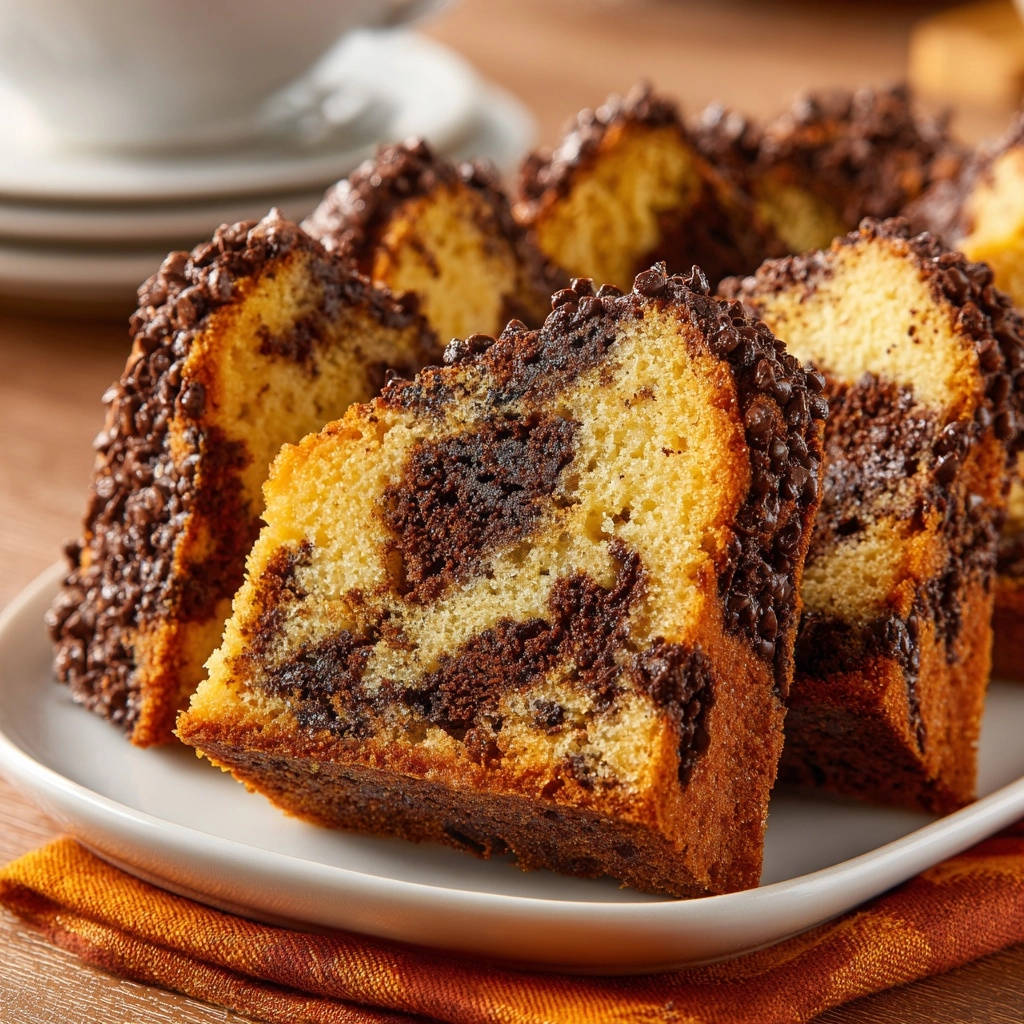
The method for swirling the vanilla and chocolate batters is designed for simplicity and stunning results. You’ll create beautiful, distinct patterns without over-blending the colors.
This ensures your Classic Marble Bundt Cake looks as impressive as it tastes, making it a true showstopper.
A Tried-and-True Recipe for Stress-Free Baking
This isn’t just a recipe; it’s a reliable guide. Every step is clearly explained with the “why” behind it, making the process intuitive.
Whether you’re a seasoned baker or just starting, this Classic Marble Bundt Cake recipe promises a beautiful, successful bake every single time, building your baking confidence.
Gathering Your Flavor Palette: Essential Ingredients for Your Classic Marble Bundt Cake
The Building Blocks: Flour, Baking Powder, and Salt
All-purpose flour provides the essential structure for your cake. Sifted flour can create an even lighter crumb.
Baking powder is your primary leavening agent, ensuring a proper rise and airy texture. Always check its freshness for optimal results.
Salt balances the sweetness and enhances all the other flavors, making the cake taste more complex and delicious.
Richness and Structure: Unsalted Butter, Granulated Sugar, and Large Eggs
Unsalted butter, softened to room temperature, is crucial for proper creaming. It contributes rich flavor and helps create air pockets for a tender crumb. Unsalted butter gives you control over the overall salt content.
Granulated sugar not only sweetens but also works with butter to create that essential aerated structure during the creaming process.
Large eggs, at room temperature, act as binders and add richness, moisture, and help with the cake’s overall structure. Room temperature eggs emulsify better with the butter and sugar.
Liquid Love: Whole Milk and Vanilla Extract
Whole milk, at room temperature, adds moisture and richness, contributing to the cake’s tender crumb. Its fat content enriches the flavor.
Vanilla extract is a foundational flavor, enhancing both the vanilla and chocolate elements of the Classic Marble Bundt Cake. Opt for pure vanilla for the best taste.
The Marble Magic Makers: Unsweetened Cocoa Powder and Extra Liquid
Unsweetened cocoa powder provides the deep chocolate flavor and color for the marble swirl. Use good quality cocoa for richer taste.
Extra milk or water thins the chocolate batter slightly to match the consistency of the vanilla batter. This ensures even marbling and proper baking.
Optional Flourishes: Mini Chocolate Chips or Sprinkles
Mini chocolate chips or sprinkles are entirely optional but add a delightful visual appeal and extra burst of sweetness to your finished Classic Marble Bundt Cake.
Beyond the Basics: Essential Tools for Classic Marble Bundt Cake Success
The Star of the Show: Your 10-12 Cup Bundt Pan
A good quality 10-12 cup Bundt pan is essential for this recipe. Its unique fluted design creates the beautiful shape that defines a Bundt cake, making presentation effortless.
The correct size ensures the cake bakes evenly and prevents overflow, allowing for proper rise and structure.
Your Baking Assistant: Electric Mixer (Stand or Handheld)
An electric mixer is crucial for achieving the light and fluffy texture this Classic Marble Bundt Cake demands. It efficiently creams the butter and sugar, incorporating vital air.
Whether a stand mixer or a handheld, it makes the process much easier and more consistent.
Measuring and Mixing Essentials
Measuring cups and spoons: Accuracy is paramount in baking to ensure the correct ingredient ratios for perfect texture.
Large mixing bowls: You’ll need at least two – one for the main batter and another for dividing and coloring the chocolate portion.
Whisk and rubber spatula: A whisk for dry ingredients and a spatula for scraping down bowls and gently folding in ingredients are indispensable.
Wooden skewer or toothpick: This simple tool is essential for testing doneness and creating the beautiful marble swirl.
Baking Your Masterpiece: A Step-by-Step Guide to Classic Marble Bundt Cake
- Preheat Your Oven and Prepare the Bundt Pan:
Set your oven to 350°F (175°C) to ensure it reaches the correct temperature before the cake goes in.
Thoroughly grease and flour a 10-12 cup Bundt pan, ensuring every crevice is coated to prevent sticking. This initial step is vital for easy release and a perfectly shaped Classic Marble Bundt Cake.
- Whisk Together the Dry Ingredients:
In a medium bowl, combine the all-purpose flour, baking powder, and salt with a whisk.
This ensures they are evenly distributed throughout the batter, promoting a consistent rise and preventing pockets of unmixed ingredients.
- Cream the Softened Butter:
Using an electric mixer in a large bowl, beat the room-temperature unsalted butter on medium speed for about 2 minutes.
This process incorporates air, which is fundamental for creating a tender and light crumb, a hallmark of a great Classic Marble Bundt Cake.
- Gradually Add Sugar and Cream Until Fluffy:
Slowly add the granulated sugar to the creamed butter, continuing to beat on medium-high speed for 3-5 minutes.
The mixture should become very light in color and fluffy, resembling whipped cream. This indicates sufficient aeration crucial for a moist and airy final cake texture.
- Incorporate Eggs One at a Time:
Add the large eggs, one at a time, to the butter-sugar mixture, beating well after each addition until fully incorporated.
Remember to scrape down the sides of the bowl periodically to ensure everything is evenly mixed and the batter remains smooth.
- Combine Milk and Vanilla:
In a separate small bowl or measuring cup, gently stir together the whole milk and vanilla extract.
Having this liquid mixture ready prevents overmixing the batter later when combining wet and dry ingredients.
- Alternately Add Dry and Wet Ingredients (The No-Overmix Method):
With the mixer on low speed, alternately add the whisked dry ingredients and the milk mixture to the butter mixture, starting and ending with the dry.
Add about one-third of the flour, mix until just combined, then half of the milk, mix until just combined. Repeat this pattern, finishing with the last third of the flour mixture.
Mix until no streaks of flour remain, but be very careful not to overmix, as this can develop gluten and lead to a tough, dry cake.
- Create the Chocolate Batter:
Divide the completed vanilla batter evenly into two separate bowls.
To one bowl, gently stir in the 1/4 cup unsweetened cocoa powder and 1/4 cup extra milk or water until the cocoa is fully incorporated and the chocolate batter is smooth.
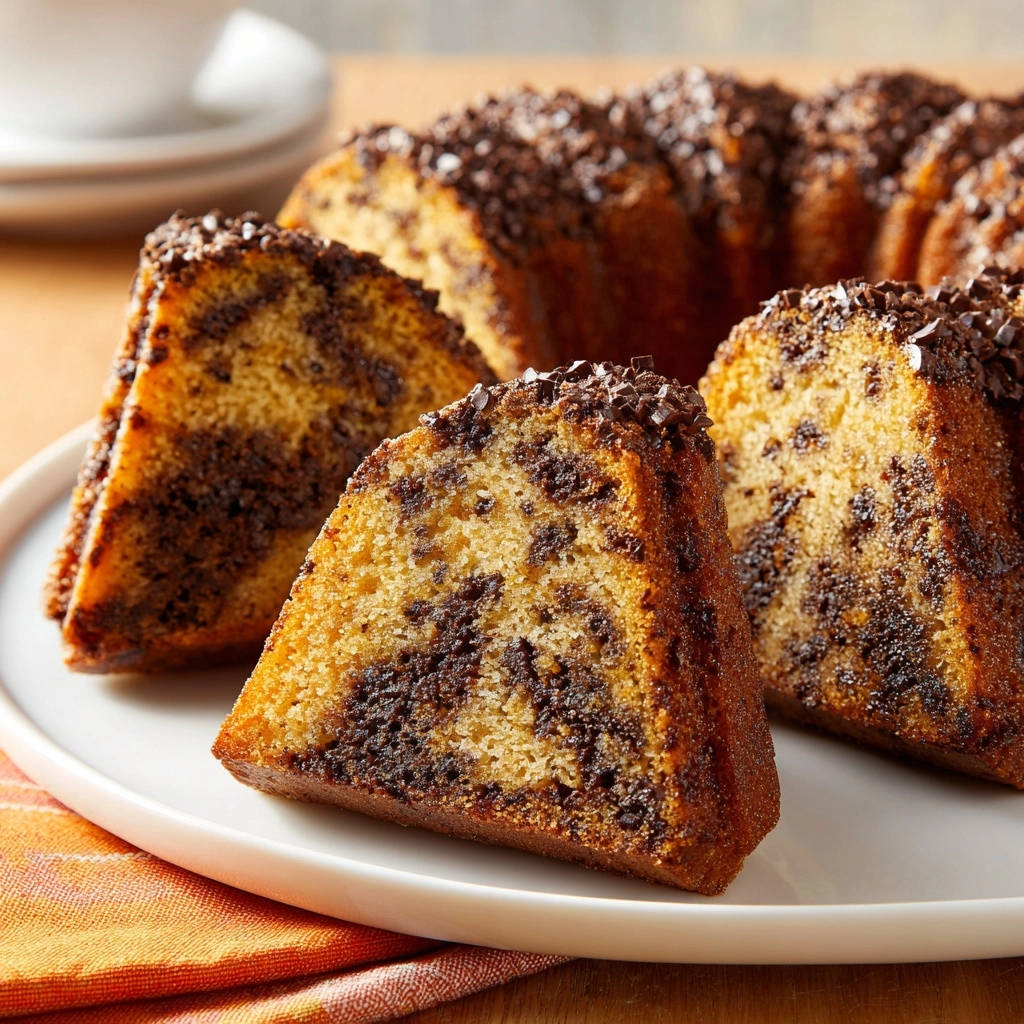
- Spoon and Swirl for the Signature Marble Effect:
Spoon alternating dollops of vanilla and chocolate batter into your prepared Bundt pan. Aim for random placement to ensure a varied marble pattern.
Using a knife or skewer, gently swirl the batters together in a figure-eight or circular motion to create the beautiful marble effect. Avoid over-swirling, or the colors will blend too much into a uniform brown.
- Bake to Golden Perfection:
Bake for 50-60 minutes, or until a wooden skewer or toothpick inserted into the center of the cake comes out clean.
Begin checking around the 50-minute mark. Crucially, do not overbake, as this is the primary cause of dry cakes and will diminish the moist texture of your Classic Marble Bundt Cake.
- Cool in the Pan: The Patience Play:
Let the Classic Marble Bundt Cake cool in its pan on a wire rack for 15-20 minutes.
This crucial cooling period allows the cake to set and firm up within the pan, preventing it from breaking when you invert it.
- Invert and Cool Completely:
After the initial cooling, carefully invert the Bundt cake onto a wire rack to cool completely.
Ensure it is fully cooled before slicing to maintain its beautiful structure and tender texture. Slicing too soon can cause it to collapse.
- Add Final Touches (Optional):
Once completely cooled, if desired, sprinkle the top with mini chocolate chips or sprinkles before slicing and serving. This adds a nice decorative touch.
Chef’s Secrets: Elevating Your Classic Marble Bundt Cake Experience
Room Temperature is Key: Ensure your butter, eggs, and milk are all at room temperature. This allows them to emulsify properly, creating a smooth, homogenous batter that holds air better for a lighter crumb.
Don’t Skip the Creaming Step: The 3-5 minutes of beating butter and sugar until light and fluffy isn’t just a suggestion; it’s critical for incorporating air, which is what gives your Bundt cake its tender, airy texture. This aeration is the foundation of a superb Classic Marble Bundt Cake.
Master the “Just Combined” Rule: When mixing in the dry and wet ingredients, stop as soon as no streaks of flour are visible. Overmixing develops gluten, leading to a tough, dense cake, which is the opposite of the “melts in your mouth” texture we’re aiming for.
Perfect Pan Prep Prevents Sticking: Thoroughly greasing and flouring every nook and cranny of your Bundt pan is non-negotiable. For extra security, especially with intricate Bundt designs, some bakers swear by a baking spray that contains flour.
The Art of the Swirl: For distinct marble swirls, use a knife or skewer and make only a few broad, gentle swirls. Too many swirls will cause the colors to blend into a uniform light brown, losing the beautiful marble effect. Think of it as painting, not stirring.
Know Your Oven: Oven temperatures can vary significantly. Investing in an oven thermometer can help you ensure your oven is truly at 350°F (175°C), preventing under or overbaking and ensuring your Classic Marble Bundt Cake bakes perfectly.
Classic Marble Bundt Cake Troubleshooting: Solving Common Baking Woes
Why is My Bundt Cake Dry or Crumbly?
The most common culprits are overmixing the batter or overbaking. Overmixing develops gluten, making the cake tough, while overbaking zaps moisture.
Ensure ingredients are at room temperature and stick to the “just combined” rule for mixing. Start checking for doneness at the earliest recommended time.
Why Did My Classic Marble Bundt Cake Stick to the Pan?
This almost always comes down to inadequate pan preparation. Make sure to grease and flour every single crevice thoroughly.
Additionally, rushing the cooling process can cause sticking. Always allow the cake to cool in the pan for the full 15-20 minutes before inverting.
My Marble Swirls Disappeared or Blended Too Much!
This happens if you over-swirl the batters. Less is more when it comes to marbling; a few gentle passes are all you need.
Ensure your vanilla and chocolate batters are of similar consistency. If the chocolate batter is too thick, it won’t swirl as easily.
Why Did My Bundt Cake Sink in the Middle?
Sinking can be caused by underbaking, opening the oven door too early (causing a sudden temperature drop), or using too much leavening agent.
Make sure the cake is fully cooked before removing it, and resist the urge to open the oven door during the first 30-40 minutes of baking.
Beyond the Bake: Serving, Storing, and Enjoying Your Classic Marble Bundt Cake
Elegant Serving Ideas for Any Occasion
A simple dusting of powdered sugar adds an elegant touch and highlights the Bundt’s intricate design. For a subtle shine, try a thin vanilla bean glaze.
Consider a simple chocolate ganache drizzle to emphasize the marble effect. Fresh berries or a dollop of freshly whipped cream make excellent accompaniments, adding freshness and contrasting textures.
Storing Your Bundt Cake for Freshness
Store your Classic Marble Bundt Cake at room temperature, tightly wrapped in plastic wrap or in an airtight cake keeper. This prevents it from drying out.
It will stay fresh and delicious for 3-4 days on the counter.
Can You Make This Cake Ahead?
Absolutely! This Classic Marble Bundt Cake is an excellent make-ahead dessert. Its flavors actually deepen overnight, making it even more enjoyable the next day.
Bake it a day in advance for effortless entertaining or a convenient treat ready when you are.
Freezing Your Bundt Cake for Later Indulgence
To freeze, ensure the cake is completely cooled. Wrap it tightly in several layers of plastic wrap, then an outer layer of aluminum foil.
It can be frozen for up to 3 months. Thaw overnight in the refrigerator, then bring to room temperature before serving for the best texture.
Your Top Questions Answered About Classic Marble Bundt Cake
Can I use different pan sizes for this Classic Marble Bundt Cake recipe?
This recipe is optimized for a 10-12 cup Bundt pan. Using a smaller pan might cause overflow, while a larger one could result in a flatter, drier cake.
If you must use a different size, adjust baking time accordingly and fill the pan no more than two-thirds full.
What if I don’t have whole milk? Can I substitute it?
While whole milk provides the best richness and moisture for this Classic Marble Bundt Cake, you can substitute with 2% milk. Skim milk is not recommended as it lacks the fat content for tenderness.
You can also use a non-dairy milk like almond or soy, but the texture might be slightly different.
Can I make this Classic Marble Bundt Cake gluten-free?
Yes, you can substitute the all-purpose flour with a 1:1 gluten-free baking flour blend that contains xanthan gum. Ensure your blend is suitable for cakes.
Baking times may vary slightly, so keep a close eye on it. For another gluten-free friendly option, consider a Pistachio Loaf Cake.
How do I make the marble effect more distinct and beautiful?
The key is minimal swirling. After spooning alternating dollops, make just 2-3 gentle swirls with a knife or skewer through the batter. Overdoing it blends the colors too much.
Vary the size of your dollops for a more organic look.
Is it necessary to use unsalted butter?
Unsalted butter is preferred as it gives you precise control over the salt content in your Classic Marble Bundt Cake. Different brands of salted butter have varying amounts of salt.
If you only have salted butter, omit the 1/2 teaspoon of salt from the recipe. Taste the batter before baking if you are concerned.
Ready to Impress? Share Your Classic Marble Bundt Cake Masterpiece!
There’s immense satisfaction in baking a dessert that not only tastes incredible but looks absolutely stunning. This Classic Marble Bundt Cake recipe simplifies the process, ensuring a tender, moist, and beautifully swirled cake every single time.
It’s a reliable recipe that will become a go-to for family gatherings, celebrations, or simply a delightful treat for yourself. We’re confident you’ll adore the results.
Bake it, share it, and perhaps even try our Perfect Orange Glazed Loaf next. We’d love to see your Classic Marble Bundt Cake creations – tag us online and let the compliments roll in!
Classic Marble Bundt Cake
Course: DessertCuisine: American CuisineDifficulty: easy12
servings20
minutes50
minutes60
minutesAmerican Cuisine
Ingredients
2 and 1/2 cups all-purpose flour
2 teaspoons baking powder
1/2 teaspoon salt
1 cup (2 sticks) unsalted butter, softened to room temperature
2 cups granulated sugar
4 large eggs, at room temperature
1 cup whole milk, at room temperature
2 teaspoons vanilla extract
1/4 cup unsweetened cocoa powder
1/4 cup extra milk or water (for chocolate batter)
1/2 cup mini chocolate chips or sprinkles, for topping (optional)
Directions
- Preheat your oven to 350°F (175°C). Grease and flour a 10-12 cup Bundt pan thoroughly. Make sure to get into all the nooks and crannies of the pan to prevent sticking later.
- In a medium bowl, whisk together the all-purpose flour, baking powder, and salt. Set aside.
- In a large mixing bowl, using an electric mixer, beat the softened butter on medium speed for about 2 minutes, until light and creamy. This step is crucial for incorporating air and achieving a tender crumb.
- Gradually add the granulated sugar to the butter, beating on medium-high speed for another 3-5 minutes until the mixture is very light in color and fluffy. This extended creaming ensures a moist and airy cake.
- Add the eggs one at a time, beating well after each addition until fully incorporated. Scrape down the sides of the bowl as needed.
- In a separate small bowl or measuring cup, combine the 1 cup of milk and vanilla extract.
- With the mixer on low speed, alternately add the dry ingredients and the milk mixture to the butter mixture, beginning and ending with the dry ingredients. Add about one-third of the flour mixture, mix until just combined, then add one-half of the milk mixture, mix until just combined. Repeat, ending with the last third of the flour mixture. Mix until just combined and no streaks of flour remain. Be careful not to overmix the batter; overmixing can develop gluten and lead to a tough, dry cake.
- Divide the batter evenly into two separate bowls. To one bowl, add the 1/4 cup unsweetened cocoa powder and 1/4 cup extra milk or water. Stir gently until the cocoa is fully incorporated and the chocolate batter is smooth.
- Spoon alternating dollops of vanilla and chocolate batter into your prepared Bundt pan. Use a knife or skewer to gently swirl the batters together, creating a marble effect. Do not over-swirl, or the colors will blend too much.
- Bake for 50-60 minutes, or until a wooden skewer or toothpick inserted into the center of the cake comes out clean. Start checking around 50 minutes. Do not overbake, as this is the primary cause of dry cakes.
- Let the cake cool in the pan on a wire rack for 15-20 minutes. This allows the cake to set and prevents it from breaking when inverted.
- After cooling slightly, carefully invert the Bundt cake onto a wire rack to cool completely.
- Once completely cooled, sprinkle the top with mini chocolate chips or sprinkles, if desired, before slicing and serving.