There was a time when achieving that perfect, decadent molten center in a cupcake felt like a culinary unicorn – elusive and often messy. I once struggled to keep that luscious caramel from either disappearing or making my cupcakes soggy, but I’ve finally cracked the code to truly spectacular Caramel Lava Cupcakes.
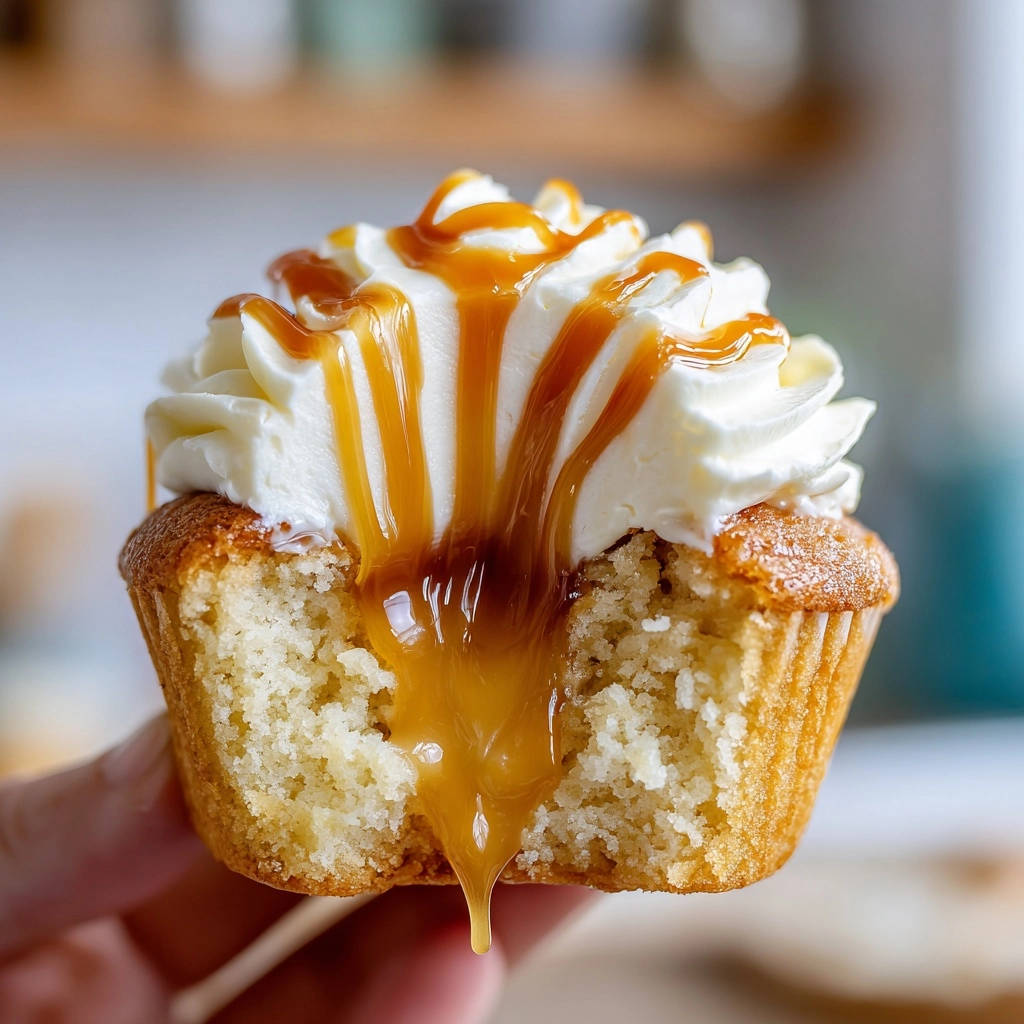
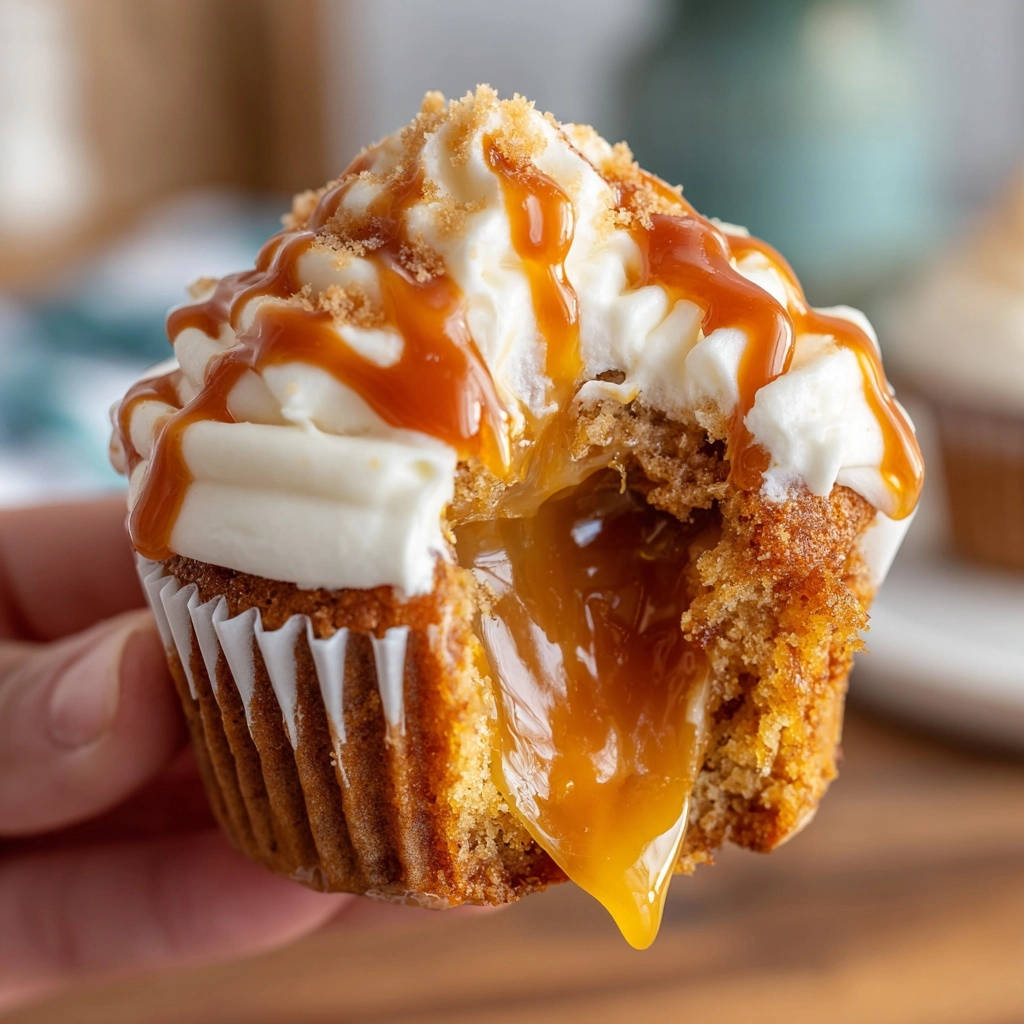
This recipe isn’t just about baking; it’s about crafting an edible experience where a warm, gooey caramel surprise spills out with every bite. It’s a game-changer for anyone who loves a dessert that delivers on both flavor and an unforgettable “wow” factor.
Beyond Basic: Why Our Caramel Lava Cupcakes Are a Must-Try
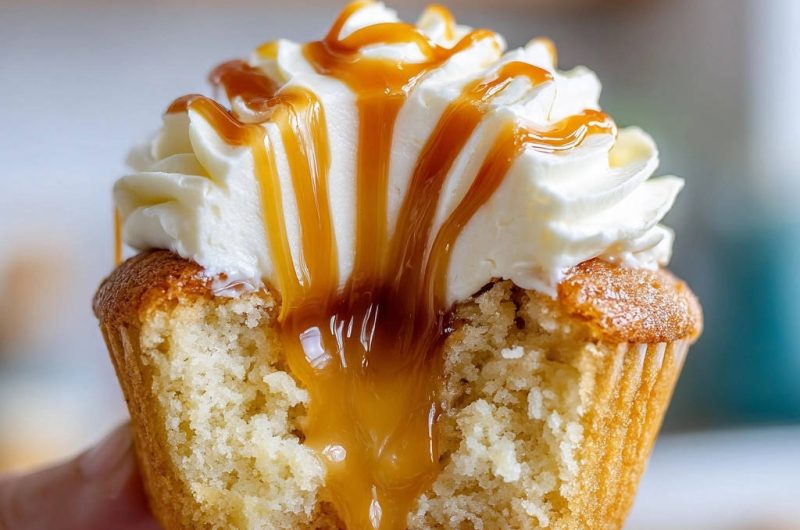
These aren’t just ordinary cupcakes; they’re a dessert sensation. Our method ensures a consistently molten caramel center, a true “lava” effect that stays gooey, never soaking into the cake.
You’ll discover a perfect harmony between the light, fluffy vanilla cupcake and the rich, sweet caramel filling. This balance elevates the entire tasting experience.
Despite their sophisticated appearance, these Caramel Lava Cupcakes are surprisingly easy to prepare. We’ve streamlined the process so anyone can achieve a seemingly complex dessert with confidence.
They are the ultimate treat for any occasion, from casual gatherings to elegant celebrations. Get ready for applause, as these cupcakes consistently impress every palate.
Gather Your Elements: Ingredients for Decadent Caramel Lava Cupcakes
The success of these cupcakes begins with quality ingredients. Each component plays a vital role in creating the perfect balance of texture and flavor.
For the Irresistible Vanilla Cupcakes
All-purpose flour: The foundation for our tender cupcakes. Measure it accurately by spooning it into your measuring cup and leveling it off.
Baking powder: This leavening agent is crucial for achieving a light and airy cupcake texture. Ensure it’s fresh for optimal rise.
Salt: A pinch of salt balances the sweetness and enhances all the other flavors in the cupcake.
Unsalted butter, softened: Softened butter creams beautifully with sugar, incorporating air for a fluffy crumb. Make sure it’s at true room temperature, not melted.
Granulated sugar: Provides sweetness and helps create that tender, moist cupcake texture.
Large eggs: Eggs add structure, richness, and moisture. Have them at room temperature for better emulsification with the butter and sugar.
Pure vanilla extract: Choose a high-quality vanilla for the best flavor. It’s the essence of our classic vanilla cupcake.
Milk: Adds moisture and contributes to the overall tenderness of the cake. Whole milk works best for richness.
Crafting the Molten Caramel Heart
Prepared caramel sauce: The star of our “lava” effect. A good quality, store-bought caramel sauce is perfectly acceptable and convenient for this recipe. You could also use a homemade caramel for an extra touch of decadence, perhaps from a recipe like our homemade orange caramel candy if you’re feeling adventurous.
The caramel should be rich and pourable when gently warmed to create that perfect gooey center.
Whipping Up the Perfect Vanilla Buttercream
Unsalted butter, softened: Again, room temperature is key for a smooth, creamy frosting base. It allows for optimal whipping.
Powdered sugar, sifted: Sifting is non-negotiable for lump-free, silky smooth buttercream. It ensures a professional finish.
Pure vanilla extract: Enhances the classic vanilla flavor of the frosting, complementing the cupcake.
Milk or cream: Adjusts the consistency of your frosting. Cream will yield a richer, thicker buttercream, while milk will make it lighter.
Essential Tools for Your Cupcake Crafting Journey
Having the right equipment at hand makes the baking process enjoyable and efficient. These tools are indispensable for creating your perfect Caramel Lava Cupcakes.
12-Cup Muffin Tin: The standard vessel for baking uniform cupcakes. A non-stick version helps prevent sticking.
Paper Liners: Essential for easy removal of cupcakes and quick cleanup. They also add a decorative touch.
Large and Medium Mixing Bowls: For separating wet and dry ingredients and combining them effectively.
Whisk: To thoroughly combine dry ingredients and ensure even distribution of leavening agents.
Electric Mixer (Stand or Handheld): Crucial for creaming butter and sugar and whipping up fluffy buttercream. It saves significant arm work!
Rubber Spatula: For scraping down the sides of bowls and gently folding in ingredients without overmixing.
Wire Rack: Necessary for cooling cupcakes completely after baking. Proper airflow prevents condensation and sogginess.
Cupcake Corer or Small Paring Knife: The secret weapon for creating that perfect pocket for your caramel lava. A corer provides a consistent hole, while a knife offers more control.
Piping Bag with a Large Tip (optional): For a professional and neat application of frosting. Alternatively, a simple offset spatula works well.
Measuring Cups and Spoons: Accurate measurements are critical for baking success. Always level off dry ingredients.
Baking Brilliance: Your Step-by-Step Caramel Lava Cupcakes Guide
Follow these detailed steps carefully, paying attention to the nuances that will transform simple ingredients into extraordinary Caramel Lava Cupcakes.
- Prepare Your Workspace:
Preheat your oven to 350°F (175°C). This ensures the oven is at the correct temperature from the moment your cupcakes go in, promoting even baking. Line a 12-cup muffin tin with paper liners; this makes removal easy and keeps your tin clean.
- Combine Dry Ingredients:
In a medium bowl, whisk together the all-purpose flour, baking powder, and salt. Whisking ensures these dry ingredients are well combined and aerated, preventing pockets of baking powder in your final cupcake.
- Cream Butter and Sugar:
In a large bowl, using an electric mixer, cream together the softened unsalted butter and granulated sugar until the mixture is light, fluffy, and pale in color. This process, called creaming, incorporates air into the batter, which is essential for the cupcake’s tender crumb.
- Incorporate Eggs and Vanilla:
Beat in the large eggs one at a time, mixing well after each addition until fully incorporated. Adding them individually helps create a stable emulsion with the butter and sugar, preventing the batter from curdling. Stir in the pure vanilla extract, ensuring it’s evenly distributed for maximum flavor.
- Alternating Wet and Dry:
Gradually add the dry ingredients to the wet ingredients, alternating with the milk. Begin and end with the dry ingredients. Mix on low speed until just combined, being extremely careful not to overmix; overmixing develops gluten, leading to tough, dense cupcakes instead of light and fluffy ones.
- Fill Cupcake Liners:
Divide the batter evenly among the prepared muffin cups, filling each about two-thirds full. This allows sufficient room for the cupcakes to rise beautifully without spilling over the sides of the liners.
- Bake to Perfection:
Bake for 18 to 22 minutes, or until a wooden skewer (or toothpick) inserted into the center of a cupcake comes out clean. This indicates they are fully cooked through. Avoid opening the oven door unnecessarily during the first two-thirds of baking to prevent the cupcakes from sinking.
- Cool Completely:
Remove cupcakes from the oven and let them cool in the muffin tin for a few minutes. Then, carefully transfer them to a wire rack to cool completely. Ensuring they are fully cooled is absolutely essential before proceeding with the filling process; warm cupcakes will cause the caramel to melt and soak into the cake, leading to a soggy mess.
- Core for the Lava:
Once the cupcakes are completely cool, use a small paring knife or a specialized cupcake corer to carefully cut a small cone-shaped hole from the center of each cupcake. Be precise and avoid cutting all the way through to the bottom. Reserve the small cake pieces you removed; these will be used later.
- Warm the Caramel:
Gently warm the prepared caramel sauce slightly. It should be pourable and smooth, but crucially, not hot. The ideal warmth ensures the caramel flows easily into the cored cupcakes, creating that perfect “lava” effect without overheating the cake.
- Fill and Cap:
Carefully spoon or pipe the warmed caramel sauce into each cored-out cupcake, filling it almost to the top. Break off a small piece from the reserved cake cones and use it to cap the top of the caramel filling. This simple trick helps contain the caramel and provides a stable, flat surface for your frosting.
- Prepare the Buttercream:
For the Vanilla Buttercream Frosting: In a large bowl, beat the softened butter with an electric mixer until it’s creamy and smooth. Gradually add the sifted powdered sugar, alternating with the milk or cream and vanilla extract, beating until the frosting is light, smooth, and fluffy.
If the frosting is too thick, add a bit more milk or cream (a teaspoon at a time); if too thin, incorporate a bit more sifted powdered sugar until you reach the desired consistency.
- Frost Your Masterpiece:
Pipe or spread the vanilla buttercream generously onto each cupcake. You can use a piping bag with your favorite tip for an elegant swirl, or simply use an offset spatula for a rustic, homemade look.
- The Final Drizzle:
For that irresistible “lava” look and extra visual appeal, drizzle any remaining warmed caramel sauce over the frosted cupcakes just before serving. This is the finishing touch that truly defines these Caramel Lava Cupcakes.
Chef’s Secrets: Elevate Your Caramel Lava Cupcakes Game
Unlock the full potential of your baking with these expert tips designed to ensure perfect results every time.
Don’t Overmix the Batter: After combining wet and dry ingredients, mix only until just incorporated. Overmixing develops gluten, which can lead to tough, chewy cupcakes rather than the desired light and tender texture.
Cooling is Crucial: Patience truly is a virtue here! Ensure your cupcakes are completely cool, preferably for at least an hour, before attempting to core and fill them. Filling warm cupcakes will cause the caramel to melt and soak into the cake, resulting in a soggy, disappointing outcome.
The Right Caramel Consistency: The perfect “lava” flow comes from caramel that’s gently warmed and pourable, but not hot or watery. If it’s too thin, it will quickly absorb; too thick, and it won’t have that satisfying molten quality. Aim for a consistency similar to warm honey.
Capping the Caramel: Using the small reserved cake pieces to cap the caramel filling is a brilliant, professional trick. This not only keeps the caramel contained within the cupcake but also provides a stable, flat surface for your frosting, ensuring a neat finish.
Sift Your Powdered Sugar: For the silkiest, smoothest buttercream frosting, always take the extra minute to sift your powdered sugar. This prevents any lumps and guarantees a wonderfully creamy texture that pipes beautifully.
Solving Sweet Dilemmas: Common Cupcake Challenges & Fixes
Even seasoned bakers encounter hiccups. Here are solutions to common issues you might face when making your Caramel Lava Cupcakes.
Problem: My Cupcakes Are Dry or Crumbly
This is often a sign of overmixing the batter or overbaking. Mix the batter only until the ingredients are just combined, and keep a close eye on your oven, checking for doneness at the earliest recommended bake time.
An oven thermometer can be a game-changer, revealing if your oven runs hot or cold, which directly impacts baking time and moisture retention.
Problem: The Caramel Soaked Through or Made My Cupcakes Soggy
The primary reason for this issue is attempting to fill cupcakes before they are completely cool. Any residual warmth will cause the cake to absorb the caramel. Additionally, ensure your caramel sauce is only gently warmed, not hot, when you pour it in.
Problem: My Frosting is Too Thin or Too Thick
Frosting consistency is easily adjusted. If it’s too thin, gradually beat in more sifted powdered sugar, a tablespoon at a time, until it reaches your desired stiffness. If it’s too thick, add more milk or cream, a teaspoon at a time, until it becomes smooth and pipeable.
Problem: My Cupcakes Sank in the Middle
Cupcakes often sink due to opening the oven door too early, leading to a sudden temperature drop. It can also be caused by an inaccurate oven temperature or expired leavening agents. Ensure your baking powder is fresh and resist the urge to peek during the first 15 minutes of baking.
Planning Ahead: Storage & Make-Ahead Tips for Your Caramel Lava Cupcakes
Proper storage ensures your Caramel Lava Cupcakes remain fresh and delicious, whether you’re enjoying them now or saving them for later.
Keeping Your Cupcakes Fresh
Store frosted Caramel Lava Cupcakes in an airtight container at room temperature for up to 2-3 days. If your kitchen is unusually warm, or for extended freshness beyond that, refrigerate them. For the best texture, always allow refrigerated cupcakes to come to room temperature before serving.
Can You Freeze Caramel Lava Cupcakes?
Yes, freezing is a fantastic way to preserve these treats! For optimal results, it’s best to freeze unfrosted cupcakes. Once completely cooled, wrap each cupcake individually in plastic wrap, then place them in an airtight freezer bag or container. They will keep well for up to 3 months.
When ready to enjoy, thaw them at room temperature. Then, proceed with coring, filling, and frosting as directed in the recipe.
Prepping for Success: Make-Ahead Strategies
You can bake the vanilla cupcakes a day in advance. Once fully cooled, store them, unfrosted and uncovered, at room temperature overnight. Prepare the caramel filling and the vanilla buttercream frosting on the day you plan to serve. Assemble the cupcakes just a few hours before your event for maximum freshness and that delightful “lava” impact.
Beyond the Bite: Creative Serving Ideas
While these Caramel Lava Cupcakes are incredible on their own, a few thoughtful additions can elevate the experience even further.
For an extra layer of pure indulgence, consider serving a warm cupcake alongside a scoop of premium vanilla bean ice cream. The contrast of warm caramel and cold ice cream is truly divine.
A delicate sprinkle of flaky sea salt over the final caramel drizzle can transform the flavor, adding a sophisticated sweet-and-salty counterpoint that delights the palate.
Garnish your masterpieces with a light dusting of cocoa powder, elegant chocolate curls, or even a mini pretzel for a fun, contrasting crunch and an intriguing flavor combination.
For a festive touch, a small dollop of fresh whipped cream on top of the buttercream, perhaps crowned with a maraschino cherry or a fresh raspberry, adds visual appeal and another creamy texture.
Your Caramel Lava Cupcakes Questions Answered
Can I Use Store-Bought Caramel Sauce?
Absolutely! This recipe embraces convenience without sacrificing quality. A high-quality store-bought caramel sauce is perfectly suitable and will yield a delicious “lava” filling. Just ensure it has a good pourable consistency when gently warmed.
How Do I Ensure the Caramel Stays Gooey?
The key to gooey caramel is using a good quality, thicker caramel and only warming it gently. Overheating can thin it out too much, making it prone to soaking. Storing the cupcakes at room temperature (unless your kitchen is very warm) also helps maintain the caramel’s soft, luscious texture.
Can I Make These Gluten-Free or Dairy-Free?
Yes, with appropriate substitutions! For a gluten-free version, use a 1:1 gluten-free all-purpose flour blend. For dairy-free, substitute unsalted butter with a high-quality plant-based butter alternative and use a plant-based milk (like almond or oat milk). Be aware that the texture might vary slightly with these changes.
Can I Make Different Flavors of Cupcakes?
While vanilla provides a classic base, feel free to experiment! A rich chocolate cupcake would create a wonderful pairing with the caramel lava, reminiscent of a molten chocolate cake. A spiced cupcake could also be delightful for an autumn-themed treat, just ensure the cake base isn’t too dense.
Ready to Impress? Share Your Caramel Lava Cupcakes Masterpiece!
You’ve now unlocked the secrets to creating truly exceptional Caramel Lava Cupcakes – a dessert that promises a delightful surprise with every bite. Whether you’re baking for a special occasion, a cozy family gathering, or simply to treat yourself, these decadent treats are guaranteed to be a hit.
We absolutely can’t wait to see your stunning creations! Be sure to share your Caramel Lava Cupcakes on social media and tag us. For more sweet inspiration, explore our wide array of decadent dessert recipes and continue your baking journey!
Caramel Lava Cupcakes: The Gooey Center Secret Revealed!
There was a time when achieving that perfect, decadent molten center in a cupcake felt like a culinary unicorn – elusive and often messy. I once struggled to keep that luscious caramel from either disappearing or making my cupcakes soggy, but I’ve finally cracked the code to truly spectacular Caramel Lava Cupcakes.
This recipe isn’t just about baking; it’s about crafting an edible experience where a warm, gooey caramel surprise spills out with every bite. It’s a game-changer for anyone who loves a dessert that delivers on both flavor and an unforgettable “wow” factor.
Beyond Basic: Why Our Caramel Lava Cupcakes Are a Must-Try
These aren’t just ordinary cupcakes; they’re a dessert sensation. Our method ensures a consistently molten caramel center, a true “lava” effect that stays gooey, never soaking into the cake.
You’ll discover a perfect harmony between the light, fluffy vanilla cupcake and the rich, sweet caramel filling. This balance elevates the entire tasting experience.
Despite their sophisticated appearance, these Caramel Lava Cupcakes are surprisingly easy to prepare. We’ve streamlined the process so anyone can achieve a seemingly complex dessert with confidence.
They are the ultimate treat for any occasion, from casual gatherings to elegant celebrations. Get ready for applause, as these cupcakes consistently impress every palate.
Gather Your Elements: Ingredients for Decadent Caramel Lava Cupcakes
The success of these cupcakes begins with quality ingredients. Each component plays a vital role in creating the perfect balance of texture and flavor.
For the Irresistible Vanilla Cupcakes
All-purpose flour: The foundation for our tender cupcakes. Ensure it’s fresh and accurately measured by spooning into your cup and leveling.
Baking powder: This leavening agent is crucial for a light and airy cupcake. Always check its freshness for optimal rise.
Salt: A small amount of salt enhances the sweetness and balances the overall flavor profile.
Unsalted butter, softened: Room temperature butter creams beautifully, incorporating air for a fluffy texture. Avoid melting it.
Granulated sugar: Provides essential sweetness and contributes to the cupcake’s moist crumb.
Large eggs: Eggs add structure, moisture, and richness. Bring them to room temperature for better emulsion.
Pure vanilla extract: Use a high-quality vanilla extract to infuse your cupcakes with authentic, comforting flavor.
Milk: Adds necessary moisture and contributes to the tender structure of the cupcake. Whole milk is recommended for richness.
Crafting the Molten Caramel Heart
Prepared caramel sauce: This is the star ingredient for our signature “lava” effect. While store-bought works wonderfully for convenience, consider making your own for an extra layer of flavor and pride, much like you might create your own salted caramel swirl brownies from scratch.
The caramel should be rich and possess a pourable consistency when gently warmed, ensuring that perfect gooey core.
Whipping Up the Perfect Vanilla Buttercream
Unsalted butter, softened: Essential for a smooth, creamy frosting. Proper softening ensures it whips up light and airy.
Powdered sugar, sifted: Sifting is key for a lump-free, silky smooth buttercream. It contributes to the frosting’s velvety texture.
Pure vanilla extract: Elevates the frosting with its classic, comforting aroma and taste, perfectly complementing the cupcake.
Milk or cream: Used to adjust the frosting’s consistency. Cream offers a richer, thicker buttercream, while milk results in a lighter finish.
Essential Tools for Your Cupcake Crafting Journey
Having the right equipment ready will make the process of creating these exquisite Caramel Lava Cupcakes smooth and enjoyable.
12-Cup Muffin Tin: Standard for baking evenly sized cupcakes. A good quality tin ensures even heat distribution.
Paper Liners: Crucial for easy cupcake removal and maintaining a clean muffin tin. They also add a neat presentation.
Large and Medium Mixing Bowls: Essential for separating wet and dry ingredients and for combining them effectively without crowding.
Whisk: Used to thoroughly blend dry ingredients, ensuring leavening agents are evenly distributed throughout the flour mixture.
Electric Mixer (Stand or Handheld): Indispensable for creaming butter and sugar, and for whipping the buttercream to a light, fluffy consistency.
Rubber Spatula: Perfect for scraping down the sides of bowls, ensuring all ingredients are incorporated, and gently folding batter.
Wire Rack: Necessary for cooling cupcakes completely, allowing air circulation to prevent soggy bottoms and maintain texture.
Cupcake Corer or Small Paring Knife: This tool is central to creating the perfect well for your caramel lava. A corer provides uniformity, while a knife offers more flexibility.
Piping Bag with a Large Tip (optional): For a neat and professional application of frosting. A small offset spatula can also work beautifully for spreading.
Measuring Cups and Spoons: Accuracy in measuring ingredients is foundational to successful baking. Always level off dry ingredients for consistent results.
Baking Brilliance: Your Step-by-Step Caramel Lava Cupcakes Guide
Follow these detailed steps carefully, paying attention to the nuances that will transform simple ingredients into extraordinary Caramel Lava Cupcakes.
- Prepare Your Workspace:
Preheat your oven to 350°F (175°C). An accurately preheated oven ensures your cupcakes bake evenly from the start. Line a 12-cup muffin tin with paper liners to prevent sticking and simplify cleanup.
- Combine Dry Ingredients:
In a medium bowl, whisk together the all-purpose flour, baking powder, and salt. This step is vital for aerating the dry ingredients and ensuring the leavening agent is evenly distributed, leading to a consistent rise.
- Cream Butter and Sugar:
In a large bowl, using an electric mixer, cream the softened unsalted butter and granulated sugar until the mixture is light, fluffy, and noticeably pale. This process incorporates air into the batter, which is fundamental for achieving a tender, open crumb in your cupcakes.
- Incorporate Eggs and Vanilla:
Beat in the large eggs one at a time, mixing thoroughly after each addition until fully incorporated. Adding eggs individually helps emulsify them into the fat, creating a stable batter. Stir in the pure vanilla extract, ensuring it’s well blended for maximum flavor depth.
- Alternating Wet and Dry:
Gradually add the dry ingredients to the wet, alternating with the milk. Always begin and end with the dry ingredients. Mix on low speed only until just combined; overmixing will develop gluten, resulting in tough, dense cupcakes instead of light and tender ones.
- Fill Cupcake Liners:
Divide the batter evenly among your prepared muffin cups, filling each approximately two-thirds full. This allows ample space for the cupcakes to rise beautifully without overflowing their liners.
- Bake to Perfection:
Bake for 18 to 22 minutes, or until a wooden skewer or toothpick inserted into the center of a cupcake comes out clean. This indicates they are thoroughly cooked. Avoid opening the oven door during the initial baking period to prevent the cupcakes from sinking.
- Cool Completely:
Remove cupcakes from the oven and let them cool in the muffin tin for a few minutes before transferring them to a wire rack. Ensuring they are fully cooled is absolutely essential before filling; warm cupcakes will cause the caramel to melt and be absorbed, leading to a soggy texture.
- Core for the Lava:
Once the cupcakes are completely cool, use a small paring knife or a specialized cupcake corer to carefully cut a small cone-shaped hole from the center of each cupcake. Be careful not to cut all the way through to the bottom. Reserve the small cake pieces you removed.
- Warm the Caramel:
Gently warm the prepared caramel sauce slightly. It should be pourable and smooth, but crucially, not hot. The perfect warmth allows the caramel to flow easily into the cored cupcakes, creating that signature “lava” effect without compromising the cake’s structure.
- Fill and Cap:
Carefully spoon or pipe the warmed caramel sauce into each cored-out cupcake, filling it almost to the top. Break off a small piece from the reserved cake cones and use it to cap the top of the caramel filling. This simple trick helps contain the caramel and provides a stable, flat surface for your frosting.
- Prepare the Buttercream:
For the Vanilla Buttercream Frosting: In a large bowl, beat the softened butter with an electric mixer until it’s creamy and smooth. Gradually add the sifted powdered sugar, alternating with the milk or cream and vanilla extract, beating until the frosting is light, smooth, and fluffy.
If the frosting is too thick, incorporate a bit more milk or cream (a teaspoon at a time); if too thin, beat in a bit more sifted powdered sugar until you achieve the desired consistency for piping or spreading.
- Frost Your Masterpiece:
Pipe or spread the vanilla buttercream generously onto each cupcake. Feel free to get creative with your frosting technique, whether it’s an elegant swirl with a piping bag or a rustic dollop with an offset spatula.
- The Final Drizzle:
Just before serving, drizzle any remaining warmed caramel sauce over the frosted cupcakes for that irresistible “lava” look. This adds both visual appeal and reinforces the delicious caramel theme.
Chef’s Secrets: Elevate Your Caramel Lava Cupcakes Game
Unlock the full potential of your baking with these expert tips designed to ensure perfect results every time.
Don’t Overmix the Batter: After combining wet and dry ingredients, mix only until just incorporated. Overmixing develops gluten, which can lead to tough, chewy cupcakes rather than the desired light and tender texture.
Cooling is Crucial: Patience truly is a virtue here! Ensure your cupcakes are completely cool, preferably for at least an hour, before attempting to core and fill them. Filling warm cupcakes will cause the caramel to melt and soak into the cake, resulting in a soggy, disappointing outcome.
The Right Caramel Consistency: The perfect “lava” flow comes from caramel that’s gently warmed and pourable, but not hot or watery. If it’s too thin, it will quickly absorb; too thick, and it won’t have that satisfying molten quality. Aim for a consistency similar to warm honey.
Capping the Caramel: Using the small reserved cake pieces to cap the caramel filling is a brilliant, professional trick. This not only keeps the caramel contained within the cupcake but also provides a stable, flat surface for your frosting, ensuring a neat finish.
Sift Your Powdered Sugar: For the silkiest, smoothest buttercream frosting, always take the extra minute to sift your powdered sugar. This prevents any lumps and guarantees a wonderfully creamy texture that pipes beautifully.
Solving Sweet Dilemmas: Common Cupcake Challenges & Fixes
Even seasoned bakers encounter hiccups. Here are solutions to common issues you might face when making your Caramel Lava Cupcakes.
Problem: My Cupcakes Are Dry or Crumbly
This is often a sign of overmixing the batter or overbaking. Mix the batter only until the ingredients are just combined, and keep a close eye on your oven, checking for doneness at the earliest recommended bake time.
An oven thermometer can be a game-changer, revealing if your oven runs hot or cold, which directly impacts baking time and moisture retention, much like knowing the secrets to a decadent chocolate cake that’s never dry.
Problem: The Caramel Soaked Through or Made My Cupcakes Soggy
The primary reason for this issue is attempting to fill cupcakes before they are completely cool. Any residual warmth will cause the cake to absorb the caramel. Additionally, ensure your caramel sauce is only gently warmed, not hot, when you pour it in.
Problem: My Frosting is Too Thin or Too Thick
Frosting consistency is easily adjusted. If it’s too thin, gradually beat in more sifted powdered sugar, a tablespoon at a time, until it reaches your desired stiffness. If it’s too thick, add more milk or cream, a teaspoon at a time, until it becomes smooth and pipeable.
Problem: My Cupcakes Sank in the Middle
Cupcakes often sink due to opening the oven door too early, leading to a sudden temperature drop. It can also be caused by an inaccurate oven temperature or expired leavening agents. Ensure your baking powder is fresh and resist the urge to peek during the first 15 minutes of baking.
Planning Ahead: Storage & Make-Ahead Tips for Your Caramel Lava Cupcakes
Proper storage ensures your Caramel Lava Cupcakes remain fresh and delicious, whether you’re enjoying them now or saving them for later.
Keeping Your Cupcakes Fresh
Store frosted Caramel Lava Cupcakes in an airtight container at room temperature for up to 2-3 days. If your kitchen is unusually warm, or for extended freshness beyond that, refrigerate them. For the best texture, always allow refrigerated cupcakes to come to room temperature before serving.
Can You Freeze Caramel Lava Cupcakes?
Yes, freezing is a fantastic way to preserve these treats! For optimal results, it’s best to freeze unfrosted cupcakes. Once completely cooled, wrap each cupcake individually in plastic wrap, then place them in an airtight freezer bag or container. They will keep well for up to 3 months.
When ready to enjoy, thaw them at room temperature. Then, proceed with coring, filling, and frosting as directed in the recipe.
Prepping for Success: Make-Ahead Strategies
You can bake the vanilla cupcakes a day in advance. Once fully cooled, store them, unfrosted and uncovered, at room temperature overnight. Prepare the caramel filling and the vanilla buttercream frosting on the day you plan to serve. Assemble the cupcakes just a few hours before your event for maximum freshness and that delightful “lava” impact.
Beyond the Bite: Creative Serving Ideas
While these Caramel Lava Cupcakes are incredible on their own, a few thoughtful additions can elevate the experience even further.
For an extra layer of pure indulgence, consider serving a warm cupcake alongside a scoop of premium vanilla bean ice cream. The contrast of warm caramel and cold ice cream is truly divine.
A delicate sprinkle of flaky sea salt over the final caramel drizzle can transform the flavor, adding a sophisticated sweet-and-salty counterpoint that delights the palate.
Garnish your masterpieces with a light dusting of cocoa powder, elegant chocolate curls, or even a mini pretzel for a fun, contrasting crunch and an intriguing flavor combination.
For a festive touch, a small dollop of fresh whipped cream on top of the buttercream, perhaps crowned with a maraschino cherry or a fresh raspberry, adds visual appeal and another creamy texture.
Your Caramel Lava Cupcakes Questions Answered
Can I Use Store-Bought Caramel Sauce?
Absolutely! This recipe embraces convenience without sacrificing quality. A high-quality store-bought caramel sauce is perfectly suitable and will yield a delicious “lava” filling. Just ensure it has a good pourable consistency when gently warmed.
How Do I Ensure the Caramel Stays Gooey?
The key to gooey caramel is using a good quality, thicker caramel and only warming it gently. Overheating can thin it out too much, making it prone to soaking. Storing the cupcakes at room temperature (unless your kitchen is very warm) also helps maintain the caramel’s soft, luscious texture.
Can I Make These Gluten-Free or Dairy-Free?
Yes, with appropriate substitutions! For a gluten-free version, use a 1:1 gluten-free all-purpose flour blend. For dairy-free, substitute unsalted butter with a high-quality plant-based butter alternative and use a plant-based milk (like almond or oat milk). Be aware that the texture might vary slightly with these changes.
Can I Make Different Flavors of Cupcakes?
While vanilla provides a classic base, feel free to experiment! A rich chocolate cupcake would create a wonderful pairing with the caramel lava, reminiscent of a molten chocolate cake. A spiced cupcake could also be delightful for an autumn-themed treat, just ensure the cake base isn’t too dense, so it can hold the caramel filling well.
Ready to Impress? Share Your Caramel Lava Cupcakes Masterpiece!
You’ve now unlocked the secrets to creating truly exceptional Caramel Lava Cupcakes – a dessert that promises a delightful surprise with every bite. Whether you’re baking for a special occasion, a cozy family gathering, or simply to treat yourself, these decadent treats are guaranteed to be a hit.
We absolutely can’t wait to see your stunning creations! Be sure to share your Caramel Lava Cupcakes on social media and tag us. For more sweet inspiration, explore our wide array of decadent dessert recipes and continue your baking journey!
Caramel Lava Cupcakes
Course: DessertCuisine: American CuisineDifficulty: easy12
cupcakes20
minutes18
minutes60
minutesAmerican Cuisine
Ingredients
For the Vanilla Cupcakes:
1 1/2 cups all-purpose flour
1 1/2 teaspoons baking powder
1/4 teaspoon salt
1/2 cup (1 stick) unsalted butter, softened
1 cup granulated sugar
2 large eggs
1 teaspoon pure vanilla extract
1/2 cup milk
For the Caramel Filling:
1 cup prepared caramel sauce
For the Vanilla Buttercream Frosting:
1/2 cup (1 stick) unsalted butter, softened
2 cups powdered sugar, sifted
1 teaspoon pure vanilla extract
2 to 3 tablespoons milk or cream
Directions
- Preheat oven to 350°F (175°C). Line a 12-cup muffin tin with paper liners.
- In a medium bowl, whisk together the flour, baking powder, and salt. Set aside.
- In a large bowl, cream together the softened butter and granulated sugar until light and fluffy.
- Beat in the eggs one at a time, mixing well after each addition. Stir in the vanilla extract.
- Gradually add the dry ingredients to the wet ingredients, alternating with the milk, beginning and ending with the dry ingredients. Mix until just combined. Do not overmix.
- Divide the batter evenly among the prepared muffin cups, filling each about two-thirds full.
- Bake for 18 to 22 minutes, or until a wooden skewer inserted into the center of a cupcake comes out clean.
- Remove cupcakes from the oven and let them cool in the muffin tin for a few minutes before transferring them to a wire rack to cool completely. Ensuring they are fully cooled is essential for the filling process.
- To create the gooey center: Once the cupcakes are completely cool, use a small paring knife or a cupcake corer to carefully cut a small cone-shaped hole from the center of each cupcake. Be careful not to cut all the way through to the bottom. Reserve the small cake pieces you removed.
- Gently warm the prepared caramel sauce slightly. It should be pourable and smooth, but not hot. Just warm enough to flow easily for that perfect “lava” effect.
- Carefully spoon or pipe the warmed caramel sauce into each cored-out cupcake, filling it almost to the top. Break off a small piece from the reserved cake cones and use it to cap the top of the caramel filling. This helps contain the caramel and creates a flat surface for frosting.
- For the Vanilla Buttercream Frosting: In a large bowl, beat the softened butter until creamy. Gradually add the sifted powdered sugar, alternating with the milk or cream and vanilla extract, until smooth and fluffy. If the frosting is too thick, add a bit more milk; if too thin, add more powdered sugar.
- Pipe or spread the frosting generously onto each cupcake.
- Drizzle any remaining warmed caramel sauce over the frosted cupcakes just before serving for that irresistible “lava” look.
Notes
- Ensure cupcakes are completely cool before coring for best results with the caramel filling.