

There’s a special kind of kitchen disappointment that hits when you’ve spent time making delicious pastries, only to watch their glorious, gooey filling erupt all over your baking sheet. It’s a tragedy of leaked cheese and sad, deflated pockets of dough!
If you’ve ever faced the heartbreak of a cheesy chicken empanada filling escaping its pastry prison, you’re not alone. I’ve been there, wrestling with sticky messes and less-than-perfect results. But guess what? I finally cracked the code! There’s a simple, almost laughably easy secret to ensuring your cheesy chicken empanadas stay perfectly sealed, keeping all that wonderful cheesy goodness locked inside where it belongs.
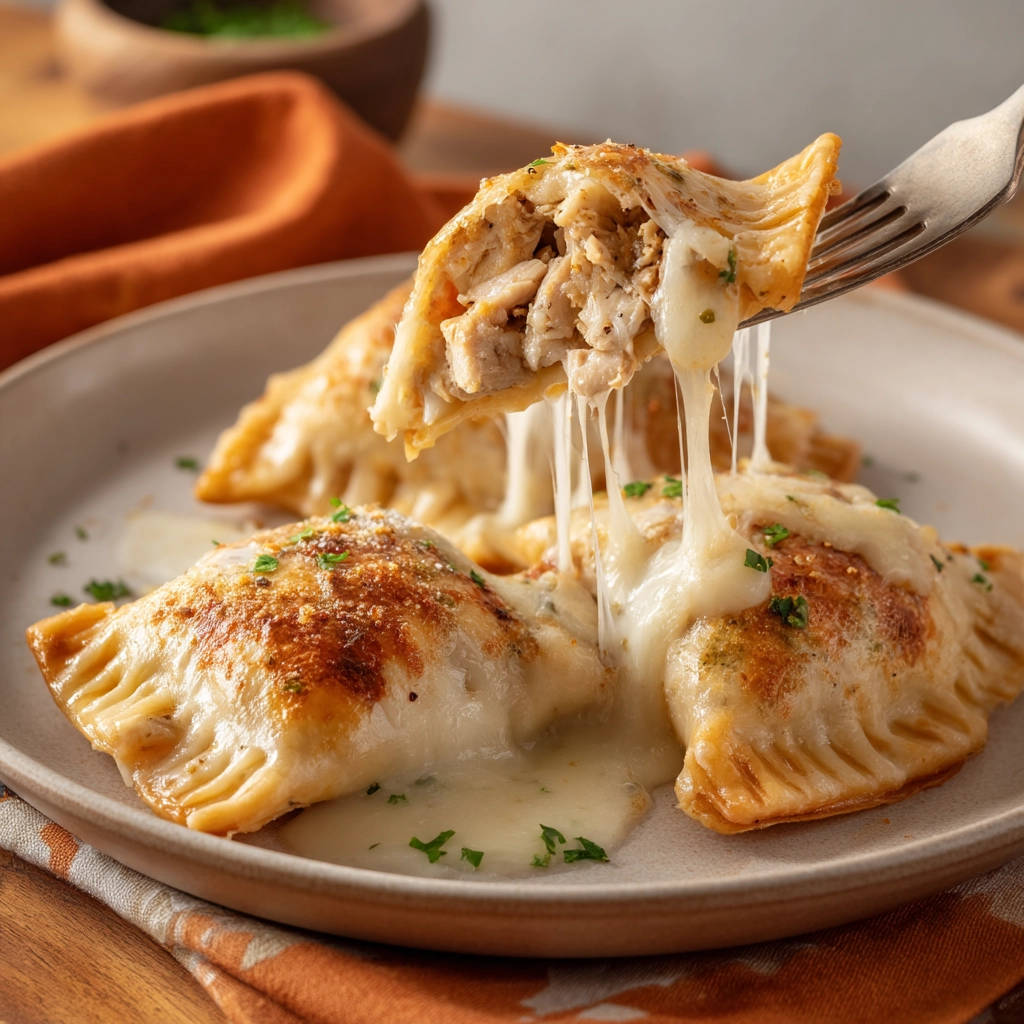
This recipe isn’t just about flavor – though it’s packed with it! It’s about mastering that crucial seal so you get a beautiful, golden pastry yielding to a truly gooey, cheesy chicken center every single time. Ready to ditch the leaks and bake up some perfection?
Why You’ll Love Making These Cheesy Chicken Empanadas
Beyond the guaranteed gooey center (which is a HUGE win!), these cheesy chicken empanadas are absolute crowd-pleasers and a joy to make. Here’s why they’re destined to become a favorite:
- No More Leaks: Seriously, the simple trick in this recipe is a game-changer. Say goodbye to messy pans and lost filling!
- Quick & Easy: Using pre-made pastry discs significantly cuts down on prep time, making this a weeknight-friendly option.
- Simple Ingredients: You only need a handful of readily available items to create something truly special.
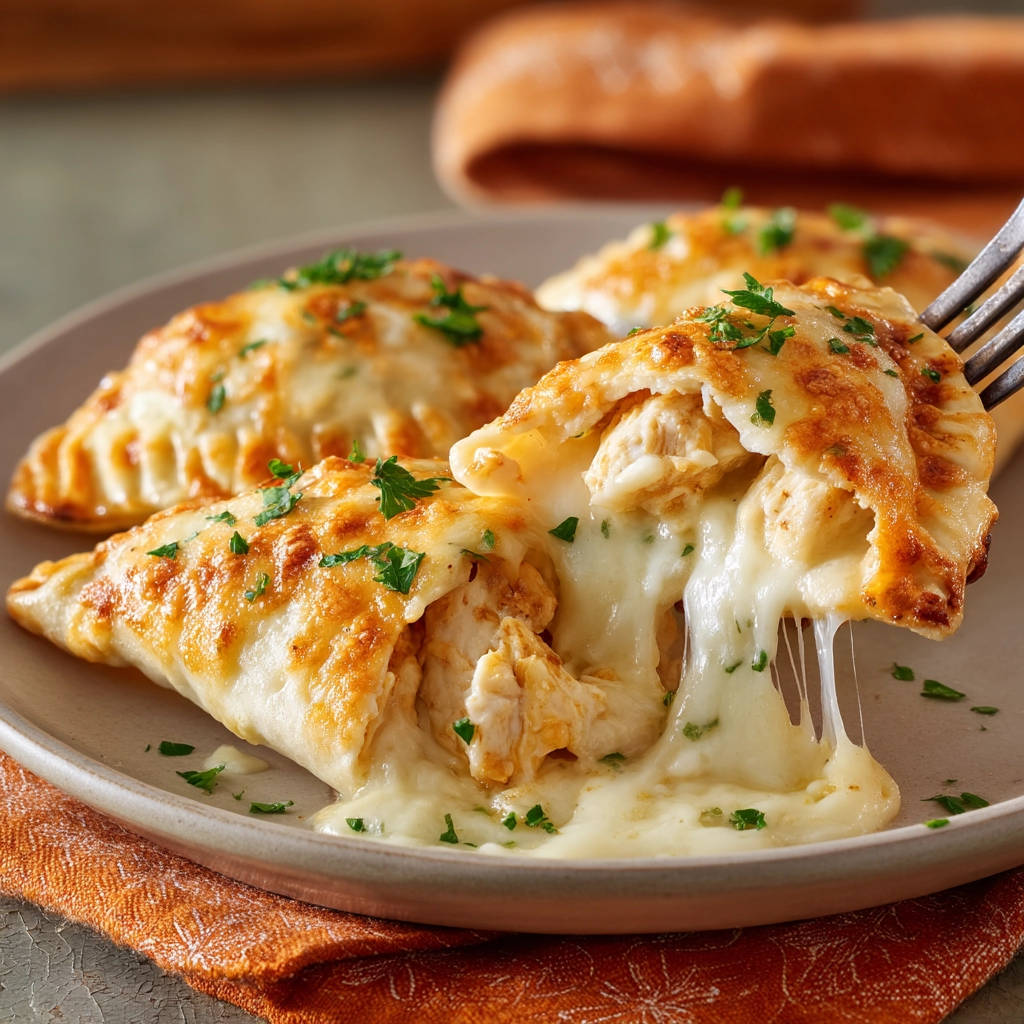
- Ultimate Comfort Food: Warm pastry, savory chicken, and lots of melted cheese? Pure bliss in every bite!
- Perfectly Portable: Empanadas are fantastic for lunches, picnics, parties, or just grabbing a warm snack straight from the oven.
Gathering Your Ingredients for Gooey Cheesy Chicken Empanadas
One of the best things about this recipe is its simplicity. You don’t need a long list of fancy items to achieve incredible flavor and that dreamy, gooey texture. Each ingredient plays a vital role in creating the perfect cheesy chicken empanada.
- Cooked Shredded Chicken (1 cup): This is the protein powerhouse of our filling. Using pre-cooked chicken (like rotisserie chicken, leftover baked chicken, or chicken you quickly boiled and shredded) makes this recipe incredibly fast. Shredding it finely helps it mix evenly with the cheese and pack nicely into the pastry.
- Shredded Mozzarella Cheese (1.5 cups) (or your favorite melty cheese blend): Ah, the star of the “gooey” show! Mozzarella is a classic for its incredible meltability and stretch factor. Don’t be shy with it – 1.5 cups ensures maximum cheesy goodness. Feel free to experiment with other great melting cheeses like Monterey Jack, a cheddar blend, or even a touch of provolone for different flavor profiles. The key is using a cheese or blend that melts smoothly.
- Salt (1/4 teaspoon) & Black Pepper (1/8 teaspoon): Simple seasonings are all you need to enhance the natural flavors of the chicken and cheese. Adjust these to your personal taste!
- Pre-made Empanada or Pie Crust Discs (6 discs, about 6-inch diameter): This is where the convenience comes in! Using store-bought discs saves loads of time. Look for discs specifically marketed for empanadas, or standard pie crust discs cut into circles. Ensure they are thawed according to package directions but still cold – cold dough is easier to work with.
- Large Egg (1), whisked: This is for our egg wash. Brushing the tops of the empanadas before baking gives them that beautiful golden-brown, slightly glossy finish. It really elevates their appearance.
- Fresh Parsley, chopped, for garnish: A little sprinkle of fresh green at the end adds a pop of color and a touch of freshness, balancing the richness of the filling. Totally optional, but highly recommended!
That’s it! Just a few simple items stand between you and a batch of utterly delicious cheesy chicken empanadas.
Crafting Your Cheesy Chicken Empanadas: Step-by-Step Perfection
Alright, let’s turn these simple ingredients into those irresistible pockets of cheesy chicken delight. Don’t worry, even if you’re new to making empanadas, this process is straightforward, and I’ll walk you through the crucial sealing step!
Prep Your Baking Space: Start by preheating your oven to 400 degrees Fahrenheit (200 degrees Celsius). High heat helps the pastry crisp up beautifully. Line a standard baking sheet with parchment paper. This prevents sticking and makes for super easy cleanup – a win-win in my book!
Mix the Gooey Filling: Grab a medium-sized mixing bowl. Add your cup of cooked shredded chicken, the generous 1.5 cups of shredded melty cheese, the salt, and the black pepper. Use a spoon or fork to gently combine everything. You want the chicken and cheese distributed evenly, but you don’t need to overwork it. Keep it simple.
Prepare the Pastry Discs: Lay your six thawed pastry discs out on a clean, dry surface, like your countertop or a large cutting board. Make sure they are flat and ready to be filled. If they’ve been sitting out for a while, they might be a little soft; working with slightly chilled dough is always best.
Fill with Care (Don’t Overdo It!): This is where precision helps prevent blowouts later. Place about 1/3 cup of the chicken and cheese mixture onto one half of each pastry disc. Imagine drawing a line down the center, and keep the filling to just one side. Crucially, leave a border of about 1/2 inch clean dough around the edge. This empty space is vital for creating a strong seal. Overfilling is a common mistake that leads to leaks, so resist the urge to pack in too much!
The Secret Seal – Moisten the Edge: Here it is! The simple magic trick to no more leaky cheese. Dip your finger in a little bit of water. Run your slightly wet fingertip all the way around the clean edge of the pastry disc that does not have the filling on it. Just a light touch of moisture is all you need – it acts like glue for the dough.
Fold and Seal Firmly: Now, carefully fold the unfilled, moistened half of the dough over the filling, bringing the edges together to meet the edge of the filled side. It should form a beautiful crescent shape. Once the edges meet, press them together firmly with your fingers all the way around the curve. Then, for extra security and that classic look, use the tines of a fork to crimp the edges. Press the fork down firmly along the sealed edge, ensuring there are absolutely no gaps or weak spots. A good, tight seal here is paramount for keeping that gooey filling inside during baking!
Arrange on the Baking Sheet: Carefully transfer each sealed empanada to the prepared baking sheet lined with parchment paper. Leave a little space between them so they bake evenly.
Apply the Egg Wash: Take your whisked large egg and a pastry brush. Lightly brush the tops and sides of each empanada with the egg wash. This helps them achieve that beautiful, appetizing golden-brown color and adds a slight sheen.
Bake to Golden Perfection: Slide the baking sheet into your preheated 400°F (200°C) oven. Bake for 20-25 minutes. Keep an eye on them; you’re looking for the pastry to be a deep golden brown and the filling to be heated through and bubbly (you might even see some glorious bubbling cheese peeking through the pastry!). For an extra touch of cheesy heaven, you can sprinkle a little extra shredded cheese on top during the last 5-7 minutes of baking, just like in the pictures you see online!
Cool Slightly and Garnish: Once they’re perfectly golden, carefully remove the empanadas from the oven. Let them cool on the baking sheet for just a few minutes before serving. They will be piping hot, especially the cheese inside! A final sprinkle of fresh chopped parsley adds a lovely touch of color and freshness before you dive in. Prepare for the glorious, perfectly gooey, non-leaky centers!
There you have it! Follow these steps, paying special attention to that simple moistening and firm sealing technique, and you’ll be rewarded with perfect cheesy chicken empanadas every single time.
Tips for Perfect Cheesy Chicken Empanadas Every Time
Achieving empanada perfection is simple, but a few extra tips can make your experience even better and open up possibilities for variations.
- Don’t Skip the Water Seal: Seriously, this is the number one trick. The little bit of water creates a stickiness that helps the dough edges fuse together much better than just pressing them dry.
- Keep the Dough Cold: Cold pastry dough is easier to handle and less likely to tear or get sticky when filling and sealing. If your discs get too soft while you’re working, pop them back in the fridge for a few minutes.
- Chill the Filling (Optional but Helpful): If your filling is very warm or just mixed, chilling it for 10-15 minutes can make it easier to scoop and portion neatly onto the dough discs without making them too warm or soft.
- Experiment with Cheese: While mozzarella is fantastic for its melt, try adding a little sharp cheddar for tang, Monterey Jack for creaminess, or even a smoked cheese for depth of flavor. A blend often gives the best results. Just ensure the majority is a good melter like mozzarella.
- Vary the Filling: This basic cheesy chicken base is incredibly versatile. You could add finely diced sautéed onions, bell peppers, corn, or even some black beans for extra flavor and texture. Just make sure any additions are cooked and drained well to avoid adding excess moisture to the filling.
- Spice It Up: For a little kick, mix in a pinch of chili powder, a dash of hot sauce, or some finely chopped pickled jalapeños into the filling mixture.
- Make Ahead: You can assemble the empanadas up to a day ahead of time. Place the unbaked, egg-washed empanadas on a parchment-lined baking sheet, cover tightly with plastic wrap, and refrigerate. You might need to add a minute or two to the baking time.
- Freezing Instructions: Empanadas freeze beautifully! Assemble them, place them on a baking sheet (don’t let them touch), and freeze until solid. Then, transfer the frozen empanadas to a freezer-safe bag or container. Bake from frozen, adding about 5-10 minutes to the bake time, or until golden brown and heated through. No need to thaw!
What to Serve With Your Cheesy Chicken Empanadas
Cheesy chicken empanadas are hearty enough to stand alone, but they pair wonderfully with various sides and dipping sauces to make a complete meal or party spread. For a lighter pairing, consider a fresh, vibrant salad. Our Easy Kale Salad or a simple creamy coleslaw provides a nice contrast to the warm pastry and rich filling. If you’re looking for a more substantial side, some perfectly cooked potatoes or a grain dish would be excellent. Maybe a side of our Easy Pan-Fried Potatoes or even some Easy Mexican Rice if you lean into a more Tex-Mex vibe with your seasoning!
Dipping sauces are also a must for many people! Classic options include sour cream, salsa, guacamole (Perfect Guacamole anyone?), or even a simple sweet chili sauce. Get creative with your dipping choices!
Your Cheesy Chicken Empanada Questions Answered (FAQ)
Let’s tackle some common questions that might pop up when you’re making these delicious cheesy chicken empanadas.
Can I use homemade dough instead of pre-made discs?
Absolutely! If you have a favorite empanada or pie dough recipe you love to make from scratch, you can definitely use that. Just ensure you roll it out to about 1/8-inch thickness and cut it into roughly 6-inch circles. The key sealing technique (moistening the edge with water) still applies regardless of whether the dough is homemade or store-bought.
My dough is cracking when I try to fold it. What’s wrong?
If your dough is cracking, it’s likely too cold or hasn’t been properly thawed. Let the discs sit at room temperature for a few more minutes until they are pliable but still cool to the touch. Don’t microwave them, as this can cook them unevenly and make them tough. Gently working the edges of the disc a little with your fingers before filling can also help make them more flexible.
Can I make these in an air fryer?
Yes, you can! Air frying is a great alternative for a slightly crispier finish. Preheat your air fryer to around 375°F (190°C). Place the empanadas in a single layer in the air fryer basket, making sure not to overcrowd them. Air fry for 10-15 minutes, flipping halfway through, until golden brown and heated through. Cooking times can vary depending on your air fryer model, so keep a close eye on them.
How should I store leftover cheesy chicken empanadas?
Allow the empanadas to cool completely, then store them in an airtight container in the refrigerator for up to 3-4 days. To reheat, you can use the oven (about 10-15 minutes at 350°F/175°C) or an air fryer to help the pastry crisp up again. Microwaving will heat the filling but can make the pastry soft.
Can I add other ingredients to the filling?
Certainly! As mentioned in the tips, feel free to customize the filling. Finely chopped sautéed onions, garlic, bell peppers, mushrooms, or even a little cooked corn or black beans can add delicious complexity. Ensure any vegetable additions are cooked and excess moisture is removed before adding them to the chicken and cheese mixture to prevent the filling from becoming too wet.
Enjoy Your Homemade Cheesy Chicken Empanadas!
There you have it – the simple secret to perfect, non-leaky cheesy chicken empanadas, along with everything you need to make them! This recipe is a true winner, whether you’re whipping up a batch for a quick snack, a casual dinner, or an appetizer for friends. The combination of crispy pastry and that gloriously gooey, cheesy chicken filling is simply irresistible.
Give this recipe a try and experience the joy of a perfectly sealed empanada! Don’t forget to leave a comment below and let me know how yours turned out, especially if you tried any fun variations. Happy baking!
Cheesy Chicken Empanadas
Ingredients
- 1 cup cooked shredded chicken
- 1.5 cups shredded mozzarella cheese (or your favorite melty cheese blend)
- 1/4 teaspoon salt
- 1/8 teaspoon black pepper
- 6 pre-made empanada or pie crust discs (about 6-inch diameter)
- 1 large egg, whisked
- Fresh parsley, chopped, for garnish
Directions
- Preheat oven to 400 degrees Fahrenheit (200 degrees Celsius). Line a baking sheet with parchment paper.
- In a medium bowl, combine the shredded chicken, shredded cheese, salt, and pepper. Mix gently to combine the filling.
- Lay out the pastry discs on a clean surface. Place about 1/3 cup of the chicken and cheese filling on one half of each disc, leaving about a 1/2 inch border around the edge. It’s important not to overfill; leave space for sealing.
- This is the key to keeping the inside gooey: Lightly moisten the edge of the pastry dough with a little bit of water using your finger. This creates a seal.
- Fold the dough over the filling, bringing the edges together to form a crescent shape.
- Press the edges firmly together to seal. You can use a fork to crimp the edges all the way around. Ensure there are no gaps for the filling to escape during baking. A good seal is crucial!
- Place the sealed empanadas on the prepared baking sheet.
- Brush the tops of the empanadas lightly with the whisked egg wash. This helps with browning and creates a nice finish.
- Bake for 20-25 minutes, or until the empanadas are golden brown and the filling is heated through. For extra cheesy tops like the picture, you can sprinkle a little extra cheese on top during the last 5-7 minutes of baking.
- Let cool slightly before serving. Garnish with fresh chopped parsley. Enjoy the perfectly gooey, non-leaky centers!


