
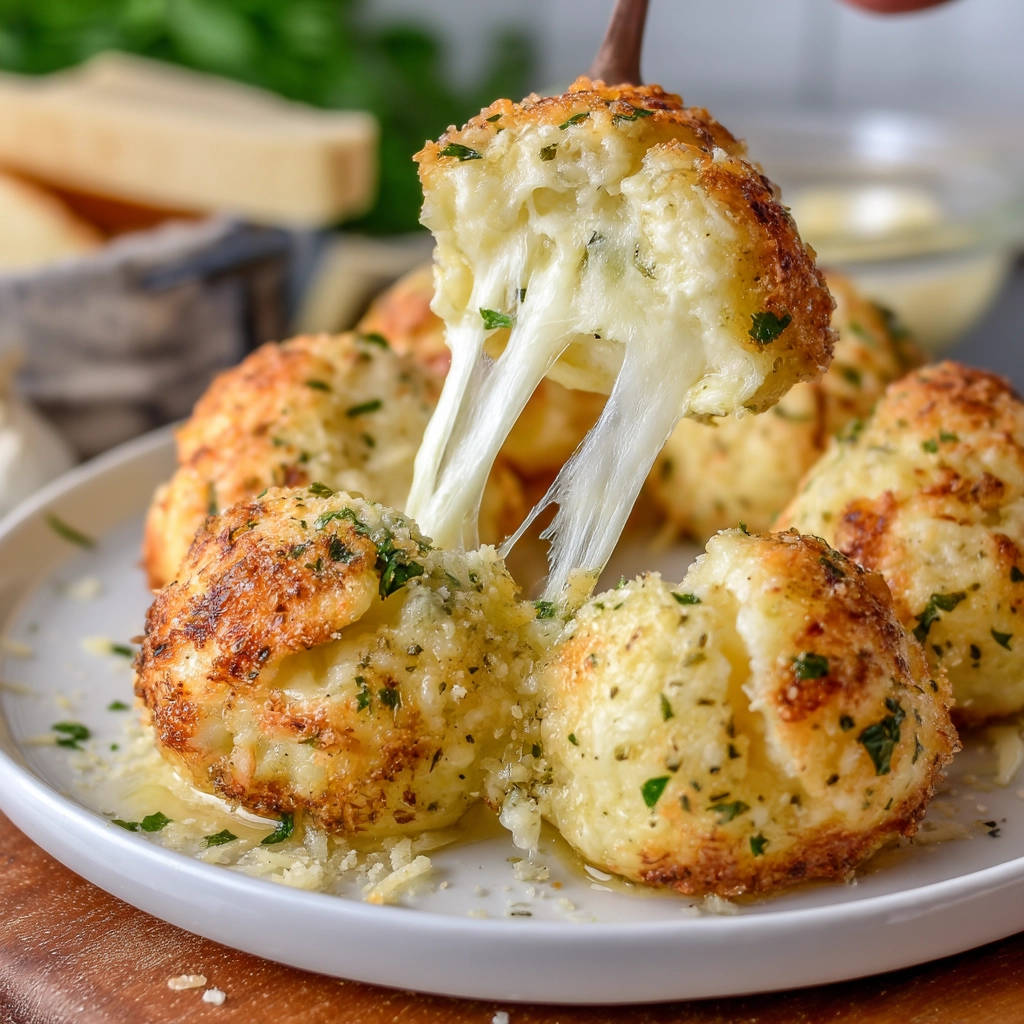
Oh, the glorious cheese pull! Isn’t it one of the most satisfying things in the kitchen? That moment you break apart a warm, freshly baked bite and watch the melted cheese stretch, stretch, stretch… But let’s be real, achieving that picture-perfect cheese pull every single time can feel like culinary magic. Sometimes, despite your best efforts, the cheese just breaks instead of stretching.
If you’ve ever been disappointed by a cheesy bite that failed to deliver on its gooey promise, you are absolutely not alone. I’ve been there! Over years of tinkering and testing, I finally landed on a super simple method for these Cheesy Garlic Bites that guarantees an epic cheese pull, guaranteed. Get ready to impress yourself and everyone lucky enough to snag one!
Why You’ll Absolutely Love These Cheesy Garlic Bites
These aren’t just any cheesy bites; they are specifically engineered for maximum pull and flavor! Here’s why they’re about to become your new favorite:
- Guaranteed Cheese Pull: Seriously. The method ensures the cheese is perfectly contained and melts into a stretchy dream.
- Incredibly Easy: We’re talking minimal ingredients and steps, perfect for beginners or seasoned pros alike.
- Crowd-Pleaser: Who can resist warm, garlicky, cheesy bread? These disappear in minutes at any gathering.
- Quick Prep & Bake: From start to finish, you can have these ready in under 30 minutes.
- Adaptable: Easy to customize with your favorite herbs or a touch of spice.
Whether you need a last-minute party appetizer, a fun snack for movie night, or just a delicious side dish for pasta or soup, these cheesy garlic bites are your answer. They’re right up there with other easy-to-make savory snacks like sausage and cheese balls or even the addictive pepperoni pizza bites.
Gathering Your Ingredients for Cheesy Garlic Bites
The beauty of this recipe lies in its simplicity. We use readily available ingredients that combine to create a powerhouse of flavor and that all-important texture. You won’t need a long list of pantry staples; just a few key players bring this delicious appetizer to life.
Here’s what you’ll need and why:

- Refrigerated Biscuit Dough: We start with one 16.3-ounce can of refrigerated biscuit dough. This is our easy shortcut to a soft, fluffy bread base without needing to mix, knead, or proof yeast dough. It’s perfectly portioned and bakes up beautifully.
- Mozzarella Cheese: About 8 ounces of mozzarella is needed. This is the star of the cheese pull show! Mozzarella has excellent melting properties and stretches wonderfully when hot. The crucial part here is to cut it into 12-15 individual cubes, roughly 1/2 to 3/4 inch in size. Using cubes rather than shredded cheese is a key part of our guaranteed pull method, as it creates a solid pocket of cheese ready to melt uniformly inside the dough.
- Grated Parmesan Cheese: You’ll want about 1/4 cup of grated Parmesan. This adds a sharp, salty, nutty flavor layer to the outside of the bites, complementing the mild mozzarella beautifully.
- Melted Butter: About 1/4 cup of melted butter is the base for our glorious garlic coating. It provides richness and helps carry the garlic and herb flavors, plus it helps the Parmesan coating stick.
- Fresh Garlic: Don’t skimp here! Two cloves of freshly minced garlic are essential for that pungent, classic garlic bread aroma and taste. Fresh is always best for maximum flavor impact.
- Fresh Parsley: You’ll need 2 tablespoons of freshly chopped parsley. Dividing this between the butter mixture and the Parmesan coating adds vibrant color and a fresh, herbaceous note that cuts through the richness.
- Red Pepper Flakes (Optional): A pinch of red pepper flakes adds just a touch of warmth and subtle heat, elevating the flavor profile without making it overly spicy. If you prefer no heat, simply leave them out.
Having these simple ingredients prepped and ready makes the assembly process smooth and quick.
Crafting Your Cheesy Garlic Bites: Step-by-Step for the Perfect Pull
Ready to make some cheesy magic? Follow these steps closely, paying special attention to the dough-wrapping part – that’s where the guaranteed cheese pull comes from!
- Get the Oven Ready: First things first, let’s preheat your oven. Set it to 375 degrees F (190 degrees C). This moderate temperature is perfect for cooking the biscuit dough through without burning the outside, allowing the cheese inside ample time to melt properly. As the oven heats, line a standard baking sheet with parchment paper. This prevents sticking and makes cleanup a breeze.
- Prep the Dough Portions: Open up that can of refrigerated biscuit dough. Separate the individual biscuits. Depending on the brand, you’ll likely have 8 biscuits in a standard 16.3 oz can. For this recipe, we need smaller portions, so take each biscuit and cut it in half horizontally. This should give you 16 pieces of dough, ready for stuffing. Having smaller, uniform pieces helps ensure consistent baking and bite-size portions.
- The Secret to the Cheese Pull – Stuffing!: This is the most crucial step for achieving that amazing cheese pull. Take one of your halved biscuit dough pieces and flatten it slightly into a small disc or square using your fingers. It doesn’t need to be perfectly round. Place one cube of mozzarella cheese right in the center of the flattened dough. Now, carefully gather the edges of the dough up and over the cheese cube. Bring them together at the top, completely enclosing the cheese. Pinch and seal the seams very tightly. You want to form a tight, seamless ball with no gaps where the cheese could escape. Any little hole means melted cheese will leak out instead of staying trapped, ready to stretch. Repeat this process with all the dough pieces and cheese cubes. Take your time here – a good seal is the key!
- Whip Up the Garlic Butter: In a small bowl, melt your 1/4 cup of butter. Add the 2 cloves of minced garlic, about half of your chopped fresh parsley (save the rest for the coating), and that pinch of red pepper flakes if you’re using them. Give it a good whisk to combine everything. The warm butter helps infuse the garlic flavor nicely.
- Prepare the Parmesan Coating: In a separate small bowl, combine the 1/4 cup of grated Parmesan cheese with the remaining half of the chopped fresh parsley. This mixture provides a flavorful, cheesy, and herbaceous crust for our bites.
- Dip in Garlic Butter: Pick up one of your carefully sealed dough balls. Dip it completely into the melted garlic butter mixture. Make sure it gets fully coated on all sides. This step not only adds fantastic flavor but also helps the next layer stick.
- Roll in Parmesan: Immediately after dipping in butter, transfer the buttered dough ball to the bowl with the Parmesan and parsley mixture. Roll it around gently, ensuring the entire surface is coated in the cheesy herb goodness. This creates that wonderful exterior texture and flavor burst.
- Arrange for Baking: Place the coated dough balls onto your prepared baking sheet lined with parchment paper. Leave a little space between each one, perhaps about an inch. This allows air to circulate so they bake evenly and get golden brown on all sides without sticking together.
- Bake ‘Em Up: Pop the baking sheet into your preheated oven. Bake for 12 to 15 minutes. The exact time will depend on your oven and how golden you like them. Look for the bites to be puffed up and beautifully golden brown all over. You might see a little bit of cheese bubbling out if a seal wasn’t perfect, but don’t worry – the magic is happening inside!
- Serve Hot for the Win!: This is critical for the cheese pull! As soon as they come out of the oven, serve them immediately while they are piping hot. This is when the mozzarella is perfectly melted and at its stretchiest peak. Gather your people and get ready for those satisfying cheese pulls!
Tips for Perfect Cheesy Garlic Bites Every Time
Making these cheesy garlic bites is straightforward, but a few little tips can help ensure your success and elevate them even further:
- Don’t Rush the Seal: We mentioned it in the steps, but it bears repeating. The most critical factor for the cheese pull is creating a completely sealed package around the mozzarella cube. Pinch those seams tight! If they aren’t sealed well, the cheese will melt out onto the baking sheet instead of staying trapped inside, ready to stretch.
- Cheese Matters: Using a good quality block of low-moisture mozzarella and cutting it into cubes works best. Pre-shredded cheese often contains anti-caking agents that can hinder the melt and stretch. Plus, a solid cube melts into a more substantial pocket of cheese for pulling.
- Fresh is Best for Garlic & Parsley: While you could technically use dried, fresh garlic and parsley offer a much brighter, more authentic flavor that truly makes these bites shine.
- Serve IMMEDIATELY: The glorious cheese pull is fleeting. Mozzarella is at its stretchiest when very hot. Have your serving platter ready and get these to your guests (or yourself!) right out of the oven.
- Vary the Herbs: Feel free to swap out or add other fresh herbs like chives, oregano, or a little bit of dried Italian seasoning into the butter or Parmesan mix for a different flavor profile.
What to Serve With Cheesy Garlic Bites
These cheesy garlic bites are incredibly versatile! Their warm, savory nature makes them a fantastic addition to many meals or perfect on their own.
- As an Appetizer: This is their natural habitat! Serve them hot with marinara sauce for dipping. They’re always the first to disappear.
- Soup & Salad Side: They are the perfect accompaniment to a hearty soup or a fresh salad. Imagine them alongside a hearty vegetable barley soup or a vibrant easy kale salad.
- With Pasta Dishes: Garlic bread’s perfect partner is pasta, and these bites are no exception! Serve them with your favorite spaghetti, lasagna like our ultimate cheesy lasagna, or even a creamy dish like creamy carbonara.
- Standalone Snack: They are utterly addictive simply as a snack. Perfect for game day, movie night, or just a craving.
Your Cheesy Garlic Bites Questions Answered (FAQ)
Got questions? We’ve got answers to help you make the most amazing cheesy garlic bites!
Can I use pre-shredded mozzarella instead of cubes?
While you technically can use pre-shredded mozzarella, we highly recommend using block mozzarella and cutting it into cubes for the best cheese pull. Pre-shredded cheese often contains anti-caking agents that can prevent it from melting and stretching as beautifully as block cheese. The cubes create a substantial pocket of cheese that is more likely to give you that satisfying stretch.
Can I make the dough balls ahead of time?
You can prep the stuffed, uncoated dough balls a few hours ahead of time. Keep them covered in the refrigerator. Just before baking, prepare the butter and Parmesan mixtures, coat the chilled balls, and bake as directed, adding a minute or two to the bake time if needed.
What’s the best way to reheat leftovers?
If you happen to have any leftovers (a rare occurrence!), the best way to reheat them is in a toaster oven or a regular oven at around 350°F (175°C) for 5-10 minutes, or until heated through and the cheese is melty again. Microwaving can make them soft and rubbery and won’t give you the same cheese pull.
Can I add other fillings besides cheese?
Absolutely! Once you master the basic cheese pull, you can experiment. Just be mindful of moisture. Small pieces of cooked bacon (remembering our rule to just say ‘bacon’), finely chopped cooked chicken, or sautéed mushrooms could be added along with the cheese cube, as long as the dough can still be completely sealed without stretching too thin.
My cheese leaked out during baking, what happened?
Don’t worry, this happens sometimes! It usually means the dough wasn’t sealed completely around the cheese cube before baking. Ensure you pinch the seams very tightly in Step 3 to create a secure pouch for the cheese. They’ll still be delicious, just maybe without the epic pull!
Enjoy Your Homemade Cheesy Garlic Bites!
There you have it! Your foolproof guide to making Cheesy Garlic Bites that are guaranteed to deliver on the gooey, stretchy promise of a perfect cheese pull every single time. They are simple, fast, and utterly delicious – everything you want in a crowd-pleasing bite.
Whip up a batch for your next get-together, movie night, or just because you deserve a cheesy treat. You might find yourself making them weekly! Give this recipe a try and let me know how your cheese pull turns out in the comments below. Happy baking (and pulling)!
Cheesy Garlic Bites

Ingredients
- 1 can (16.3 ounces) refrigerated biscuit dough
- 8 ounces mozzarella cheese, cut into 12-15 cubes
- 1/4 cup grated Parmesan cheese
- 1/4 cup melted butter
- 2 cloves garlic, minced
- 2 tablespoons fresh parsley, chopped
- Pinch of red pepper flakes (optional)
Directions
- Preheat your oven to 375 degrees F (190 degrees C). Line a baking sheet with parchment paper.
- Separate the biscuit dough into individual biscuits. Cut each biscuit into two pieces. You should have 12-15 pieces total.
- For the key to that amazing cheese pull, take one piece of dough and flatten it slightly. Place one cube of mozzarella cheese in the center. Carefully bring the edges of the dough up and around the cheese, pinching and sealing the seams completely to form a tight ball with the cheese sealed inside. Repeat with the remaining dough pieces and cheese cubes. Ensuring the cheese is fully enclosed is essential for the pull!
- In a small bowl, whisk together the melted butter, minced garlic, half of the chopped parsley, and red pepper flakes if using.
- In another small bowl, combine the grated Parmesan cheese and the remaining chopped parsley.
- Dip each dough ball into the melted garlic butter, coating it completely.
- Immediately roll the buttered dough ball in the Parmesan and parsley mixture to coat the outside.
- Place the coated balls on the prepared baking sheet, leaving a little space between them.
- Bake for 12-15 minutes, or until the bites are golden brown and puffed up. You should see some bubbling cheese peeking out if any seals weren’t perfect, but the internal cheese will be melted and ready to stretch.
- Serve immediately while hot for the best cheese pull!


