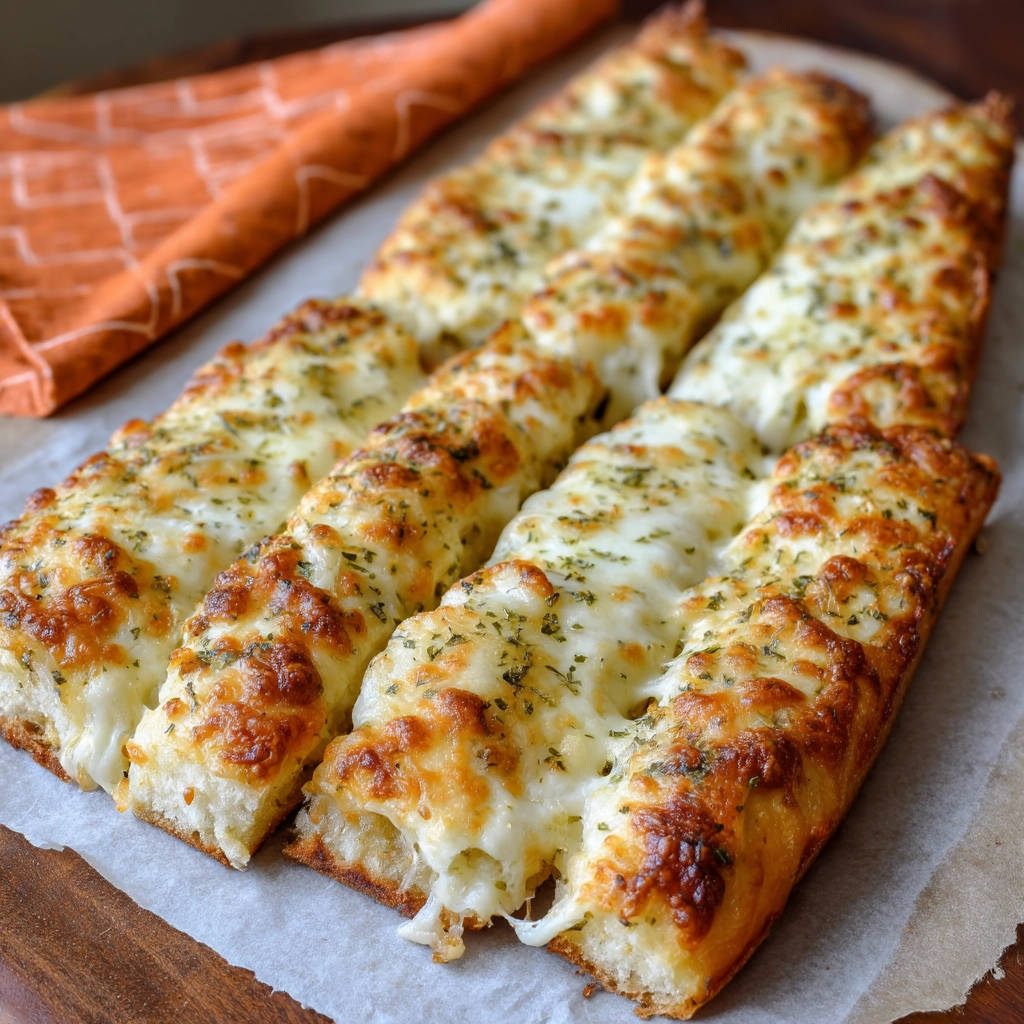
Have you ever eagerly pulled garlic bread from the oven, only to find it disappointingly dry, hard, or worse, a greasy, soggy mess? It’s truly a letdown when all you crave is that perfect combination of gooey cheese, fragrant garlic, and satisfying texture. For years, I struggled to get it just right, cycling through various methods with inconsistent results. But I finally discovered the simple, game-changing trick that ensures every single batch of my garlic bread comes out golden brown with wonderfully crispy edges and a perfectly soft, pillowy center. These Cheesy Garlic Breadsticks are the culmination of that quest!
They are effortless to make, requiring just a few pantry staples and minimal time. The result? Addictively good cheesy garlic goodness that disappears faster than you can say “seconds!” Get ready to bake the best garlic breadsticks you’ve ever had, guaranteed to become a family favorite.
Why You’ll Absolutely Adore These Cheesy Garlic Breadsticks
Beyond solving the age-old dry/soggy garlic bread dilemma, there are so many reasons these breadsticks deserve a permanent spot in your recipe rotation.
- Texture Perfection: This is the star! That incredible contrast between the gloriously crispy, golden cheese and crust on the edges and the soft, tender interior of the bread is simply divine.
- Flavor Explosion: Rich melted butter infused with fresh garlic and a hint of herbs, topped with a double layer of melted mozzarella and sharp parmesan? Pure comfort food bliss in every bite.
- Speedy Satisfaction: With only 15 minutes of prep and about 18 minutes in the oven, you can have these warm, cheesy delights ready to go in well under an hour. Perfect for impromptu gatherings or a quick weeknight treat.
- Incredibly Easy: No complex techniques or fancy equipment needed. If you can slice bread and mix ingredients, you can master these garlic breadsticks.
- Versatile Companion: While they are utterly fantastic on their own (warning: they are highly snackable!), they also make the ultimate sidekick to countless meals, from pasta night to soups and salads.
Gathering Your Ingredients for Cheesy Garlic Breadsticks
Creating that perfect flavor and texture starts with selecting the right components. Each ingredient plays a crucial role in building these irresistible cheesy garlic breadsticks.
The foundation begins with a good loaf of bread, providing the necessary structure and chew. Then comes the aromatic butter mixture, infusing the bread with classic garlic flavor. Finally, a generous blanket of cheese delivers that essential gooey, crispy topping we all crave.
- Crusty Bread: You’ll need 1 loaf of a good quality crusty bread. French or Italian loaves work beautifully. Look for one that feels sturdy on the outside but has a reasonably soft crumb inside. The crust is key to getting those delightful crispy edges.
- Unsalted Butter: 1/2 cup of unsalted butter, melted. Using unsalted butter allows you to control the overall saltiness of the breadsticks. It carries the garlic and herb flavors deep into the bread.
- Fresh Garlic: 3 cloves of garlic, freshly minced. Please, please use fresh! The pungent, aromatic punch of fresh garlic is incomparable here and is absolutely essential for true garlic bread flavor.
- Fresh Parsley: 1 tablespoon of fresh parsley, finely chopped. Fresh herbs brighten the flavor and add a lovely visual appeal. Parsley is classic with garlic and cheese.
- Dried Oregano: 1/2 teaspoon of dried oregano (optional). While optional, a pinch of dried oregano adds an extra layer of earthy, slightly peppery flavor that complements the other ingredients nicely.
- Salt & Black Pepper: 1/4 teaspoon salt and 1/8 teaspoon black pepper. These basic seasonings enhance all the other flavors and prevent the breadsticks from tasting flat.
- Shredded Mozzarella Cheese: 1 1/2 cups of shredded mozzarella cheese. Mozzarella provides that incredible, stretchy, gooey melt that is non-negotiable for cheesy breadsticks.
- Grated Parmesan Cheese: 1/4 cup of grated parmesan cheese. Parmesan adds a sharp, nutty, salty depth of flavor and crisps up beautifully under the broiler, contributing to those golden edges.
Ensure your ingredients are fresh and ready to go before you begin. High-quality components truly make a difference in the final outcome.
Crafting Your Cheesy Garlic Breadsticks: Step-by-Step
Ready to create garlic breadstick perfection? This process is straightforward, but paying attention to a couple of key moments will ensure you achieve that sought-after crispy-soft texture.
-
Prepare Your Oven and Pan: Begin by preheating your oven to 400°F (200°C). Proper preheating is important for even cooking right from the start. Next, line a standard baking sheet with parchment paper. Parchment paper is a simple step that makes cleanup a breeze and prevents the bread from sticking to the pan.
-
Slice the Bread: Take your loaf of crusty bread and slice it lengthwise through the middle. This creates two long halves, giving you a large surface area for the butter and cheese. Then, cut each of these halves crosswise into 4 or 5 long portions or “sticks,” depending on how long you want them. If you prefer wider, shorter pieces, you can simply slice the loaf into thick, individual slices instead of sticks. Aim for relatively consistent thickness so they bake evenly.
-
Make the Garlic Butter Mixture: In a small bowl, combine your melted unsalted butter, minced fresh garlic, chopped fresh parsley, dried oregano (if you’re using it), salt, and black pepper. Give everything a good stir to ensure the flavors are well distributed throughout the butter. This is where the magic garlic flavor really comes to life!
-
Butter the Bread: Arrange the sliced bread pieces, cut-side up, on your prepared baking sheet. Using a pastry brush, generously brush the cut surfaces of each piece with the garlic butter mixture. Don’t be shy! Make sure to get into all the nooks and crannies. The butter not only adds flavor but also helps create a barrier that keeps the inside soft while the outside gets crispy.
-
Prepare the Cheese Blend: In a separate small bowl, toss together the shredded mozzarella and grated parmesan cheeses. Combining them before sprinkling ensures you get a nice mix of both types of cheese on every breadstick.
-
Add the Cheese: Generously sprinkle the cheese mixture evenly over the buttered surfaces of the bread pieces. Cover the buttered area completely! More cheese means more melty, bubbly, crispy goodness.
-
Bake and Broil for Perfect Texture (The Key Trick!): Place the baking sheet on the middle rack of your preheated oven. Bake for 10 to 12 minutes. During this time, the bread will start to toast, the butter will soak in, and the cheese will melt and become beautifully bubbly around the edges. Once you see the cheese is fully melted and maybe just starting to turn slightly golden, you’re ready for the texture step. To get those glorious crispy edges and the perfect golden-brown top while keeping the center wonderfully soft, turn your oven setting to broil on low. Move the baking sheet to a rack that is a safe distance from the broiler element (usually the top or second-to-top rack, but watch very closely). Broil for just 2 to 3 minutes. The radiant heat from the broiler works quickly to crisp up the cheese and the very edges of the bread without drying out the interior. This step requires your full attention – cheese can go from perfectly golden to burnt in seconds!
-
Cool Slightly and Serve: Carefully remove the baking sheet from the oven. Let the cheesy garlic breadsticks cool on the sheet for just a few minutes before handling. This allows the cheese to set slightly, preventing it from slipping off and saving you from burning your fingers on molten cheese. Serve them warm and enjoy!
Tips for Perfect Cheesy Garlic Breadsticks Every Time
Want to ensure your breadsticks are absolute showstoppers? Here are a few extra tips to keep in mind:
- Fresh Garlic is a Must: While garlic powder has its place, nothing beats the intense flavor of fresh garlic for garlic bread. Mince it finely for the best distribution.
- Choose Your Bread Wisely: A good crusty loaf makes all the difference. Avoid soft sandwich bread; you need that exterior structure to support the buttery, cheesy topping and achieve crispy edges.
- Grate Your Own Cheese: Pre-shredded cheeses often contain anti-caking agents that can prevent them from melting as smoothly and getting as golden brown as cheese shredded right from the block. It’s worth the extra minute!
- Don’t Skimp on the Butter and Cheese: Generosity is key here! Make sure the bread is well-saturated with the garlic butter and covered with plenty of cheese for maximum flavor and optimal texture contrast.
- Watch the Broiler Like a Hawk: Seriously, stand right there and watch. Broilers are powerful and ovens vary. What takes 2 minutes in one oven might take 1 minute in another. As soon as you see the cheese turning that beautiful golden brown and bubbling aggressively, pull them out.
- Serve Immediately: Cheesy garlic breadsticks are best enjoyed hot and fresh from the oven when the cheese is melty and the edges are at their crispiest.
What to Serve With Cheesy Garlic Breadsticks
These breadsticks are incredibly versatile and pair wonderfully with a variety of dishes. Of course, they are the quintessential partner for pasta night! Imagine dipping these into a rich sauce from your favorite recipe like ultimate cheesy lasagna or twirling them alongside creamy fettuccine alfredo.
They are also fantastic served with comforting soups and stews, perfect for soaking up every last drop. Consider them with a warm bowl of grandma’s comfort chicken soup on a chilly evening. And don’t forget salads – they add a satisfying, savory crunch to a light salad, turning it into a more substantial meal.
Honestly, sometimes, a platter of these warm cheesy garlic breadsticks is a meal in itself, especially for a casual snack or appetizer!
Your Cheesy Garlic Breadsticks Questions Answered (FAQ)
Got questions about making these irresistible breadsticks? Here are some common ones:
Can I use pre-minced garlic?
While you can use pre-minced garlic in a pinch, freshly minced garlic provides a much more vibrant and intense flavor, which is really what you want in garlic bread. If using pre-minced, you might need a little extra to get the same punch.
What if I don’t have a crusty loaf?
You can use other types of bread, but the texture might not be the same. Softer breads like sandwich bread won’t give you those desired crispy edges and might absorb too much butter, becoming soggy. A French baguette or Italian boule are ideal.
Can I make these ahead of time?
You can prep them partially ahead. Slice the bread and make the garlic butter mixture. Store the bread airtight at room temperature and the butter mixture in the fridge. When ready to bake, gently warm the butter mixture if needed, brush the bread, add cheese, and proceed with baking and broiling. For the best texture, baking right before serving is recommended.
How should I store and reheat leftovers?
Store any leftover breadsticks in an airtight container at room temperature for a day or two. To reheat and regain some of that crispness, it’s best to use a toaster oven or a regular oven set to around 350°F (175°C) for a few minutes until warmed through and the cheese is bubbly again. Microwaving will make them soft, which isn’t ideal for this recipe.
Can I add other seasonings or cheeses?
Absolutely! Feel free to experiment. A pinch of red pepper flakes can add a little heat. You could sprinkle on dried basil or a blend of Italian herbs. For cheeses, consider adding a little smoked provolone or a sharp white cheddar along with the mozzarella and parmesan for a different flavor profile. Just avoid anything that might release too much liquid as it melts.
Enjoy Your Homemade Cheesy Garlic Breadsticks!
There you have it – the secret to perfectly textured, outrageously delicious cheesy garlic breadsticks right in your own kitchen. Say goodbye to dry, hard, or soggy attempts and hello to golden, crispy, soft, and utterly irresistible perfection!
Whether you’re pairing them with your favorite meal, serving them as a crowd-pleasing appetizer, or simply treating yourself to a savory snack, these breadsticks are sure to impress. Give them a try tonight and experience the difference that simple trick makes!
Did you make these Cheesy Garlic Breadsticks? What did you pair them with? Let me know in the comments below!
Cheesy Garlic Breadsticks

Details
- Prep time: 15 minutes
- Cook time: 18 minutes
- Total time: 33 minutes
- Servings: 5
Ingredients
- 1 loaf crusty bread, like French or Italian
- 1/2 cup unsalted butter, melted
- 3 cloves garlic, minced
- 1 tablespoon fresh parsley, chopped
- 1/2 teaspoon dried oregano (optional, if visible or implied by image)
- 1/4 teaspoon salt
- 1/8 teaspoon black pepper
- 1 1/2 cups shredded mozzarella cheese
- 1/4 cup grated parmesan cheese
Directions
- Preheat your oven to 400F (200C). Line a baking sheet with parchment paper.
- Slice the loaf of bread lengthwise, then cut each half into 4-5 long portions or “sticks”. You can also just slice it into thick slices if preferred.
- In a small bowl, combine the melted butter, minced garlic, chopped parsley, dried oregano (if using), salt, and pepper. Stir well.
- Place the bread pieces on the prepared baking sheet. Brush the cut sides generously with the garlic butter mixture, making sure to get into all the nooks and crannies.
- In a separate bowl, toss together the shredded mozzarella and grated parmesan cheeses.
- Sprinkle a generous amount of the cheese mixture evenly over the buttered surfaces of the bread.
- The Key Technique for Texture: Place the baking sheet on the middle rack of the preheated oven. Bake for 10-12 minutes, or until the edges are golden and the cheese is melted and bubbly. Then, to achieve those crispy edges and the perfectly golden top while keeping the inside soft, turn the oven to broil on low for the last 2-3 minutes, watching very closely to prevent burning. The radiant heat from the broiler quickly crisps the surface cheese and bread edges without drying out the center.
- Remove from the oven and let cool slightly before serving.