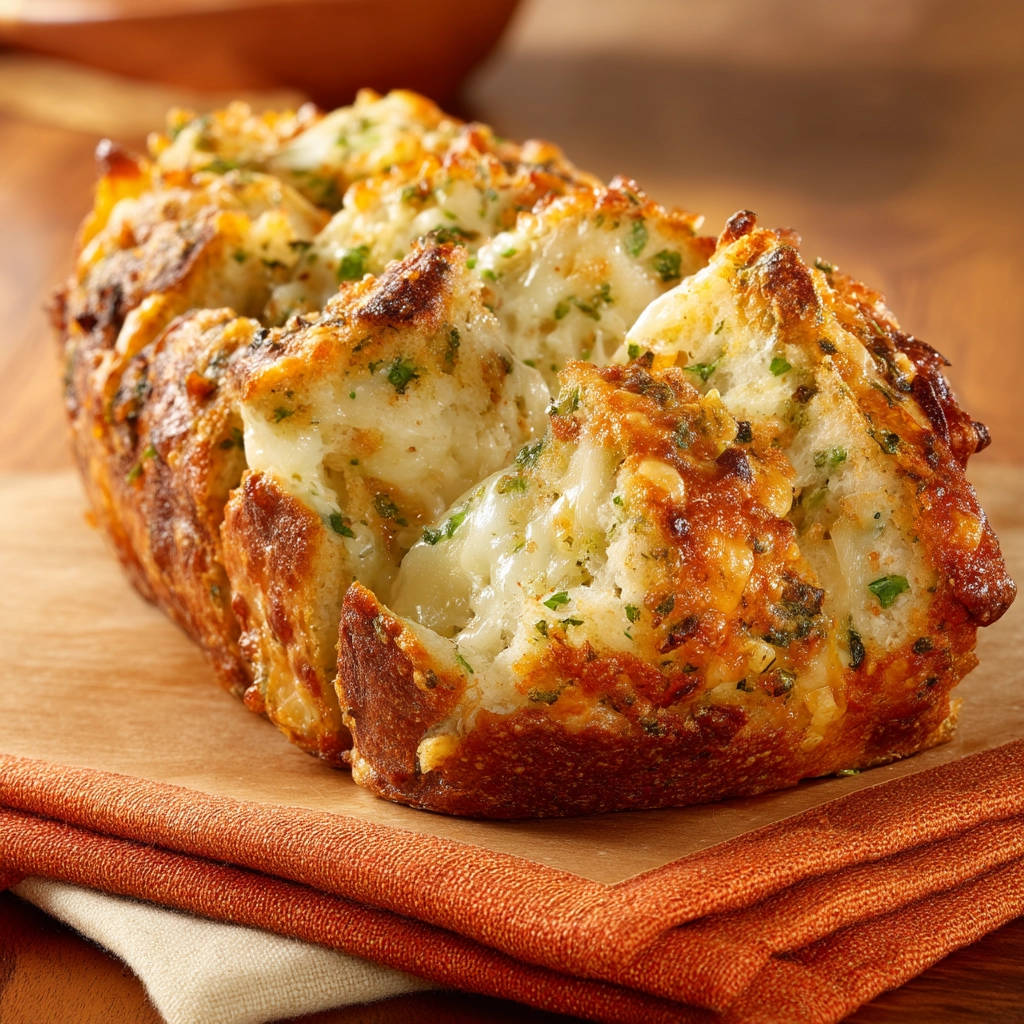
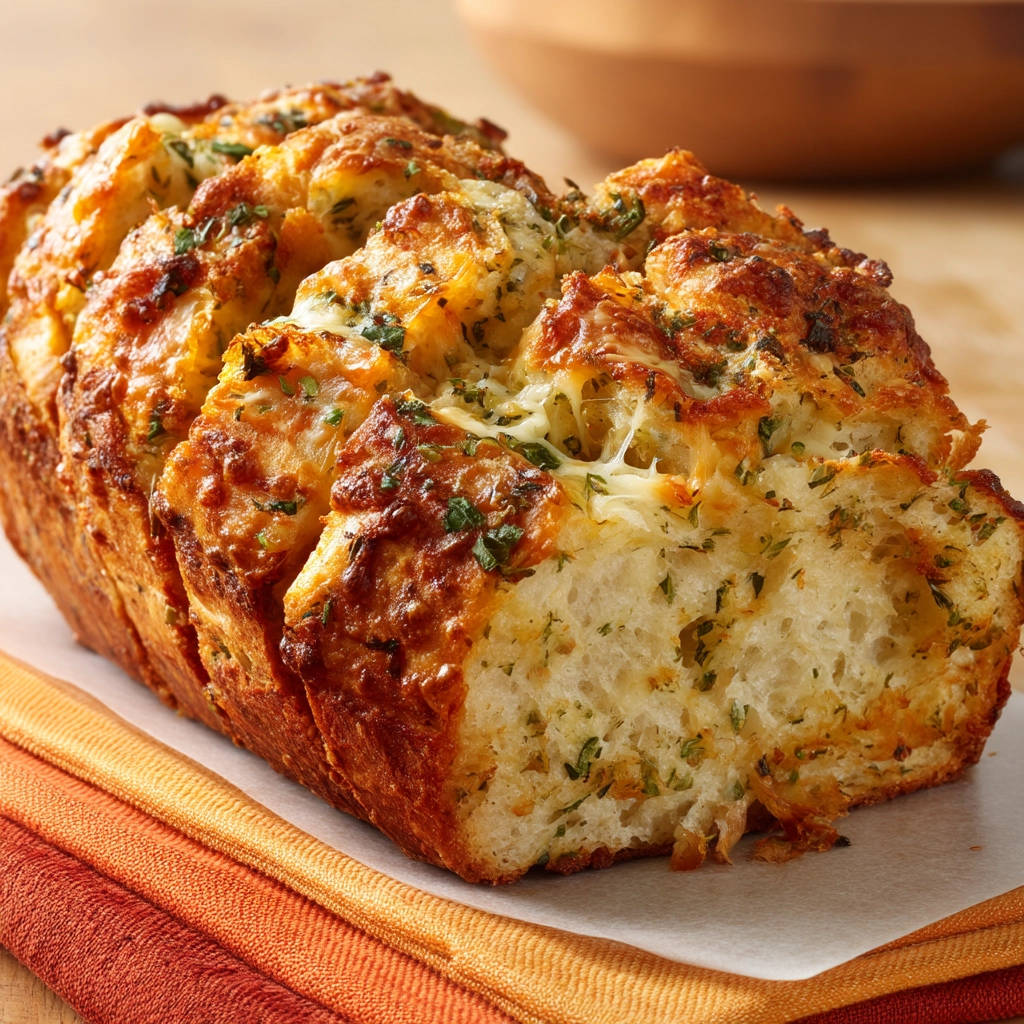
Imagine this: a loaf of golden bread, fragrant with garlic and herbs, stuffed to the brim with gooey, melted cheese. You reach in, pull a piece free, and it stretches beautifully, the cheese oozing just a little. Sounds like heaven, right? But we’ve all been there – anticipating that glorious moment, only to pull apart a slice and find it disappointingly dry and hard inside. What a letdown! Cheesy Garlic Pull-Apart Bread should be tender and flavorful from edge to center, every single time.
Well, guess what? I’ve finally cracked the code to consistently perfect, moist, and outrageously delicious cheesy garlic pull-apart bread. There’s a simple little trick that changes everything, ensuring that every crevice is bathed in garlicky butter and every bite is loaded with luscious cheese without drying out the bread itself. This recipe isn’t just about ingredients; it’s about a technique that guarantees amazing texture and flavor profile with minimum fuss. Get ready to become everyone’s favorite host or potluck guest!
Why You’ll Love This Cheesy Garlic Pull-Apart Bread
This isn’t just another recipe for garlic bread; it’s an experience! Here’s why you’ll find yourself making this version again and again:
- Guaranteed Moistness: That secret step ensures the bread stays incredibly soft and tender on the inside, contrasting beautifully with the slightly crispy exterior.
- Flavor Explosion: Fresh garlic, fragrant herbs, and a generous amount of cheese permeate every single nook and cranny. No bland spots here!
- Easy to Share: The pull-apart format makes it the ultimate communal appetizer or side dish. Just place it on the table and watch it disappear!
- Simple Ingredients: You won’t need any fancy components – just standard pantry staples and a good loaf of bread.
- Perfect Texture Combo: You get the satisfying chew of the bread, the slight crisp from the uncovered bake, and the irresistible pull of melted cheese.
Gathering Your Ingredients for Cheesy Garlic Pull-Apart Bread
Making fantastic cheesy garlic pull-apart bread starts with choosing the right components. Each ingredient plays a crucial role in building that irresistible flavor and achieving the perfect texture. You’ll find everything you need is readily available at your local grocery store, focusing on freshness and quality.
- 1 loaf rustic or Italian bread (about 1 pound): The foundation of our pull-apart masterpiece! Look for a round or oblong loaf with a sturdy crust and a soft, porous interior. Sourdough or a French baguette can also work, but the rustic or Italian styles tend to have the perfect balance of structure and softness to hold up to the fillings while still being easy to pull apart.
- 1/2 cup unsalted butter, melted: Butter is the vehicle for our garlic and herbs, carrying that delicious flavor deep into the bread’s cuts. Using unsalted butter gives you control over the final saltiness. Melting it allows us to easily pour or brush it into all those wonderful crevices.
- 4 cloves garlic, minced: Fresh garlic is non-negotiable for truly spectacular garlic bread! Four cloves give it a robust, noticeable garlic punch without being overwhelming. Mincing it finely ensures the flavor is distributed evenly throughout the butter mixture. If you’re a serious garlic lover, feel free to add an extra clove!
- 2 tablespoons fresh parsley, chopped: Fresh herbs add brightness and color, cutting through the richness of the butter and cheese. Parsley is a classic for a reason – its clean, slightly peppery flavor complements the garlic beautifully. Be sure to use fresh parsley for the best results; dried just won’t provide the same vibrant lift.
- 1 teaspoon dried oregano: Adding dried oregano introduces a lovely, earthy, slightly peppery note that pairs wonderfully with the Italian-inspired flavors. It adds depth to the simple garlic-butter mix.
- 1/4 teaspoon salt: Just enough salt to enhance all the other flavors and bring everything into balance.
- 1/4 teaspoon black pepper: A touch of freshly ground black pepper adds a subtle warmth and a hint of bite.
- 2 cups shredded mozzarella cheese: This is your primary cheese workhorse! Mozzarella is essential for that iconic, stretchy, gooey pull. Using pre-shredded is convenient, but shredding from a block yourself often results in a creamier melt as it lacks the anti-caking agents sometimes found in packaged shreds.
- 1/2 cup grated parmesan cheese: Parmesan adds a salty, nutty, umami-rich depth that complements the milder mozzarella perfectly. The fine grate helps it distribute evenly and melt beautifully into the crevices alongside the mozzarella.
Crafting Your Cheesy Garlic Pull-Apart Bread: Step-by-Step
Ready to transform simple ingredients into a cheesy, garlicky masterpiece? Follow these steps carefully, paying special attention to the method for keeping the inside perfectly moist while getting that golden exterior. It’s easier than you think!
- Start by preheating your oven. Set it to 350 degrees Fahrenheit (175 degrees Celsius). This moderate temperature is perfect for melting the cheese slowly and allowing the flavors to meld without burning the outside of the bread too quickly.
- Prepare your bread by cutting it into a grid pattern. Use a good serrated knife, which is key for cutting bread cleanly without crushing it. Place the loaf on a cutting board. Make crosswise cuts across the loaf, about 1 inch apart. The crucial part here is to not cut all the way through the bottom crust; leave it intact so the bread stays together at the base. Then, turn the loaf 90 degrees and repeat the process, making lengthwise cuts about 1 inch apart, again stopping before you cut through the bottom. This technique creates a structure of connected cubes that you can pull apart – hence the name!
- In a small bowl, whisk together the delicious flavor base. Combine the melted unsalted butter, finely minced garlic (get every bit!), chopped fresh parsley, dried oregano, salt, and black pepper. Give it a good stir to ensure everything is well combined. This mixture is what will infuse the bread with incredible taste. If you enjoy experimenting with flavors, sometimes adding a pinch of red pepper flakes here can provide a little zing!
- Now it’s time to get that buttery garlic goodness into every nook and cranny. Gently pull open the cuts you made in the bread. You can use your fingers or a small spatula. Spoon or brush the melted butter mixture down into all the spaces – side cuts, cross cuts, everywhere! Make sure to get the mixture onto the sides of the bread cubes you created. This ensures that wonderful flavor is distributed throughout the entire loaf, not just on the top.
- While the butter mixture is seeping in, prepare the cheesy filling. In a separate medium-sized bowl, toss together the shredded mozzarella cheese and the grated parmesan cheese. Giving them a quick toss helps distribute the two types of cheese evenly for the next step.
- Generously stuff the cheese mixture into all the cuts and gaps throughout the loaf. Don’t be shy! Use your fingers to gently push the cheese down into the bread, making sure it gets in between the cubes. You want cheese in every single bite! This step can be a bit messy, but it’s worth it for the cheesy payoff.
- Prepare the loaf for its magical bake. Place the stuffed loaf onto a large piece of aluminum foil. Make sure the foil is large enough to completely wrap around the bread. Wrap the foil loosely but securely around the entire loaf. This is the game-changing step!
- Bake the wrapped bread in your preheated 350°F (175°C) oven for the first phase, which takes about 20 minutes. Baking it fully wrapped in foil is the genius trick. The foil traps steam inside, creating a moist environment around the bread. This prevents the bread from drying out while the cheese starts to melt into all those crevices.
- After 20 minutes, carefully remove the bread from the oven. Gently open and peel back the foil from the top of the bread. You can leave the sides partially wrapped underneath the loaf; this helps catch any cheese drips later and makes cleanup easier.
- Return the partially unwrapped bread to the oven for the second baking phase. Bake uncovered for an additional 10 to 15 minutes. Keep a close eye on it during this stage. The goal is to get the cheese on top bubbly, gloriously melted, and slightly golden brown, while the exposed bread gets a little crispy around the edges. This final uncovered bake gives it that perfect finish without losing the precious moisture trapped inside during the first bake.
- Once baked to golden, bubbly perfection, carefully remove the bread from the oven. Transfer it, still on the foil or placed directly onto a wire rack, and let it cool slightly for just a few minutes before serving. This brief cooling time allows the cheese to set just enough so it’s still wonderfully gooey but doesn’t all spill out when you first pull it apart. Serve it warm and let everyone dig in! For another delicious bread experience, you might also enjoy our easy homemade naan, perfect for dipping or enjoying alongside your favorite meals.
Tips for Perfect Cheesy Garlic Pull-Apart Bread Every Time
Elevate your cheesy garlic bread game with these extra tips and tricks:
- Bread Choice Matters: Avoid soft sandwich loaves. A good rustic or Italian loaf with a substantial crust holds its shape better and provides a satisfying contrast to the soft interior and gooey cheese.
- Fresh is Best (Garlic & Parsley): While dried herbs can work in a pinch, fresh minced garlic and fresh chopped parsley make a noticeable difference in flavor vibrancy.
- Don’t Skimp on the Fillings: Be generous when spooning in the butter mixture and stuffing the cheese. You want every section of bread to be coated and filled for maximum flavor and gooiness.
- Wrap It Right: Ensure the foil is wrapped completely around the bread during the initial bake. This is the critical step for trapping steam and keeping the bread soft. Loosely wrapped is fine, but it must be sealed.
- Watch the Uncovered Bake: Ovens vary! Keep an eye on the bread during the final uncovered bake. You’re looking for bubbly cheese and a golden crust, not a dark brown or burnt one.
- Rest is Important: Letting it cool for a few minutes helps the cheese set slightly, making it easier (and less messy!) to pull apart.
- Make Ahead: You can prepare the loaf all the way up to step 7 (wrapping in foil). Store it in the refrigerator for a few hours or even overnight. When ready to bake, add a few minutes to the initial wrapped baking time since it’s starting cold.
What to Serve With Cheesy Garlic Pull-Apart Bread
This cheesy garlic goodness is incredibly versatile! It makes a fantastic appetizer on its own, but it’s also a perfect companion to many meals. Here are a few ideas:
- Pasta Dishes: It’s the classic pairing! Serve it alongside anything from a simple marinara to a rich meat sauce like our comforting Beef Ragu or a creamy pasta dish like Creamy Garlic Shrimp Orzo.
- Soups and Stews: Cheesy garlic bread is ideal for dipping into hearty soups like our Hearty Beef Stew or a creamy tomato soup.
- Salads: It adds a warm, savory element to a fresh green salad, making a light meal more substantial.
- Grilled Meats: Serve it alongside grilled chicken or steak for a complete and satisfying meal.
- As an Appetizer: Simply place it on a serving platter and let everyone gather around and pull! It’s always a crowd-pleaser. If you’re looking for other exciting cheesy pull-apart ideas, you might enjoy our Cheesy Chicken Bacon Pull-Apart Bread for another fun twist.
Your Cheesy Garlic Pull-Apart Bread Questions Answered (FAQ)
Can I use pre-minced garlic?
While fresh garlic is highly recommended for the best flavor, you can use jarred minced garlic in a pinch. Use slightly more (maybe 1-2 teaspoons extra) as its flavor can be less potent than fresh. However, for that vibrant, punchy garlic taste, mincing fresh cloves yourself is truly worth the minimal effort.
What other cheeses can I use?
The mozzarella and parmesan combination is classic for its meltiness and flavor, but you can definitely experiment! Provolone, Gruyere, cheddar (sharp or mild), or even Monterey Jack would melt well and offer different flavor profiles. A blend is usually best. You could also add a little sprinkle of red pepper flakes to the cheese mix for some heat.
Can I make this ahead of time?
Yes! You can prepare the bread completely, stuff it with the butter mixture and cheese, and wrap it tightly in foil. Refrigerate for up to 24 hours. When you’re ready to bake, place the cold loaf directly into the preheated oven and add about 5-10 minutes to the initial wrapped baking time (step 8) to ensure it heats through before you uncover it for browning.
How do I store and reheat leftovers?
If you somehow manage to have leftovers, wrap the cooled bread tightly in aluminum foil. Store it at room temperature for a day or two, or in the refrigerator for up to 4 days. To reheat, wrap the loaf loosely in foil and bake in a 350°F (175°C) oven for 10-15 minutes, or until the cheese is melted and the bread is warm again. You can briefly open the foil at the end if you want to crisp the top slightly.
My bread still seems a little dry, what went wrong?
The most common reason for dry pull-apart bread is skipping or shortening the foil-wrapped baking step. That initial bake in the foil is crucial for steaming the interior. Ensure your foil is completely sealed during that first 20 minutes. Also, make sure you are getting the butter mixture deep down into all the cuts, not just on the surface. Lastly, don’t over-bake during the uncovered stage; bake just until the cheese is bubbly and golden, no longer.
Can I add anything else to the filling?
Absolutely! This recipe is a fantastic base for variations. Consider adding finely chopped chives or green onions to the butter mixture, a sprinkle of garlic powder or onion powder for extra punch, or even some finely chopped sundried tomatoes for a burst of tanginess. Just be careful not to add too much moisture or large chunks that prevent the cheese from melting and distributing properly.
Enjoy Your Homemade Cheesy Garlic Pull-Apart Bread!
Say goodbye to dry, disappointing garlic bread and hello to consistently moist, gooey, and incredibly flavorful cheesy garlic pull-apart bread! This recipe, with its simple yet effective technique, is sure to become a staple in your home. It’s perfect for parties, movie nights, or just because you deserve a treat.
Give it a try and prepare for rave reviews! Don’t forget to leave a comment below and let me know how yours turns out. Happy pulling!
Cheesy Garlic Pull-Apart Bread

Ingredients
- 1 loaf rustic or Italian bread (about 1 pound)
- 1/2 cup unsalted butter, melted
- 4 cloves garlic, minced
- 2 tablespoons fresh parsley, chopped
- 1 teaspoon dried oregano
- 1/4 teaspoon salt
- 1/4 teaspoon black pepper
- 2 cups shredded mozzarella cheese
- 1/2 cup grated parmesan cheese
Directions
- Preheat oven to 350 degrees F (175 degrees C).
- Use a serrated knife to cut the bread loaf crosswise into 1-inch slices, but do not cut all the way through the bottom crust. Then cut the loaf lengthwise into 1-inch slices, again not cutting through the bottom crust. This creates a grid of cubes attached at the base.
- In a small bowl, whisk together the melted butter, minced garlic, chopped parsley, dried oregano, salt, and black pepper.
- Gently pull apart the cuts in the bread and spoon or brush the butter mixture down into all the cracks and crevices. Make sure to get it onto the sides of the bread cubes.
- In a separate bowl, toss together the shredded mozzarella and grated parmesan cheeses.
- Stuff the cheese mixture generously into the cuts and gaps throughout the loaf, pushing it down gently so it gets in between the cubes.
- Place the prepared loaf on a large piece of aluminum foil. Wrap the foil loosely but completely around the bread.
- Bake in the preheated oven for 20 minutes. Baking it wrapped in foil is the key step here to trap steam and keep the inside of the bread soft and moist while the cheese melts.
- After 20 minutes, carefully open and remove the foil from the top of the bread, leaving the sides partially wrapped to catch drips.
- Return the bread to the oven and bake uncovered for an additional 10 to 15 minutes, or until the cheese is bubbly and the top is golden brown and slightly crispy. This final uncovered bake gives it that perfect finish without drying out the inside.
- Let the bread cool slightly on a wire rack for a few minutes before pulling apart and serving warm.