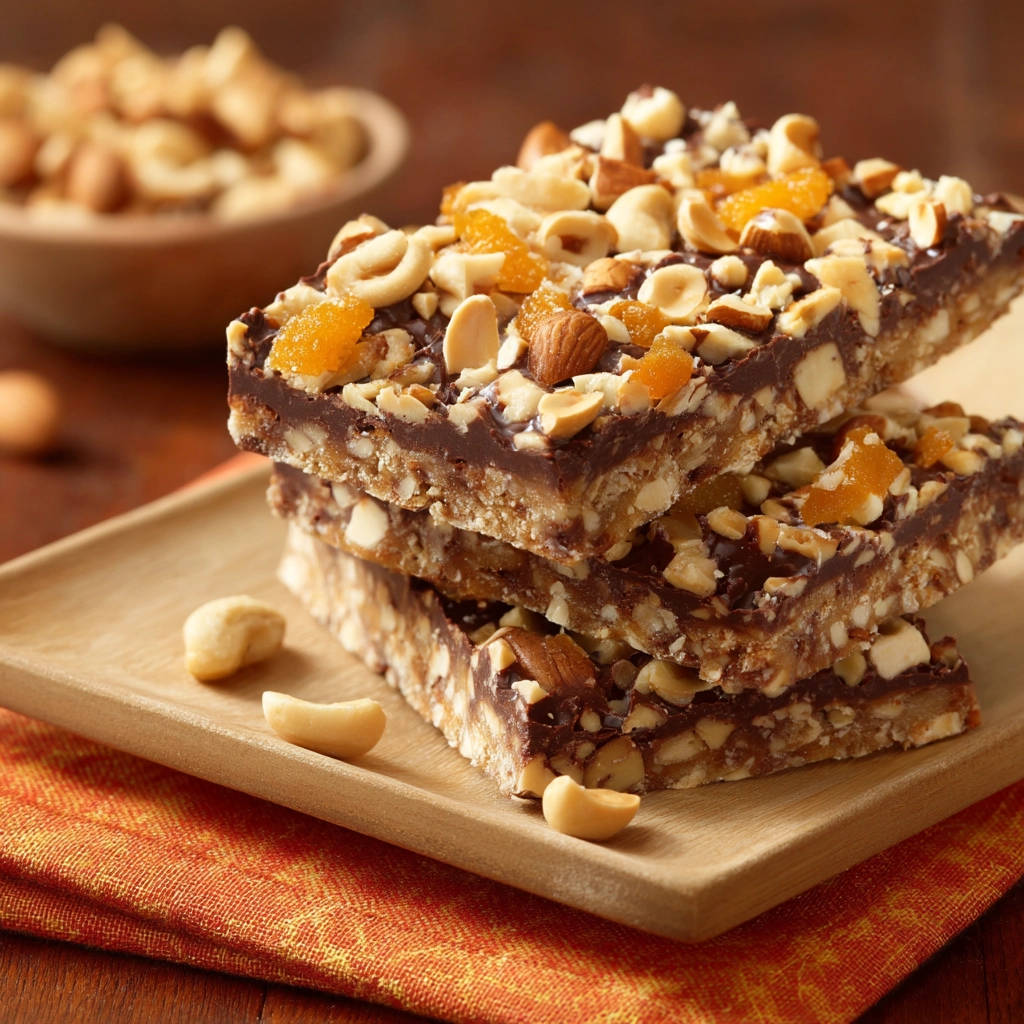
There’s something truly magical about homemade candy, isn’t there? The sweet aroma filling your kitchen, the anticipation of that first bite… pure bliss! But let’s be honest, sometimes candy making can feel a little intimidating, especially when it comes to caramel. Achieving that perfect, dreamy chewiness can sometimes feel like chasing a culinary unicorn. It can turn out too hard, too sticky, or just a bit of a mess. If you’ve ever struggled with making the perfect caramel for a treat like Chocolate Caramel Nut Bark, you’re not alone!
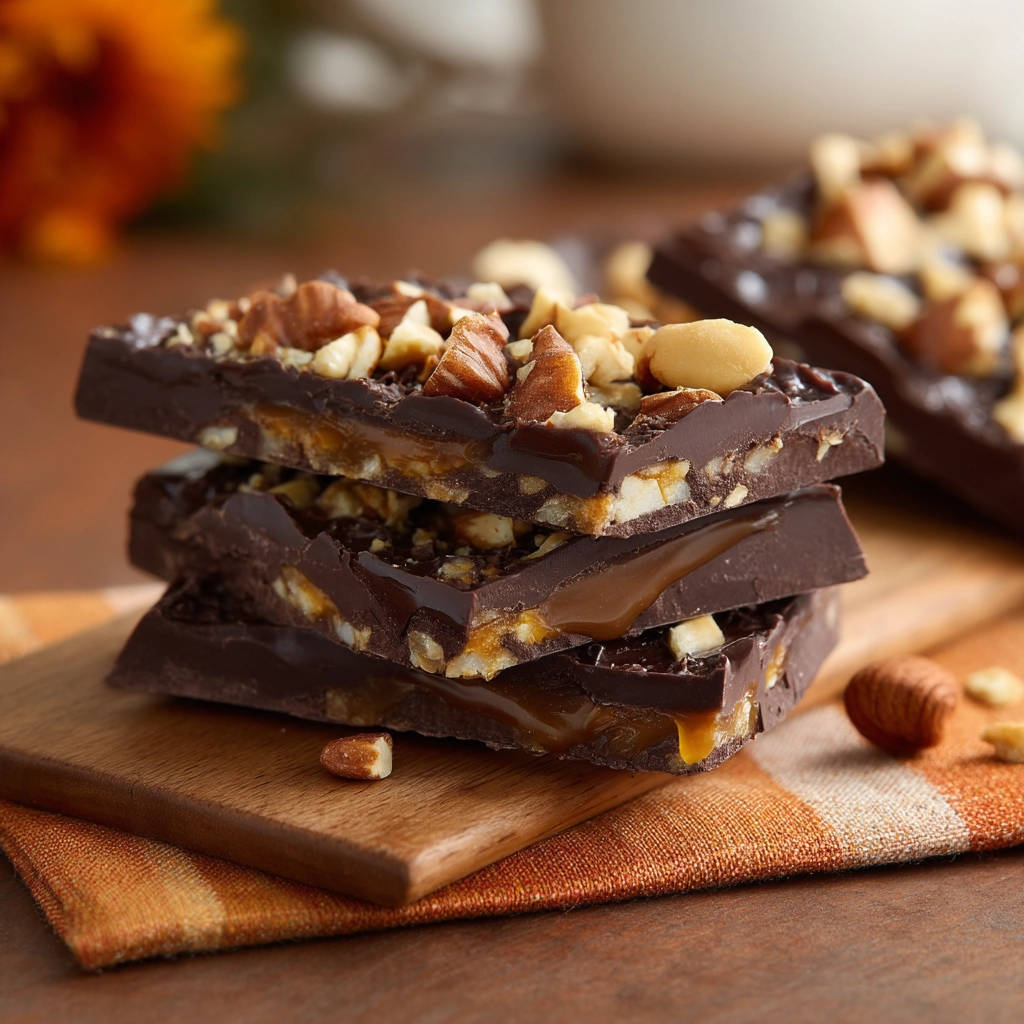
Well, get ready to find your sweet spot, because once you know the secret to perfectly chewy caramel, making this incredible Chocolate Caramel Nut Bark is not only achievable but surprisingly easy and turns out absolutely perfectly every single time. This recipe brings together luscious layers of rich chocolate, smooth, yielding caramel, and crunchy nuts for a treat that’s impossible to resist. Forget store-bought; this homemade version is in a league of its own.
Why You’ll Fall in Love with This Bark
This isn’t just any Chocolate Caramel Nut Bark. This recipe is designed for success, focusing on the most crucial element: the caramel. Here’s why it’s going to become your new favorite:
- Perfectly Chewy Caramel: No more rock-hard or runny caramel disasters! We’ll walk through the exact technique to get that ideal, satisfying chew.
- Simple Assembly: Once the caramel is made (which is easier than you think with the right tools!), assembling the bark is a breeze.
- Classic Flavor Combination: Chocolate, caramel, and nuts are a trio that never disappoints. It’s a universally loved flavor profile.
- Customizable Crunch: Easily swap out the nuts to suit your preference or what you have on hand.
- Great for Gifting: Homemade bark makes a wonderful gift for friends, family, or neighbors during the holidays or just because.
- Impressive Results: Despite being straightforward, the finished product looks beautiful and sophisticated.
Gathering Your Essential Ingredients
Making this delightful bark requires a few key players, each contributing to the final symphony of textures and flavors. Using good quality ingredients will always elevate your homemade treats.
For the Caramel Layer:
- Granulated Sugar: The base of our sweet caramel. We’ll be cooking this to a specific temperature to control texture.
- Water & Light Corn Syrup: This dynamic duo is essential for preventing sugar crystallization, ensuring a smooth, silky caramel. The corn syrup also contributes to that desired chewy texture.
- Unsalted Butter: Cut into pieces, butter adds richness and helps create a smooth emulsion with the cream. Using unsalted allows you to control the overall saltiness later.
- Heavy Cream: This is where the luxurious creaminess comes from! Warm it slightly beforehand if you like, to minimize temperature shock when adding it to the hot sugar.
- Vanilla Extract: A touch of vanilla enhances all the other flavors, adding warmth and depth to the caramel.
- Salt: Just a pinch balances the sweetness and brings out the incredible caramel flavor. Don’t skip this!
For the Chocolate & Nut Layers:
- Good Quality Milk or Dark Chocolate: You’ll need about a pound. Chopped chocolate (from a bar) melts smoother and sets up better than chocolate chips, which often contain stabilizers. Choose your favorite type – milk for classic sweetness, dark for a richer, slightly bitter contrast.
- Mixed Nuts: Pecans, almonds, and peanuts are classic choices, offering a variety of shapes and textures. Roughly chop them for easy distribution on the bark. You’ll need about 1 ½ cups, which is a generous amount for maximum crunch!
Crafting Your Decadent Bark: Step-by-Step
Ready to make candy magic happen? Follow these steps closely, paying special attention to the caramel stage, and you’ll have perfect Chocolate Caramel Nut Bark in no time. Remember, patience and a candy thermometer are your best friends here!
- Prep Your Canvas: Start by lining a large baking sheet. Parchment paper is great, or a silicone baking mat works wonders for easy release. Having this ready means you can immediately pour and spread your chocolate when it’s ready.
- Begin the Sugar Journey: Grab a medium, heavy-bottomed saucepan. Combine your granulated sugar, water, and light corn syrup in the pan. Place it over medium heat and stir gently with a whisk or wooden spoon just until all the sugar crystals have dissolved. Once it starts to boil, stop stirring! Stirring boiling sugar can cause crystallization, leading to grainy caramel – and we want smooth and chewy!
- Watch the Color Transform: Now, let the mixture boil undisturbed. You can gently swirl the pan occasionally to ensure even cooking. This is the stage where the magic happens – the sugar molecules break down and caramelize. Watch carefully as the liquid goes from clear to pale yellow, then golden, and finally a deep amber color. This color is where the rich caramel flavor develops. Be patient, but keep a close eye; it can go from perfect to burnt quickly!
- Add the Butter (Carefully!): Once you’ve hit that beautiful deep amber, remove the saucepan from the heat immediately. Add the pieces of unsalted butter. The mixture will bubble up quite a bit due to the temperature difference, so whisk carefully until all the butter has melted and is fully incorporated into the sugar mixture.
- Whisk in the Cream & Flavor: Now, slowly and cautiously whisk in the heavy cream. Again, stand back a little as it will bubble and steam. Continue whisking until the cream is fully combined and you have a smooth, luscious caramel sauce. Stir in the vanilla extract and the pinch of salt.
- The Chewy Secret: Hit the Right Temperature! This is the MOST important step for chewy caramel. Return the saucepan to medium heat. Attach a candy thermometer to the side of the pan, making sure the bulb is submerged in the caramel but not touching the bottom. Cook the caramel, stirring occasionally to prevent scorching, until the thermometer registers between 240-245°F (115-118°C). This temperature range is known as the “firm ball” stage in candy making, and it’s precisely what gives the caramel its delightful chewiness once cooled. Do not guess here – a thermometer is essential for consistency.
- Brief Resting Period: Once the caramel reaches the target temperature, take the pan off the heat and set it aside for just a moment while you prepare the first layer of chocolate.
- Melt the First Chocolate Layer: Measure out about two-thirds of your chopped good quality chocolate. You can melt this gently in the microwave using 30-second bursts, stirring well after each one until smooth, or use a double boiler (a heatproof bowl set over a pot of simmering water, ensuring the bottom of the bowl doesn’t touch the water). Stir until it’s completely smooth and glossy. If you’re interested in different ways to handle chocolate for baking, you might find tips in recipes like our Easy Chocolate Clusters helpful.
- Lay the Chocolate Foundation: Pour the melted chocolate onto your prepared baking sheet. Use an offset spatula or the back of a spoon to spread it into a thin, even layer, aiming for about 1/8 to 1/4 inch thickness. Let this chocolate layer sit at room temperature for 5-10 minutes. You want it to start setting slightly so the warm caramel doesn’t melt straight through, but not become completely hard yet.
- Pour the Perfect Caramel: Gently pour the warm (but not boiling hot) caramel over the partially set chocolate layer. Work quickly and spread it evenly across the chocolate using an offset spatula. Let the caramel cool on the baking sheet for about 10-15 minutes. It needs this time to firm up slightly before the final chocolate layer goes on.
- Melt the Final Chocolate Layer: While the caramel is cooling on the sheet, melt the remaining one third of the chopped chocolate using the same method (microwave or double boiler) until smooth and pourable.
- Top with Chocolate and Nuts: Pour this second layer of melted chocolate over the slightly firmed caramel, spreading it evenly to the edges. This second chocolate layer seals in the caramel and provides the glue for the nuts. Immediately after spreading the chocolate, sprinkle the chopped mixed nuts generously and evenly over the top. Gently press some of the nuts into the warm chocolate layer to ensure they stick securely once set.
- Let it Set Completely: Now for the hardest part: waiting! Let the bark cool completely. This can take at least 45 minutes at room temperature, or you can speed things up by popping it in the refrigerator for about 20-30 minutes until it’s fully set and hard.
- Break and Enjoy: Once the bark is completely cool and firm, simply break it into irregular pieces. The satisfying crack is part of the fun! Store your delicious Chocolate Caramel Nut Bark in an airtight container at room temperature or in the refrigerator.
Tips for Perfect Bark Every Time
Achieving candy perfection is all about a few key details. Keep these tips in mind for the best Chocolate Caramel Nut Bark:
- Candy Thermometer is Non-Negotiable: Seriously, this recipe lives or dies by the caramel temperature. A good candy thermometer (and checking its accuracy beforehand in boiling water!) is crucial for hitting the chewy “firm ball” stage (240-245°F / 115-118°C).
- Don’t Rush the Caramel Color: Getting that deep amber color before adding the butter and cream is where the rich, complex caramel flavor comes from. Boiling sugar takes time, but rushing it or not going dark enough will result in a less flavorful caramel.
- Be Cautious with Hot Caramel: Sugar heated to candy temperatures is extremely hot and can cause severe burns. Use a deep saucepan, wear oven mitts if you feel more comfortable, and add the butter and cream slowly and carefully, expecting it to bubble vigorously.
- Quality Chocolate Matters: Using good quality chocolate that you enjoy eating on its own will make a big difference in the final taste and texture of the bark. Chocolate chips are formulated to hold their shape and may not melt or set as smoothly.
- Prep Everything First: Candy making moves fast, especially in the later stages. Have your baking sheet lined, chocolate chopped and measured, nuts chopped, and butter/cream measured and ready to go before you even start cooking the sugar.
- Experiment with Nuts: While pecans, almonds, and peanuts are classic, feel free to mix it up! Walnuts, hazelnuts, or even macadamia nuts would be delicious variations. Ensure they are roughly chopped so they distribute well and stick to the chocolate.
Delicious Variations and Add-Ins
Once you’ve mastered the basic Chocolate Caramel Nut Bark, the possibilities for variations are endless! Here are a few ideas to spark your creativity:
- Salty Sweet: Sprinkle a generous pinch of flaky sea salt over the top chocolate layer immediately after adding the nuts. The salt provides a fantastic contrast to the sweetness of the chocolate and caramel.
- Different Chocolate Combinations: Use all dark chocolate for a more intense flavor, or mix milk and dark chocolate for a balanced taste. White chocolate could also be used for one of the layers, though it’s sweeter and behaves slightly differently when melting.
- Add Pretzels: For an extra layer of salty crunch, sprinkle broken pretzel pieces over the top with the nuts. This adds another dimension of texture and flavor.
- Dried Fruit: A sprinkle of dried cranberries or cherries could add a chewy, tart element that pairs wonderfully with chocolate and nuts. While you’re exploring sweet treats, you might enjoy trying our Classic Cherry Crumble Bars or our Classic Peach Crumble Tart for other fruity dessert ideas.
- Different Extracts: Swap the vanilla extract for almond extract or a hint of coffee extract for a different flavor profile in the caramel.
Your Chocolate Caramel Nut Bark Questions Answered
Got questions? Don’t worry, we’ve got answers to some common inquiries about making this irresistible bark.
Why is my caramel hard instead of chewy?
This is almost always because the caramel was cooked to too high a temperature. Cooking sugar past the “firm ball” stage (240-245°F / 115-118°C) moves it into stages like “hard ball” or “soft crack,” resulting in harder caramel. Using an accurate candy thermometer is the key to hitting the chewy sweet spot.
Do I really need corn syrup? Can I substitute it?
Yes, corn syrup plays a crucial role! It’s an invert sugar that helps prevent the granulated sugar from crystallizing as it cooks. Without it, your caramel is much more likely to become grainy or seize up. While theoretically other invert sugars like honey or maple syrup could sometimes be used in other candy recipes, light corn syrup is specifically formulated for clarity and texture control in caramel like this. For reliable chewy caramel bark, sticking to the corn syrup is highly recommended.
What’s the best way to melt chocolate for bark?
Both the microwave method (using 30-second intervals and stirring) and the double boiler method work well. The key is to melt it gently and avoid overheating, which can cause the chocolate to seize or become grainy. Ensure the bowl is completely dry if using a double boiler, as even a drop of water can seize chocolate. If you’re a chocolate lover looking for other ways to use melted chocolate, you might like our guide on Decadent Chocolate Layer Cake or the simple delight of Easy Chocolate Clusters.
My caramel seems grainy. What went wrong?
Grainy caramel is usually caused by sugar crystallization. This can happen if you start stirring the sugar mixture after it boils, or if sugar crystals splash onto the sides of the pan and fall back in. Using corn syrup helps, and avoiding stirring once boiling begins is crucial. Some people wipe down the sides of the pan with a wet pastry brush while the sugar is boiling to dissolve any stray crystals.
How should I store the Chocolate Caramel Nut Bark?
Once completely set and broken into pieces, store the bark in an airtight container at room temperature for up to a week, or in the refrigerator for longer storage (several weeks). If storing in the fridge, you might want to layer pieces with parchment paper to prevent them from sticking together.
Enjoy Your Homemade Treat!
There you have it – the secret to perfectly chewy, utterly delicious Chocolate Caramel Nut Bark! This recipe proves that homemade candy is within reach, and the results are so much more satisfying than anything you can buy. The combination of smooth chocolate, yielding caramel, and crunchy nuts is simply irresistible.
Whether you’re making it for a special occasion, holiday gifting, or just to satisfy a serious sweet tooth, this bark is sure to be a hit. So grab your candy thermometer, gather your ingredients, and get ready to make some truly incredible candy.
Did you try this recipe? Let us know how it turned out in the comments below! What are your favorite nut combinations? Share your bark adventures!
Chocolate Caramel Nut Bark
Ingredients
- 1 cup granulated sugar
- 1/4 cup water
- 1/4 cup light corn syrup
- 1/2 cup unsalted butter, cut into pieces
- 1/2 cup heavy cream
- 1 teaspoon vanilla extract
- 1/4 teaspoon salt
- 1 pound good quality milk or dark chocolate, chopped
- 1 1/2 cups mixed nuts (pecans, almonds, peanuts), roughly chopped
Directions
- Line a large baking sheet with parchment paper or a silicone baking mat.
- In a medium saucepan, combine the granulated sugar, water, and corn syrup. Heat over medium heat, stirring until the sugar is dissolved. Stop stirring once it boils.
- Continue to cook, swirling the pan occasionally, until the sugar mixture turns a deep amber color. This takes some time, so be patient. Watch carefully so it doesnt burn.
- Once the caramel reaches a rich amber color, remove from the heat. Carefully whisk in the butter until melted and smooth. The mixture will bubble up, so be cautious.
- Slowly and carefully whisk in the heavy cream until fully combined. Stir in the vanilla extract and salt.
- This is the crucial step for chewy caramel: Return the saucepan to medium heat. Insert a candy thermometer. Cook the caramel, stirring occasionally, until the temperature reaches 240-245°F (115-118°C). This is the “firm ball” stage and guarantees a chewy texture. Dont guess, use the thermometer!
- Remove the caramel from the heat and set aside for a moment.
- Melt about two thirds of the chopped chocolate. You can do this in a microwave in 30-second intervals, stirring between each, or in a bowl set over a pot of simmering water (double boiler). Stir until smooth.
- Pour the melted chocolate onto the prepared baking sheet and spread it into a thin, even layer, about 1/8 to 1/4 inch thick. Let it sit at room temperature for 5-10 minutes to set slightly, but not completely harden.
- Pour the warm caramel over the partially set chocolate layer, spreading it evenly. Let the caramel cool for about 10-15 minutes until it starts to firm up slightly.
- While the caramel is cooling, melt the remaining one third of the chopped chocolate using the same method as before.
- Pour the second layer of melted chocolate over the caramel. Immediately sprinkle the chopped nuts evenly over the top chocolate layer, gently pressing some into the chocolate so they stick.
- Let the bark cool completely at room temperature for at least 45 minutes, or refrigerate for about 20-30 minutes, until fully set and firm.
- Once completely cool and hard, break the bark into pieces. Store in an airtight container at room temperature or in the refrigerator.