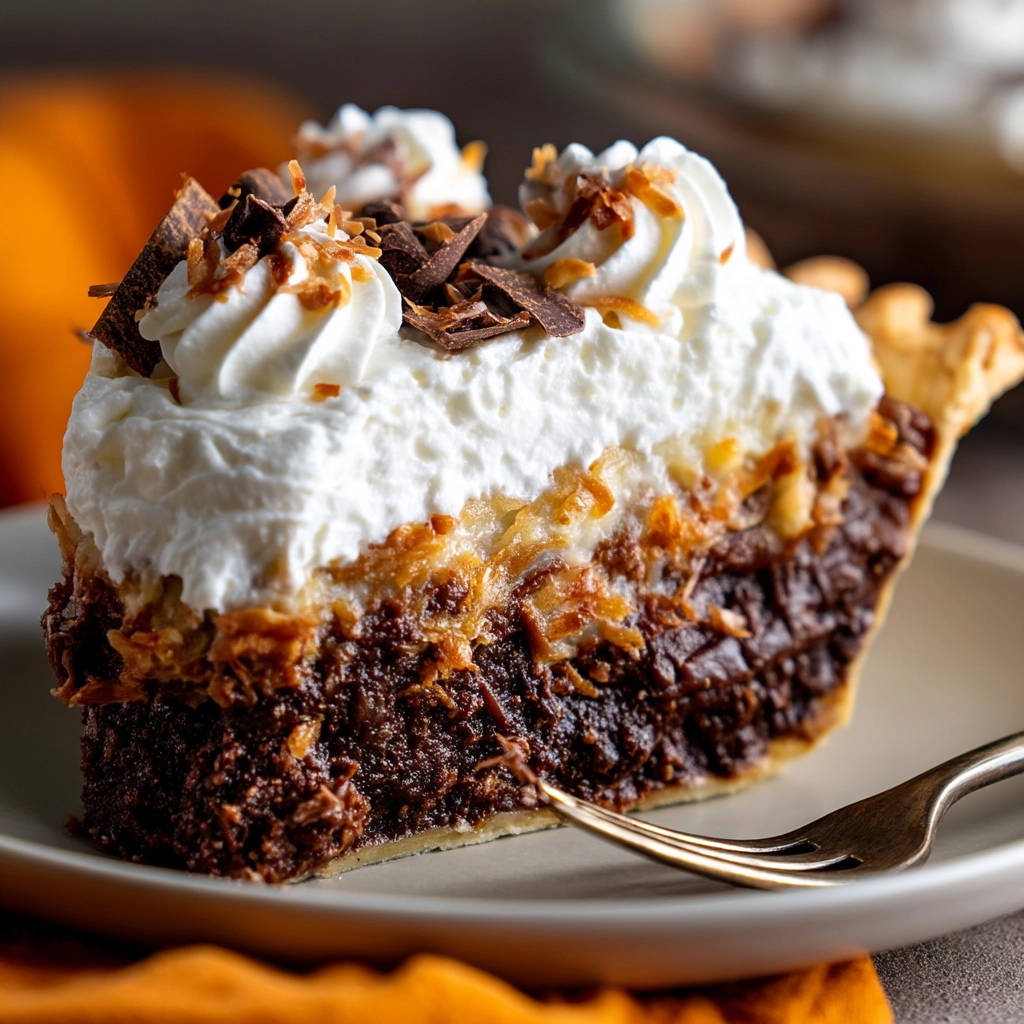
Ever dreamed of a chocolate coconut pie so decadent, so perfectly balanced, that it practically melts in your mouth? A pie where the chocolate filling is rich and creamy, the coconut layer adds a delightful chew, and the whipped topping is light as air? And, most importantly, a pie with a crust that’s delightfully crisp, never soggy? Look no further! This Chocolate Coconut Dream Pie recipe is your ticket to pie perfection, and the secret is simpler than you think.
Why You’ll Love This Chocolate Coconut Dream Pie
This pie isn’t just delicious; it’s an experience. Here are a few reasons why this Chocolate Coconut Dream Pie will become a family favorite:
- No More Soggy Crust: Our secret weapon? Blind baking! This simple step guarantees a crisp, flaky crust every time.
- Layers of Flavor and Texture: The combination of rich chocolate, chewy coconut, and light whipped cream is simply irresistible.
- Impressive Yet Easy: While it looks like it came from a fancy bakery, this pie is surprisingly simple to make at home.
- Perfect for Any Occasion: From casual gatherings to holiday celebrations, this pie is always a crowd-pleaser.
Gathering Your Ingredients for Chocolate Coconut Dream Pie
Before we dive into the baking process, let’s talk about the ingredients that make this Chocolate Coconut Dream Pie so special. We’re aiming for a balance of rich chocolate flavor, a hint of tropical sweetness from the coconut, and a light, airy finish. For the best results, be sure to use high-quality ingredients.
For a Flaky, Golden Crust:
- All-Purpose Flour: The foundation of our pie crust. Using the right amount is key to achieving that perfect flaky texture.
- Salt: Enhances the flavors of all the other ingredients in the crust.
- Unsalted Butter: Very cold butter is essential for creating those delicate layers in the crust. Cut it into cubes and keep it chilled until ready to use.
- Vegetable Shortening: Shortening adds tenderness and helps prevent the crust from becoming too tough. Make sure it’s also very cold.
- Ice Water: The final touch that brings the dough together. Add it gradually, just until the dough comes together.
For the Rich Chocolate Filling:
- Granulated Sugar: Provides the sweetness and structure for the filling.
- Unsweetened Cocoa Powder: The star of the show! Use a good quality cocoa powder for a deep, rich chocolate flavor.
- Salt: Balances the sweetness and enhances the chocolate flavor.
- Cornstarch: Thickens the filling to the perfect consistency.
- Milk: Adds moisture and creaminess to the filling.
- Large Eggs: Provide richness and help to set the filling.
- Unsalted Butter: Adds richness and shine to the filling.
- Vanilla Extract: Enhances the chocolate flavor and adds a touch of warmth.
For the Tropical Coconut Layer:
- Shredded Coconut: Toasted shredded coconut adds a nutty flavor and a delightful chewiness to the pie.
- Sweetened Condensed Milk: Binds the coconut together and adds a touch of sweetness.
For the Light and Airy Topping:
- Heavy Cream: The base of our whipped topping. Make sure it’s very cold for the best results.
- Powdered Sugar: Sweetens the whipped cream and helps to stabilize it.
- Vanilla Extract: Adds a touch of flavor to the whipped cream.
- Chocolate Shavings: For garnish, adding a touch of elegance and intensifying the chocolate experience.
- Toasted Coconut Flakes: For garnish, complementing the coconut layer and adding visual appeal.
Crafting Your Chocolate Coconut Dream Pie: Step-by-Step
Ready to bake your dream pie? Don’t be intimidated! We’ll break down each step to ensure success. The key to this recipe is taking your time and paying attention to detail, especially when it comes to the crust. And remember, that blind baking step is the golden ticket to a perfectly crisp crust!
- Making the Perfect Pie Crust: Start by whisking together the flour and salt in a large bowl. The salt enhances the other flavors in the crust. Then, cut in the cold butter and shortening using a pastry blender or your fingers. The goal is to create coarse crumbs – this creates flaky layers in the baked crust. Keep everything as cold as possible.
- Bringing the Dough Together: Gradually add the ice water, one tablespoon at a time, mixing until the dough just comes together. Don’t overmix! Overmixing develops the gluten in the flour, resulting in a tough crust. Form the dough into a disc, wrap it tightly in plastic wrap, and refrigerate for at least 30 minutes. This allows the gluten to relax and the fat to firm up, making it easier to roll out.
- Rolling and Shaping the Crust: Preheat your oven to 400°F (200°C). On a lightly floured surface, roll out the dough to a 12-inch circle. Carefully transfer it to a 9-inch pie plate. Crimp the edges to create a decorative border.
- The Secret Weapon: Blind Baking! This is the most important step for preventing a soggy crust. Line the crust with parchment paper and fill it with pie weights or dried beans. The weights will prevent the crust from puffing up during baking. Bake for 15 minutes. Then, remove the parchment paper and weights and bake for another 5-10 minutes, or until the crust is lightly golden brown. This crucial step ensures a crisp, flaky bottom. Let the crust cool completely before adding the filling.
- Creating the Rich Chocolate Filling: In a saucepan, whisk together the sugar, cocoa powder, salt, and cornstarch. The cornstarch helps to thicken the filling. Gradually whisk in the milk until smooth, ensuring there are no lumps of cocoa powder or cornstarch.
- Cooking the Filling to Perfection: Cook over medium heat, stirring constantly, until the mixture comes to a boil and thickens. Reduce the heat to low and cook for 1 minute more, stirring constantly. Constant stirring is key to prevent the filling from scorching or sticking to the bottom of the pan.
- Adding the Eggs: Remove the saucepan from the heat and whisk in the lightly beaten eggs until well combined. Return the saucepan to low heat and cook for 1 minute, stirring constantly. This is to temper the eggs, preventing them from scrambling.
- Finishing the Filling: Stir in the butter and vanilla extract until smooth and glossy. The butter adds richness and shine, while the vanilla extract enhances the chocolate flavor. Pour the chocolate filling into the cooled pie crust.
- Adding the Coconut Layer: In a medium bowl, combine the toasted shredded coconut and sweetened condensed milk. Mix well to ensure the coconut is evenly coated. Spread the coconut mixture evenly over the chocolate filling.
- Chilling is Key: Cover the pie loosely with plastic wrap and chill for at least 3 hours, or preferably overnight. This allows the filling to set completely and the flavors to meld together.
- Making the Whipped Cream Topping: In a large bowl, whip the heavy cream with the powdered sugar and vanilla extract until stiff peaks form. Be careful not to overwhip, as it can turn into butter!
- The Finishing Touches: Spread the whipped cream evenly over the chilled pie. Garnish with chocolate shavings and toasted coconut flakes.
- Serve and Enjoy! Slice and serve your masterpiece. Watch the smiles as everyone enjoys the decadent layers of flavor and texture.
Tips for Perfect Chocolate Coconut Dream Pie Every Time
Want to ensure your pie is a showstopper? Here are a few extra tips and tricks to help you achieve pie perfection:
- Keep it Cold: Cold ingredients are key for a flaky pie crust. Make sure your butter, shortening, and water are all very cold. You can even chill your flour for 30 minutes before starting.
- Don’t Overmix the Dough: Overmixing develops the gluten in the flour, resulting in a tough crust. Mix just until the dough comes together.
- Blind Baking is Essential: Don’t skip the blind baking step! It’s the only way to guarantee a crisp, never soggy, crust.
- Toast the Coconut: Toasting the shredded coconut before adding it to the pie enhances its flavor and texture. Spread the coconut on a baking sheet and bake at 350°F (175°C) for 5-7 minutes, or until lightly golden brown, watching carefully to prevent burning.
- Chill Thoroughly: Chilling the pie for at least 3 hours, or preferably overnight, allows the filling to set completely and the flavors to meld together.
- Make Ahead: The pie crust can be made ahead of time and stored in the refrigerator for up to 2 days or in the freezer for up to 2 months. The chocolate filling can also be made ahead of time and stored in the refrigerator for up to 2 days. Assemble the pie just before serving.
- For a Gluten-Free Version: Try using a gluten-free all-purpose flour blend for the crust. You might need to adjust the amount of liquid, so add it gradually until the dough comes together.
What to Serve With Chocolate Coconut Dream Pie
This pie is delicious on its own, but here are a few ideas for complementary pairings:
- A scoop of vanilla ice cream adds a cool and creamy contrast to the rich chocolate and coconut.
- A cup of hot coffee or tea is the perfect accompaniment to a slice of this decadent pie.
- For a lighter option, consider serving it with a side of fresh berries.
Your Chocolate Coconut Dream Pie Questions Answered (FAQ)
Why is my pie crust soggy?
A soggy pie crust is usually caused by moisture from the filling seeping into the crust. The best way to prevent a soggy crust is to blind bake it before adding the filling. This creates a barrier that prevents the moisture from seeping in. Also, make sure your filling isn’t too runny. Using the correct amount of cornstarch is vital for a perfect filling consistency.
Can I use a store-bought pie crust?
Yes, you can use a store-bought pie crust if you’re short on time. However, for the best flavor and texture, we recommend making your own. The homemade crust truly elevates this pie to another level. If you do use a store-bought crust, still blind bake it to prevent sogginess.
Can I freeze this pie?
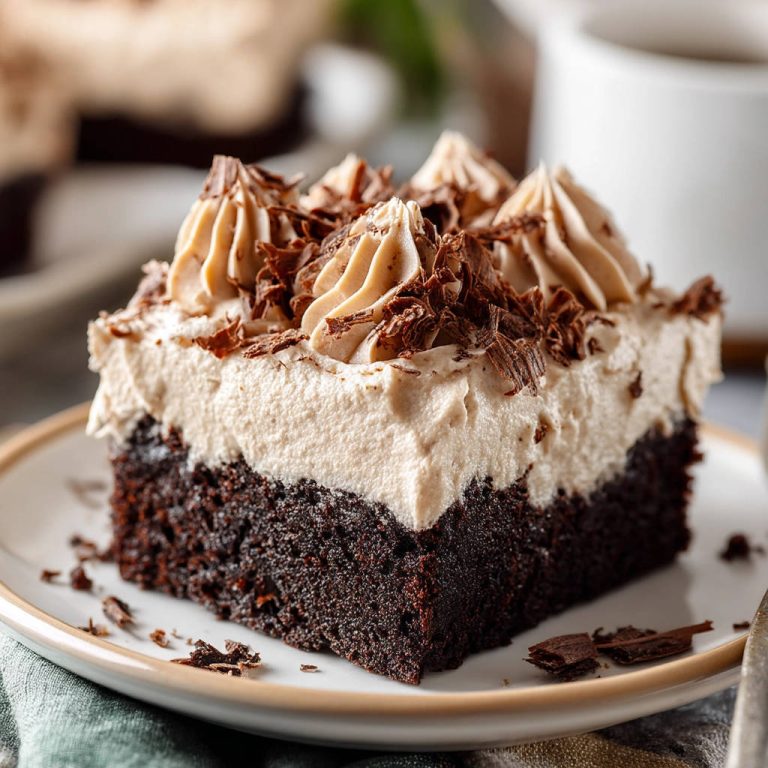
Yes, you can freeze this pie, but the texture of the whipped cream topping may change slightly. To freeze, wrap the pie tightly in plastic wrap and then in aluminum foil. Freeze for up to 2 months. Thaw in the refrigerator overnight before serving. You may want to add fresh whipped cream after thawing. For more freezer-friendly desserts, consider our recipe for easy caramel nut dessert jars – individual portions that thaw beautifully.
Can I use regular coconut flakes instead of shredded coconut?
Shredded coconut works best for this recipe because it combines nicely with the sweetened condensed milk, creating the perfect texture for the coconut layer. If you only have coconut flakes available, you can pulse them a few times in a food processor until they reach a smaller size that’s similar to the shredded texture.
Enjoy Your Homemade Chocolate Coconut Dream Pie!
There you have it – a Chocolate Coconut Dream Pie with a guaranteed crisp crust! This recipe is more than just a dessert; it’s an experience, a memory waiting to be made. So, gather your ingredients, follow these steps, and prepare to be amazed. And don’t forget to come back and leave a comment to let me know how it turned out! Happy baking!
Chocolate Coconut Dream Pie (No Soggy Crust!)

Ingredients
- For the Crust:
- 1 1/4 cups all-purpose flour
- 1/2 teaspoon salt
- 1/2 cup (1 stick) unsalted butter, very cold and cubed
- 1/4 cup vegetable shortening, very cold
- 1/4 cup ice water
- For the Chocolate Filling:
- 1 cup granulated sugar
- 1/2 cup unsweetened cocoa powder
- 1/4 teaspoon salt
- 3 tablespoons cornstarch
- 2 1/2 cups milk
- 2 large eggs, lightly beaten
- 2 tablespoons unsalted butter
- 1 teaspoon vanilla extract
- For the Coconut Layer:
- 1 1/2 cups shredded coconut, toasted
- 1/2 cup sweetened condensed milk
- For the Topping:
- 2 cups heavy cream
- 1/4 cup powdered sugar
- 1 teaspoon vanilla extract
- Chocolate shavings, for garnish
- Toasted coconut flakes, for garnish
Directions
- Make the Crust: In a large bowl, whisk together flour and salt. Cut in the cold butter and shortening using a pastry blender or your fingers until the mixture resembles coarse crumbs.
- Gradually add the ice water, one tablespoon at a time, mixing until the dough just comes together. Form the dough into a disc, wrap in plastic wrap, and refrigerate for at least 30 minutes.
- Preheat oven to 400°F (200°C). On a lightly floured surface, roll out the dough to a 12-inch circle. Transfer to a 9-inch pie plate. Crimp the edges.
- *The Secret: Blind Bake the Crust!* Line the crust with parchment paper and fill with pie weights or dried beans. Bake for 15 minutes. Remove the parchment paper and weights, and bake for another 5-10 minutes, or until lightly golden. This crucial step prevents a soggy bottom. Let cool completely.
- Make the Chocolate Filling: In a saucepan, whisk together sugar, cocoa powder, salt, and cornstarch. Gradually whisk in the milk until smooth.
- Cook over medium heat, stirring constantly, until the mixture comes to a boil and thickens. Reduce heat to low and cook for 1 minute more, stirring constantly.
- Remove from heat and whisk in the beaten eggs until well combined. Return to low heat and cook for 1 minute, stirring constantly.
- Stir in the butter and vanilla extract until smooth. Pour the chocolate filling into the cooled pie crust.
- Prepare the Coconut Layer: In a medium bowl, combine the toasted shredded coconut and sweetened condensed milk. Spread evenly over the chocolate filling.
- Chill for at least 3 hours, or preferably overnight, to allow the filling to set completely.
- Make the Topping: In a large bowl, whip the heavy cream with powdered sugar and vanilla extract until stiff peaks form.
- Spread the whipped cream evenly over the chilled pie. Garnish with chocolate shavings and toasted coconut flakes.
- Slice and serve.