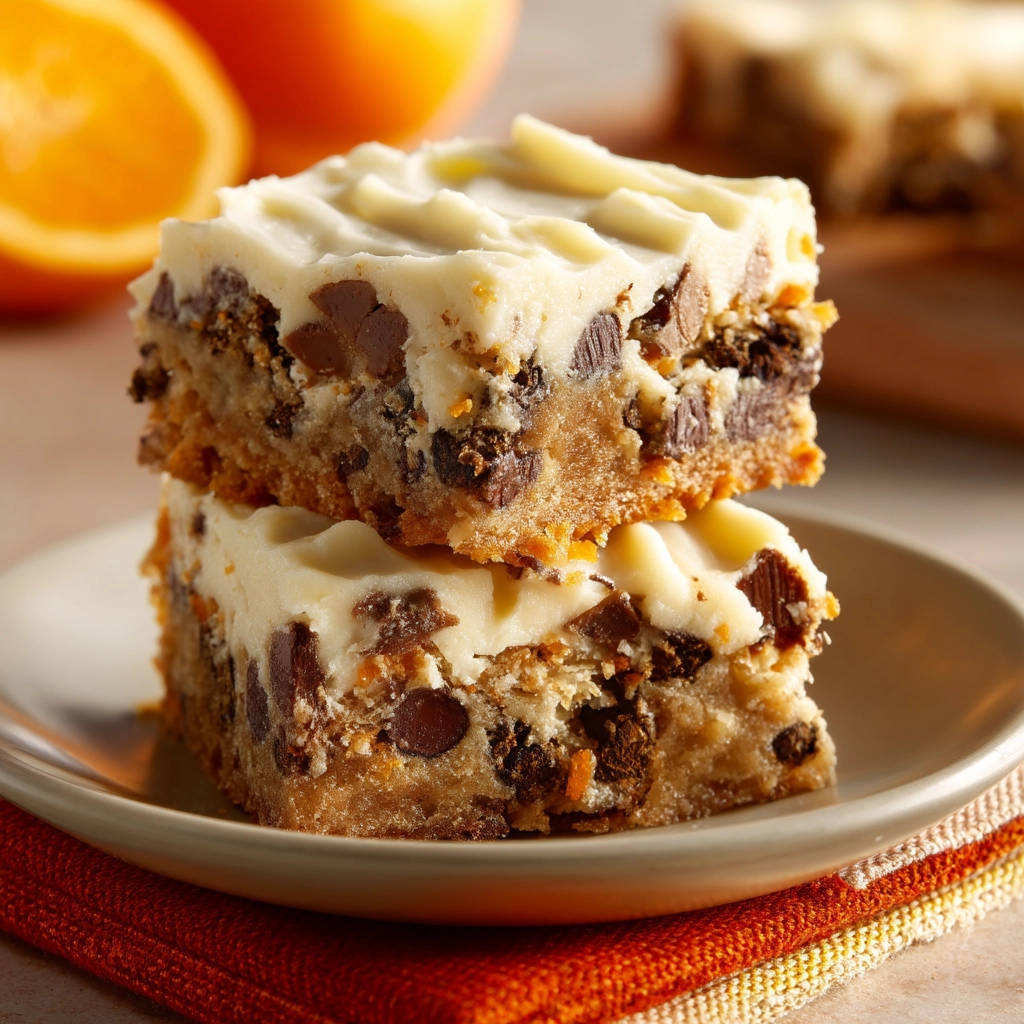
Ever bitten into a seemingly perfect cookie bar only to have the whole thing crumble into a sad, messy pile? I know that feeling, and it’s the worst! That’s why I’m so excited to share this recipe for chocolate orange dream bars. These bars aren’t just delicious; they’re engineered to hold their shape, slice cleanly, and deliver a burst of citrusy, chocolatey goodness in every bite. The secret? A little trick to ensure the base stays firm and doesn’t fall apart. Get ready for perfect bars every single time!
Why You’ll Love These Chocolate Orange Dream Bars
These aren’t your average cookie bars. Here’s why you’ll be making them again and again:
- No More Crumbling: The base stays perfectly intact for clean, satisfying slices.
- Intense Flavor: The combination of rich chocolate and bright orange is simply irresistible.
- Easy to Make: Despite the amazing results, these bars are surprisingly simple to whip up.
- Perfect for Sharing: They’re a crowd-pleaser and ideal for parties, potlucks, or just a sweet treat at home.
- That Dreamy Frosting: A tangy cream cheese frosting takes these bars to the next level.
Gathering Your Ingredients for Chocolate Orange Dream Bars
Let’s talk ingredients! This recipe is all about balance, combining familiar pantry staples with a few key elements that elevate these bars to something truly special. The star players here are, of course, chocolate and orange, creating a harmonious blend of sweet and citrusy notes. We’ll create a sturdy but delicious base, then amp up the flavor with a vibrant frosting that ties everything together. The full details and quantities are below, but here’s a little more on a few of the key ingredients.
For the Base:
- 1 cup all-purpose flour: This provides the structure for our base. Make sure to measure it accurately – spooning and leveling is key to avoid dry bars.
- 1/2 teaspoon baking powder: This gives the base a little lift, creating a slightly softer texture.
- 1/4 teaspoon salt: Don’t skip the salt! It balances the sweetness and enhances all the other flavors.
- 1/2 cup (1 stick) unsalted butter, softened: Softened butter is crucial for creaming with the sugars and creating a light, airy base. Make sure it’s softened, not melted!
- 1/2 cup granulated sugar: This adds sweetness and helps create a crisp edge.
- 1/4 cup packed light brown sugar: We use brown sugar here because its molasses content adds moisture and a deeper flavor compared to white sugar. Packing the brown sugar ensures you get the right amount.
- 1 large egg: The egg binds the ingredients together and adds richness.
- 1 teaspoon vanilla extract: A touch of vanilla enhances the overall flavor profile.
- 1 tablespoon orange zest: This is where that beautiful orange flavor comes in! Be sure to zest only the orange part of the peel, avoiding the bitter white pith.
- 1 cup semi-sweet chocolate chips: Use your favorite brand of semi-sweet chocolate chips. Feel free to experiment with different types of chocolate if you like!
For the Cream Cheese Frosting:
- 4 ounces cream cheese, softened: Softened cream cheese is essential for a smooth, lump-free frosting.
- 2 cups powdered sugar: Powdered sugar adds sweetness and structure to the frosting.
- 2 tablespoons milk: Milk helps to thin the frosting to the perfect consistency.
- 1/2 teaspoon orange extract: This boosts the orange flavor in the frosting, complementing the zest in the base.
Crafting Your Chocolate Orange Dream Bars: Step-by-Step
Ready to get baking? Don’t be intimidated by the layers; each step is straightforward, and the results are well worth the effort. The most important thing to remember is to really press that base into the pan. This is the key to preventing crumbling! Let’s walk through it together, one step at a time.
- Preheat and Prep: Start by preheating your oven to 350°F (175°C). While the oven is warming up, grease and flour a 9×13 inch baking pan. This prevents the bars from sticking and ensures easy removal. A light coating of cooking spray followed by a dusting of flour works perfectly.
- Combine Dry Ingredients: In a medium bowl, whisk together the all-purpose flour, baking powder, and salt. Whisking ensures that the baking powder is evenly distributed, which helps the base rise evenly. Set this mixture aside for now.
- Cream Butter and Sugars: In a large bowl, cream together the softened unsalted butter, granulated sugar, and packed light brown sugar until light and fluffy. This step is best done with an electric mixer, but you can also do it by hand. The goal is to incorporate air into the mixture, which will create a tender base.
- Add Egg and Extracts: Beat in the large egg and vanilla extract, followed by the orange zest. Make sure the egg is fully incorporated before moving on to the next step. The orange zest adds a bright, citrusy note that complements the chocolate perfectly.
- Combine Wet and Dry: Gradually add the dry ingredients to the wet ingredients, mixing until just combined. Be careful not to overmix, as this can result in a tough base. Stop mixing as soon as the flour disappears.
- Stir in Chocolate Chips: Gently stir in the semi-sweet chocolate chips. You can use a spatula or a wooden spoon for this step.
- The Crucial Step: Press Firmly! Transfer the mixture to the prepared baking pan and press it FIRMLY and EVENLY into the pan. This is the key to preventing crumbling! Use the flat bottom of a measuring cup or your fingers to really compact the base. Make sure the corners and edges are well-pressed.
- Bake to Golden Perfection: Bake for 20-25 minutes, or until the edges are golden brown and a toothpick inserted into the center comes out clean. Let the bars cool completely in the pan before frosting. This is important to prevent the frosting from melting.
- Make the Dreamy Frosting: While the bars are cooling, prepare the frosting. In a large bowl, beat together the softened cream cheese and powdered sugar until smooth. Make sure the cream cheese is softened to avoid lumps in the frosting.
- Flavor the Frosting: Beat in the milk and orange extract until light and fluffy. Add the milk gradually, until you reach your desired consistency.
- Frost and Enjoy: Spread the frosting evenly over the completely cooled bars.
- Slice and Serve: Cut into squares and serve. For the cleanest cuts, chill the bars in the refrigerator for 30 minutes before slicing.
Tips for Perfect Chocolate Orange Dream Bars Every Time
Want to ensure your bars are a smashing success? Here are a few extra tips and tricks:
- Don’t Overmix: Overmixing the base can lead to tough bars. Mix until just combined.
- Press, Press, Press: Seriously, don’t skimp on pressing the base firmly into the pan. This is the most important step for preventing crumbling.
- Cool Completely: Make sure the bars are completely cool before frosting to prevent the frosting from melting.
- Chill for Clean Cuts: For the neatest slices, chill the bars in the refrigerator for about 30 minutes before cutting.
- Zest Wisely: When zesting the orange, be sure to only zest the orange part of the peel, avoiding the bitter white pith.
- Experiment with Chocolate: Feel free to use dark chocolate chips, milk chocolate chips, or even white chocolate chips in place of the semi-sweet chocolate chips.
- Add Nuts: Chopped walnuts or pecans would be a delicious addition to the base.
What to Serve With Chocolate Orange Dream Bars
These bars are delicious on their own, but they also pair well with other treats. Consider serving them alongside some fresh fruit, such as berries or orange slices. They’re also fantastic with a cup of coffee or tea. For a complete dessert spread, you could also include some easy caramel nut dessert jars for a contrasting texture and flavor. Alternatively, a scoop of vanilla ice cream would create a delightful contrast of temperatures and textures.
Your Chocolate Orange Dream Bars Questions Answered (FAQ)
Can I make these bars ahead of time?
Yes! These bars are perfect for making ahead. You can bake the base and store it in an airtight container at room temperature for up to 2 days. Frost the bars just before serving. Frosted bars can be stored in the refrigerator for up to 3 days.
Can I freeze these bars?
Yes, you can freeze these bars. For best results, freeze the unfrosted base. Wrap it tightly in plastic wrap and then in foil. Freeze for up to 2 months. Thaw completely before frosting and serving. You can also freeze the frosted bars, but the frosting may become slightly softer after thawing.
Can I use a different type of flour?
While all-purpose flour works best in this recipe, you can try using a gluten-free all-purpose flour blend for a gluten-free version. Be sure to use a blend that contains xanthan gum. You might need to experiment with the amount of liquid to get the right consistency. You can also try replacing a portion of the all-purpose flour with almond flour for a nuttier flavor. If you’re looking for another delicious dessert with almond flour, be sure to try our decadent chocolate topped cream cake recipe!
My base is still crumbling, what am I doing wrong?
The most common reason for a crumbly base is not pressing the mixture firmly enough into the pan. Make sure you really compact the base using the flat bottom of a measuring cup or your fingers. Also, be careful not to overmix the base, as this can also lead to crumbling. Another factor could be using too little butter or improperly measured flour.
Enjoy Your Homemade Chocolate Orange Dream Bars!
There you have it – the recipe for perfectly sliceable, utterly irresistible chocolate orange dream bars! These bars are a delightful combination of flavors and textures, and they’re sure to become a new favorite. So, gather your ingredients, preheat your oven, and get ready to bake a batch of these dreamy treats. Don’t forget to leave a comment below and let me know how they turned out. Happy baking!
Chocolate Orange Dream Bars (Stops Base Crumbling!)

Ingredients
- 1 cup all-purpose flour
- 1/2 teaspoon baking powder
- 1/4 teaspoon salt
- 1/2 cup (1 stick) unsalted butter, softened
- 1/2 cup granulated sugar
- 1/4 cup packed light brown sugar
- 1 large egg
- 1 teaspoon vanilla extract
- 1 tablespoon orange zest
- 1 cup semi-sweet chocolate chips
- 4 ounces cream cheese, softened
- 2 cups powdered sugar
- 2 tablespoons milk
- 1/2 teaspoon orange extract
Directions
- Preheat oven to 350°F (175°C). Grease and flour a 9×13 inch baking pan.
- In a medium bowl, whisk together the flour, baking powder, and salt. Set aside.
- In a large bowl, cream together the softened butter, granulated sugar, and brown sugar until light and fluffy.
- Beat in the egg and vanilla extract. Stir in the orange zest.
- Gradually add the dry ingredients to the wet ingredients, mixing until just combined.
- Stir in the chocolate chips.
- **Press mixture FIRMLY and EVENLY into the prepared baking pan. This is crucial to prevent crumbling! Use the flat bottom of a measuring cup or your fingers to really compact the base before baking. A compacted base is key.**
- Bake for 20-25 minutes, or until golden brown. Let cool completely in the pan.
- For the frosting: In a large bowl, beat together the softened cream cheese and powdered sugar until smooth.
- Beat in the milk and orange extract until light and fluffy.
- Spread the frosting evenly over the cooled bars.
- Cut into squares and serve.