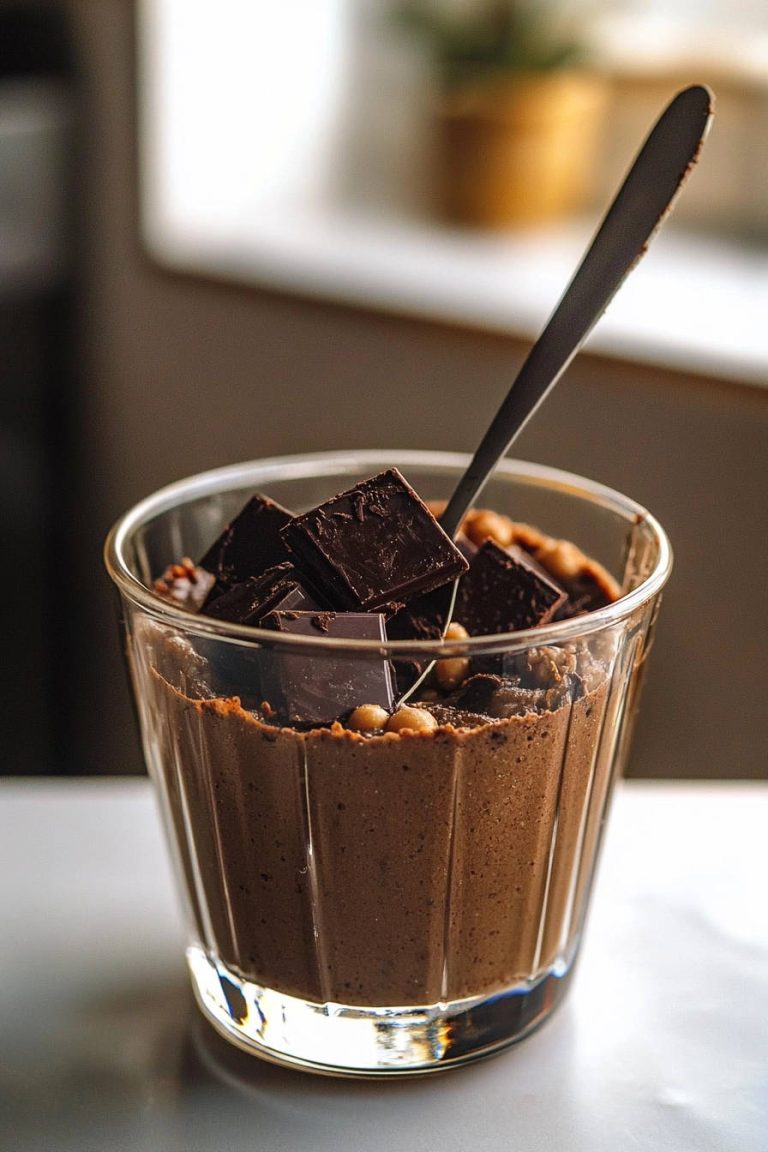
Oh, the classic pecan pie! It’s a dessert that instantly brings a sense of comfort and nostalgia. The sweet, gooey filling studded with crunchy pecans, all nestled in a flaky crust… pure bliss. But let’s be honest, adding chocolate elevates it to a whole new level of decadence, wouldn’t you agree?
Yet, for many home bakers, the dreaded “runny pie” is a real fear. We’ve all been there – slicing into what should be a perfectly set slice of chocolate pecan pie, only to have that beautiful filling ooze everywhere. Or worse, it’s too firm, almost dry. Finding that sweet spot between too liquid and too solid can feel like chasing a dessert dragon.
I spent a good amount of time wrestling with this very problem myself. I tried different ratios, different baking times, different temperatures. Sometimes it worked, sometimes it didn’t. It felt like pure luck. But after countless attempts (and many slightly-less-than-perfect pies), I finally cracked the code. There’s a simple trick, a visual cue really, that makes the filling in this Chocolate Pecan Pie set beautifully every single time. It results in slices that hold their shape with pride, showcasing that gorgeous combination of chocolate and pecans, while still delivering that wonderfully rich, slightly gooey center we all crave.
Why This Chocolate Pecan Pie is a Keeper
Beyond the promise of a perfectly set filling, there are so many reasons to fall in love with this particular chocolate pecan pie recipe. It’s not just a dessert; it’s an experience. Here are just a few:
- Decadent Flavor Combination: The marriage of rich, melted chocolate and buttery, toasted pecans is simply divine. It’s a step up from a traditional pecan pie, adding a layer of complexity and indulgence.
- Reliable Results: That “simple trick” isn’t really a trick at all, but rather understanding the science of baking and what to look for. Once you know the visual cues, you’ll feel confident making this pie again and again.
- Surprisingly Simple: Despite its impressive appearance and delicious taste, the process itself is quite straightforward. If you can whisk and pour, you can make this pie!
- Crowd-Pleasing Classic: This pie is a guaranteed hit at any gathering, from holiday dinners to casual get-togethers. It has that comforting familiarity with an exciting chocolate twist.
- Make Ahead Friendly: Pie is often best when allowed to cool completely, making it a perfect dessert to bake in advance, freeing up time on the day you need it.
Gathering Your Ingredients for Chocolate Pecan Pie
Creating this heavenly dessert starts with assembling a few key components. The beauty of this recipe lies in its simplicity, using readily available ingredients that combine to create magic. Each item plays a crucial role in building that perfect texture and flavor profile.
At the heart of the pie is, of course, a reliable base. A prepared 9-inch pie crust is our starting point, offering a convenient shortcut without sacrificing quality. You can opt for your favorite store-bought brand or use a homemade recipe if you prefer; just ensure it’s ready for filling.
- 1 prepared pie crust (9 inch)
Next, we introduce the stars of the show! We need plenty of pecans – chopped nuts fill the bottom, providing texture throughout the filling, and a few extra halves are reserved for decorating the top, adding a beautiful visual flourish. Choose fresh, good-quality pecans for the best flavor. Complementing the pecans is semi-sweet chocolate. Whether you use chocolate chips or finely chopped chocolate from a bar, the key is quality. Semi-sweet offers a perfect balance, providing chocolatey depth without being overly bitter or sweet against the richness of the filling. Using chopped chocolate from a bar often results in a slightly smoother melt, but chips are perfectly fine.
- 1 cup chopped pecans, plus extra halves for topping
- 1 cup semi-sweet chocolate chips or chopped chocolate
The luscious, gooey filling is built upon a foundation of pantry staples. Unsalted butter, melted, provides richness and helps carry the flavors. Granulated sugar sweetens the pie, of course, but also interacts with the other ingredients to create that signature texture. The essential binding and setting agents come from large eggs, lightly beaten. These are crucial for structure. For that classic pecan pie gooiness, we rely on light corn syrup. If you don’t have corn syrup or prefer an alternative, maple syrup works beautifully and adds its own subtle, delicious complexity.
- 1/2 cup unsalted butter, melted
- 1 cup granulated sugar
- 1/2 cup light corn syrup or maple syrup
- 3 large eggs, lightly beaten
Finally, we add flavor enhancers to round everything out. Vanilla extract deepens the sweetness and aroma, complementing both the chocolate and pecans. A touch of salt is vital – it balances the sweetness and enhances all the other flavors, making the pie taste richer and more complex.
- 1 teaspoon vanilla extract
- 1/2 teaspoon salt
For serving, while the pie is utterly delicious on its own, consider having whipped cream and chocolate syrup on hand. They add an extra layer of indulgence that’s hard to resist.
- Whipped cream and chocolate syrup for serving (optional)
Crafting Your Chocolate Pecan Pie: Step-by-Step
Ready to turn these simple ingredients into a show-stopping dessert? The process is straightforward, but paying attention to a few key details, especially during the baking and cooling phases, is what guarantees that perfect set every single time. Let’s walk through it together.
-
Prepare Your Workspace: Preheat and Crust Prep. Before you even think about mixing, get your oven ready. Preheat it to 350 degrees F (175 degrees C). Proper preheating ensures the pie bakes evenly from the start. While the oven heats, place your chosen 9-inch pie crust into a suitable pie plate. This is the time to make it look pretty! If you’re using a refrigerated or frozen crust, you might want to flute the edges for a classic look. A well-formed edge not only looks lovely but also helps contain that generous filling.
-
Lay the Foundation: Nuts and Chocolate. Once the crust is in place, scatter the chopped pecans and chocolate chips (or chopped chocolate) evenly across the bottom. Don’t just dump them in; spread them out so you get a good distribution of pecans and chocolate in every single slice. These goodies will settle slightly into the filling as it bakes, creating layers of texture and flavor.
-
Mix the Wet Base: Butter, Sugar, Syrup. In a medium-sized bowl, combine the melted unsalted butter, granulated sugar, and your choice of light corn syrup or maple syrup. Whisk these together thoroughly until they are well combined. This creates the sweet, rich base of your filling and helps dissolve the sugar before you add the eggs.
-
Incorporate the Binders and Flavor: Eggs, Vanilla, Salt. Now, add the lightly beaten eggs, vanilla extract, and salt to the bowl with the butter and sugar mixture. Whisk everything until the mixture is smooth and everything is fully incorporated. You’re looking for a homogenous liquid here, with no streaks of egg yolk or unincorporated salt. The eggs are what will set the filling, the vanilla adds depth, and the salt balances the sweetness.
-
Fill the Pie: Pour and Decorate. Carefully pour the prepared filling mixture over the pecans and chocolate that are already in your pie crust. Pour slowly to avoid splashing or disturbing the even layer of nuts and chocolate too much. If you saved some pecan halves for decoration, now is the time to artfully arrange them on top of the filling. They’ll float slightly as the pie bakes.
-
The Crucial Baking Step: Bake and Watch. Place the pie in the preheated oven and bake for 50 to 60 minutes. This is where the “perfect set” trick comes in. You need to watch the pie, not just the timer. The edges of the filling should appear set and look slightly puffed. However, the center needs to still have a SLIGHT jiggle when you gently shake the pie plate. Think of it like a barely-set jelly. If the center is completely firm and doesn’t jiggle at all, you’ve likely overbaked it. If it looks like liquid lava, it needs more time. That gentle jiggle means it’s mostly set but will continue to cook and firm up as it cools. This visual cue is your best friend!
-
The MOST Crucial Step: Cool Completely! Once the pie shows those perfect visual cues from baking, carefully remove it from the oven. Immediately place the hot pie plate on a wire rack. This allows air to circulate underneath, promoting even cooling. This step is absolutely critical for the filling to finish setting properly and firm up into that sliceable consistency. You MUST let the pie cool COMPLETELY. This means letting it sit undisturbed for at least 2 to 3 hours, maybe even longer, until it’s at room temperature. Seriously, resist the urge to slice it while it’s warm – the filling will likely run, and all your careful baking will be undone. Patience is key here!
-
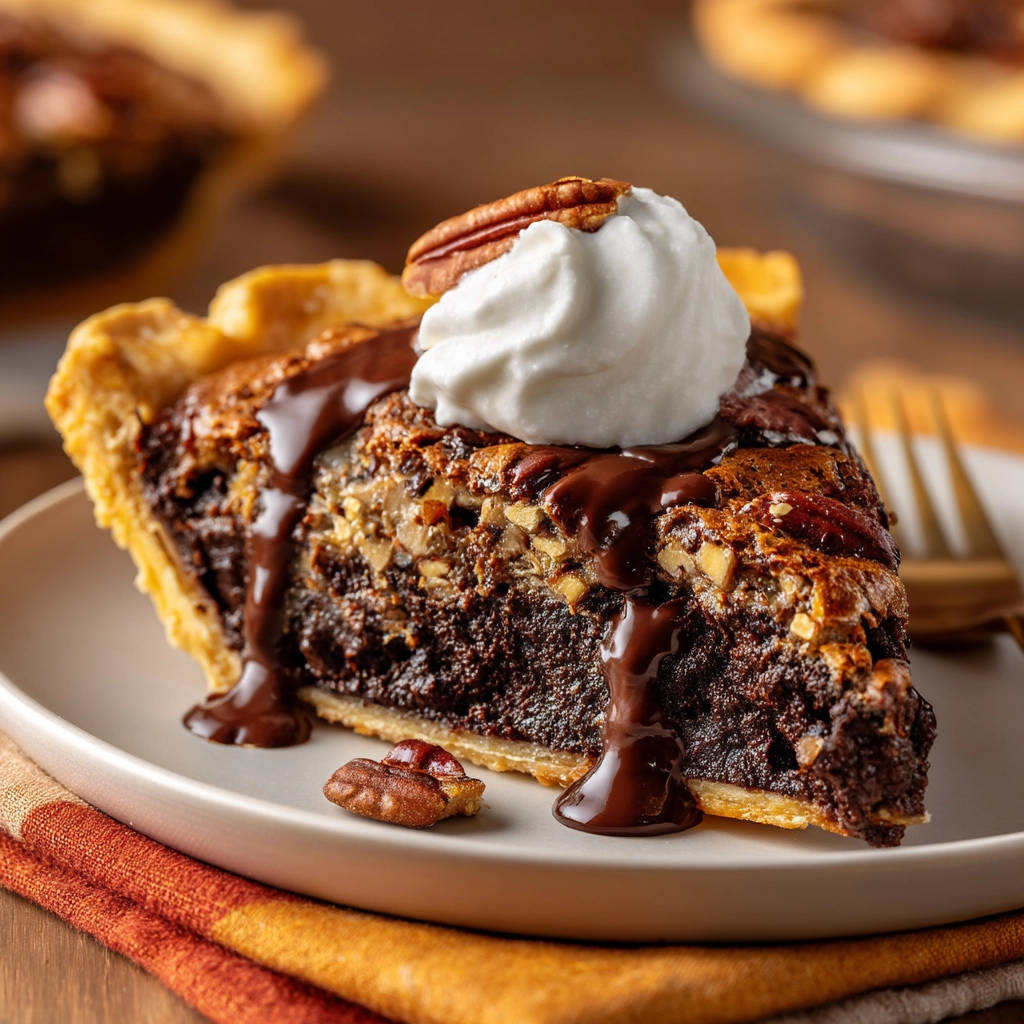
Serve and Enjoy: The Delicious Reward. Once the pie is completely cool and perfectly set, it’s ready to be enjoyed! Slice it with a sharp knife. Serve slices plain to appreciate the pure chocolate and pecan goodness, or add toppings. A dollop of whipped cream or a drizzle of chocolate syrup takes it over the top, adding extra richness and beauty.
Tips for Perfect Chocolate Pecan Pie Every Time
Achieving pie perfection is within reach! While the recipe is straightforward, a few extra tips can help ensure your chocolate pecan pie turns out beautifully set and utterly delicious, bite after bite.
-
Preventing a Soggy Bottom: If you’ve struggled with soggy crusts, you can try blind baking your pie crust for about 10-15 minutes before adding the filling. Just prick the bottom with a fork, line it with parchment paper, fill with pie weights or dried beans, and bake until the edges are just starting to set. Let it cool slightly before filling.
-
Protecting the Crust Edges: Pie crust edges are thinner than the rest and can brown too quickly. If you notice the edges getting dark before the filling is done, loosely cover the edges with foil or a pie crust shield. This simple step can save your crust from burning.
-
Trust the Jiggle: As emphasized in the steps, learning the visual cue of the “slight jiggle” in the center is key. Ovens vary, so relying solely on time can be misleading. Look for those set, slightly puffed edges and the gentle wobble in the middle.
-
Cooling is Non-Negotiable: I can’t stress this enough! The filling continues to cook and firm up as it cools. Trying to slice a warm pie is the number one reason for a runny mess. Plan ahead and give your pie ample time to cool completely on a wire rack.
-
Quality Ingredients Matter: Using fresh pecans (stale nuts can taste bitter) and good quality chocolate will truly make a difference in the final flavor. Since there are only a few ingredients, their quality shines through.
-
Serving Temperature: While it needs to cool completely to set, some people prefer pecan pie served slightly warm. If you want to warm it up, heat individual slices gently in the microwave or a low oven. Just be aware that warming can make the filling softer.
Serving Suggestions for Your Chocolate Pecan Pie
This chocolate pecan pie is a showstopper all on its own, but pairing it with the right accompaniments can elevate the dessert experience even further. Think textures and temperatures that complement the rich, gooey filling and crunchy nuts.
The classic choices mentioned in the recipe, whipped cream and chocolate syrup, are winners for a reason. A cloud of fresh whipped cream adds a light, airy contrast to the dense pie, while a drizzle of extra chocolate syrup leans into the decadence. Don’t be shy with either!
For another delightful contrast, consider serving a slice alongside a scoop of vanilla bean ice cream. The cold, creamy ice cream melting slightly into the warm (or room temperature) pie is pure bliss. If you’re feeling adventurous, a salted caramel ice cream would be absolutely phenomenal.
Sometimes, a simple drink is the perfect pairing. A cup of hot coffee, a rich espresso, or even a glass of milk can beautifully complement the sweetness and richness of the pie.
Your Chocolate Pecan Pie Questions Answered (FAQ)
Making pie can sometimes bring up questions, especially when you’re aiming for that perfect set. Here are some common questions and helpful answers to ensure your chocolate pecan pie success.
Why did my Chocolate Pecan Pie not set?
The most common culprit is not letting it cool completely. The filling continues to set significantly as it cools. Make sure you allow the pie to cool undisturbed on a wire rack for at least 2-3 hours, or until it reaches room temperature. Another reason could be under-baking. Remember to look for those visual cues: set and slightly puffed edges with only a slight jiggle in the very center. If the center is still very liquidy when you take it out, it needs more oven time. Trust the jiggle test!
Can I use a different type of pie crust?
Absolutely! This recipe works well with a variety of 9-inch pie crusts. You can use a frozen crust, a refrigerated rolled crust, or even a homemade pastry crust. If using a frozen crust, follow package directions for thawing if necessary. For homemade or refrigerated crusts, you might consider blind baking for a few minutes if you’re worried about a soggy bottom, as mentioned in our tips section.
Can I substitute the light corn syrup?
Yes, the recipe offers maple syrup as a direct substitute. Use an equal amount of pure maple syrup (not pancake syrup). This will give the pie a subtle maple flavor, which pairs beautifully with both pecans and chocolate. Other liquid sweeteners like honey or agave could potentially work, but they might alter the flavor and texture more significantly, as they have different consistencies and sugar profiles compared to corn syrup.
What kind of chocolate is best?
The recipe specifies semi-sweet chocolate chips or chopped chocolate, which provides a balanced sweetness against the richness of the filling. You could experiment with dark chocolate chips or chopped dark chocolate for a deeper, less sweet flavor, or even milk chocolate for a sweeter, creamier result. Just be aware that different types of chocolate melt and behave slightly differently, but semi-sweet is generally a safe and delicious bet for this pie.
How do I store leftover Chocolate Pecan Pie?
Leftover pie should be stored in the refrigerator. Cover it loosely with plastic wrap or aluminum foil. It will keep well for 3-4 days. For longer storage, you can freeze the pie. To freeze, first cool it completely. Wrap the cooled pie tightly in plastic wrap, then wrap again in aluminum foil or place in a freezer-safe bag. It can be frozen for up to 2-3 months. Thaw overnight in the refrigerator before serving.
Can I make this pie ahead of time?
Yes, this pie is an excellent make-ahead dessert! Since it requires several hours to cool and set completely, baking it the day before you plan to serve it works perfectly. Just bake, cool completely on the wire rack, and then cover and refrigerate until ready to slice and serve.
Why is placing the pie on a wire rack important for cooling?
Placing the hot pie directly on a solid surface (like a countertop) traps heat underneath, which can prolong the cooling time and even lead to a steamier, potentially less set bottom crust. A wire rack allows air to circulate around the entire pie plate, facilitating faster and more even cooling, which is crucial for the filling to set properly.
Enjoy Your Homemade Chocolate Pecan Pie!
There’s something incredibly satisfying about baking a beautiful pie from scratch, and this Chocolate Pecan Pie recipe, with its promise of a perfect set filling, is truly rewarding. The combination of rich chocolate, crunchy pecans, and sweet, gooey filling in a flaky crust is simply irresistible.
Whether you’re making it for a special occasion, a holiday feast, or just because you’re craving something wonderfully sweet and nutty, this recipe is sure to impress. Don’t be intimidated by pie; armed with these tips and the knowledge of what to look for during baking and cooling, you’ve got this!
Give this recipe a try and let me know how it turns out in the comments below! Did you master the jiggle test? How did you serve your slice? I love hearing about your kitchen adventures!
Chocolate Pecan Pie

Ingredients
- 1 prepared pie crust (9 inch)
- 1 cup chopped pecans, plus extra halves for topping
- 1 cup semi-sweet chocolate chips or chopped chocolate
- 1/2 cup unsalted butter, melted
- 1 cup granulated sugar
- 1/2 cup light corn syrup or maple syrup
- 3 large eggs, lightly beaten
- 1 teaspoon vanilla extract
- 1/2 teaspoon salt
- Whipped cream and chocolate syrup for serving (optional)
Directions
- Preheat oven to 350 degrees F (175 degrees C). Place the pie crust in a 9-inch pie plate. Flute edges if desired.
- Scatter the chopped pecans and chocolate chips evenly over the bottom of the prepared pie crust.
- In a medium bowl, whisk together the melted butter, granulated sugar, and corn syrup (or maple syrup) until well combined.
- Add the lightly beaten eggs, vanilla extract, and salt to the bowl. Whisk until the mixture is smooth and fully incorporated.
- Carefully pour the filling mixture over the pecans and chocolate in the pie crust. Arrange pecan halves on top if using them for decoration.
- Bake for 50 to 60 minutes. The key to a perfect set filling is to watch for visual cues: the edges of the filling should appear set and slightly puffed, but the center should still have a slight jiggle when gently shaken. This indicates that the filling is mostly set but will continue to firm up as it cools.
- Carefully remove the pie from the oven and place it on a wire rack. This step is crucial for allowing the filling to finish setting properly. Let the pie cool completely for at least 2 to 3 hours before slicing. Do not slice while warm, or the filling will likely run.
- Serve slices plain or topped with whipped cream and a drizzle of chocolate syrup.