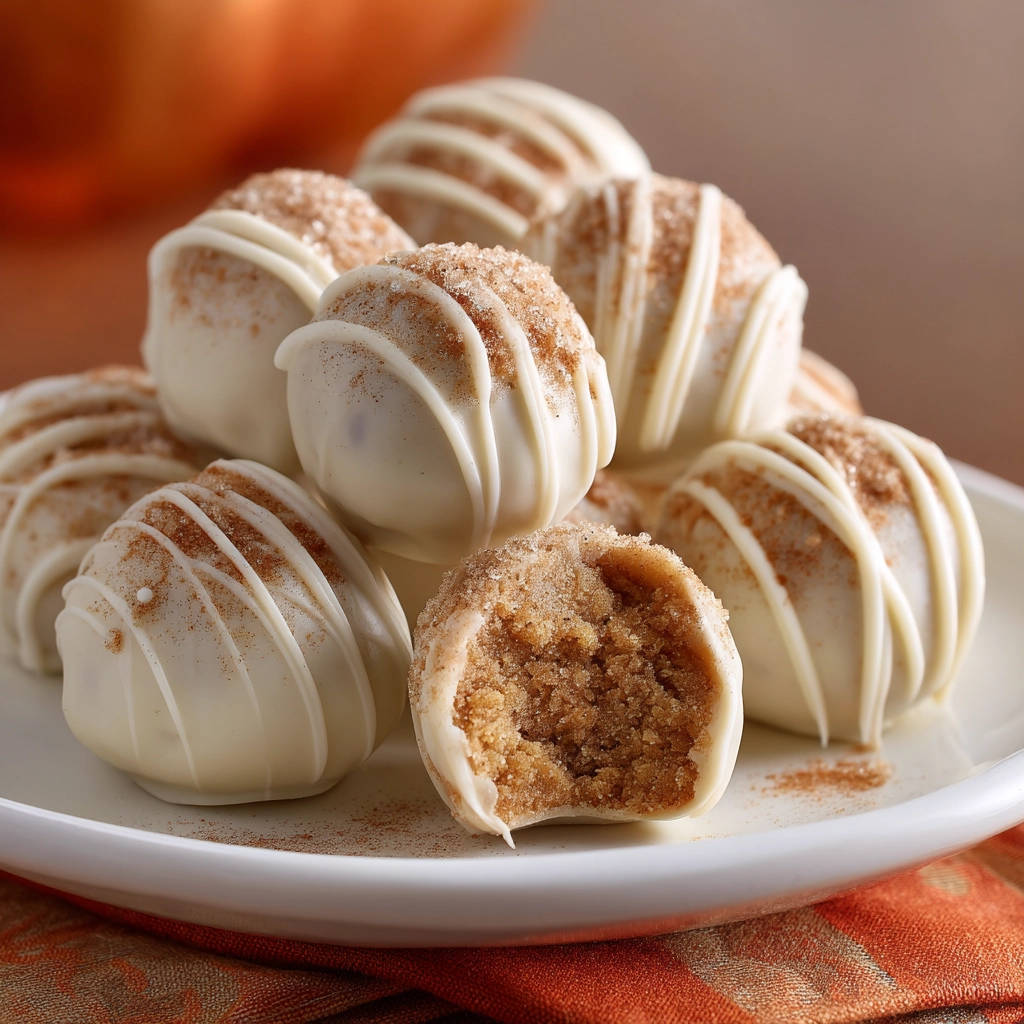
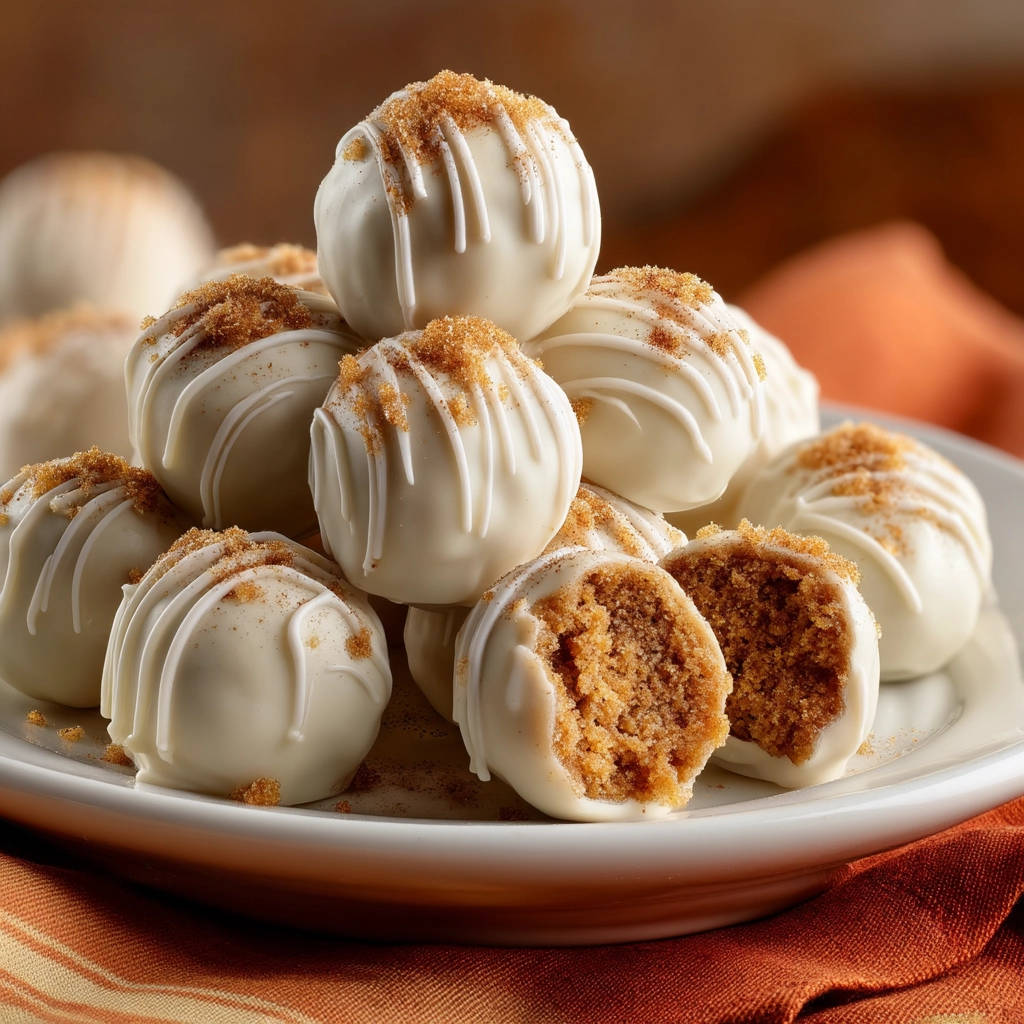
Looking for a simple, satisfying, and utterly irresistible treat? These Cinnamon Sugar Cookie Balls are the answer! These delightful, no-bake wonders are perfect for holidays, parties, or simply when you need a sweet pick-me-up. They’re incredibly easy to make, require minimal ingredients, and deliver maximum flavor. Plus, the secret to perfectly shaped balls? We’ve got you covered!
Why You’ll Love These Cinnamon Sugar Cookie Balls
These aren’t your average cookies. Here’s why they will become a favorite:
- No-Bake Bliss: No oven required! Perfect for those hot days or when you just don’t want to fire up the oven.
- Simple Ingredients: Made with everyday ingredients you probably already have in your pantry.
- Perfectly Portable: These little balls of joy are ideal for parties, potlucks, or lunchbox treats.
- Kid-Friendly Fun: Get the kids involved in rolling and decorating!
- Cinnamon Sugar Goodness: The warm, comforting flavor of cinnamon sugar is simply irresistible.
Gathering Your Ingredients for Cinnamon Sugar Cookie Balls
Before you begin, let’s talk about the ingredients that make these cookie balls so special. We’re aiming for a creamy, melt-in-your-mouth texture with a delightful cinnamon-sugar coating. Each ingredient plays a crucial role in achieving this delicious outcome. Getting the right ingredients makes the biggest difference.
- Vanilla Wafer Cookies (about 14 oz): These form the base of our cookie balls, providing a delicate sweetness and a wonderfully crumbly texture. The brand isn’t critical, but aim for a classic vanilla wafer for the best flavor.
- Cream Cheese (8 oz block, softened): This is the magic ingredient that binds everything together and creates a rich, creamy consistency. Be sure to use a block of full-fat cream cheese for the best results and ensure it’s properly softened so it mixes evenly.
- White Melting Chocolate or Wafers (12 oz): For that smooth, decadent coating, good quality melting chocolate is essential. Wafers are designed to melt evenly and easily, but you can also use a bar of white chocolate specifically made for melting. Avoid chocolate chips, as they often contain stabilizers that prevent them from melting as smoothly.
- Granulated Sugar (1/4 cup): This adds a touch of extra sweetness to the cinnamon coating and helps create that delightful sugary crunch.
- Ground Cinnamon (1 tsp): The star of the show! Cinnamon provides warmth, spice, and that classic comforting flavor we all love. Adjust the amount to your preference – more for a bolder cinnamon flavor, less for a more subtle hint.
Crafting Your Cinnamon Sugar Cookie Balls: Step-by-Step
Now for the fun part! Making these Cinnamon Sugar Cookie Balls is a breeze, but here’s a detailed walkthrough to ensure success. Follow these steps, and you’ll be enjoying these treats in no time. The key to great cookie balls is getting the right consistency.
- Crush the Vanilla Wafers: The first step is to transform those vanilla wafers into fine crumbs. You can use a food processor for a quick and easy job, pulsing until you achieve a sand-like texture. Alternatively, place the cookies in a zip-top bag and crush them with a rolling pin. This method is a bit more hands-on and therapeutic! Make sure there aren’t any large pieces remaining for the best texture.
- Combine Cookie Crumbs and Cream Cheese: In a medium bowl, gently combine the crushed cookie crumbs and the softened cream cheese. This is where the magic happens! Mix thoroughly until the mixture is uniform and holds together easily when you press a small amount between your fingers. This is the crucial step to avoid crumbly cookie balls. If the mixture feels too dry, add a tiny bit more softened cream cheese (start with 1/2 teaspoon). If it feels too wet, add a tablespoon or two more cookie crumbs or even a bit of powdered sugar. The goal is a consistency that is moldable but not sticky.
- Chill the Mixture: Cover the bowl with plastic wrap and refrigerate for at least 30 minutes. This chilling step is essential! It allows the cream cheese to firm up, making the balls much easier to roll and preventing them from falling apart later. Don’t skip this step!
- Roll into Balls: Once chilled, roll the mixture into 1-inch balls. This is where the fun begins! Use a small cookie scoop or a spoon to portion out the mixture evenly. Roll each portion between your palms until smooth and round. Place the rolled balls on a baking sheet lined with parchment or wax paper.
- Refrigerate the Rolled Balls: Place the baking sheet with the rolled cookie balls back into the refrigerator for another 15-20 minutes. This second chilling helps them maintain their shape when dipped in the warm chocolate.
- Prepare the Cinnamon Sugar Topping: While the balls are chilling, prepare the cinnamon sugar topping. In a small bowl, stir together the granulated sugar and ground cinnamon until well combined. Set aside.
- Melt the White Chocolate: Now it’s time to melt the white chocolate. Follow the package directions carefully. You can use a microwave or a double boiler. If using a microwave, melt the chocolate in 30-second intervals, stirring in between, to prevent overheating, which can cause it to seize and become unusable. A double boiler provides more gentle and even heating.
- Dip in Chocolate: Dip each chilled cookie ball into the melted white chocolate, turning to coat completely. Lift the ball out with a fork or a dipping tool, letting any excess chocolate drip off. This is a delicate step, so take your time.
- Sprinkle with Cinnamon Sugar: Place the coated ball back on the lined baking sheet. Immediately sprinkle the top of the wet chocolate with the cinnamon sugar mixture. The cinnamon sugar will adhere best while the chocolate is still melted.
- Chill to Set: Once all the cookie balls are coated and sprinkled, refrigerate them for about 15-20 minutes, or until the chocolate is completely set. This final chill ensures a firm and stable coating.
Tips for Perfect Cinnamon Sugar Cookie Balls Every Time
Want to ensure your Cinnamon Sugar Cookie Balls are a smashing success? Here are a few pro tips to keep in mind:
- Soften the Cream Cheese Properly: Properly softened cream cheese is crucial for a smooth and even mixture. Let it sit at room temperature for at least an hour before using, or microwave it in 15-second intervals until softened but not melted.
- Adjust the Consistency: Don’t be afraid to adjust the amount of cookie crumbs or cream cheese to achieve the perfect consistency. If the mixture is too dry, add more cream cheese. If it’s too wet, add more cookie crumbs.
- Chill, Chill, Chill: Chilling the mixture and the rolled balls is essential for preventing them from crumbling or losing their shape. Don’t skip these steps!
- Use Good Quality Melting Chocolate: Good quality melting chocolate or wafers will melt smoothly and evenly, creating a beautiful and delicious coating.
- Don’t Overheat the Chocolate: Overheating white chocolate can cause it to seize and become grainy. Melt it gently and slowly, stirring frequently.
- Get Creative with Toppings: While cinnamon sugar is classic, feel free to experiment with other toppings, such as sprinkles, chopped nuts, or cocoa powder.
- Storage: Store these Cinnamon Sugar Cookie Balls in an airtight container in the refrigerator for up to a week.
What to Serve With Cinnamon Sugar Cookie Balls
These delightful cookie balls are perfect on their own, but they also pair well with a variety of other treats. Consider serving them alongside a rich, creamy dessert like our Decadent Chocolate Topped Cream Cake. They also make a lovely addition to a dessert platter with other cookies and candies. For a cozy, comforting treat, enjoy them with a warm cup of coffee or tea. They are also fantastic in dessert cups! You can follow the same instructions in our article: Chocolate Covered Apple Dessert Cups.
Your Cinnamon Sugar Cookie Balls Questions Answered (FAQ)
Can I use a different type of cookie for the base?
Yes, you can! While vanilla wafers provide a classic flavor and texture, you can experiment with other cookies, such as shortbread cookies or even chocolate wafers. Keep in mind that the flavor of the cookie will affect the overall taste of the cookie balls.
Can I make these ahead of time?
Absolutely! In fact, making these Cinnamon Sugar Cookie Balls ahead of time is a great idea. They can be stored in an airtight container in the refrigerator for up to a week. This makes them perfect for parties or holiday gatherings where you want to get a head start on the dessert preparation.
Can I freeze these cookie balls?
Yes, you can freeze them for longer storage. Place the cookie balls in a single layer on a baking sheet and freeze until solid. Then, transfer them to an airtight container or freezer bag. They can be stored in the freezer for up to 2-3 months. Thaw them in the refrigerator before serving.
My chocolate seized when I was melting it. What did I do wrong?
Chocolate seizes when it comes into contact with even a small amount of water or is overheated. Ensure that your bowl and utensils are completely dry when melting the chocolate. If using a microwave, melt the chocolate in short intervals, stirring frequently to prevent overheating. If the chocolate does seize, try adding a teaspoon of vegetable oil or shortening and stirring vigorously. This can sometimes help to smooth it out.
Can I use milk chocolate instead of white chocolate?
Yes, you can definitely use milk chocolate! Milk chocolate will give the cookie balls a richer, more decadent flavor. You can also use dark chocolate for a more intense chocolate flavor. Just be sure to use good quality melting chocolate or wafers for the best results.
Enjoy Your Homemade Cinnamon Sugar Cookie Balls!
There you have it! A simple, delicious, and utterly irresistible treat that’s perfect for any occasion. These Cinnamon Sugar Cookie Balls are a guaranteed crowd-pleaser and are sure to become a new family favorite. So gather your ingredients, follow these easy steps, and get ready to enjoy these little balls of cinnamon-sugar goodness. Don’t forget to rate the recipe and leave a comment below to let us know what you think. Happy baking (or rather, no-baking)!