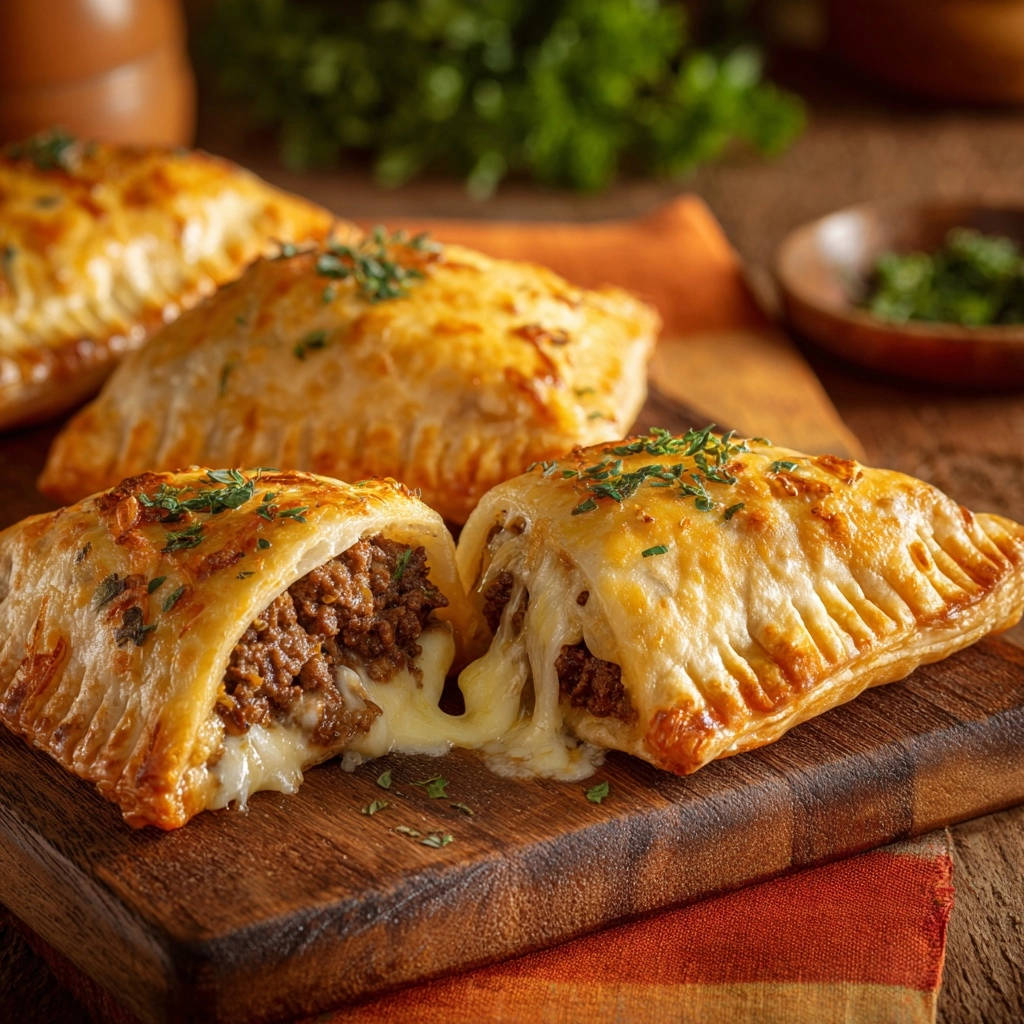
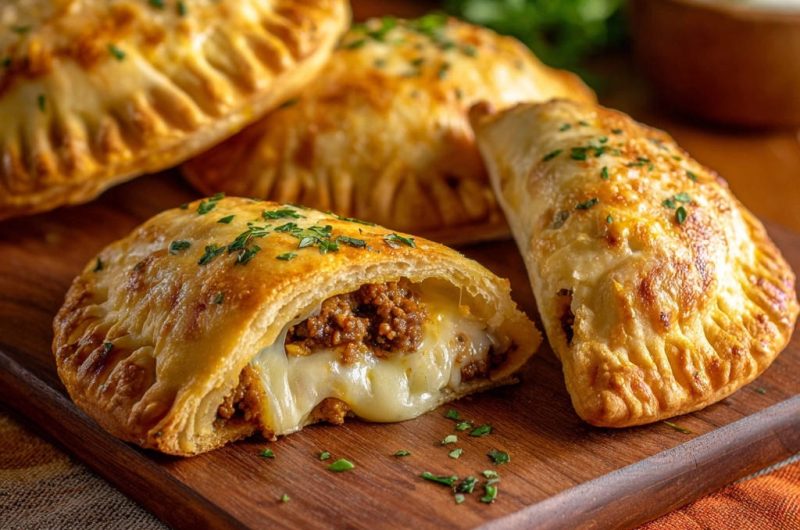
There’s nothing quite like biting into a perfectly golden, savory empanada, only to find the delicious cheesy filling has completely vanished, oozed out during baking. It’s a common culinary heartbreak! I’ve been there countless times, but after years of perfecting, I finally cracked the code to making flawless Classic Beef and Cheese Empanadas that hold all their gooey goodness inside.
This recipe isn’t just about incredible flavor; it’s about a fool-proof method that guarantees a perfectly sealed, no-mess empanada every single time. Get ready to experience the ultimate handheld comfort food, where every bite is packed with savory beef and melted cheese, just as it should be.
Why These Classic Beef and Cheese Empanadas Are a Game-Changer
The Leak-Proof Promise: Say Goodbye to Messy Fillings
The number one complaint with homemade empanadas is often the dreaded cheese leak, leaving a sticky mess on your baking sheet. Our method directly addresses this frustration head-on.
By focusing on precise filling placement and a crucial double-sealing technique, this recipe ensures your cheesy, savory interior stays exactly where it belongs: inside the crispy shell.
Irresistible Flavor, Effortless Prep: What Makes Our Recipe Shine
Beyond being leak-proof, these empanadas boast a robust, perfectly seasoned beef filling that is utterly delicious. The blend of savory meat and melty cheese creates a harmonious flavor profile.
Using readily available store-bought empanada wrappers streamlines the process significantly, making this a surprisingly effortless dish to prepare. You get maximum flavor with minimal fuss.
Assembling Your Culinary Arsenal: Ingredients for Perfect Empanadas
The Heart of the Empanada: Crafting Your Savory Beef Filling
The foundation of these incredible empanadas is a flavorful ground beef filling. Opt for a lean ground beef (80/20) to ensure a juicy texture without excessive grease.
A finely chopped onion and fresh minced garlic create an aromatic base that deepens the savory notes. Fresh is always best for maximum flavor impact.
Ground cumin and paprika are the stars of the spice blend, adding warmth and a hint of smoky sweetness characteristic of Latin American flavors. Adjust salt and pepper to your preference for a perfectly balanced seasoning.
Cheese Choices: Achieving Gooey Perfection
For that irresistible gooey factor, shredded mozzarella or cheddar cheese are ideal choices. They melt beautifully and provide a creamy contrast to the savory beef.
Feel free to experiment with a blend of cheeses, such as Monterey Jack or a Mexican blend, for added complexity. The key is using cheeses known for their excellent melting properties.
Wrapper Wisdom: Store-Bought Convenience vs. Homemade Charm
While homemade empanada wrappers offer a unique touch, high-quality store-bought wrappers are a fantastic shortcut. They save considerable time without compromising the final result.
Ensure your wrappers are at room temperature before handling to prevent cracking. This makes them pliable and much easier to work with when filling and sealing.
The Golden Touch: Essential Finishes and Garnishes
The simple egg wash, a beaten egg mixed with a tablespoon of water, is crucial for achieving that beautiful golden-brown, crispy crust. It also aids in the sealing process.
Fresh chopped parsley adds a vibrant pop of color and a fresh, herbaceous note. It’s an optional but highly recommended garnish that elevates the presentation and taste.
From Skillet to Sheet Pan: Your Step-by-Step Guide to Classic Beef and Cheese Empanadas
Preparing the Rich Beef Base: Sautéing for Flavor
- Sauté Aromatics:
Begin by heating cooking oil in a large skillet over medium heat. Add your chopped onion and sauté for about 5 minutes until it’s beautifully softened and translucent. This step extracts their sweetness.
Stir in the minced garlic for just one more minute until it’s fragrant, being careful not to let it brown, as burnt garlic can taste bitter.
- Brown the Beef and Season:
Add the ground beef to the skillet, breaking it up with a spoon as it cooks. Continue until it’s evenly browned, ensuring no pink remains. This develops deep, savory notes.
Carefully drain off any excess fat from the skillet to prevent a greasy filling. Stir in the ground cumin and paprika, then season generously with salt and pepper to taste. Cook for an additional 1-2 minutes, allowing the spices to become fragrant. Remove the filling from the heat and let it cool slightly before proceeding; this prevents the cheese from melting prematurely and helps the wrappers from tearing.
The Art of Sealing: Master Our No-Ooze Techniques
- Fill Off-Center:
Lay out your empanada wrappers on a clean, dry surface. This is one of the most critical steps for preventing leaks: place a small amount of the cooled beef filling slightly off-center on each wrapper.
This strategic placement leaves ample clean space along the edges for a secure seal. Remember not to overfill, and keep the wrapper edges perfectly clean for optimal adhesion.
- Add the Cheese:
Sprinkle a modest amount of your shredded cheese directly over the beef filling. Avoid overloading to ensure the wrapper can fully enclose the filling without straining.
- Brush with Egg Wash:
Dip a pastry brush into your prepared egg wash (egg beaten with water) and lightly brush the entire edge of each wrapper. This creates an adhesive barrier, forming a strong initial seal.
- Fold and Press:
Carefully fold the wrapper over the filling, aligning the edges to create a perfect half-moon shape. Gently but firmly press the edges together with your fingers, working from the center outwards.
Be sure to squeeze out any trapped air pockets as you seal, as air can cause the empanadas to puff up unevenly or burst during baking.
- Crimp for a Double Seal:
For an extra layer of security, use the tines of a fork to crimp the edges tightly. This creates a decorative pattern and a robust double seal that is essential for preventing any filling from escaping. This crucial step is your best defense against leaks, much like when crafting perfectly sealed crispy mozzarella sticks.
Baking to Golden Perfection: Achieving That Irresistible Crust
- Prepare for Baking:
Transfer your perfectly sealed empanadas to a baking sheet lined with parchment paper. Ensure they are spaced adequately to allow for even air circulation and browning.
Brush the tops of all the empanadas generously with the remaining egg wash. This is what gives them that beautiful, glossy golden-brown crust and a satisfying crispness.
- Bake:
Bake the empanadas in a preheated oven at 375 degrees Fahrenheit (190 degrees Celsius) for 18-20 minutes. Keep an eye on them; they are done when they appear golden brown and visibly puffed, indicating a crispy exterior and a cooked filling.
The Final Flourish: Cooling and Garnish
- Cool and Serve:
Allow the empanadas to cool on the baking sheet for a few minutes before serving. This brief resting period allows the filling to set, making them easier to handle and preventing burns.
If desired, sprinkle with fresh chopped parsley for a bright, herbaceous garnish that adds both flavor and visual appeal.
Common Challenges Solved: Troubleshooting Your Empanada Journey
My Filling Is Leaking! Why & How to Fix It
Leakage is almost always due to overfilling, not enough egg wash on the edges, or insufficient crimping. Ensure you’re only using a small amount of filling, placed off-center, to leave plenty of sealing room.
Don’t skimp on the egg wash along the edges; it’s your primary adhesive. Finally, press firmly with your fingers and then use the fork to create a very tight, consistent crimp all around the edge.
Dough Cracks or Tears: Tips for Pliable Wrappers
Dough cracks usually happen if the wrappers are too cold or too dry. Let store-bought wrappers come to full room temperature before you start working with them.
If your kitchen is very dry, you can lightly mist the wrappers with a little water before filling them. This helps maintain their pliability and prevents tearing during folding.
Uneven Browning? Getting That Perfect Golden Hue
Uneven browning can be caused by inconsistent oven temperature or hot spots, or by not applying the egg wash evenly. Always preheat your oven fully before baking.
Rotate your baking sheet halfway through the cooking time to ensure all empanadas brown uniformly. Apply the egg wash thoroughly and evenly across the entire top surface of each empanada.
Elevate Your Empanada Experience: Expert Tips & Creative Twists
Beyond the Basics: Flavor Variations and Customizations
-
Spice It Up: Enhance the beef filling with a pinch of cayenne pepper or a dash of chili powder for a subtle kick. A pinch of dried oregano can also add a classic Latin flavor.
-
Veggie Boost: Finely diced bell peppers, corn, or black beans can be sautéed with the onions to add extra texture and nutrition to your filling.
-
Protein Swaps: While beef is classic, consider a ground chicken or turkey filling for a lighter version. You can even explore different types of empanadas, like these delicious Golden Chicken Empanadas, for variety.
Make-Ahead Magic: Prep, Store, and Freeze for Later Enjoyment
-
Prep Ahead: The beef filling can be cooked and cooled up to 2-3 days in advance and stored in an airtight container in the refrigerator. This significantly cuts down on assembly time.
-
Freezing Unbaked: Assemble the empanadas completely (including the egg wash), then place them on a parchment-lined baking sheet in a single layer. Freeze until solid, about 2 hours.
Once frozen, transfer them to a freezer-safe bag or container, layered with parchment paper, for up to 3 months. Bake from frozen at the same temperature, adding an extra 5-10 minutes to the baking time until golden and cooked through.
-
Freezing Baked: Baked empanadas can also be frozen after cooling completely. Reheat them in a preheated oven at 350°F (175°C) for 10-15 minutes, or until heated through and crisp again.
Serving Suggestions: Perfect Pairings and Presentation Ideas
These empanadas are fantastic on their own, but they truly shine with a few complementary additions. Serve them with a side of zesty salsa, creamy guacamole, or a simple sour cream dip.
For a complete meal, pair them with a light side salad or some fluffy rice. They are perfect for parties, appetizers, or as a hearty main course.
Your Top Questions Answered: Classic Beef and Cheese Empanada FAQs
Can I use different types of meat or cheese?
Absolutely! While ground beef is traditional, you can substitute it with ground chicken, turkey, or even a plant-based ground alternative. For cheese, feel free to use any good melting cheese like Colby Jack, provolone, or a spicy pepper jack for an extra kick.
Is baking the only cooking method, or can I fry them?
Baking is our preferred method for a healthier, less messy result and to achieve that beautiful golden crust without excess oil. However, you can certainly deep-fry them in hot oil (around 350°F/175°C) until golden brown and crispy, about 3-5 minutes per side. For tips on achieving maximum crispiness without deep-frying, consider techniques used in making crispy mozzarella sticks.
How long do these empanadas stay fresh, and how should I store them?
Baked empanadas will stay fresh in an airtight container in the refrigerator for up to 3-4 days. For best texture, reheat them in the oven or an air fryer to crisp them up again, rather than the microwave.
Are these Classic Beef and Cheese Empanadas suitable for meal prep?
Yes, they are excellent for meal prep! As mentioned in our “Make-Ahead Magic” section, you can prepare the filling in advance, or even assemble and freeze the empanadas unbaked or baked. This makes them a convenient grab-and-go meal or snack for busy days.
Ready to Impress? Share Your Classic Beef and Cheese Empanada Creation!
Now that you hold the secret to perfectly sealed, utterly delicious Classic Beef and Cheese Empanadas, it’s time to bring this culinary magic to your own kitchen. You’ll love how easy it is to achieve professional-level results with this reliable recipe.
Don’t hesitate to dive in and create these savory pockets of joy. Once you’ve enjoyed your batch, we’d love to see your creations! Share your photos on social media and tag us, or leave a comment below with your feedback and any personal twists you tried. Happy cooking!
Classic Beef and Cheese Empanadas
Course: Main CourseCuisine: Mexican cuisineDifficulty: easy8
empanadas30
minutes20
minutes50
minutesMexican cuisine
Ingredients
1 pound ground beef
1 onion chopped
2 cloves garlic minced
1 teaspoon ground cumin
1 teaspoon paprika
Salt and pepper to taste
1 cup shredded cheese (like mozzarella or cheddar)
8 empanada wrappers (store bought or homemade)
1 large egg beaten with 1 tablespoon water for egg wash
2 tablespoons cooking oil
Fresh parsley chopped for garnish
Directions
- Heat cooking oil in a large skillet over medium heat. Add the chopped onion and cook until softened about 5 minutes. Add the minced garlic and cook for 1 minute more until fragrant.
- Add the ground beef to the skillet and cook breaking it up with a spoon until browned. Drain off any excess fat. Stir in the cumin and paprika and season with salt and pepper. Cook for 1-2 minutes more until fragrant. Remove the filling from the heat and let it cool slightly.
- Lay out the empanada wrappers on a clean surface. Place a small amount of the cooled beef filling just off center on each wrapper. This is key to preventing leaks. Do not overfill and keep the edges clean.
- Sprinkle a small amount of shredded cheese over the filling.
- Brush the edges of each wrapper with the egg wash. This creates a seal.
- Fold the wrapper over the filling to create a half moon shape. Press the edges together firmly with your fingers squeezing out any air pockets.
- Crimp the edges using a fork to seal them tightly. This double seal is another important step to keep the filling inside.
- Place the sealed empanadas on a baking sheet lined with parchment paper. Brush the tops of the empanadas with the remaining egg wash for a golden crust.
- Bake in a preheated oven at 375 degrees Fahrenheit (190 degrees Celsius) for 18-20 minutes or until golden brown and puffed.
- Let cool for a few minutes before serving. Garnish with chopped fresh parsley if desired.