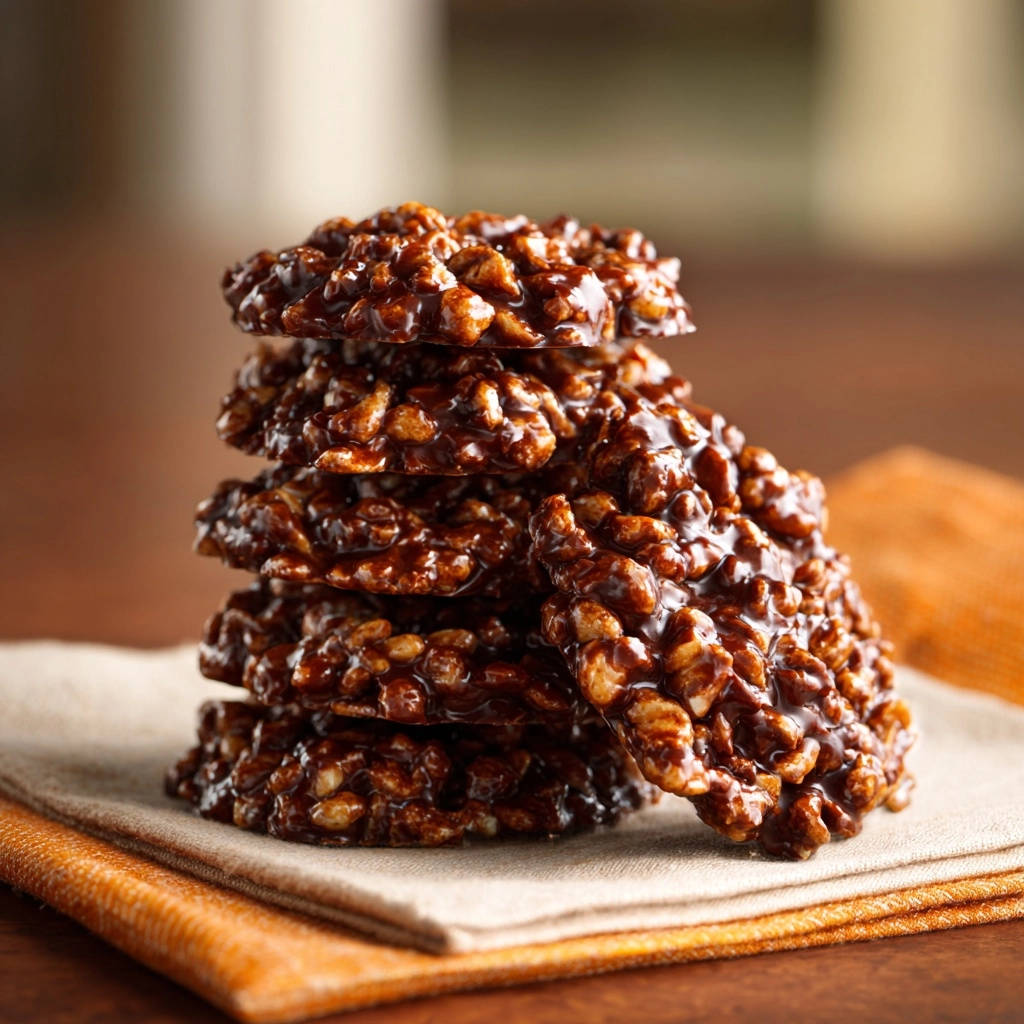
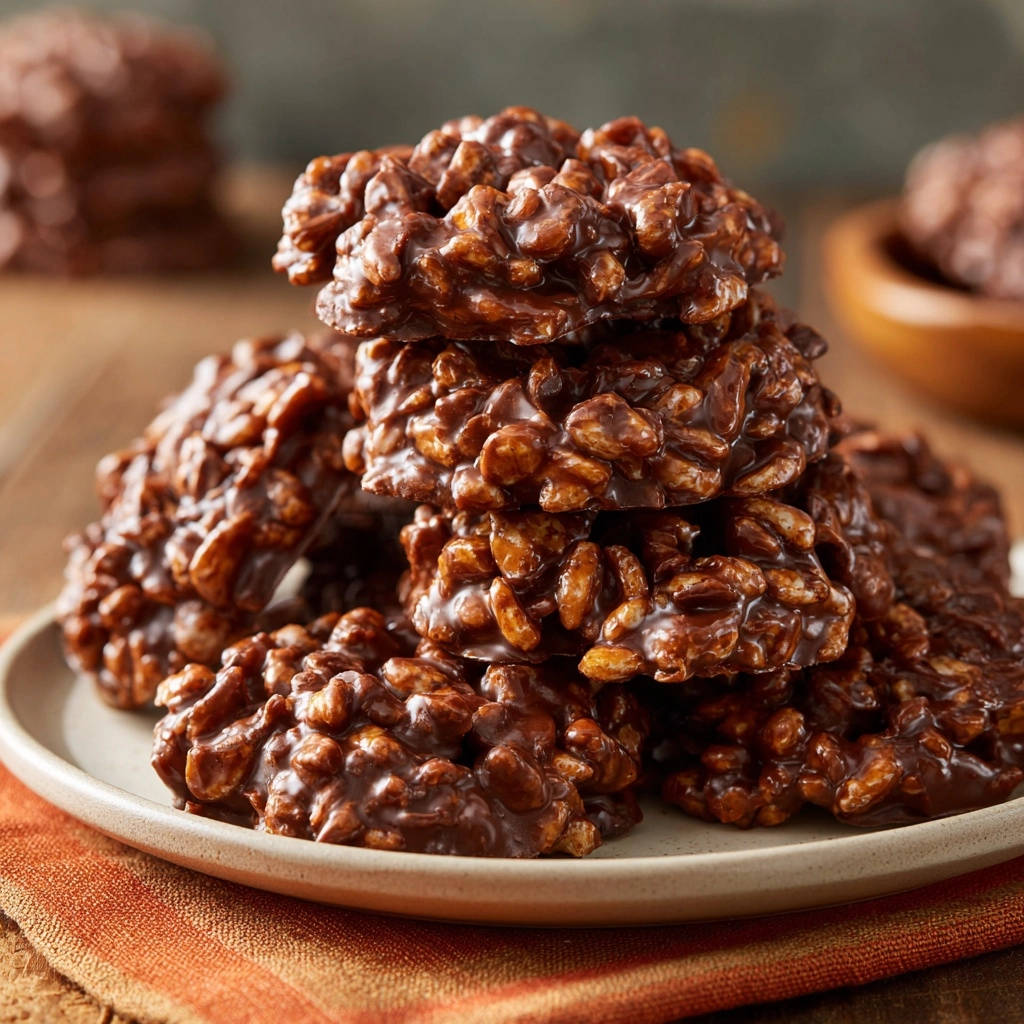
I know the frustration of crafting what you hope will be perfectly set treats, only to end up with a sticky, crumbling mess. Many classic recipes for chocolate no-bake cookies often fall short on consistency, but I’ve perfected a method for these `Classic Chocolate Cereal No-Bakes` that guarantees they’re firm and stackable every single time. Get ready to bake up pure nostalgic joy without the usual guesswork!
Why This Classic Chocolate Cereal No-Bakes Recipe is Your New Favorite
The Foolproof Secret to Firm, Non-Sticky Bites
The most common complaint about chocolate no-bakes is their tendency to be too soft or sticky. This recipe eliminates that problem completely.
Our secret lies in a precisely timed, full rolling boil of the chocolate mixture. This crucial step ensures the sugar reaches the correct concentration, providing the perfect firm set without any stickiness.
Effortless Sweet Treats: Ready in Minutes
With just 10 minutes of hands-on prep and a mere 2 minutes of cooking, these `Classic Chocolate Cereal No-Bakes` are incredibly fast. They are the ideal solution for sudden sweet cravings or when you need a quick dessert for unexpected guests.
This recipe is perfect for busy individuals and a fantastic way to get kids involved in the kitchen, offering instant gratification.
A Beloved Classic Reinvented for Consistent Success
These aren’t just any no-bakes; they are a reinvented version of a cherished childhood favorite. We’ve taken the nostalgic charm of chocolate cereal treats and added a layer of reliability.
This means you can confidently whip up a batch, knowing they will turn out perfectly firm and delicious every single time, just like you remember them.
The Building Blocks of Flavor: Simple Ingredients for Sweet Success
Pantry Staples: Your Foundation for Deliciousness
The beauty of `Classic Chocolate Cereal No-Bakes` lies in their simplicity. You’ll find most of the core ingredients already in your pantry.
Unsalted butter provides richness, while granulated sugar gives the necessary sweetness and structure. Milk brings moisture, and unsweetened cocoa powder delivers that irresistible deep chocolate flavor.
Choosing Your Cereal: The Perfect Crispy Texture
Puffed rice cereal is the star for its light, airy texture and excellent absorption capabilities. It holds the chocolate mixture beautifully without becoming soggy.
Always opt for fresh puffed rice cereal to ensure maximum crispness in your finished no-bakes.
Flavor Boosters & Optional Swaps
While delicious as is, a pinch of flaky sea salt can enhance the chocolate notes. You might also consider a dash of almond extract in place of vanilla for a different aromatic profile.
For an extra layer of richness, try swirling in a tablespoon of your favorite luscious whipped honey peanut butter into the hot mixture. For dairy-free versions, feel free to use any non-dairy milk alternative; they work wonderfully.
Setting Up for Success: Essential Kitchen Tools You’ll Need
The Right Saucepan for Optimal Boiling
Using a large, heavy-bottomed saucepan is crucial for these `Classic Chocolate Cereal No-Bakes`. A heavy bottom distributes heat evenly, preventing scorching.
The large size allows for a proper, vigorous rolling boil without the risk of the mixture overflowing.
Prepping Your Surface: No More Stickiness!
Before you even begin cooking, lay out sheets of wax paper or parchment paper on your counter or baking sheets. This step is non-negotiable.
The chocolate mixture sets quickly, and having your surface ready ensures you can drop and shape the cookies efficiently without any sticking.
Measuring & Mixing Essentials
You’ll need standard measuring cups and spoons for accuracy. A sturdy whisk is essential for continuously stirring the mixture as it heats and boils.
Finally, a heat-proof spatula or large spoon will be indispensable for gently but thoroughly mixing the puffed rice cereal into the hot chocolate base.
Crafting Your Classic Chocolate Cereal No-Bakes: A Detailed Guide
- Step 1: Preparing Your Workspace for Efficiency
Lay out sheets of wax paper or parchment paper on your counter or baking sheets. This ensures you have a ready surface for dropping the cookies as the mixture sets quickly. Prepare your space for a smooth, swift process.
- Step 2: Combining the Wet & Dry Foundation
In a large saucepan, combine the 1/2 cup unsalted butter, 2 cups granulated sugar, 1/2 cup milk (dairy or non-dairy), and 1/2 cup unsweetened cocoa powder. Stir these ingredients together until the butter begins to melt and everything is well combined into a smooth chocolate base.
- Step 3: The CRUCIAL 1-Minute Boil: Unlocking Firmness
Place the saucepan over medium heat and stir constantly until the mixture reaches a full, rolling boil-meaning it continues to bubble vigorously even while stirring. Once this full boil is achieved, set a timer and let it boil for exactly 1 minute. Do not stir during this minute.
This precise boiling time is the key to achieving perfectly firm, non-sticky `Classic Chocolate Cereal No-Bakes`. Removing from the heat too soon, or boiling too long, can drastically affect the final texture, leading to either too-soft or too-hard cookies.
- Step 4: Incorporating Vanilla & Cereal Swiftly
Immediately remove the saucepan from the heat after the 1-minute boil. Stir in the 1 teaspoon vanilla extract to infuse flavor. Then, quickly add the 6 cups of puffed rice cereal to the hot chocolate mixture; work swiftly as the mixture will begin to set very rapidly.
Gently but thoroughly stir until all the cereal is evenly coated with the rich chocolate mixture. Ensure no dry spots remain, providing uniform flavor and texture in every bite.
- Step 5: Shaping & The Patience of Setting
Working quickly before the mixture sets completely, drop spoonfuls (about 2 tablespoons each) of the mixture onto your prepared wax or parchment paper. You can use the back of a spoon to shape them into uniform round cookie shapes if desired, or leave them rustic.
Allow the `Classic Chocolate Cereal No-Bakes` to cool completely and set firm, which typically takes about 30 to 60 minutes at room temperature. For faster setting, you can place them in the refrigerator for 15-20 minutes, ensuring they become perfectly firm and ready to enjoy.
Troubleshooting Your No-Bakes: Common Issues & Quick Solutions
“Why Are My Cookies Too Soft or Sticky?”
This is the most common issue, and it almost always comes down to the boiling step. Ensure your mixture reaches a full, rolling boil where it bubbles vigorously even when stirred.
The most important factor is boiling for the full and exact 1 minute. Cutting this time short prevents the sugar from reaching the correct concentration needed for a firm set.
“My Mixture Won’t Come Together/Is Crumbly!”
If your mixture becomes too hard or crumbly before you even add the cereal, it’s likely been over-boiled. Over-boiling causes too much moisture to evaporate, making the mixture seize up.
Stick to the precise 1-minute boiling time. Also, double-check your ingredient measurements to ensure the correct liquid-to-solid ratio.
“Help, My No-Bakes Are Granular!”
A grainy texture indicates that the sugar didn’t fully dissolve. To prevent this, stir the butter, sugar, milk, and cocoa mixture constantly over medium heat.
Continue stirring until you see no more sugar crystals on the bottom of the pan or clinging to your spoon, before the mixture even begins to boil vigorously.
Chef’s Secrets: Elevate Your Classic Chocolate Cereal No-Bakes Game
Creative Flavor Twists & Delicious Add-Ins
Elevate your `Classic Chocolate Cereal No-Bakes` with simple additions. Stir in shredded coconut, chopped nuts like pecans or walnuts, or even mini marshmallows just before adding the cereal.
For a deeper chocolate flavor, try a tiny dash of instant espresso powder. A pinch of cayenne pepper can also add a surprising and delightful kick. Consider using leftover decadent chocolate pecan tart filling as a topping or mix-in for an indulgent twist.
Achieving Uniform Size & Perfect Presentation
For consistently sized `Classic Chocolate Cereal No-Bakes`, use a cookie scoop (about 2-tablespoon capacity) to portion out the mixture. This ensures even setting and a professional look.
Once your no-bakes are fully set, get creative with presentation. A simple drizzle of melted white or dark chocolate, or a sprinkle of colorful edible sprinkles, can make them even more appealing.
Smart Storage & Make-Ahead Strategies
Once completely firm, store your `Classic Chocolate Cereal No-Bakes` in an airtight container at room temperature. They will remain fresh and delicious for 3-5 days.
These treats are fantastic for making ahead of time, especially for parties or school events. Their sturdy nature makes them perfect for transporting and serving.
Frequently Asked Questions About Classic Chocolate Cereal No-Bakes
Can I substitute other types of cereal?
Yes, you can experiment with other cereals! Corn flakes or various oat squares (like Chex or Life cereals) can work well. Just be mindful that their absorbency and final texture might differ slightly from puffed rice, potentially requiring minor adjustments to the mixture ratio for optimal results.
Are there dairy-free or gluten-free variations?
Absolutely! For a dairy-free version, simply substitute regular milk with your favorite non-dairy alternative like almond, oat, or soy milk. For gluten-free no-bakes, ensure you use a certified gluten-free puffed rice cereal, as some brands may contain gluten or be cross-contaminated.
What’s the best way to store Classic Chocolate Cereal No-Bakes?
To maintain their firmness and freshness, store your `Classic Chocolate Cereal No-Bakes` in an airtight container at room temperature. Layer them with parchment paper if stacking to prevent sticking, especially in humid environments.
Can I speed up the setting time?
Yes, you can accelerate the setting process. Once you’ve dropped the spoonfuls onto your prepared surface, place the baking sheets into the refrigerator. They typically firm up within 15-20 minutes, ready to enjoy even sooner.
How long do Classic Chocolate Cereal No-Bakes last?
When stored properly in an airtight container at room temperature, these `Classic Chocolate Cereal No-Bakes` will remain at their optimal freshness and texture for about 3 to 5 days. Beyond that, while still edible, their texture might begin to soften slightly.
Ready to Create Sweet Memories?
Share Your Success & Join Our Community
Now that you have the foolproof method for perfectly firm `Classic Chocolate Cereal No-Bakes`, it’s time to get into the kitchen! We’d love to see your creations. Share your results on social media and tag us, or drop a comment below to tell us how they turned out.
Discover More Easy & Delicious Dessert Recipes
If you loved the simplicity and deliciousness of these no-bakes, there’s a world of other effortless sweet treats waiting for you. Explore our collection of other irresistible dessert recipes, like our decadent chocolate cake, designed for guaranteed success and pure enjoyment.
Classic Chocolate Cereal No-Bakes
Course: DessertCuisine: American CuisineDifficulty: easy24
cookies10
minutes2
minutes60
minutesAmerican Cuisine
Ingredients
1/2 cup unsalted butter
2 cups granulated sugar
1/2 cup milk (dairy or non-dairy)
1/2 cup unsweetened cocoa powder
1 teaspoon vanilla extract
6 cups puffed rice cereal
Directions
- Prepare your workstation by laying out sheets of wax paper or parchment paper on your counter or baking sheets.
- In a large saucepan, combine the butter, granulated sugar, milk, and unsweetened cocoa powder.
- Place the saucepan over medium heat and stir constantly until the butter is melted and the ingredients are well combined. Bring the mixture to a full, rolling boil. This is the crucial step for firm cookies!
- Once the mixture reaches a full, rolling boil (meaning it continues to bubble vigorously even while stirring), set a timer and let it boil for exactly 1 minute. Do not stir during this minute. Removing from the heat too soon, or boiling too long, can affect the final texture.
- Remove the saucepan from the heat immediately after the 1 minute boil. Stir in the vanilla extract.
- Quickly add the puffed rice cereal to the hot chocolate mixture. Stir gently but thoroughly until all the cereal is evenly coated.
- Working quickly before the mixture sets, drop spoonfuls of the mixture onto your prepared wax or parchment paper. Shape them into round cookie shapes using the back of a spoon if desired.
- Allow the cookies to cool completely and set firm, which will take about 30 to 60 minutes at room temperature. For faster setting, you can place them in the refrigerator for 15-20 minutes.
- Once firm, store in an airtight container at room temperature.
Notes
- Crucial 1-minute boil for firm cookies; do not stir during this time to ensure perfect texture.