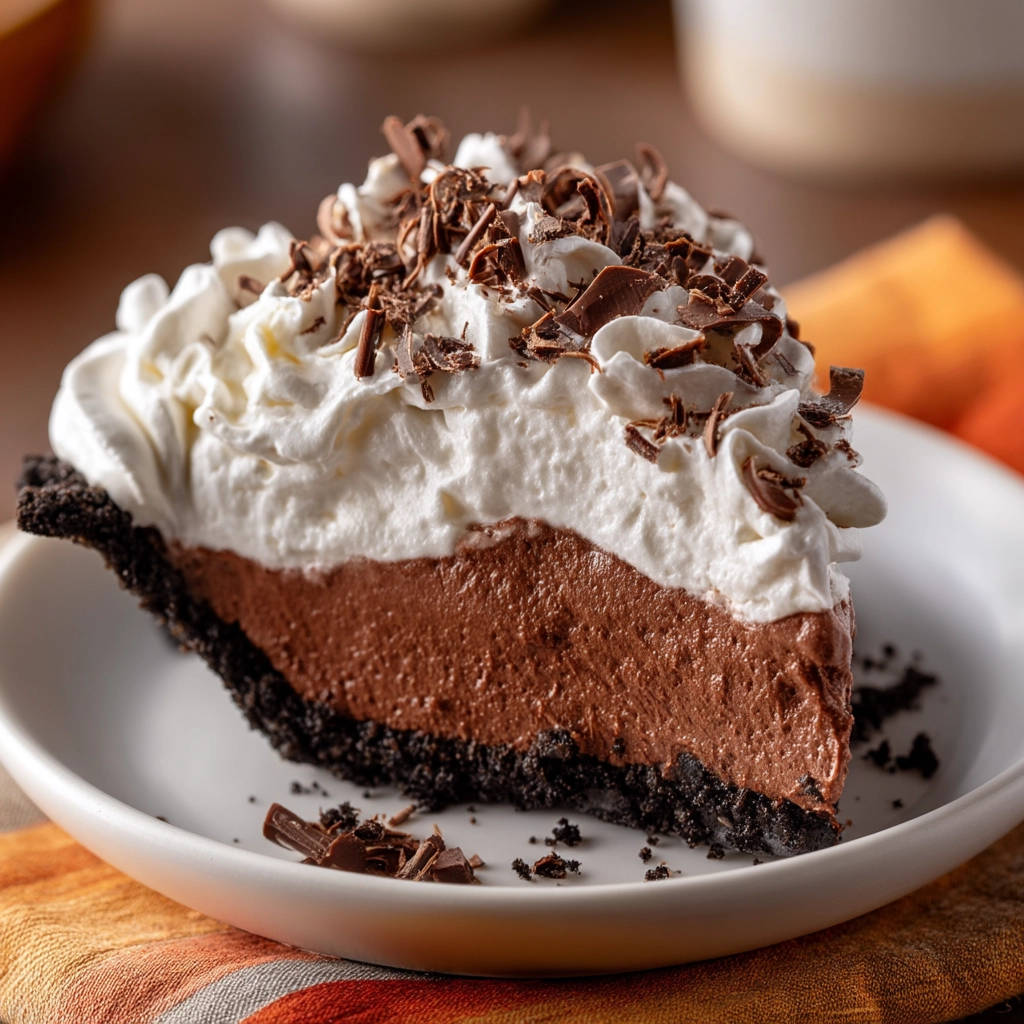
Is there anything more comforting than a slice of classic chocolate cream pie? That creamy, rich chocolate filling, the delicate whipped cream topping, all nestled in a crisp chocolate cookie crust… it’s pure dessert heaven. But let’s be honest, a runny chocolate cream pie is a major letdown. That’s why I’m sharing this recipe for a chocolate cream pie that sets perfectly every single time. Get ready to impress your friends and family with this foolproof recipe!
Why You’ll Love This Classic Chocolate Cream Pie
This chocolate cream pie is a guaranteed crowd-pleaser, and here’s why:
- Silky Smooth Texture: The filling is incredibly creamy and melts in your mouth.
- Perfectly Set: No more runny pies! This recipe uses a simple technique to ensure a firm, sliceable filling.
- Rich Chocolate Flavor: Made with good quality semi-sweet chocolate, this pie has a deep, satisfying chocolate taste.
- Easy to Make: While it looks impressive, this pie is surprisingly easy to put together.
- Make-Ahead Friendly: You can make the pie a day or two in advance, making it perfect for entertaining.
Gathering Your Ingredients for Classic Chocolate Cream Pie
Before we dive into the baking process, let’s talk about the ingredients. A great chocolate cream pie relies on quality components. The interplay between the bittersweet chocolate, creamy dairy, and subtly salty crust creates a symphony of flavors that’s hard to resist. Here’s what you’ll need:
- For the Chocolate Cookie Crust:
- 1 and 1/2 cups chocolate cookie crumbs (from about 24 sandwich cookies): The crust forms the foundation of our pie. Using chocolate sandwich cookies adds a deep chocolate flavor and a satisfying crunch. Feel free to use your favorite brand.
- 1/4 cup melted butter: The butter binds the cookie crumbs together, creating a sturdy and flavorful crust. Unsalted or salted butter will both work here, just adjust the salt in the filling accordingly.
- For the Chocolate Cream Filling:
- 1 and 1/4 cups granulated sugar, divided: Sugar provides sweetness and helps to create the right texture in the filling. We use it both in the filling and the whipped cream.
- 1/3 cup cornstarch: Cornstarch is the key to a perfectly set pie filling. It thickens the milk and creates a smooth, stable texture. Don’t skimp on this!
- 1/4 teaspoon salt: A pinch of salt enhances the chocolate flavor and balances the sweetness.
- 3 cups whole milk: Whole milk adds richness and creaminess to the filling. While you could use lower-fat milk, whole milk provides the best texture and flavor.
- 4 large egg yolks: Egg yolks contribute to the richness and creaminess of the filling. They also help to thicken it.
- 8 ounces good quality semi-sweet chocolate, finely chopped: Use a good quality semi-sweet chocolate for the best flavor. Finely chopping the chocolate ensures that it melts evenly into the filling.
- 2 tablespoons butter: Adding butter at the end of cooking gives the filling a glossy shine and even more richness.
- 1 teaspoon vanilla extract: Vanilla extract enhances the chocolate flavor and adds a touch of warmth.
- For the Whipped Cream Topping:
- 1 and 1/2 cups cold heavy cream: Cold heavy cream is essential for making a stable whipped cream. Make sure it’s well-chilled before whipping.
- 1/4 cup powdered sugar: Powdered sugar sweetens the whipped cream and helps to stabilize it.
- Chocolate shavings, for garnish: Chocolate shavings add a beautiful finishing touch to the pie.
Crafting Your Classic Chocolate Cream Pie: Step-by-Step
Making this classic chocolate cream pie is easier than you think! Just follow these step-by-step instructions, and you’ll have a beautiful and delicious pie in no time. The most important part is cooking the filling properly, ensuring the cornstarch is fully activated, giving you that perfect set. Let’s get baking!

- Preheat and Prepare the Crust: Start by preheating your oven to 350 degrees F (175 degrees C). While the oven heats, prepare the chocolate cookie crust. In a medium bowl, thoroughly combine the chocolate cookie crumbs and melted butter. Press this mixture firmly and evenly into the bottom and up the sides of a 9-inch pie plate. Bake the crust for 8-10 minutes, then remove it from the oven and let it cool completely on a wire rack. This pre-baking helps the crust to set and become more stable.
- Prepare the Milk Mixture: In a medium saucepan, whisk together 1 cup of the granulated sugar, cornstarch, and salt. This ensures that the cornstarch is evenly distributed and won’t clump when you add the milk. Gradually whisk in the milk until the mixture is smooth and free of lumps.
- Whisk the Egg Yolks: In a separate bowl, lightly whisk the egg yolks. This prepares them for tempering, which prevents them from scrambling when added to the hot milk mixture.
- Cook the Filling: The Critical Step: Heat the milk mixture over medium heat, stirring constantly with a whisk, until it begins to thicken and bubble. This is the most important step for a filling that sets perfectly. Once the mixture bubbles, continue to whisk vigorously for one full minute. This extra minute of cooking is crucial to fully cook and activate the cornstarch, which will prevent a runny filling. Don’t skip this step!
- Temper the Egg Yolks: Remove the saucepan from the heat. Now, it’s time to temper the egg yolks to prevent them from cooking too quickly. Slowly pour about half a cup of the hot milk mixture into the egg yolks while whisking constantly. This gradually raises the temperature of the egg yolks and prevents them from scrambling when added back to the saucepan.
- Combine and Thicken: Pour the tempered egg yolk mixture back into the saucepan with the remaining hot milk mixture. Return the saucepan to medium-low heat. Cook, stirring constantly with a wooden spoon or heatproof spatula, for 1-2 minutes more, until the filling is thickened but not boiling rapidly. The filling should be thick enough to coat the back of a spoon.
- Add Chocolate and Flavor: Remove the saucepan from the heat. Stir in the chopped semi-sweet chocolate and 2 tablespoons of butter until the chocolate is completely melted and the mixture is smooth. The butter adds extra richness and shine. Finally, stir in the vanilla extract for a touch of warmth and enhanced flavor.
- Chill the Pie: Pour the chocolate filling into the cooled pie crust. Press plastic wrap directly onto the surface of the filling to prevent a skin from forming as it chills. Refrigerate the pie for at least 4 hours, or preferably overnight. Adequate chilling time is essential for the filling to firm up completely and slice cleanly.
- Prepare the Whipped Cream: Just before serving, beat the cold heavy cream and powdered sugar in a cold bowl with cold beaters or a whisk attachment until firm peaks form. A cold bowl and beaters will help the cream to whip up more quickly and easily.
- Assemble and Garnish: Spoon or pipe the whipped cream over the chilled pie. Garnish with chocolate shavings for a beautiful and delicious finishing touch. Store any leftovers covered in the refrigerator.
Tips for Perfect Classic Chocolate Cream Pie Every Time
Want to make sure your chocolate cream pie is a showstopper? Here are a few extra tips to ensure success:
- Use Good Quality Chocolate: The quality of the chocolate will directly impact the flavor of the pie. Choose a semi-sweet chocolate that you enjoy eating on its own.
- Don’t Overbake the Crust: Overbaking the crust can make it dry and brittle. Bake it just until it’s set and lightly golden brown.
- Whisk Constantly While Cooking the Filling: Constant whisking prevents the filling from sticking to the bottom of the saucepan and ensures that it cooks evenly.
- Don’t Boil the Filling: Boiling the filling can cause the egg yolks to curdle. Keep the heat on medium-low and stir constantly.
- Chill the Pie Thoroughly: Chilling the pie for at least 4 hours, or preferably overnight, is essential for the filling to set completely.
- Make it Gluten-Free: Use gluten-free chocolate sandwich cookies for the crust to make this pie gluten-free.
What to Serve With Classic Chocolate Cream Pie
This classic chocolate cream pie is delicious on its own, but it also pairs well with other desserts. Consider serving it alongside our easy caramel nut dessert jars for a delightful dessert spread. You could also pair it with fresh berries or a scoop of vanilla ice cream.
Your Classic Chocolate Cream Pie Questions Answered (FAQ)
Why is my chocolate cream pie runny?
The most common reason for a runny chocolate cream pie is that the cornstarch was not fully cooked and activated. Make sure to cook the filling over medium heat, stirring constantly, until it bubbles. Then, continue to whisk vigorously for one full minute after it starts bubbling to ensure the cornstarch is fully cooked.
Can I use a different type of chocolate?
Yes, you can use milk chocolate or dark chocolate instead of semi-sweet chocolate. However, keep in mind that this will affect the sweetness and intensity of the chocolate flavor. If you use milk chocolate, you may want to reduce the amount of sugar in the filling.
Can I make this pie ahead of time?
Yes, you can make the pie a day or two in advance. In fact, it’s even better the next day after the flavors have had time to meld together. Just be sure to store it covered in the refrigerator.
Can I freeze chocolate cream pie?
While you can technically freeze chocolate cream pie, the texture of the filling may change slightly after thawing. The whipped cream topping may also become watery. For the best results, it’s best to enjoy the pie fresh.
Enjoy Your Homemade Classic Chocolate Cream Pie!
There you have it – a classic chocolate cream pie recipe that guarantees a perfect set every single time. This pie is rich, creamy, and utterly delicious, perfect for any occasion. So gather your ingredients, follow the steps, and get ready to indulge in a slice of pure chocolate bliss. Don’t forget to leave a comment below and let me know how your pie turns out! And if you’re in the mood for other sweet treats, be sure to check out our recipe for easy delicious chocolate sheet cake!