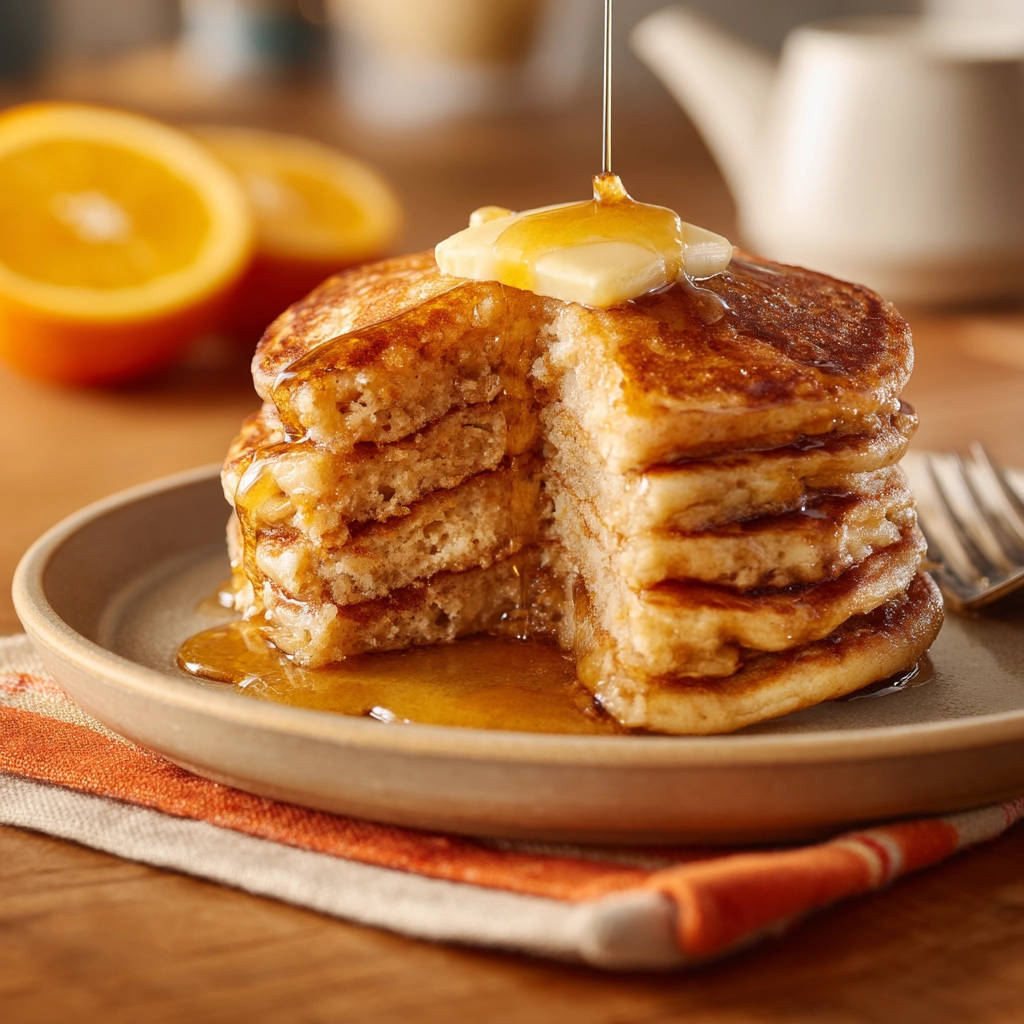
Oh, homemade pancakes. Is there anything better to kickstart a lazy weekend morning or brighten up a weekday breakfast? We’ve all been there – excitedly mixing up a batch, only for them to turn out… well, flat as a board. It’s a pancake tragedy! For years, I wrestled with dense, heavy discs instead of the light, airy clouds I dreamed of. But guess what? I finally cracked the code. This classic fluffy pancakes recipe uses a simple trick that guarantees that perfect rise and tender texture every single time. Get ready to say goodbye to pancake disappointments and hello to your new favorite breakfast staple!
Why These Fluffy Pancakes Are the Best
You might think making truly fluffy pancakes is some kind of culinary magic, but it’s really about understanding a few key principles. This recipe simplifies the process while focusing on the techniques that matter most for achieving that sought-after height and tenderness. It’s forgiving enough for beginners but delivers results that will impress even the most seasoned breakfast enthusiasts.
Beyond the guaranteed fluff factor, these pancakes are incredibly quick and easy to whip up. From gathering your pantry staples to serving a stack, you’re looking at less than half an hour. That means you can enjoy a restaurant-quality breakfast without the fuss, leaving you more time to savor those precious morning moments. They are perfect on their own, but also make a fantastic base for all sorts of toppings, sweet or even savory if you’re feeling adventurous!
Gathering Your Ingredients for Classic Fluffy Pancakes
Making delicious pancakes starts with having the right ingredients measured out and ready to go. The beauty of this recipe is that it uses simple, everyday items you likely already have in your kitchen. Think of these as the building blocks for breakfast perfection. The combination creates a balanced batter that rises beautifully and cooks up golden and tender.
For the dry ingredients, we start with all-purpose flour, which provides the structure. Granulated sugar adds a touch of sweetness and helps with browning, giving your pancakes those lovely golden edges. The real hero of the fluff, however, is baking powder. Using a full tablespoon might seem like a lot, but this is one of the secrets to getting that impressive lift. Finally, a touch of salt balances the sweetness and enhances the overall flavor.
On the wet side, milk brings everything together and activates the baking powder. A large egg adds richness and helps bind the ingredients, contributing to a tender crumb. Melted unsalted butter is crucial for flavor and moistness; remember to melt it gently so it’s not scorching hot when you add it.

Here’s a quick list of what you’ll need:
- 1 and 1/2 cups all purpose flour
- 2 tablespoons granulated sugar
- 1 tablespoon baking powder
- 1/2 teaspoon salt
- 1 and 1/4 cups milk
- 1 large egg
- 2 tablespoons unsalted butter, melted, plus more for cooking
- Syrup for serving
- Unsalted butter for serving
- Optional orange slices for garnish
Beyond the batter itself, don’t forget your serving essentials! Plenty of your favorite syrup (maple, fruit-flavored, you name it!) and extra butter are non-negotiable for the ultimate pancake experience. A little garnish like optional orange slices adds a lovely touch of freshness.
Crafting Your Classic Fluffy Pancakes: Step-by-Step
Ready to turn those simple ingredients into a stack of golden, fluffy goodness? Follow these steps carefully, paying close attention to the mixing technique – it’s the real game-changer here!
- Combine the Dry: Grab a large mixing bowl. Add your 1 and 1/2 cups of all-purpose flour, 2 tablespoons of granulated sugar, 1 tablespoon of baking powder, and 1/2 teaspoon of salt. Give these dry ingredients a good whisk together. Whisking isn’t just about mixing; it helps to aerate the flour and ensures the baking powder and salt are evenly distributed, which is important for consistent rise and flavor throughout your pancakes.
- Whisk the Wet: In a separate, medium-sized bowl, whisk together the 1 and 1/4 cups of milk, 1 large egg, and 2 tablespoons of melted unsalted butter. Make sure the egg is fully incorporated and the melted butter is dispersed throughout the milk.
- Combine Wet and Dry Gently: Now for the crucial part! Pour the wet ingredients from the medium bowl into the large bowl containing the dry ingredients.
- Mix JUST Until Combined (This is Key!): Using a whisk or a spoon, begin to gently mix the wet and dry ingredients together. Your goal here is only to moisten the dry ingredients. Stop mixing as soon as there are no visible pockets of dry flour remaining. The batter will look lumpy – and that is exactly what you want! Those lumps are unmixed bits of flour that haven’t fully developed gluten. Overmixing the batter develops gluten, just like when you knead bread dough. Too much gluten makes pancakes tough and causes them to spread thin rather than rise high and fluffy. Embrace the lumps; they are your friends on the path to fluffiness!
- Let the Batter Rest: Cover the bowl of lumpy batter and let it rest for about 5 minutes at room temperature. While the batter rests, heat your griddle or nonstick pan over medium heat. This rest period is important – it allows the baking powder to start reacting with the liquid, creating air bubbles, and gives the flour a chance to hydrate without needing excessive mixing. It’s like a little power nap for your batter before its big moment.
- Prepare Your Cooking Surface: Once your griddle or pan is hot (a drop of water should sizzle and evaporate quickly), lightly grease it with butter or oil. This prevents sticking and helps create that beautiful golden-brown crust on your pancakes.
- Pour the Pancakes: Pour about 1/4 cup of batter for each pancake onto the hot, greased surface. Don’t overcrowd the pan; leave space between each pancake so they cook evenly and are easy to flip.
- Cook and Flip: Let the pancakes cook on the first side for 2 to 3 minutes. Watch for the signs they are ready to flip: bubbles will start to form and pop on the surface, and the edges will look set and slightly dry. Once you see these cues, gently slide your spatula under the pancake and flip it. Cook on the second side for another 1 to 2 minutes, or until golden brown and cooked through the center.
- Serve Immediately: Transfer the cooked pancakes to a plate and serve immediately with your desired toppings like butter, syrup, or those optional orange slices. Pancakes are best enjoyed fresh off the griddle when they are at their fluffiest!
Expert Tips for Ultimate Fluffiness
Getting perfectly fluffy pancakes isn’t hard, but a few insider tips can elevate your game from good to absolutely amazing. These are the little things that make a big difference in achieving that sought-after light and airy texture.
First and foremost, let’s talk about that mixing technique again. I cannot stress this enough: Do Not Overmix Your Batter! Seriously. Those lumps you see after combining the wet and dry ingredients? They’re perfectly fine. Overmixing develops gluten, making your pancakes tough and flat instead of light and airy. Mix just enough to bring everything together, leave the lumps alone, and you’ll be rewarded with superior texture.
The short 5-minute rest is also more important than it seems. While your griddle heats up, this brief pause allows the baking powder to begin its work, creating tiny air pockets in the batter before it even hits the heat. It also lets the flour absorb the liquid evenly, resulting in a more tender pancake.
Getting your griddle or pan to the right temperature is critical. Medium heat is usually perfect. If it’s too hot, the outside will burn before the inside cooks through. If it’s too cool, the pancakes will spread out too much and won’t get a good rise. You know it’s ready when a drop of water sizzles and dances on the surface before evaporating.
Don’t rely solely on a timer for flipping. Look for those visual cues: bubbles forming and popping on the surface and edges that appear set and slightly dull. This tells you the bottom is likely golden brown and ready to be flipped. The second side cooks faster, typically just a minute or two, until it’s also golden.
Serving pancakes immediately is key to enjoying their maximum fluffiness. As they cool, they start to deflate slightly. Have your butter and syrup ready! If you’re cooking for a crowd, you can keep finished pancakes warm on a baking sheet in a low oven (around 200°F or 90°C) for a short time, but they are truly best straight from the pan.
Serving Suggestions for Your Fluffy Stack
While classic butter and maple syrup are always a win, fluffy pancakes are a blank canvas for all sorts of delicious toppings! Get creative and make your pancake feast an event.
Fresh fruit is a fantastic addition – sliced bananas, berries, peaches, or even a homemade fruit compote. A dollop of whipped cream or Greek yogurt adds a creamy counterpoint. For something a little more decadent, consider chocolate chips stirred into the batter or sprinkled on top while they cook, or a drizzle of chocolate sauce.
Pair your sweet pancakes with savory breakfast sides like bacon or breakfast sausage. A side of scrambled eggs or a simple fruit salad rounds out the meal beautifully. If you’re looking for other great breakfast or brunch ideas, you might enjoy exploring something like a Baked Berry French Toast Casserole for a make-ahead option, or perhaps whipping up some Easy Crepes if you’re feeling fancy!
Variations to Try
Once you’ve mastered the basic fluffy pancake recipe, feel free to experiment with some variations to change things up!
- Chocolate Chip Pancakes: Stir 1/2 to 1 cup of chocolate chips into the batter just before resting.
- Blueberry Pancakes: Gently fold 1/2 to 1 cup of fresh or frozen blueberries (do not thaw frozen blueberries) into the batter just before resting.
- Spiced Pancakes: Add 1/2 teaspoon of cinnamon or a pinch of nutmeg to the dry ingredients for a warm flavor.
- Lemon Zest Pancakes: Add the zest of one lemon to the wet ingredients for a bright, citrusy twist.
- Buttermilk Pancakes: You can often substitute buttermilk for regular milk in a 1:1 ratio, sometimes reducing the baking powder slightly (check specific buttermilk pancake recipes for ratios, but the core no-overmixing principle remains). Buttermilk reacts strongly with baking powder, often yielding an extra tender result.
Your Classic Fluffy Pancakes Questions Answered (FAQ)
Got questions about making the perfect stack? Here are some common queries I get asked:
Can I make the pancake batter ahead of time?
While you can mix the dry ingredients and wet ingredients separately the night before and combine them in the morning, I don’t recommend mixing the full batter and letting it sit overnight. The baking powder starts reacting as soon as it hits the liquid, and much of its leavening power will be lost overnight, resulting in flatter pancakes. The 5-minute rest is perfect; anything much longer diminishes the fluffiness.
What kind of milk should I use?
Whole milk will give you the richest, most tender results due to its fat content. However, 2% milk works perfectly fine. Skim milk can be used but may result in a slightly less rich pancake. For non-dairy options, unsweetened almond milk, soy milk, or oat milk can often be substituted successfully, though results can vary slightly in texture and flavor.
Can I use oil instead of butter?
Yes, you can substitute an equal amount of neutral-flavored oil (like vegetable or canola oil) for the melted butter in the batter. The pancakes will still be tender, but you will lose some of the lovely buttery flavor. Using butter for greasing the pan adds flavor during cooking, but oil also works well to prevent sticking.
Why are my pancakes still not fluffy?
The most common culprits are overmixing the batter and old baking powder. Ensure you are mixing only until the dry ingredients are just moistened and embracing those lumps! Also, check the freshness of your baking powder. You can test it by adding a teaspoon to a few tablespoons of hot water; it should bubble vigorously if it’s still active. If it doesn’t, it’s time for a new container.
How do I store and reheat leftover pancakes?
Let leftover pancakes cool completely on a wire rack. Store them in an airtight container or a resealable plastic bag in the refrigerator for up to 2-3 days. To reheat, the best methods are a toaster, toaster oven, or on a griddle over medium heat until warmed through. Microwaving works in a pinch but can sometimes make them a little rubbery.
Enjoy Your Homemade Classic Fluffy Pancakes!
There’s a special kind of joy in making and sharing a stack of perfect, fluffy pancakes. The aroma filling your kitchen, the golden color, the cloud-like texture… it’s simple comfort food at its finest. This recipe is designed to take the guesswork out of getting that perfect fluff, ensuring delicious results every time you crave them.
Give this recipe a try this weekend (or even for dinner!). I’d love to hear how they turn out for you. Leave a comment below and let me know what your favorite toppings are! Happy pancake making!
Classic Fluffy Pancakes

Ingredients
- 1 and 1/2 cups all purpose flour
- 2 tablespoons granulated sugar
- 1 tablespoon baking powder
- 1/2 teaspoon salt
- 1 and 1/4 cups milk
- 1 large egg
- 2 tablespoons unsalted butter melted plus more for cooking
- Syrup for serving
- Unsalted butter for serving
- Optional orange slices for garnish
Directions
- In a large bowl whisk together the flour sugar baking powder and salt.
- In a separate medium bowl whisk together the milk egg and melted butter.
- Pour the wet ingredients into the bowl with the dry ingredients.
- Mix with a whisk or spoon just until the dry ingredients are moistened. There should still be some lumps. Do not overmix. Overmixing develops the gluten and makes pancakes tough and flat. Leaving lumps is key for fluffiness.
- Let the batter rest for 5 minutes while you heat your griddle or nonstick pan over medium heat.
- Lightly butter or oil the griddle or pan.
- Pour about 1/4 cup of batter for each pancake onto the hot surface.
- Cook for 2 to 3 minutes per side or until bubbles begin to form on the surface and the edges look set then flip and cook for another 1 to 2 minutes until golden brown and cooked through.
- Serve immediately with butter syrup and optional orange slices.