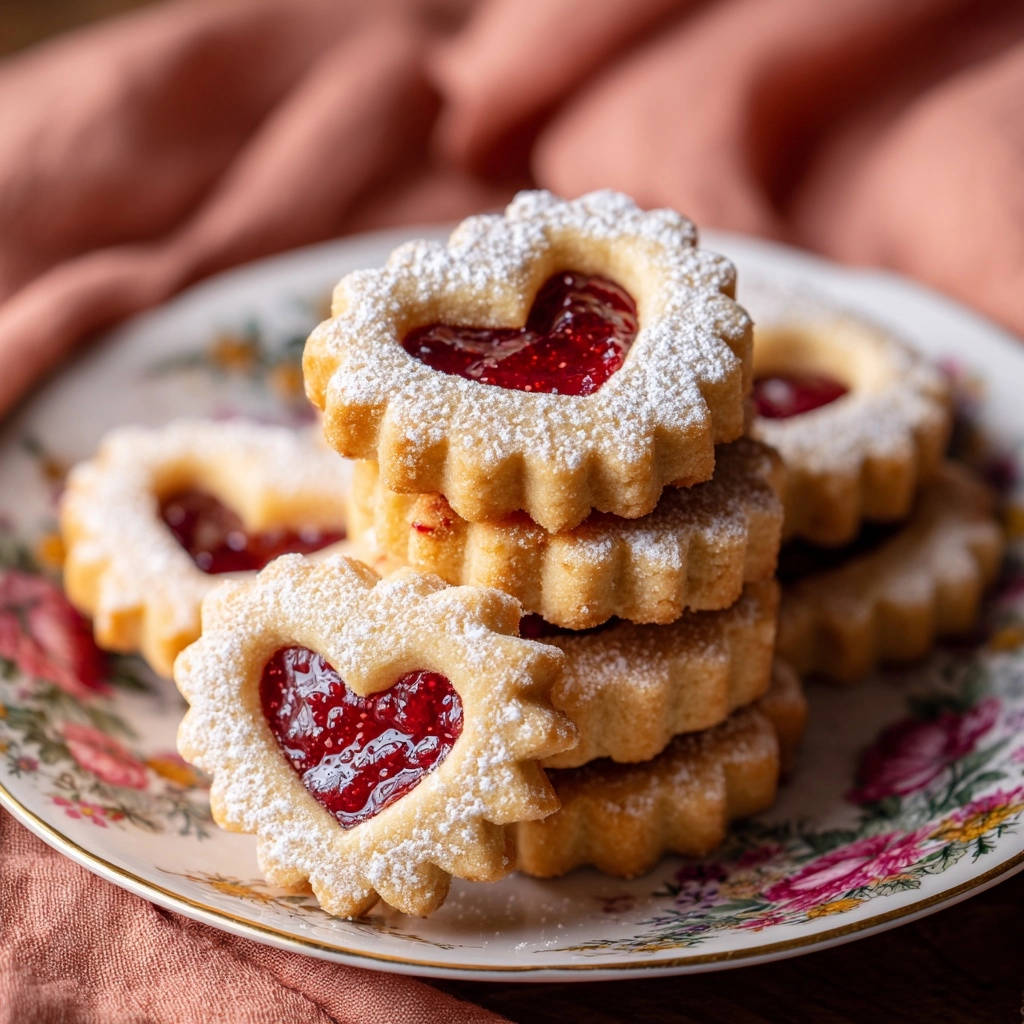
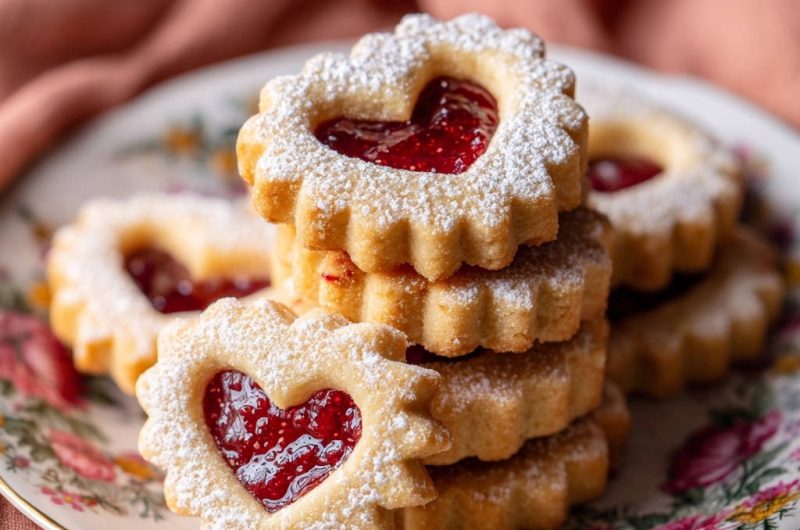
There’s nothing quite as disheartening as envisioning delicate, beautifully shaped cookies, only to have them morph into indistinct blobs in the oven. I’ve been there, and it’s frustrating! That’s why I perfected these Classic Jam Heart Cookies, ensuring every single one holds its crisp edges and charming heart cutout flawlessly.
This recipe isn’t just about a delicious treat; it’s about reliable baking success, delivering perfectly pristine results every time. Get ready to create stunning, tender cookies filled with sweet jam that are as delightful to look at as they are to eat.
Beyond Basic: Why This Cookie Recipe Stands Out
Many sugar cookie recipes promise perfect shapes, but few deliver with the consistent precision found here. This recipe solves the universal baker’s dilemma: spreading cookies. Our meticulous approach guarantees a cookie that holds its form, offering both beauty and exceptional flavor.
The Double-Chill Advantage: Perfectly Pristine Shapes
The secret to non-spreading cookies lies in strategic chilling. Our method incorporates a crucial double-chill technique. This firms up the butter within the dough, preventing it from melting too quickly in the oven and ensuring your cookies retain their intricate heart cutouts and scalloped edges with pristine clarity.
This simple yet powerful step transforms a good cookie into a truly outstanding one, delivering a consistently crisp and tender texture that melts in your mouth without compromising its delightful appearance.
Effortless Elegance for Any Occasion
Despite their elegant appearance, these Classic Jam Heart Cookies are surprisingly straightforward to prepare. The techniques are easy to master, making them accessible for bakers of all skill levels. They add a touch of homemade sophistication to any gathering, from intimate tea parties to festive holiday celebrations, or simply for a sweet everyday indulgence.
A Beloved Classic, Elevated for Modern Bakers
Jam-filled cookies are a timeless favorite, evoking warmth and nostalgia. This recipe honors that tradition while introducing modern, foolproof techniques that address common baking pitfalls. It ensures a consistently delicious and beautiful result, making it a go-to for any home baker seeking reliability and perfection in their sweet endeavors.
Gather Your Essentials: What You’ll Need
Selecting the right ingredients, and understanding their role, is fundamental to baking success. Here’s a breakdown of what you’ll need for these exquisite Classic Jam Heart Cookies.
Unsalted Butter: Using unsalted butter allows you to control the salt content in your baking. Ensure it’s softened, but not melted, to properly cream with the sugar for a light, airy texture.
Granulated Sugar: This provides the primary sweetness and contributes to the cookie’s crisp-tender texture. It also helps in the creaming process, creating air pockets for a delicate crumb.
Large Egg Yolk: The egg yolk adds richness, tenderness, and helps bind the dough without making it overly tough. It contributes to the golden color of the baked cookie.
Vanilla Extract: Pure vanilla extract is crucial for classic cookie flavor. Choose a good quality extract for the best aromatic depth.
All-Purpose Flour: This forms the structural backbone of the cookie. Accurate measurement is key; too much flour can lead to a dry, crumbly cookie, while too little can cause spreading.
Salt: A small amount of salt balances the sweetness and enhances all the other flavors in the cookie. It’s essential, even in sweet recipes.
Raspberry or Strawberry Jam: The heart of these cookies! Choose a good quality, thicker jam. Seedless varieties often provide a smoother experience, but a classic jam with small seeds works beautifully too.
Powdered Sugar: Used for dusting the top cookies, it adds a lovely visual appeal and a delicate sweetness, perfectly complementing the jam filling.
Essential Tools for Your Classic Jam Heart Cookie Journey
Having the right equipment makes the baking process smoother and ensures better results.
Large Mixing Bowls: You’ll need at least two – one for wet ingredients and one for dry. Ensure they are clean and dry before use.
Electric Mixer (Stand or Handheld): Essential for creaming butter and sugar until light and fluffy. This step is difficult to achieve by hand effectively.
Whisk: For combining dry ingredients evenly.
Rubber Spatula: Perfect for scraping down the sides of the bowl and gently folding in ingredients.
Plastic Wrap: Crucial for chilling the dough. It prevents the dough from drying out and absorbing refrigerator odors.
Rolling Pin: For rolling out dough to an even thickness. A rolling pin with adjustable guides can be particularly helpful for consistent results.
Scalloped Cookie Cutter (approx. 2 inches): For the main cookie shape. Any round or square cutter can also work if you prefer a different aesthetic.
Small Heart-Shaped Cookie Cutter: This creates the signature “window” for the top cookies.
Parchment Paper: Lines baking sheets, preventing sticking and allowing for easy cleanup. It also helps with even baking.
Baking Sheets: Flat baking sheets are ideal for cookies, promoting even heat distribution.
Wire Rack: For cooling the cookies completely, which prevents them from becoming soggy on the bottom.
Fine-Mesh Sieve: For dusting powdered sugar evenly over the top cookies, creating a delicate, professional finish.
Crafting Your Cookies: A Step-by-Step Guide to Perfection
Follow these steps closely for Classic Jam Heart Cookies that are beautiful and delicious, with zero spread.
- Cream Butter and Sugar:
In a large bowl, combine the softened unsalted butter and granulated sugar. Beat them together using an electric mixer on medium speed until the mixture is light, fluffy, and noticeably paler in color, typically 2-3 minutes. This creaming process incorporates air, which is vital for a tender cookie texture.
- Incorporate Wet Ingredients:
Reduce your mixer speed to low. Add the large egg yolk and vanilla extract to the creamed butter mixture. Continue to beat until these wet ingredients are fully incorporated and the mixture is smooth. Scrape down the sides of the bowl to ensure everything is evenly combined.
- Combine Dry and Wet Ingredients:
In a separate medium bowl, whisk together the all-purpose flour and salt until well combined. Gradually add this dry mixture to your wet ingredients, mixing on the lowest speed until just combined. It’s crucial to avoid overmixing at this stage; stop as soon as a soft, cohesive dough forms to prevent gluten development, which can lead to tough cookies.
- First Chill for Dough Stability:
Divide the freshly made dough into two equal halves. Gently shape each half into a flat disc, about an inch thick, and wrap them tightly in plastic wrap. Refrigerate the dough for at least 1 hour, or up to 2 days. This initial chill is absolutely critical as it firms up the butter, setting the stage for perfectly shaped cookies that won’t spread excessively during baking.
- Prepare for Baking:
Once your dough has chilled for at least an hour, preheat your oven to 350°F (175°C). While the oven preheats, line two large baking sheets with parchment paper. Parchment paper helps prevent sticking and promotes even baking.
- Roll and Cut Your Shapes:
Lightly flour a clean work surface. Take one chilled dough disc and roll it out to a thickness of about 1/8 to 1/4 inch. Use your scalloped cookie cutter to cut out as many shapes as possible, re-rolling scraps as needed. For half of these cutouts, use a smaller heart-shaped cutter to create the signature center window. Remember to keep the dough as cold as possible during this process.
- The Critical Second Chill: Locking in Shape:
Carefully transfer your cut cookie shapes to the prepared baking sheets, leaving about an inch between each cookie. For the absolute best results and to guarantee a perfect shape with no spreading, place the baking sheets with the cut cookies back into the refrigerator for another 15 minutes. This vital second chill truly locks in the butter, ensuring your Classic Jam Heart Cookies maintain their intricate forms.
- Bake to Golden Perfection:
Bake the chilled cookies for 10-12 minutes, or until the edges appear lightly golden. The centers of the cookies should still look pale and set, not browned. This indicates they are perfectly baked, tender yet firm. Overbaking can lead to dry, brittle cookies.
- Cooling for Structure:
Once baked, remove the baking sheets from the oven. Let the cookies cool on the baking sheets for at least 5 minutes. This brief cooling period allows them to firm up before you attempt to move them. After 5 minutes, carefully transfer the cookies to a wire rack to cool completely. Cooling completely is important before assembling to prevent the jam from melting.
- Dust and Fill for Assembly:
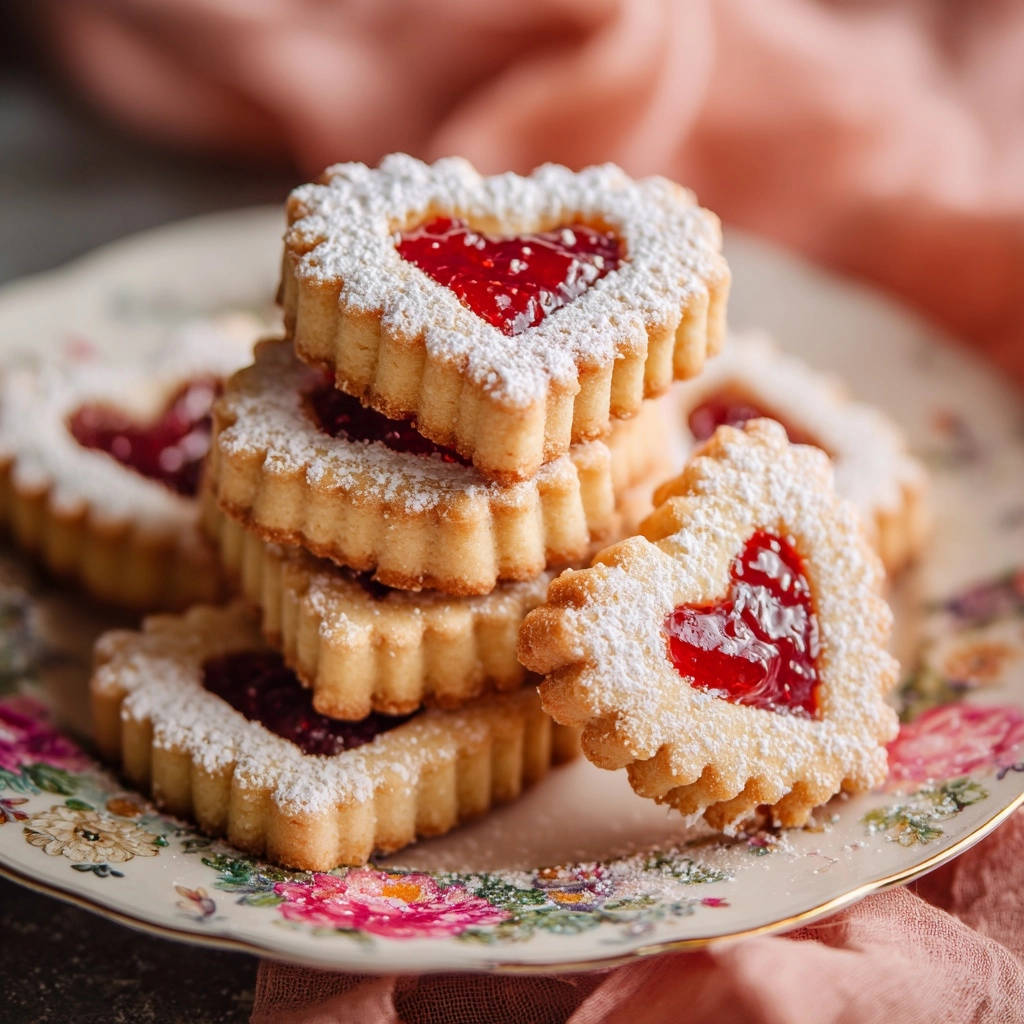
Once the cookies are entirely cool, begin assembly. Take a full (non-cutout) cookie and spread a small, even amount of your chosen jam onto its flat side. Meanwhile, take the top half cookies (the ones with the heart cutout) and lightly dust them with powdered sugar using a fine-mesh sieve. This creates a delicate, snowy finish.
- Assemble Your Sandwich Cookies:
Gently place a powdered sugar-dusted top half onto a jam-covered bottom half, aligning the edges to create a perfect sandwich cookie. Repeat this process with all the remaining cookies. Your beautiful Classic Jam Heart Cookies are now ready to be enjoyed!
Chef’s Secrets: Elevate Your Classic Jam Heart Cookies Game
Beyond the basic steps, these professional tips will help you achieve truly exceptional results with your Classic Jam Heart Cookies.
Achieving Uniform Thickness for Consistent Baking
Rolling your dough to a consistent thickness is paramount. Uneven dough will result in some cookies being under-baked and others over-baked. Use a rolling pin with thickness guides or visually ensure your dough is uniform (1/8 to 1/4 inch) across the entire sheet. This ensures every cookie bakes evenly and has the same delightful crisp-tender texture.
The Golden Rule of Not Overmixing Dough
Overmixing flour develops gluten, which leads to tough, chewy cookies instead of tender, melt-in-your-mouth ones. Always mix dry ingredients into wet ones on low speed, and stop the mixer as soon as the flour streaks disappear and a cohesive dough forms. A slightly crumbly dough is better than an overmixed one, as chilling will help it come together. For other amazing cookies, mastering dough handling is key, much like our perfect sugar cookies recipe.
Temperature Matters: Oven Accuracy is Key
An accurate oven temperature is vital for cookies that hold their shape and bake evenly. If your oven runs hot or cold, it can significantly impact the final texture and appearance. Consider using an oven thermometer to verify your oven’s true temperature, adjusting accordingly. This ensures your Classic Jam Heart Cookies bake perfectly without spreading or browning too quickly.
Don’t Skimp on Quality Jam (or Quantity!)
The jam is a star ingredient, so choose a high-quality one you love. Opt for a jam that isn’t too runny, as excessively liquid jams can make the cookies soggy or seep out. While you want enough jam for a good flavor, don’t overfill them; a thin, even layer is perfect to prevent overflow during assembly or storage.
Common Cookie Conundrums Solved
Even seasoned bakers encounter issues. Here are solutions to common problems with cutout cookies.
Why Did My Classic Jam Heart Cookies Spread Too Much?
Cookie spreading is usually due to butter that was too warm or insufficient chilling time. Ensure your butter is softened, not melted. More importantly, do not skip or shorten the critical double-chilling steps. Warm dough means the butter melts too fast in the oven, causing the cookies to lose their shape. Additionally, too little flour or an overmixed dough can contribute to spreading.
My Cookies Are Too Hard/Dry! What Went Wrong?
Hard or dry cookies are typically a sign of overbaking or overmixing the dough. Bake only until the edges are lightly golden and the centers are just set, not browned. Remove them promptly from the oven. Overmixing develops gluten, which creates a tough texture, so always mix the flour in just until combined.
My Jam Ran Out! Or, My Jam Made the Cookies Soggy!
If you run out of jam, consider other fillings like lemon curd, chocolate spread, or even a different flavor of jam. If your jam made the cookies soggy, it was likely too thin or you used too much. Thicker jams work best for stability. For very runny jams, you can try reducing them slightly in a saucepan over low heat until they thicken, then cool completely before using.
Storing Your Cookie Creations: Freshness & Longevity
Proper storage is essential to keep your Classic Jam Heart Cookies delicious and beautiful for days.
Keeping Baked Classic Jam Heart Cookies Fresh
Once assembled, store your Classic Jam Heart Cookies in an airtight container at room temperature. For best results, place parchment paper between layers of cookies to prevent sticking. They will stay fresh and tender for up to 3-5 days. While they are delightful immediately, their flavors often meld and deepen beautifully after a day.
Can You Make the Dough Ahead? (Freezing Tips!)
Absolutely! The dough for these Classic Jam Heart Cookies is perfect for making ahead. You can wrap the discs of dough tightly in plastic wrap and store them in the refrigerator for up to 2-3 days. For longer storage, you can freeze the dough for up to 2-3 months. Thaw frozen dough in the refrigerator overnight before rolling and baking. This makes spontaneous cookie baking a breeze!
Delightful Pairings: How to Serve Your Classic Jam Heart Cookies
These elegant Classic Jam Heart Cookies are versatile and can be enjoyed in many ways.
Classic Servings and Beverages
Pair these charming cookies with a warm cup of tea for a cozy afternoon treat, or with coffee for a delightful breakfast indulgence. They also make a wonderful addition to a dessert platter, offering a burst of fruity sweetness. A cold glass of milk is always a timeless and comforting companion for any cookie.
Creative Variations and Presentation Ideas
Experiment with different jam flavors like apricot, blackberry, or even a citrus marmalade for new taste experiences. You can also drizzle melted white or dark chocolate over the powdered sugar tops for an extra touch of decadence. For a festive presentation, arrange them on a tiered stand or package them in small gift boxes for a thoughtful homemade present. They are as delightful as our strawberry crumble cookies, just with a different charm!
Your Top Classic Jam Heart Cookie Questions Answered
Can I Use Different Jams or Fillings?
Yes, absolutely! While raspberry and strawberry are traditional, feel free to experiment with other fruit jams like apricot, cherry, blueberry, or even lemon curd for a tangy twist. Just ensure the jam is not too runny to prevent it from making the cookies soggy.
Is There a Gluten-Free Option for This Recipe?
While this specific recipe uses all-purpose flour, you can often adapt it using a good quality 1:1 gluten-free baking flour blend that contains xanthan gum. Results may vary slightly in texture, but many bakers have success with this substitution. Ensure all other ingredients are naturally gluten-free.
What If I Don’t Have a Heart-Shaped Cutter?
No problem! You can use any small, simple cookie cutter for the center cutout, such as a tiny circle, star, or even a small square. Alternatively, you can make them as solid round cookies and simply spread jam on one half, then top with another solid half dusted with powdered sugar, omitting the cutout entirely.
How Long Do These Cookies Stay Fresh?
When stored in an airtight container at room temperature, Classic Jam Heart Cookies remain fresh for 3-5 days. For optimal freshness and texture, consume them within this timeframe. The jam can start to soften the cookie over time, so enjoy them relatively quickly!
Can I Freeze the Baked Classic Jam Heart Cookies?
You can freeze the baked, unassembled cookies (without jam and powdered sugar) in an airtight container for up to 2-3 weeks. Thaw them at room temperature, then assemble with jam and powdered sugar before serving. Freezing fully assembled cookies can sometimes make the jam weep or alter the cookie’s texture slightly upon thawing.
Ready to Share Your Classic Jam Heart Cookies Masterpiece?
With these detailed steps and expert tips, you’re now equipped to bake the most beautiful and delicious Classic Jam Heart Cookies. The joy of seeing those perfectly formed shapes emerge from the oven, coupled with the delightful taste of sweet jam and tender cookie, is truly rewarding. Go forth, bake with confidence, and share these stunning treats with loved ones!
Classic Jam Heart Cookies
Course: DessertCuisine: American CuisineDifficulty: easy4
24 sandwich cookies30
minutes10
minutes60
minutesAmerican Cuisine
Ingredients
1 cup unsalted butter, softened
1/2 cup granulated sugar
1 large egg yolk
1 teaspoon vanilla extract
2 cups all-purpose flour
1/4 teaspoon salt
1/2 cup raspberry or strawberry jam
Powdered sugar, for dusting
Directions
- In a large bowl, cream together the softened butter and granulated sugar until light and fluffy.
- Beat in the egg yolk and vanilla extract until well combined.
- In a separate bowl, whisk together the all-purpose flour and salt. Gradually add the dry ingredients to the wet ingredients, mixing on low speed until just combined and a soft dough forms. Be careful not to overmix.
- Divide the dough in half, shape each half into a flat disc, and wrap tightly in plastic wrap. This is the first key step to preventing spreading: Chill the dough in the refrigerator for at least 1 hour. This firms up the butter, which is crucial for maintaining shape during baking.
- Preheat your oven to 350°F (175°C). Line two baking sheets with parchment paper.
- On a lightly floured surface, roll out one disc of chilled dough to about 1/8 to 1/4 inch thickness. Use a scalloped cookie cutter (about 2 inches) to cut out shapes. For half of these cutouts, use a small heart-shaped cutter to create the center window.
- Carefully transfer the cut cookie shapes to the prepared baking sheets. For the absolute best results and to guarantee a perfect shape, place the baking sheets with the cut cookies into the refrigerator for another 15 minutes before baking. This double chill locks in the shape.
- Bake for 10-12 minutes, or until the edges are lightly golden. The cookies should still be pale in the center.
- Let the cookies cool on the baking sheets for 5 minutes before transferring them to a wire rack to cool completely.
- Once cooled, spread a small amount of jam onto the flat side of the full cookies. Lightly dust the top half (the ones with the heart cutout) with powdered sugar using a fine-mesh sieve.
- Gently place the powdered sugar-dusted top half onto the jam-covered bottom half to create a sandwich cookie. Repeat with the remaining cookies.
Notes
- The double chilling step is crucial for maintaining the cookies’ perfect shape and preventing spreading during baking.