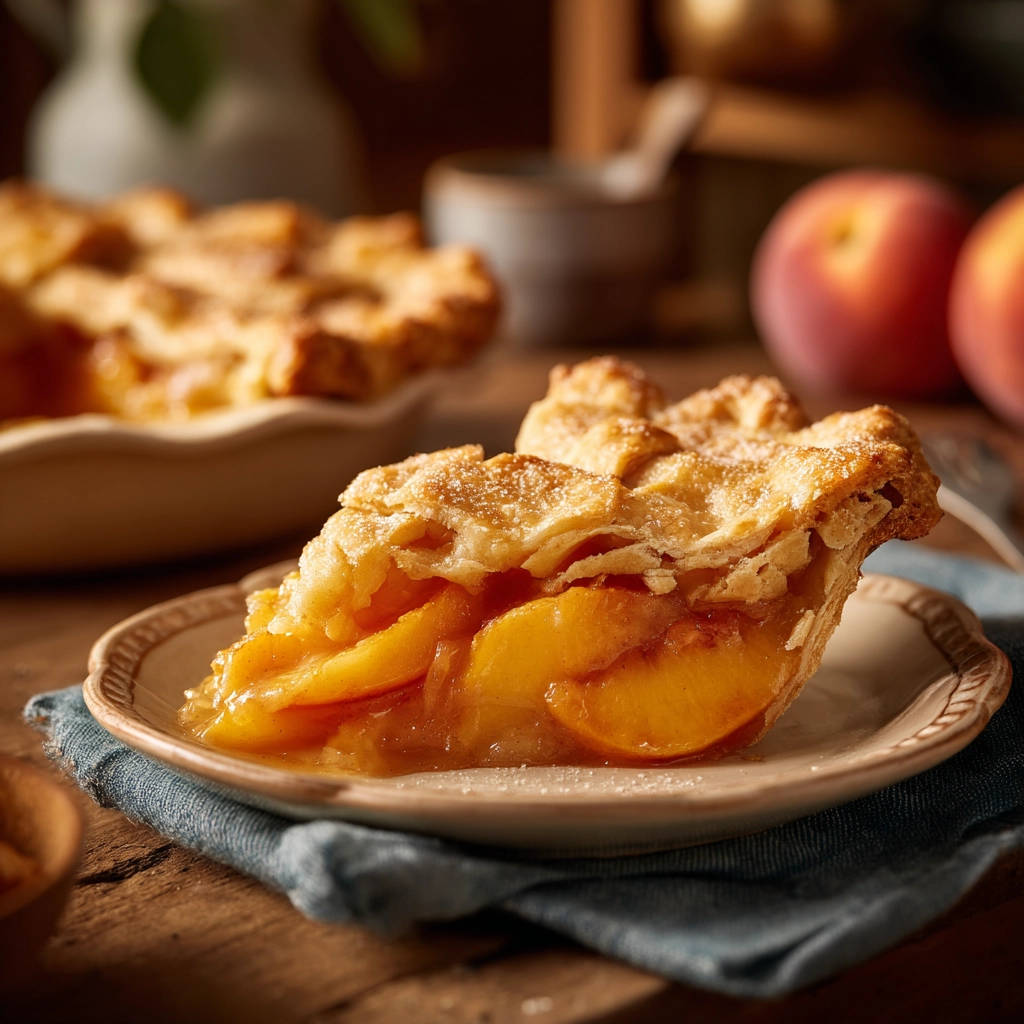
Ah, the quintessential taste of summer! There’s really nothing quite like a warm slice of homemade peach pie, its sweet, juicy filling encased in a perfectly flaky crust. It’s a dessert that evokes lazy afternoons and backyard gatherings. But if you’ve ever baked a classic peach pie only to find the filling turn into a runny, watery mess that floods your plate, you’re definitely not alone! It’s a common baking woe, especially with wonderfully ripe, juicy peaches.
For years, I struggled with this exact problem. My pies tasted great, but they lacked that beautifully set, luscious filling you dream of. Through trial and error (and a bit of research!), I discovered a simple yet incredibly effective technique that guarantees a perfect peach filling every single time. Say goodbye to watery pie disappointment and hello to your new go-to recipe for the best peach pie!
Why This Classic Peach Pie is a Must-Bake
Beyond the simple joy of biting into a slice of summer, this classic peach pie recipe stands out for a few key reasons:
- No More Watery Filling: This is the big one! The method employed here ensures your filling sets beautifully, creating thick, spoonable slices instead of a juicy soup.
- Perfectly Balanced Flavor: The sweetness of ripe peaches is perfectly complemented by a hint of spice (if you choose) and the richness of butter, all nestled in a tender, flaky crust.
- Uses Simple Ingredients: You won’t need any fancy or hard-to-find items. The magic is in the technique, not exotic components.
- Impressive Yet Approachable: While the results look bakery-worthy, the process is straightforward and manageable for bakers of all levels.
Gathering Your Ingredients for Perfect Peach Pie Filling
Making a memorable peach pie starts with selecting the right ingredients and understanding how they work together. This recipe relies on fresh, ripe peaches as the star, supported by pantry staples that transform their natural juices into a glorious, thick filling.
The foundation begins with your crust. You can use store-bought crusts for convenience, or if you’re feeling ambitious, whip up your favorite homemade recipe. Either way, a good crust is crucial for holding that delicious filling.
The heart of the pie is, of course, the peaches. Using 6-8 ripe peaches provides ample fruitiness. Look for peaches that yield slightly to gentle pressure and have a sweet fragrance. Peeling them is traditional for a smooth filling, but you can leave the skins on if you prefer a more rustic texture (just make sure they are thoroughly washed!). Slicing them to a consistent thickness helps ensure even cooking.
Now, for the secret weapon against wateriness: a thickener. This recipe calls for either granulated sugar alongside a generous amount of cornstarch or all-purpose flour. The sugar not only sweetens the fruit but also helps draw out some of the peach’s natural liquid. The cornstarch or flour is the binding agent. As the pie bakes and the peach juices release and heat up, the starch activates, thickening those juices into a lovely, set gel. This is the crucial step that prevents that dreaded runny mess.
A touch of ground cinnamon is optional but highly recommended. It adds a warm, comforting note that pairs beautifully with peaches. Just a half teaspoon is enough to enhance the flavor without overpowering the fruit.
Small pieces of butter dotted over the filling before the top crust goes on are essential. As the butter melts, it adds richness, helps create a smoother texture, and prevents the filling from becoming dry on top.
Finally, for that bakery-quality finish, an optional egg wash (simply a beaten egg) brushed over the top crust gives it a beautiful golden sheen, and a sprinkle of coarse sugar adds a lovely sparkle and a tiny bit of crunch.
Here’s a quick list of everything you’ll need:
- 2 Pie crusts (store-bought or homemade)
- 6-8 ripe peaches, peeled, pitted, and sliced
- 3/4 cup granulated sugar
- 1/4 cup cornstarch or all-purpose flour
- 1/2 teaspoon ground cinnamon (optional)
- 1 tablespoon butter, cut into small pieces
- 1 egg, beaten (for egg wash, optional)
- 1 tablespoon coarse sugar (optional)
Baking Bliss: Crafting Your Peach Pie Step-by-Step
Ready to create a slice of peach perfection? Follow these steps closely, paying special attention to the key moments that ensure a beautifully set filling and a golden crust.
- Prepare Your Oven: Start by preheating your oven to a relatively hot 425 degrees Fahrenheit (220 degrees Celsius). This initial high temperature is important; it helps to quickly set the bottom crust and encourages the edges of the pie to brown nicely from the start, giving you that desired crispness.
- Get Your Crust Ready: If you’re using homemade pie crust, make sure it’s prepared according to your recipe and has had adequate time to chill in the refrigerator. Chilling the dough helps the fat stay solid, which creates a flaky crust when it hits the hot oven. If you’re using store-bought rolled crusts, let them sit at room temperature for about 15 minutes. This makes them pliable enough to unroll without cracking.
- Mix the Magical Filling: This is the most critical step for preventing a watery pie! In a large mixing bowl, gently combine your sliced peaches, granulated sugar, the cornstarch (or flour), and the cinnamon, if you’re using it. The starches will absorb the liquid released by the fruit as it bakes, thickening the filling. Toss everything together very gently with a spoon or your hands until the peach slices are evenly coated with the sugar and starch mixture. Avoid over-mixing, which can bruise the fruit and release too much juice prematurely.
- Line the Pie Plate: Carefully place one of your pie crusts into a standard 9-inch pie plate. Press it gently into the bottom and up the sides, making sure it’s snug. Use kitchen shears or a knife to trim off any excess crust around the edge, leaving about a half-inch overhang. This overhang is necessary for crimping.
- Fill ‘Er Up: Pour the delicious peach mixture directly into the prepared pie crust. Try to distribute the peach slices evenly, filling the pie plate mounded slightly in the center, as the filling will settle as it bakes. Dot the top of the peach filling evenly with the small pieces of cold butter. These little butter pockets will melt and distribute moisture and richness throughout the top layer of the filling.
- Add the Top Crust: Now it’s time for the second crust. You have options here! You can place the second crust on whole and cut several vents in it with a knife or cookie cutter (this allows steam to escape while baking). Alternatively, for a classic look, you can cut the dough into strips to create a beautiful lattice top. Trim the edges of the top crust to match the bottom, and then crimp the edges of both the top and bottom crusts together all around the pie plate to create a tight seal. This seal helps keep the juices inside the pie where they belong.
- Golden Crust Finish: For that inviting golden-brown color, brush the top surface of the pie crust (whether whole or lattice) with the beaten egg wash. Then, sprinkle the coarse sugar evenly over the egg wash. This not only adds sparkle but also a delightful subtle crunch to each bite of crust.
- Prep for Baking: Place the assembled pie onto a baking sheet. This is a simple but crucial step! Juicy fruit pies can sometimes bubble over, and the baking sheet will catch any drips, preventing a sticky mess on the bottom of your oven and potential smoke.
- The Baking Process (Two-Stage): Place the baking sheet with the pie into your preheated 425°F (220°C) oven. Bake at this high temperature for 15 minutes. This blast of heat helps the crust set quickly. After 15 minutes, reduce the oven temperature to 375 degrees Fahrenheit (190 degrees Celsius) without opening the oven door if possible. Continue baking for another 40-45 minutes. You’ll know it’s done when the crust is a deep golden brown and you can see the filling bubbling up through the vents or lattice. If you notice the edges of your crust getting too dark too quickly during the longer bake, you can loosely tent the edges with strips of aluminum foil.
- Cooling is KEY: Perhaps the most difficult step for impatient pie lovers! Once baked, carefully remove the pie from the oven and place it on a wire rack. You MUST let the pie cool completely before slicing, which means waiting at least 2-3 hours, sometimes even longer. As the pie cools, the starches in the filling continue to set and thicken. Cutting into a warm pie, no matter how well it’s thickened with starch, will almost always result in a runnier filling. Patience truly is a virtue here!
Tips for the Best Classic Peach Pie Every Time
Even with a solid recipe, a few extra tips can elevate your peach pie from good to absolutely amazing. Here are some pro pointers:
- Choose Ripe, But Not Mushy, Peaches: While ripeness is key for flavor, overly soft peaches can make the filling too wet. Just-ripe peaches that are still slightly firm work best.
- Peeling Made Easy: The easiest way to peel peaches is the blanching method. Score a small ‘X’ on the bottom of each peach. Briefly dip them in boiling water for 30-60 seconds, then immediately transfer them to an ice bath. The skins should slip right off! If you’re preparing other fruit-filled desserts, like a Perfected Fruit Tart or Classic Peach Crumble Tart, this technique is often helpful there too.
- Cornstarch vs. Flour: Cornstarch provides a clearer, glossier filling. Flour results in a slightly cloudier, sometimes less firm set. Both work well, so use what you have on hand or prefer.
- Dealing with Extra Juicy Peaches: If your peaches are exceptionally juicy, you can increase the amount of starch slightly, maybe by an extra tablespoon. Alternatively, you can toss the peaches with the sugar and starch ahead of time and let them sit for 15-20 minutes. This draws out some juice, which you can then drain off before assembling the pie, concentrating the flavor and reducing excess liquid.
- Freezing Peach Pie: You can freeze an unbaked peach pie. Assemble the pie completely, then wrap it very well in plastic wrap and then foil. Freeze for up to 3-4 months. To bake, unwrap and bake from frozen (do not thaw) at the initial higher temperature (425°F) for about 20-25 minutes, then reduce temperature as directed and continue baking until golden and bubbly (this will take longer than baking from fresh).
- Preventing Soggy Bottoms: Beyond the initial high heat, ensuring your oven rack is in the lower third of the oven can help crisp the bottom crust. Some bakers also pre-bake the bottom crust briefly (par-baking) before adding the filling, especially if using very juicy fruit.
Variations to Spice Up Your Peach Pie
While a classic peach pie is divine on its own, a few additions can offer delightful variations:
- Peach & Berry Pie: Peaches pair wonderfully with berries. Try adding a cup or two of fresh raspberries, blueberries, or blackberries to the peach mixture. If adding very juicy berries like raspberries, you might want to slightly increase the starch. If you love berry desserts, you might also enjoy our Layered Blueberry Cake or Raspberry Dream Bake.
- Add More Spices: Beyond cinnamon, a pinch of nutmeg, ginger, or even cardamom can add complexity to the filling.
- Nutty Crunch: Chop some pecans or walnuts and sprinkle them into the filling before adding the top crust for added texture and flavor.
- Crumble Top: Instead of a second pastry crust, top the pie with a buttery streusel crumble. It’s a delicious alternative texture.
What to Serve with Your Classic Peach Pie
A warm slice of homemade peach pie is a dessert meant to be enjoyed. Here are a few classic pairings:
- Vanilla Ice Cream: The ultimate companion! A scoop of creamy vanilla ice cream melting into the warm peach filling is pure heaven. If you’re an ice cream enthusiast, you might want to check out our recipe for Creamy Chocolate Chip Ice Cream for another frozen treat idea.
- Fresh Whipped Cream: Lighter than ice cream, but equally delightful. A dollop of freshly whipped cream adds airy sweetness.
- Sharp Cheddar Cheese: A traditional pairing in some regions, the salty tang of a good sharp cheddar is surprisingly wonderful with sweet fruit pies.
- A Warm Beverage: Enjoy your pie with a cup of coffee or tea. For cozy vibes, especially in the fall, a Homemade Pumpkin Spice Latte makes a lovely pairing.
Your Peach Pie Questions Answered (FAQ)
Got questions about making the perfect peach pie? Here are some answers to common queries:
How do I choose the best peaches for pie?
Look for ripe peaches that have a strong peachy aroma and yield slightly when gently squeezed. Avoid hard, unripe peaches (flavorless) and overly soft or bruised ones (can become mushy). Freestone peaches are easier to work with than clingstone.
Can I use frozen peaches instead of fresh?
Yes, absolutely! Thaw the frozen peaches completely and drain off all the excess liquid before using them in the recipe. You may need to slightly increase the amount of cornstarch or flour (maybe by 1-2 tablespoons) as frozen fruit tends to release more liquid.
Why is my peach pie still watery even after using starch?
There are a few potential reasons. Did you use enough starch for the amount of peaches/juices? Did you toss the peaches thoroughly to coat them evenly? Most importantly, did you let the pie cool completely? Cutting into a pie that hasn’t fully cooled for at least 2-3 hours is the most common cause of a runny filling, as the starches haven’t had time to set properly.
Can I make the pie ahead of time?
Yes, you can assemble the entire pie, wrap it tightly, and refrigerate it for up to 24 hours before baking. You can also freeze it unbaked as described in the tips section above.
How do I store leftover peach pie?
Store leftover peach pie loosely covered with plastic wrap or in an airtight container at room temperature for up to 2 days. For longer storage or in warmer climates, refrigerate it. Reheat slices gently in the oven or microwave if desired.
Enjoy Your Homemade Classic Peach Pie!
Baking a classic peach pie doesn’t have to be intimidating, and achieving that perfectly set, bubbly filling is entirely within reach! By following this recipe and understanding the role of that simple starch, you’re well on your way to baking a pie that will disappear quickly and earn you rave reviews.
So grab those beautiful, ripe peaches, roll out your crust, and get baking! Share this best peach pie with friends and family and watch their faces light up with pure summertime joy. Don’t forget to leave a comment below and let me know how your pie turns out, or if you have any other questions!
Classic Peach Pie

Ingredients
- 2 Pie crusts (store-bought or homemade)
- 6-8 ripe peaches, peeled, pitted, and sliced
- 3/4 cup granulated sugar
- 1/4 cup cornstarch or all-purpose flour
- 1/2 teaspoon ground cinnamon (optional)
- 1 tablespoon butter, cut into small pieces
- 1 egg, beaten (for egg wash, optional)
- 1 tablespoon coarse sugar (optional)
Directions
- Preheat your oven to 425 degrees Fahrenheit (220 degrees Celsius).
- If using homemade crust, prepare it according to your recipe and chill. If using store-bought, let it sit at room temperature for 15 minutes before unrolling.
- In a large bowl, combine the sliced peaches, granulated sugar, cornstarch (or flour), and cinnamon (if using). This step is key to preventing a watery filling. The cornstarch or flour binds with the peach juices as they release during baking, creating a thick, luscious filling instead of a runny mess. Gently toss everything together until the peaches are evenly coated.
- Place one pie crust into a 9-inch pie plate. Trim any excess crust, leaving about a 1/2 inch overhang.
- Pour the peach mixture into the pie crust, distributing the peaches evenly. Dot the top of the filling with the small pieces of butter.
- Top the pie with the second crust. You can create a lattice top or place the crust on whole, cutting vents into the top. Trim the top crust overhang and crimp the edges of the top and bottom crusts together to seal.
- For a golden crust, brush the top with beaten egg wash and sprinkle with coarse sugar, if desired.
- Place the pie on a baking sheet to catch any drips.
- Bake for 15 minutes at 425 degrees Fahrenheit (220 degrees Celsius). Then, reduce the oven temperature to 375 degrees Fahrenheit (190 degrees Celsius) and continue baking for 40-45 minutes more, or until the crust is golden brown and the filling is bubbly. If the crust edges brown too quickly, you can cover them loosely with foil.
- Let the pie cool completely on a wire rack before slicing, at least 2-3 hours. This allows the filling to set properly. Patience is also important here; cutting into a warm pie will result in a runnier filling.