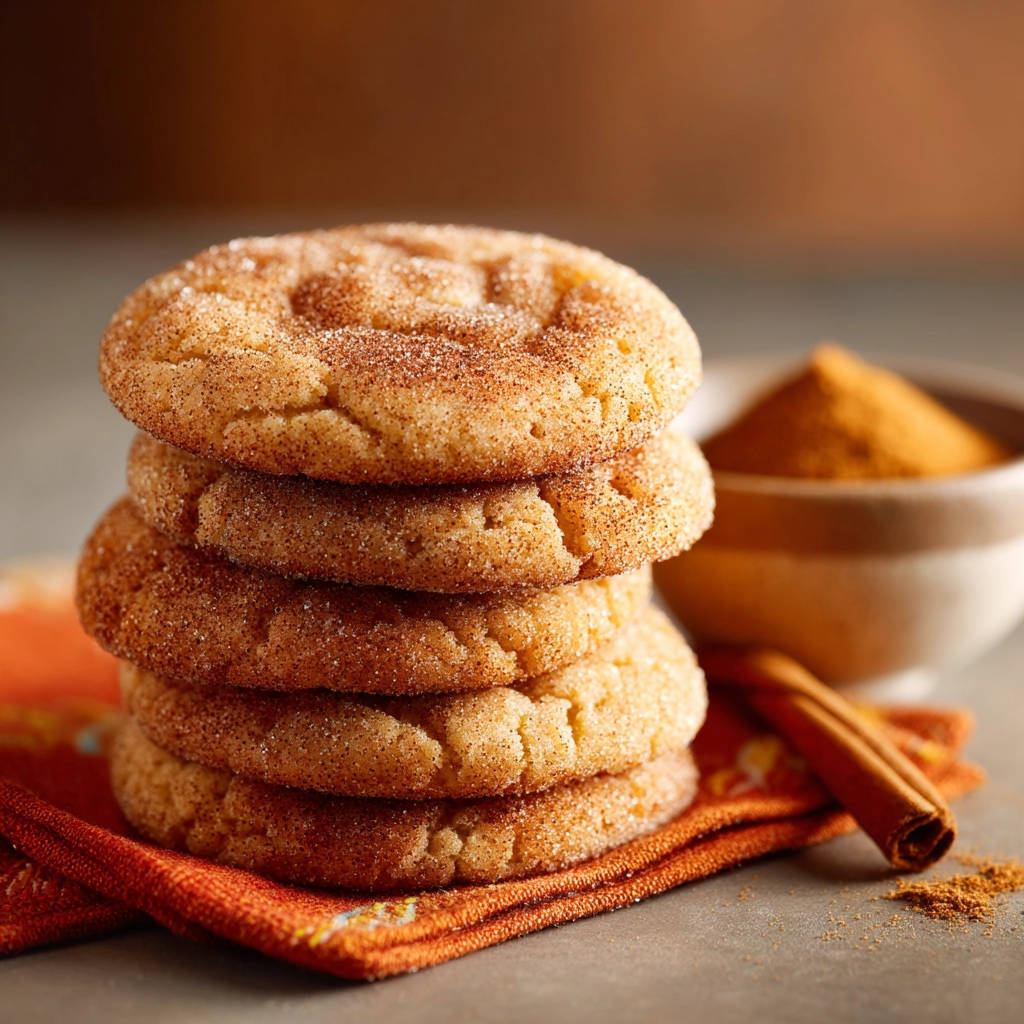
Ah, the classic snickerdoodle. Just thinking about that warm, cinnamon-sugar coated cookie conjures up feelings of comfort, nostalgia, and pure simple joy. They are a beloved treat for a reason!
But if you’ve ever baked a batch only to pull out sad, flat, or worse, rock-hard and dry snickerdoodles, you know the disappointment is real. For years, I chased that elusive perfectly soft and chewy texture, struggling through crumbly dough and overbaked pucks.
Finally, after much trial and error (and eating a lot of not-quite-right cookies!), I cracked the code. I discovered the simple, yet crucial, techniques that transform a basic cookie dough into those tender, pillowy delights you dream of. Get ready to bake the best Classic Snickerdoodles you’ve ever had, because dry cookies are officially a thing of the past!
Why You’ll Fall in Love with This Snickerdoodle Recipe
This isn’t just another snickerdoodle recipe; it’s the recipe that delivers on the promise of soft, chewy perfection every single time. Here’s why it’s a keeper:
- Guaranteed Softness: We focus on key steps that prevent dryness and ensure a tender crumb.
- Classic Flavor: That quintessential tangy sweetness perfectly balanced with warm cinnamon.
- Simple Ingredients: You likely have everything you need in your pantry right now.
- Perfect Texture: Chewy centers, slightly crisp edges, and that delightful crackle from the cinnamon-sugar coating.
- Reliable Results: Say goodbye to guesswork and hello to consistent, delicious cookies batch after batch.
Whether you’re baking for a holiday cookie swap, a school bake sale, or just because you need a little comfort food, these soft snickerdoodles are guaranteed to be a hit.
Gathering Your Ingredients for Classic Snickerdoodles
Creating these perfect cinnamon-sugar cookies starts with understanding the role each ingredient plays. It’s a simple list, but the quality and preparation of these components are key to achieving that sought-after texture and flavor.
For the base of our tender dough, we rely on a standard set of baking staples:
- Unsalted Butter: Using unsalted butter gives you control over the saltiness of the cookie. Ensure it’s properly softened – not melted! Softened butter creams beautifully with sugar, incorporating air that contributes to the cookie’s texture.
- Granulated Sugar: This provides sweetness and helps create that initial light and fluffy base when creamed with the butter.
- Large Eggs: Eggs bind the ingredients together, add richness, and contribute to the structure and tenderness of the cookie. Using large eggs is standard for consistency in baking recipes.
- Vanilla Extract: A touch of vanilla enhances the overall flavor profile and complements the cinnamon beautifully.
- All-Purpose Flour: The foundation of the cookie’s structure. Using standard all-purpose flour works perfectly here.
- Cream of Tartar: This is the magic ingredient in snickerdoodles! Cream of tartar is an acidic salt that reacts with baking soda. It gives snickerdoodles their characteristic tangy flavor and contributes significantly to their chewy texture and slight puff. It also helps prevent sugar crystallization, keeping the cookies soft.
- Baking Soda: A leavening agent that works in tandem with the cream of tartar to help the cookies spread and rise slightly, giving them that signature cracked surface.
- Salt: Just a small amount of salt balances the sweetness and enhances all the other flavors.
And, of course, we can’t forget the iconic coating:
- Granulated Sugar: Forms the base of the sweet coating.
- Ground Cinnamon: The warm, aromatic spice that gives snickerdoodles their name and signature flavor. Use good quality, fresh cinnamon for the best results.
Having all your ingredients measured out and ready before you begin is always a great practice in baking. For many other delicious baked treats that use similar pantry staples, you might enjoy making our perfect sugar cookies or maybe even tackling a classic baked cheesecake.
Crafting Your Classic Snickerdoodles: Step-by-Step
Ready to turn these simple ingredients into cookie perfection? Follow these steps closely, paying attention to the little details – they make all the difference!
- Start with the Creaming Process: In a spacious mixing bowl, take your softened butter and the larger portion of the granulated sugar (1 1/2 cups). Use an electric mixer to beat them together. This step is crucial – you want to beat until the mixture is truly light and fluffy. This isn’t a quick whisk; it takes a few minutes for the butter and sugar to aerate properly, which helps create that tender cookie texture later. Scrape down the sides of the bowl occasionally to ensure everything is evenly combined.
- Introduce the Wet Elements: Once the butter and sugar are beautifully creamed, add the eggs one at a time, beating well after each addition. This ensures they are fully incorporated into the fatty mixture. Follow up by stirring in the vanilla extract. The mixture might look slightly curdled at this stage, but don’t worry; it will come together when you add the dry ingredients.
- Combine the Dry Foundation: In a separate, medium-sized bowl, measure out your all-purpose flour, cream of tartar, baking soda, and salt. Give these a good whisk together. Whisking ensures that the leavening agents (cream of tartar and baking soda) and salt are evenly distributed throughout the flour, preventing pockets of leavening or saltiness in your cookies.
- Gently Bring the Dough Together: Gradually add the whisked dry ingredients to your wet mixture. Mix on a low speed just until the dry ingredients are incorporated and no streaks of flour remain. This is a critical point for tenderness: avoid overmixing once the flour is added. Overmixing develops the gluten in the flour, which can lead to tougher, dry cookies. Stop mixing as soon as everything is just combined.
- The Secret Chill: Cover the cookie dough bowl tightly with plastic wrap and place it in the refrigerator. You absolutely must chill the dough for at least 60 minutes. This isn’t just to make it easier to roll; chilling allows the fats to firm up, which helps prevent excessive spreading during baking. More importantly, it allows the flavors to meld and helps create that desirable chewy texture. Don’t skip this step if you want truly soft snickerdoodles!
- Prepare Your Baking Environment: While the dough is chilling, preheat your oven to 375 degrees Fahrenheit (190 degrees Celsius). Prepare your baking sheets by lining them with parchment paper. Parchment paper prevents sticking and makes cleanup a breeze. Having multiple baking sheets ready means you can bake batches continuously after the dough is chilled.
- Mix the Signature Coating: In a small, shallow bowl – something easy to roll cookie balls in – combine the remaining 1/4 cup of granulated sugar and the ground cinnamon. Stir them together until the cinnamon is evenly distributed throughout the sugar. This is the classic cinnamon-sugar mixture that defines a snickerdoodle.
- Shape and Coat the Cookies: Once the dough is sufficiently chilled and firm, scoop or roll it into 1-inch balls. The exact size doesn’t have to be perfect, but aim for consistency so they bake evenly. Take each dough ball and roll it thoroughly in the cinnamon-sugar mixture. Make sure it’s completely coated on all sides; this is where the cookie gets its iconic appearance and flavor.
- Arrange on Baking Sheets: Place the coated dough balls onto your prepared baking sheets, leaving about 2 inches of space between each cookie. They will spread slightly as they bake, and giving them room ensures they don’t merge into one giant cookie blob.
- Bake to Perfection (and Tenderness!): Place the baking sheets in your preheated oven and bake for 8 to 10 minutes. Watch them carefully! You’re looking for the edges to look set and slightly firm, but the centers should still appear slightly soft, puffed, and maybe even a little underbaked. This is the final secret to keeping them wonderfully soft. They will continue to cook slightly from the residual heat once they are out of the oven and will set up as they cool.
- Cooling Process: Once the cookies are out of the oven, let them rest on the baking sheets for 2-3 minutes. They are delicate when hot, and this short resting time allows them to firm up slightly before you move them. After a few minutes, carefully transfer the cookies to a wire rack to cool completely. This allows air circulation, stopping the baking process and ensuring they cool properly, maintaining their soft texture.
Tips for the Most Delicious Snickerdoodles
While the steps above are straightforward, here are a few extra pointers to elevate your snickerdoodle game and ensure stellar results every time.
- Properly Softened Butter: Don’t underestimate this! Butter should be soft enough to easily indent with your finger, but not greasy or melted. Cold butter won’t cream correctly, and melted butter will result in flat, greasy cookies.
- Accurate Measuring: Especially with flour, be precise. Too much flour is a common culprit for dry cookies. Spoon the flour into your measuring cup and level it off with a straight edge; don’t scoop directly from the bag.
- Don’t Overbake: Seriously, watch them like a hawk in the last few minutes. Pulling them out when the centers are still soft is key to that chewy texture. When in doubt, err on the side of underbaking slightly.
- Chill Time is Non-Negotiable: Rushing the chill time means your cookies might spread too much and won’t have that ideal texture development. Plan ahead!
- Uniform Balls: Try to make the cookie balls roughly the same size. This ensures they all bake evenly. A cookie scoop can be helpful for consistency.
- Variations: Want to mix it up? While the classic is divine, you could add a pinch of nutmeg to the cinnamon-sugar coating for extra warmth. For those who love spiced treats, exploring variations like our chewy orange ginger crinkle cookies could be a fun next step.
- Storage: Store cooled snickerdoodles in an airtight container at room temperature for up to 3-4 days. If they start to lose a little softness, you can place a slice of white bread in the container with them overnight; the cookies will absorb moisture from the bread!
What to Serve With Snickerdoodles
These cookies are perfect on their own, of course, but they’re even better paired with a few simple things.
A tall glass of cold milk is the absolute classic pairing. For a cozy treat, serve them warm alongside a mug of tea or a homemade pumpkin spice latte during the fall. They’re also a lovely addition to a dessert platter alongside other favorites like brownies or fruit tarts.
Your Classic Snickerdoodles Questions Answered (FAQ)
Why did my snickerdoodles turn out hard and dry?
This is the most common issue! The main culprits are usually overmixing the dough after adding flour, adding too much flour (often from improper measuring), or overbaking. Ensure you mix until just combined, measure flour accurately, and pull the cookies from the oven when the centers still look slightly soft.
What is cream of tartar, and can I skip it?
Cream of tartar is an acidic byproduct of winemaking (though it contains no alcohol itself!). It reacts with baking soda to create a unique leavening and texture. It’s essential for the signature tangy taste and chewy texture of traditional snickerdoodles. While you can make a cookie without it (often by substituting baking powder), it won’t be a true snickerdoodle. We strongly recommend using it for the authentic experience.
Can I make the snickerdoodle dough ahead of time?
Absolutely! You can chill the dough for longer than 60 minutes, even overnight or up to 2-3 days in the refrigerator. Just ensure it’s well-covered. If chilling for longer, you might need to let it sit at room temperature for 10-15 minutes before rolling to make it more pliable.
Can I freeze snickerdoodle dough or baked cookies?
Yes! To freeze dough, roll balls as directed, coat them in cinnamon-sugar, then place them on a baking sheet lined with parchment paper. Freeze until solid, then transfer to a freezer-safe bag or container for up to 3 months. Bake from frozen, adding a minute or two to the baking time. Baked cookies can be frozen in an airtight container for up to 3 months; thaw at room temperature.
Why did my snickerdoodles spread too much?
Common reasons for excessive spreading include using butter that was too soft or melted, not chilling the dough long enough, or having an oven that isn’t calibrated correctly (running cooler than it indicates). Ensure your butter is just softened, commit to the full chill time, and consider checking your oven temperature if you frequently have spreading issues.
Enjoy Your Homemade Classic Snickerdoodles!
Now that you have the secrets to perfectly soft and chewy classic snickerdoodles, it’s time to get baking! These cookies are more than just a dessert; they’re a little bit of edible happiness, perfect for sharing (or keeping all to yourself!).
Try this recipe, and I promise you won’t go back to dry, hard snickerdoodles. They are everything a snickerdoodle should be – soft, tangy, sweet, and warmly spiced. Happy baking!
Did you try this recipe? I’d love to hear how they turned out! Leave a comment below or rate the recipe.
Classic Snickerdoodles

Ingredients
- 1 cup unsalted butter, softened
- 1 1/2 cups granulated sugar
- 2 large eggs
- 1 teaspoon vanilla extract
- 2 3/4 cups all-purpose flour
- 1 teaspoon cream of tartar
- 1/2 teaspoon baking soda
- 1/4 teaspoon salt
- For the coating:
- 1/4 cup granulated sugar
- 2 teaspoons ground cinnamon
Directions
- In a large bowl, cream together the softened butter and 1 1/2 cups granulated sugar until light and fluffy. This should take several minutes.
- Beat in the eggs one at a time, then stir in the vanilla extract.
- In a separate medium bowl, whisk together the flour, cream of tartar, baking soda, and salt.
- Gradually add the dry ingredients to the wet ingredients, mixing on low speed until just combined. Do not overmix the dough after adding the flour.
- This is key for tenderness: Cover the dough and chill in the refrigerator for at least 60 minutes. Chilling the dough is essential for the best texture.
- Preheat your oven to 375 degrees Fahrenheit (190 degrees Celsius). Line baking sheets with parchment paper.
- In a small shallow bowl, combine the 1/4 cup granulated sugar and cinnamon for the coating.
- Roll the chilled dough into 1-inch balls. Roll each ball thoroughly in the cinnamon-sugar mixture to coat completely.
- Place the coated dough balls about 2 inches apart on the prepared baking sheets.
- Bake for 8 to 10 minutes, or until the edges are set but the centers still look slightly soft and puffed. Undercooking them slightly is the secret to keeping them wonderfully soft. They will continue to set up as they cool.
- Let the cookies cool on the baking sheets for 2-3 minutes before carefully transferring them to a wire rack to cool completely.