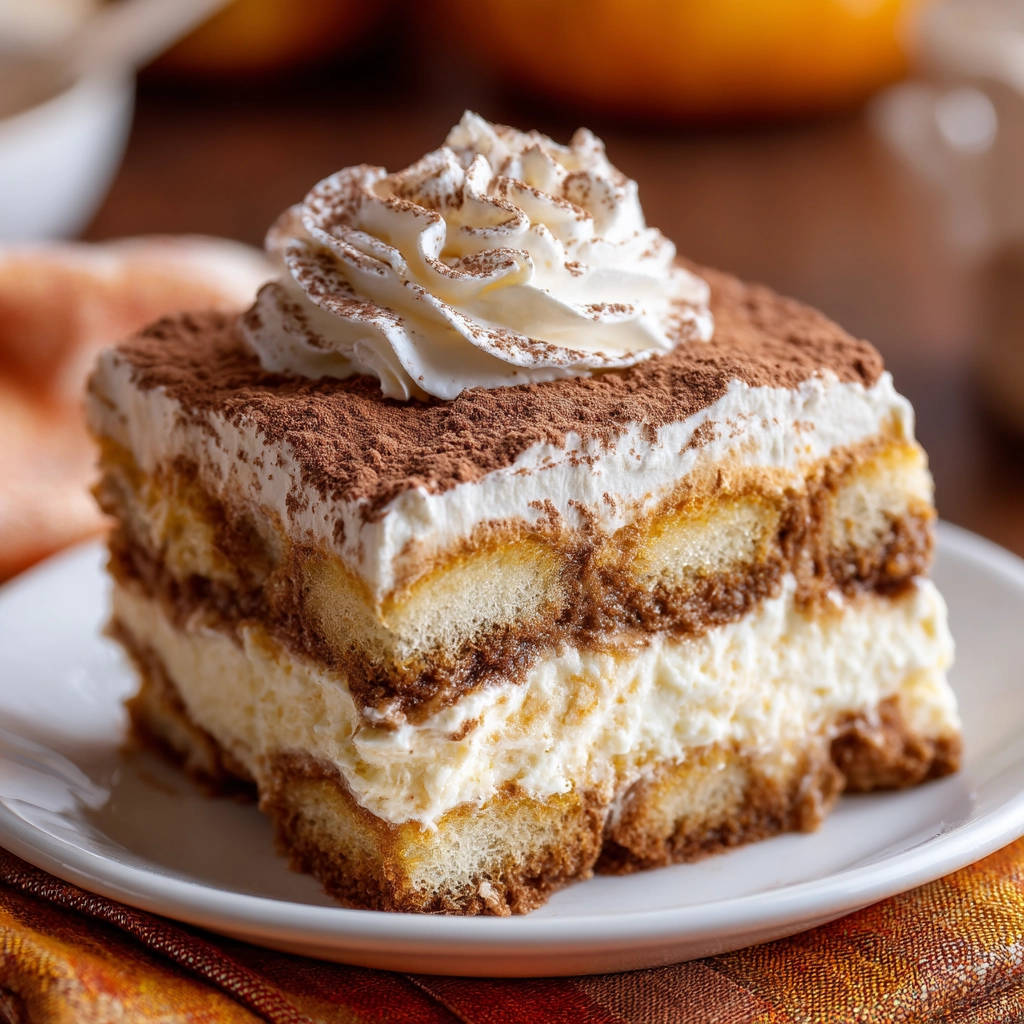
There’s truly nothing quite like sinking your spoon into a luxurious slice of classic Tiramisu. That exquisite combination of rich coffee-soaked ladyfingers and light-as-air mascarpone cream is pure bliss. But if you’ve ever tried making it at home, you might have faced a common frustration: a beautiful dessert that turns into a sad, watery mess when you try to serve it.
I know that struggle all too well! For years, my homemade Tiramisu was delicious, but the layers just wouldn’t hold. Finding the right technique for the creamy base and understanding the absolute necessity of proper chilling completely changed the game for me. Now, I get gorgeously clean slices every single time, making this classic Tiramisu recipe my go-to for impressing guests or simply treating myself. It sets up perfectly, allowing you to serve it with confidence and enjoy every delightful bite.
Why You’ll Love This Classic Tiramisu Recipe
This isn’t just any Tiramisu recipe; it’s the one that promises a beautifully set, non-watery dessert. Here are a few reasons why you’ll fall in love with making this version:
- Perfectly Set Texture: The specific method for preparing the egg and mascarpone base is key to achieving a cream that holds its shape beautifully, giving you clean, elegant slices.
- Rich, Balanced Flavor: It combines the bold bitterness of coffee with the creamy sweetness of the mascarpone mixture and the hint of cocoa for that classic Italian dessert experience.
- Relatively Simple Process: While it involves a few distinct steps, none are overly complicated. It’s a great recipe for building confidence in dessert making, especially for layered treats.
- Make-Ahead Magic: Tiramisu actually needs time to chill, making it the perfect dessert to prepare in advance for parties or gatherings. The flavors deepen and meld beautifully overnight.
- No Baking Required: Aside from gently heating the egg base over simmering water, there’s no oven involved! This makes it ideal for any time of year. In fact, it’s a fantastic no-bake dessert option, right alongside our easy no-bake chocolate cream loaf.
Ready to make Tiramisu that looks as good as it tastes? Let’s gather our ingredients!
Gathering Your Ingredients for Classic Tiramisu
Crafting the perfect Classic Tiramisu starts with selecting the right components. Each ingredient plays a vital role in building the layers of flavor and texture that make this dessert so beloved. We’ll combine rich dairy, fresh eggs, bold coffee, and delicate ladyfingers to create something truly special.
Here’s a look at what you’ll need, with a few notes on why they are important:
- Large Egg Yolks: These provide the richness and, when properly heated with sugar, form the stable, custard-like base for our cream. Using large eggs ensures the right ratio of yolk to sugar.
- Granulated Sugar: Works with the egg yolks to create a stable sabayon-style base when heated. It also provides essential sweetness to balance the bitterness of the coffee and cocoa.
- Strong Brewed Espresso or Coffee, Cooled: This is the soul of the Tiramisu flavor. Using strong coffee or espresso is crucial – don’t use weak brew! Ensure it’s completely cooled before dipping the ladyfingers; hot coffee will make them fall apart instantly.
- Vanilla Extract: A touch of vanilla enhances the overall sweetness and creamy flavors, adding a subtle layer of warmth to the dessert.
- Mascarpone Cheese, Softened: This Italian cream cheese is the star of the creamy layer. Its smooth texture and slightly tangy flavor are essential. Make sure it’s softened at room temperature before you start mixing; cold, hard mascarpone is difficult to incorporate smoothly and can lead to lumps.
- Heavy Cream: Whipping heavy cream adds lightness and airiness to the rich mascarpone mixture. It helps create that signature fluffy texture. Ensure your heavy cream is very cold for best whipping results.
- Package (about 7 ounces) Ladyfingers: These dry, porous cookies are designed to soak up the coffee while still retaining some structure. Make sure you get the slightly firmer, sponge-like kind, not the soft, cakey ones, as the latter can turn mushy too quickly.
- Unsweetened Cocoa Powder, for Dusting: The classic finish! An unsweetened powder provides a pleasant, slightly bitter contrast to the sweet cream. Use a good quality cocoa for the best flavor and color.
Gather all these ingredients before you begin, and ensure your mascarpone is softened and your coffee is brewed and cooled. Having everything prepped makes the assembly process much smoother.
Crafting Your Perfect Classic Tiramisu: A Detailed Guide
Now for the fun part – bringing all these wonderful ingredients together to create layers of pure delight. The process is straightforward, but paying attention to a few key techniques will ensure your Tiramisu is perfectly layered, incredibly creamy, and sets up like a dream.
- Prepare the Cream Base with Care: We start by making the essential egg base. Set a heatproof bowl over a pot of simmering water – this is your double boiler. Make sure the bottom of the bowl doesn’t touch the water. Add the egg yolks and granulated sugar to the bowl. Whisk constantly, without stopping, over the simmering water. This gentle, consistent heat pasteurizes the egg yolks (making them safe to eat uncooked later) and allows them to thicken slightly with the sugar into a pale yellow, stable mixture. Use an instant-read thermometer to ensure it reaches 160 degrees F. This step is absolutely critical for both safety and the stability of the final cream! Once it hits the temperature and thickens, remove the bowl from the heat and let this mixture cool down a bit before moving on.
- Combine Egg Base and Mascarpone: Once your cooked egg-sugar base has cooled slightly, stir in the vanilla extract. Then, add your softened mascarpone cheese. Gently whisk the mixture together until it is just combined and beautifully smooth. Be careful not to overmix at this stage! Overmixing mascarpone can cause it to break down and become runny, which we definitely don’t want for a perfectly set Tiramisu.
- Whip the Heavy Cream: In a separate, large bowl, pour your cold heavy cream. Use an electric mixer or a whisk to whip the cream until stiff peaks form. You’ll know you’re there when you lift the whisk and the cream stands straight up without drooping. This airy whipped cream will provide the lightness for our rich mascarpone mixture.
- Gently Fold the Whipped Cream into the Mascarpone: This is another key technique for achieving that lovely, airy yet stable cream texture. Add about half of your whipped cream to the mascarpone-egg mixture. Use a rubber spatula to gently fold it in. The motion should be light, bringing the mixture up from the bottom and over the top. Once mostly combined, add the second half of the whipped cream and continue folding gently until just incorporated. Stop folding as soon as you see no more streaks of plain whipped cream. Overfolding can deflate the mixture and make the cream runny. The goal is a light, fluffy, and unified cream that holds its shape.
- Prepare the Coffee Dip and Ladyfingers: Pour the cooled strong coffee or espresso into a shallow dish, like a pie plate or a wide bowl. Take one ladyfinger at a time and quickly dip it into the coffee. The key word here is QUICKLY! You want the ladyfinger coated in coffee, but not soaked all the way through. A brief dip (just a second or two per side) is enough for the porous cookie to absorb moisture without becoming soggy. This quick dip prevents the dreaded watery bottom later on.
- Start Layering: Arrange a single layer of your quickly-dipped ladyfingers in the bottom of your chosen dish. A 9×13 inch baking dish is classic for a large Tiramisu, but individual serving dishes also work beautifully and make for elegant presentation. Fit the ladyfingers together as snugly as possible, breaking pieces if needed to fill gaps.
- Add the First Cream Layer: Gently spoon and spread half of your prepared mascarpone cream mixture evenly over the layer of ladyfingers. Take care not to press down too hard, which could squeeze coffee out of the cookies or compact the cream.
- Repeat the Layers: Create a second layer by dipping the remaining ladyfingers and arranging them over the first layer of cream. Then, spread the rest of the mascarpone cream evenly over this second layer of ladyfingers.
- Chill, Chill, Chill: This step is non-negotiable for a perfectly set Tiramisu. Cover the dish tightly with plastic wrap, ensuring the wrap touches the surface of the cream slightly to prevent a skin from forming. Refrigerate for at least 4 hours, but ideally, refrigerate it overnight. This extended chilling time allows the ladyfingers to soften fully from the absorbed coffee, the flavors to meld together beautifully, and most importantly, the mascarpone cream to firm up and stabilize. Patience here is rewarded with those clean slices!
- The Grand Finale – Dusting: Just before you plan to serve your chilled Tiramisu, remove the plastic wrap. Generously dust the top surface with unsweetened cocoa powder. A fine-mesh sieve is your best friend here for an even, lump-free coating. The visual appeal is undeniable, and the slight bitterness of the cocoa perfectly complements the sweet, creamy layers. This final touch is like the cherry on top! It adds a beautiful contrast, much like the final dusting on our rich chocolate mousse.
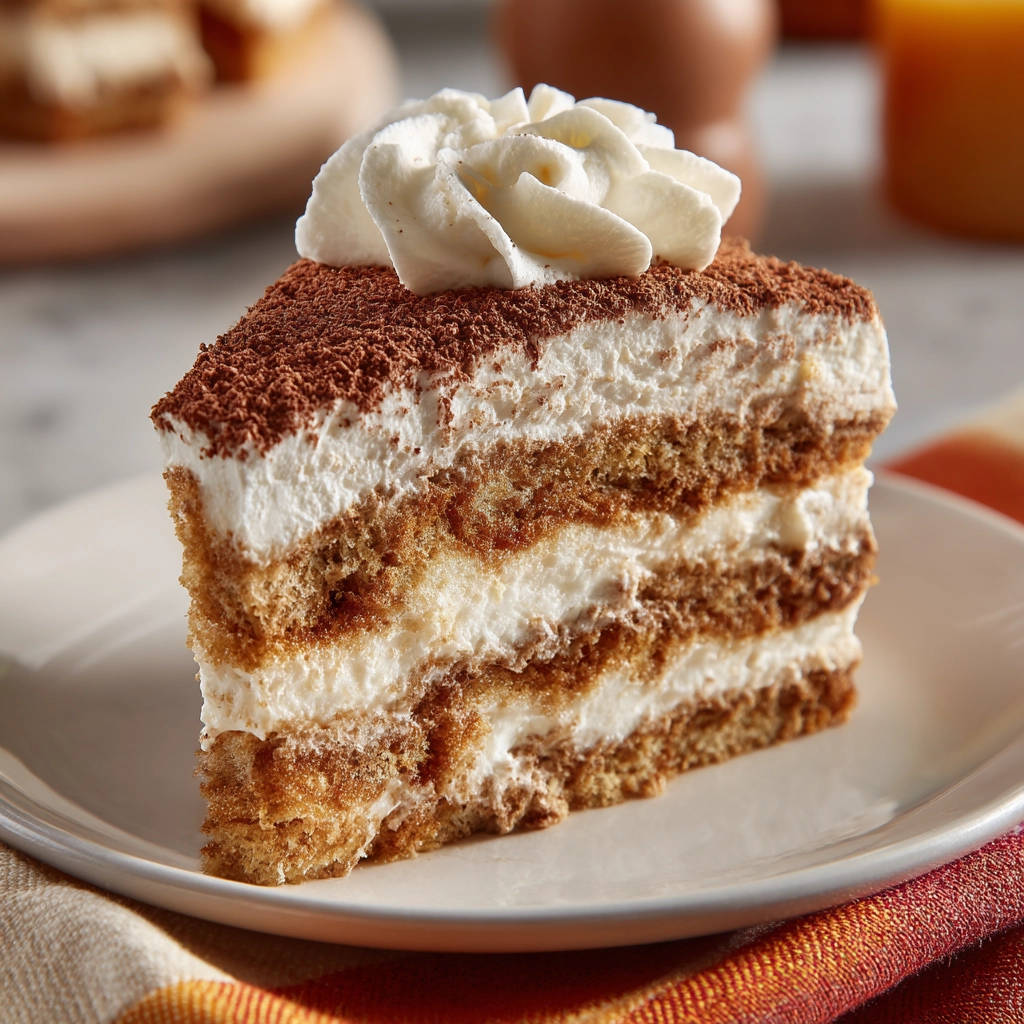
Once dusted, your Classic Tiramisu is ready to be admired, sliced with ease, and devoured! Each layer should be distinct yet harmonious, offering that perfect blend of coffee, cream, and cocoa in every bite.
Secrets to Tiramisu Success & Variations
Making a Tiramisu that sets up perfectly isn’t a mystery; it comes down to understanding a few key principles and handling your ingredients with care. Here are some tips to ensure your success, along with ideas for simple variations (keeping our no-alcohol rule in mind!).
Tips for a Flawless Tiramisu:
- Ingredient Temperature Matters: Ensure your mascarpone is genuinely softened (room temperature) before you start, but your heavy cream is ice cold. This difference in temperature is key for successfully combining them.
- Don’t Skip the Egg Base Cooking: Heating the egg yolks with sugar isn’t just for safety; it provides structure and stability to the cream that raw eggs simply won’t. Whisk constantly and hit that 160°F mark.
- Master the Dip: As mentioned in the steps, the ladyfinger dip is CRUCIAL. Practice with one or two if you’re unsure. A quick dunk is all they need. They will continue to soften from the cream and the chilling.
- Gentle Folding is Gold: Overmixing the mascarpone with the whipped cream is a top reason for runny Tiramisu. Use a light hand and a spatula, cutting through the mixture and folding gently until just combined.
- Embrace the Chill: Seriously, do not rush the chilling time. 4 hours is the minimum for it to hold together, but overnight (8+ hours) yields the best flavor development and the most solid structure for slicing.
Simple Variations:
While the classic is divine, you can easily adapt this recipe to your preferences:
- Coffee Strength: Adjust the strength of your brewed coffee or espresso. Prefer it bolder? Use an extra shot of espresso. Want a milder flavor? Use slightly weaker coffee.
- Extract Experimentation: While vanilla is classic, a tiny splash of almond extract or even a food-grade orange extract could add a different dimension to the cream.
- Chocolate Boost: Instead of just dusting with cocoa, you could shave some dark chocolate over the top just before serving, or even fold some mini chocolate chips into the mascarpone cream (though this might slightly affect the smoothness).
- Different Dipping Liquid: While not traditional Tiramisu, you could experiment with dipping ladyfingers in strong hot chocolate (cooled!), or even a sweet berry syrup diluted with water for a non-coffee dessert. For a fruity twist, you might enjoy something like our layered blueberry cake.
Storing Your Tiramisu:
Keep leftover Tiramisu covered tightly with plastic wrap in the refrigerator. It will last for 3-4 days. The flavor often improves on the second day! Freezing Tiramisu is generally not recommended, as the dairy layers can change texture and become grainy upon thawing.
Your Classic Tiramisu Questions Answered (FAQ)
It’s natural to have questions when tackling a dessert that requires specific techniques like Tiramisu. Here are some answers to common queries to help you feel confident:
Why did my Tiramisu turn out watery?
Several factors can cause a watery Tiramisu. The most common culprits are over-dipping the ladyfingers (they soaked up too much liquid), overmixing the mascarpone cream (which breaks down the cheese), or not chilling the Tiramisu for long enough. Ensuring you cook the egg base to 160°F also contributes to a stable cream.
Can I make this Tiramisu recipe ahead of time?
Absolutely, and you should! Tiramisu is an ideal make-ahead dessert because it requires significant chilling time for the flavors to meld and the structure to set. Making it the day before serving is highly recommended for the best results.
Do I really need to cook the egg yolks?
Yes, cooking the egg yolks with sugar over a double boiler is crucial for two main reasons: safety (it pasteurizes the eggs, reducing the risk of foodborne illness) and stability (the cooked egg-sugar mixture creates a solid, stable base for the cream that helps it set properly).
What kind of coffee is best for Tiramisu?
Strong brewed coffee or espresso is best. The flavor needs to be robust enough to stand up to the rich cream. Avoid instant coffee if possible, unless it’s a high-quality one brewed strongly. Make sure it’s cooled completely before dipping the ladyfingers.
Can I use a different type of cookie instead of ladyfingers?
Traditional Tiramisu uses savoiardi (ladyfingers) because their dry, porous texture is perfect for absorbing liquid without completely dissolving. While you could experiment with other dry sponge cakes or cookies, they might not hold up as well or could become soggy too quickly. For the classic texture and structure, ladyfingers are recommended.
How long will homemade Tiramisu last?
When stored properly covered in the refrigerator, your homemade Tiramisu should stay fresh and delicious for 3 to 4 days.
Can I use a different cheese instead of mascarpone?
Mascarpone has a unique rich, smooth texture and slightly sweet tang that is central to Classic Tiramisu. While some recipes might suggest cream cheese as a substitute, it has a tangier, firmer profile that will significantly change the character of the dessert. For an authentic taste and texture that sets perfectly, it’s best to stick with mascarpone.
Enjoy Your Homemade Classic Tiramisu!
Armed with these tips and this detailed guide, you’re ready to conquer the art of making classic Tiramisu that sets up perfectly every time. The process is rewarding, and the result is an elegant, incredibly delicious dessert that’s sure to impress. From the creamy layers to the bold coffee flavor and the dusting of cocoa, every bite is a little piece of heaven.
Whether you’re making it for a special occasion or just because, this recipe delivers on its promise of a perfectly set, sliceable Tiramisu that won’t disappoint. Give it a try, and discover how satisfying it is to create this timeless Italian treat in your own kitchen. We’d love to hear how it turns out! Leave a comment below and share your experience. Happy dessert making!
Classic Tiramisu

Ingredients
- 6 large egg yolks
- 1 cup granulated sugar
- 1 and 1/2 cups strong brewed espresso or coffee, cooled
- 1 teaspoon vanilla extract
- 1 pound mascarpone cheese, softened
- 1 and 1/2 cups heavy cream
- 1 package (about 7 ounces) ladyfingers
- Unsweetened cocoa powder, for dusting
Directions
- Prepare the cream base. In a heatproof bowl set over a pot of simmering water (a double boiler), whisk together the egg yolks and granulated sugar constantly until the mixture is pale yellow, thickened slightly, and reaches 160 degrees F on an instant-read thermometer. This pasteurized egg base is key to a stable cream. Remove from heat and let cool slightly.
- Stir the vanilla extract into the cooled egg mixture. Add the softened mascarpone cheese and gently whisk until just combined and smooth. Do not overmix.
- In a separate large bowl, whip the heavy cream until stiff peaks form.
- Gently fold the whipped cream into the mascarpone mixture in two additions using a rubber spatula. Fold until just combined; do not overmix, as this can make the cream runny. The goal is a light, airy, and stable cream.
- Pour the cooled espresso or coffee into a shallow dish. Quickly dip each ladyfinger into the coffee, ensuring it’s coated but not soaking wet. This quick dip prevents the ladyfingers from becoming soggy later.
- Arrange a single layer of dipped ladyfingers in the bottom of a 9×13 inch baking dish or individual serving dishes.
- Spread half of the mascarpone cream mixture evenly over the layer of ladyfingers.
- Repeat with another layer of dipped ladyfingers, followed by the remaining mascarpone cream.
- Cover the dish tightly with plastic wrap and refrigerate for at least 4 hours, or preferably overnight. This extended chilling time is crucial for the flavors to meld and for the Tiramisu to set up firmly.
- Just before serving, dust the top generously with unsweetened cocoa powder. You can use a fine-mesh sieve for an even coating. Slice and serve your perfectly set Tiramisu.