

Oh, corn muffins! That perfect bite of slightly sweet, crumbly goodness that should ideally be light as air and bursting with sunny corn flavor. But let’s be honest, how many times have you bitten into one hoping for that heavenly texture, only to be met with a dense, dry disappointment? If your hand is raised, you’re not alone! It happened to me more times than I care to admit on my own kitchen adventures.
I was determined to crack the code. I tried different ratios, temperatures, and mixing methods. And finally, after much testing (and eating!), I discovered the simple, little trick that transforms these humble muffins into consistently light, tender, and absolutely perfect corn muffins, batch after glorious batch. Get ready to finally experience the corn muffins you’ve always dreamed of!
Why You’ll Absolutely Adore This Fluffy Corn Muffin Recipe
So, what makes THIS the ultimate recipe for achieving those coveted fluffy corn muffins? It boils down to a few key factors that work together to ensure success:
- Speedy Prep: Seriously, from gathering your ingredients to getting them into the oven, we’re talking just 10 minutes. Perfect for a quick breakfast addition or last-minute side dish.
- Foolproof Fluffiness: The secret mixing technique (which I’ll walk you through!) guarantees a light, tender crumb every single time, banishing dry muffins forever.
- Classic Flavor: This recipe highlights the lovely texture and slightly sweet taste of yellow cornmeal, balanced perfectly with just the right amount of sweetness.
- Versatile Companions: These aren’t just for eating plain! They’re incredible with savory meals, delightful with a drizzle of something sweet, and a fantastic base for variations.
- Simple Ingredients: You likely have most, if not all, of these pantry staples on hand right now. No fancy ingredients required!
Gathering Your Simple Ingredients for Sunny Corn Muffins
Creating bakery-style corn muffins at home starts with selecting quality ingredients. This recipe relies on a straightforward lineup that comes together beautifully. Here’s a look at the essential components and what they bring to our fluffy equation:
We’ll begin with the dry foundations:
- All-Purpose Flour (1 cup): Provides the main structure for our muffins. It gives them shape and tenderness when combined correctly with the wet ingredients.
- Yellow Cornmeal (1 cup): This is where the magic happens! Yellow cornmeal gives these muffins their signature texture, subtle sweetness, and beautiful golden hue. Using a medium grind is generally recommended for the best balance of texture – not too gritty, not too fine.
- Granulated Sugar (1/4 cup): Adds just enough sweetness to complement the corn flavor without overpowering it. It also contributes to the muffins’ tenderness and helps with browning.
- Baking Powder (1 tablespoon): This is our primary leavening agent, working hard to create those airy pockets and give the muffins their rise and light texture. Make sure your baking powder is fresh!
- Salt (1/2 teaspoon): A little salt is crucial! It balances the sweetness, enhances the corn flavor, and brings all the ingredients together in harmony.
Now, let’s look at the wet ingredients that provide moisture, richness, and binding:
- Large Egg (1): Acts as a binder, holding the muffin batter together. When beaten, it also contributes a little lift and richness. Make sure it’s at room temperature for better emulsification.
- Milk or Buttermilk (1 cup): Provides essential moisture and activates the baking powder. Buttermilk is a fantastic choice here as its acidity reacts with the baking powder to give an extra boost of lift and creates an exceptionally tender crumb. If using regular milk, room temperature is best.
- Melted Unsalted Butter or Neutral Oil (1/4 cup): Adds richness and moisture. Melted butter provides a lovely flavor, while a neutral oil (like vegetable, canola, or even a light olive oil) offers consistent moisture without adding extra flavor. Choose what you prefer or have on hand! Unsalted butter is preferred so you can control the salt level yourself.
And for serving, don’t forget the optional golden touch:
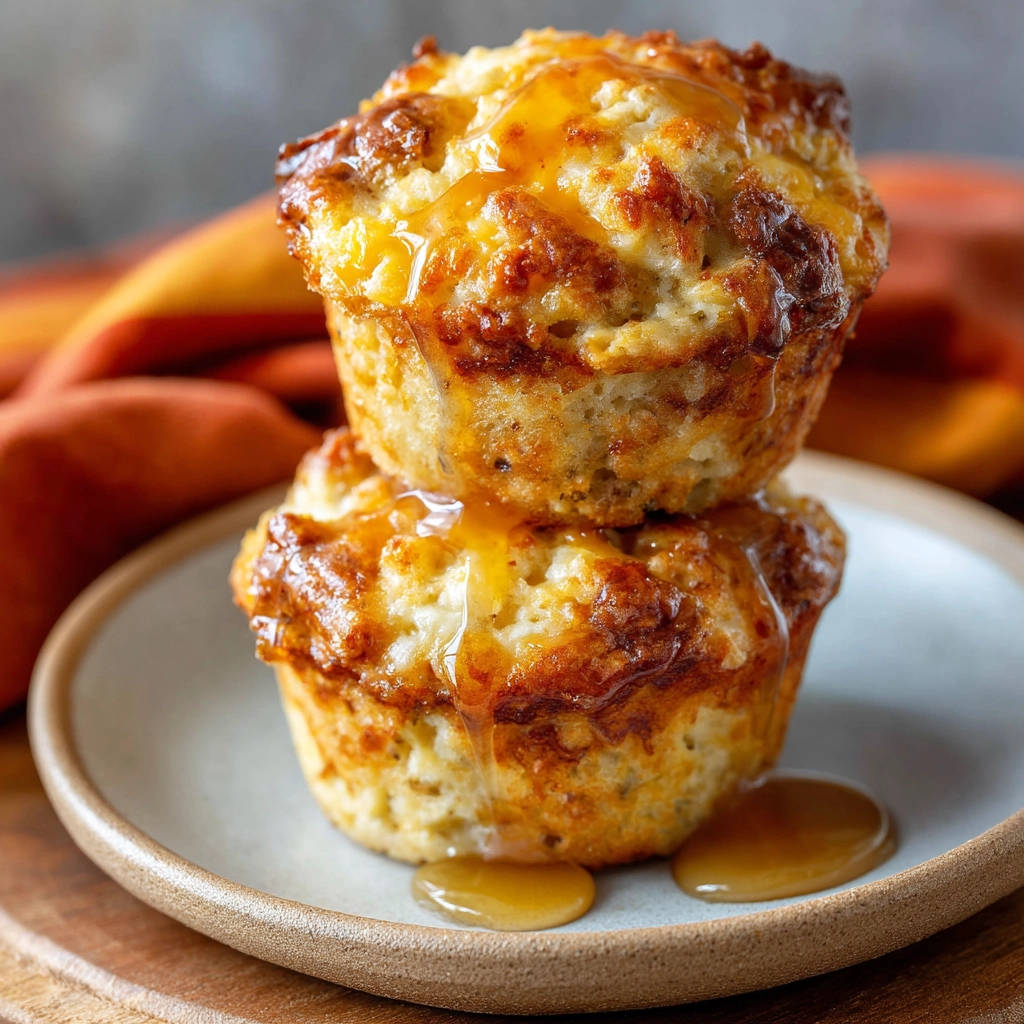
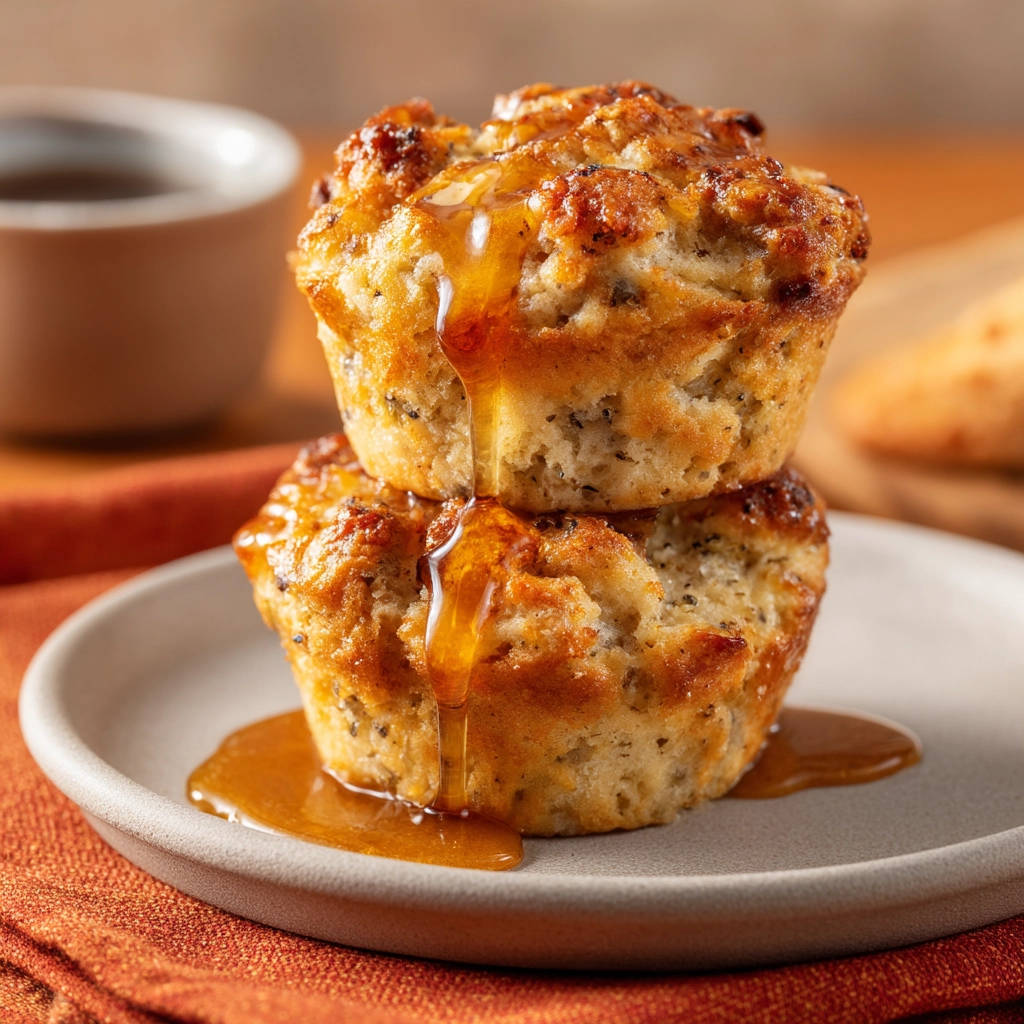
- Honey or Maple Syrup: While delicious on their own, a warm corn muffin drizzled with honey or maple syrup is truly a simple pleasure.
Crafting Your Corn Muffins: The Simple, Step-by-Step Guide
Okay, let’s get baking! Follow these steps carefully, paying special attention to the mixing instruction, and you’ll be rewarded with the fluffiest corn muffins imaginable.
Preheat and Prepare: Get your oven ready! Preheat it to a warm 400 degrees Fahrenheit (200 degrees Celsius). This higher initial temperature helps the muffins rise quickly and develop those nice domed tops. While the oven heats, prepare a standard 12-cup muffin tin. You can either grease the cups thoroughly with butter or cooking spray, or line them with paper muffin liners. I find liners make cleanup a breeze and are great for portability!
Combine Dry Ingredients: In a large bowl, measure out your all-purpose flour, yellow cornmeal, granulated sugar, baking powder, and salt. Grab a whisk and give these dry ingredients a good whisking. This isn’t just mixing; it aerates the flour and cornmeal and helps distribute the baking powder and salt evenly. Think of it like giving them a little fluffy head start!
Combine Wet Ingredients: In a separate, medium-sized bowl, crack your large egg. Whisk it lightly first to break up the yolk and white. Then, add your milk (or buttermilk) and the melted unsalted butter or neutral oil. Give these wet ingredients a good whisk until everything is well combined and the egg is fully incorporated. Ensure your melted butter isn’t too hot, or it could cook the egg!
The Fluffiness Secret (Mix Gently!): Now, this is the crucial step, the one that separates the fluffy muffins from the dense ones. Pour the wet ingredients from the medium bowl into the large bowl containing your whisked dry ingredients. Put the whisk down! Pick up a spoon or a rubber spatula. Gently, and I mean GENTLY, fold and stir the mixture just until you no longer see streaks of dry flour or cornmeal. The batter will look lumpy. That’s not just okay; it’s exactly what you want! Overmixing develops gluten, which gives bread structure but makes muffins tough. Stop mixing the moment the dry bits disappear.
Fill the Muffin Cups: Using a spoon or a disher (ice cream scoop), divide the lumpy batter evenly among the prepared muffin cups. Fill each cup about two-thirds full. This leaves room for the muffins to rise beautifully without overflowing the tin.
Time to Bake: Carefully place the filled muffin tin into your preheated oven. Bake for 18 to 22 minutes. The exact time can vary depending on your oven. You’ll know they’re done when the tops are golden brown and a toothpick inserted into the center of a muffin comes out clean, free of wet batter. A few moist crumbs clinging is fine, but you shouldn’t see liquid batter.
Cool Slightly: Once baked, remove the tin from the oven. Let the muffins cool in the tin for about 5-10 minutes. This allows them to set up slightly before you move them, preventing them from breaking apart. Then, carefully transfer the warm corn muffins to a wire rack to cool completely. Or, if you just can’t wait, snatch one while it’s still warm!
Serve and Enjoy: These muffins are truly best served warm. Offer them plain, or follow the lead of classic pairings by drizzling them with honey or maple syrup right before serving. Absolute perfection!
Extra Tips for Perfect Corn Muffins Every Time
Beyond the core technique, here are a few extra pointers to ensure your corn muffin baking is always a success:
- Don’t Overmeasure: Especially with the flour and cornmeal! Scooping directly from the bag can compact the ingredients. Use a spoon to lightly scoop the flour/cornmeal into your measuring cup, then level it off with a straight edge. This “spoon and level” method ensures accuracy.
- Room Temperature Ingredients: Using milk, egg, and melted butter (if using) that are at room temperature helps them emulsify better and create a more uniform batter. This leads to a better rise and more tender crumb.
- Fresh Leavening: Baking powder loses its potency over time. Check the expiration date! You can also test its freshness by putting a teaspoon in a small bowl of hot water – it should fizz vigorously.
- The Gentle Mix Again: I know I already stressed this, but it’s worth repeating! Mix JUST until combined. Lumps are your friend! This is the single biggest factor in achieving that guaranteed fluffy texture.
Serving Suggestions for Your Delicious Corn Muffins
These fluffy corn muffins are incredibly versatile! While fantastic on their own, they make wonderful companions to a variety of dishes, both sweet and savory.
For a classic Southern-inspired meal, they pair perfectly with hearty fare. Imagine them alongside a steaming bowl of chili or a comforting beef stew. We even have recipes for Hearty Beef Chili or a delicious Hearty Vegetable Stew that would be absolutely divine with these muffins.
They are also a great sidekick for roasted or grilled meats, fried chicken, or even a simple weeknight dinner like meatloaf. Don’t forget they make a wonderful addition to a breakfast or brunch spread, perhaps alongside a cheesy egg scramble or crispy potatoes.
And for those with a sweet tooth, warming one up and drizzling it with extra honey or maple syrup is always a winner. You could also try slathering them with butter or cream cheese.
Your Corn Muffin Questions Answered (FAQ)
Can I add other ingredients to this corn muffin batter?
Absolutely! This is a great base recipe. Feel free to stir in things like a cup of fresh or frozen corn kernels (no need to thaw), a half cup of shredded cheese (cheddar or Monterey Jack are great), or even a couple of finely diced pickled jalapenos for a savory kick. Just fold them in gently with the wet and dry ingredients.
Why are my corn muffins dense or tough?
The most common culprit for dense or tough muffins is overmixing. Remember that crucial step? Mixing too much develops gluten, making the muffins chewy and dense. Stick to mixing just until the dry ingredients are barely incorporated, even if there are lumps!
Can I use white cornmeal instead of yellow?
Yes, you can. White cornmeal will work in this recipe. The main difference will be in color (they’ll be lighter) and potentially a slightly milder corn flavor compared to yellow cornmeal. The texture should still be lovely if you follow the mixing instructions.
Can I make these ahead of time? How should I store them?
Yes, you can make them ahead. Once cooled completely, store corn muffins in an airtight container at room temperature for 2-3 days. For longer storage, you can freeze them for up to 3 months. Thaw at room temperature or gently reheat.
What’s the difference between using milk and buttermilk?
Using buttermilk in this recipe will react with the baking powder to create an even lighter, more tender muffin with a subtle tang. Regular milk still works perfectly well and produces a delicious, fluffy muffin, just without that extra acidic lift and tang.
Enjoy Your Homemade Fluffy Corn Muffins!
There you have it – the secret to perfectly fluffy corn muffins, every single time! No more dry, sad muffins for you. Whether you’re serving them with a hearty meal, enjoying them warm with a drizzle of honey, or adding your own creative mix-ins, these muffins are sure to become a favorite in your home.
Give this recipe a try and let me know how they turn out! Did you get that guaranteed fluffiness? What’s your favorite way to enjoy them? Leave a comment below and share the corn muffin love!
Corn Muffins
Ingredients
- 1 cup all-purpose flour
- 1 cup yellow cornmeal
- 1/4 cup granulated sugar
- 1 tablespoon baking powder
- 1/2 teaspoon salt
- 1 large egg
- 1 cup milk or buttermilk
- 1/4 cup melted unsalted butter or neutral oil
- Optional: Honey or maple syrup for serving
Directions
- Preheat your oven to 400 degrees F (200 degrees C). Grease or line a standard 12-cup muffin tin.
- In a large bowl, whisk together the flour, cornmeal, sugar, baking powder, and salt.
- In a separate medium bowl, whisk together the egg, milk or buttermilk, and melted butter or oil.
- Pour the wet ingredients into the bowl with the dry ingredients. This is the critical step for fluffy muffins: Mix gently using a spoon or spatula just until the dry ingredients are incorporated. There should still be visible lumps in the batter. Do not overmix, as this develops gluten and makes muffins tough.
- Divide the batter evenly among the prepared muffin cups, filling each about two thirds full.
- Bake for 18 to 22 minutes, or until a toothpick inserted into the center of a muffin comes out clean and the tops are golden brown.
- Let the muffins cool in the tin for a few minutes before transferring them to a wire rack to cool slightly.
- Serve warm, optionally drizzled with honey or maple syrup as shown in the image.


