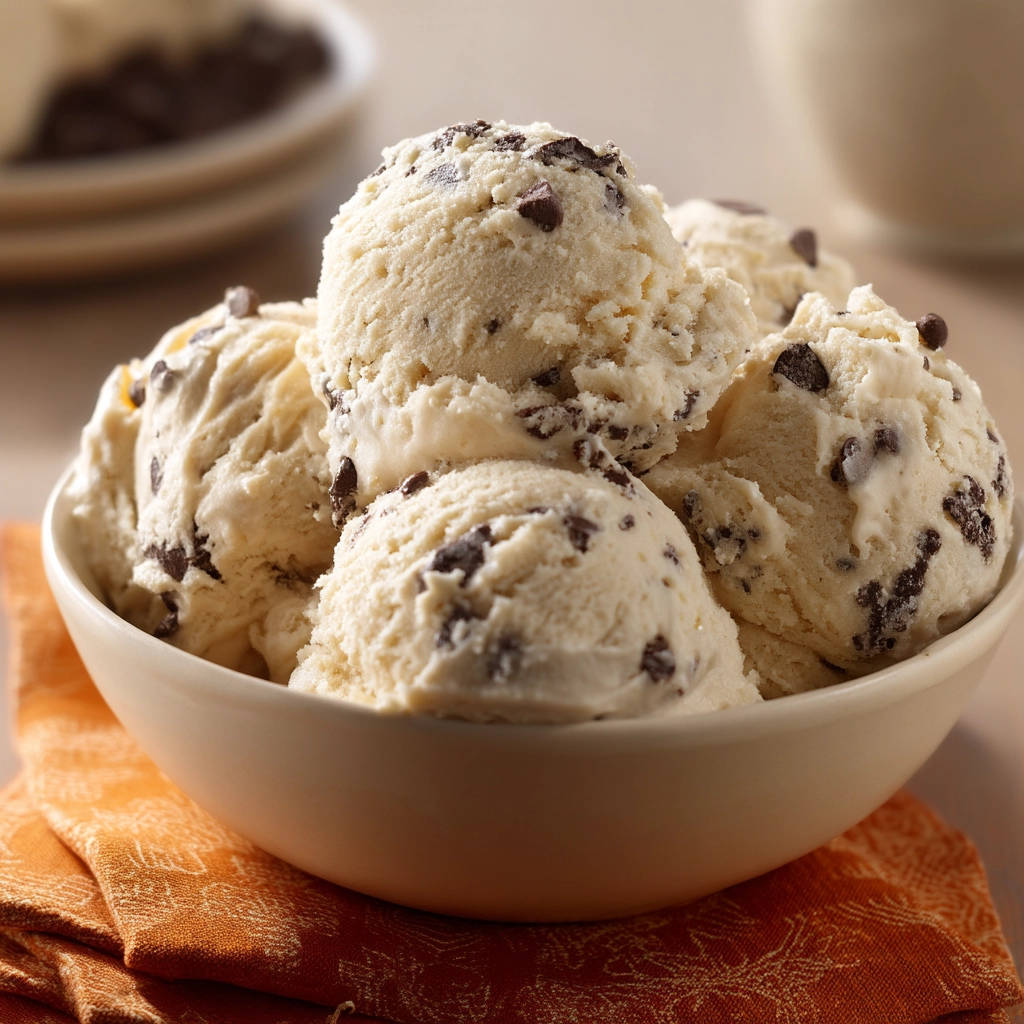
There’s nothing quite like homemade ice cream, is there? That perfect, creamy texture, the pure flavors…it’s a summertime dream! But all too often, that dream turns into a grainy nightmare thanks to pesky ice crystals. I’ve spent years tweaking and testing to bring you this recipe for incredibly Creamy Chocolate Chip Ice Cream that stays smooth and delicious, scoop after scoop. And the best part? The secret is surprisingly simple!
Why You’ll Love This Chocolate Chip Ice Cream
This isn’t just another ice cream recipe. It’s a game-changer! Here’s why you’ll be obsessed:
- Unbelievably Creamy: Say goodbye to ice crystals forever!
- Simple Ingredients: No weird additives or hard-to-find items.
- Easy to Make: No complicated techniques, just straightforward steps.
- Customizable: Add your favorite mix-ins for endless flavor combinations.
- Kid-Friendly (and Adult-Approved!): Everyone loves a classic chocolate chip ice cream.
Gathering Your Ingredients for Creamy Chocolate Chip Ice Cream
The key to truly outstanding ice cream lies in the quality of the ingredients. Think of it like building a house – you need a solid foundation! For this recipe, we’re focusing on richness and ensuring we have the right balance to prevent ice crystal formation. Let’s break down what you’ll need:
- Heavy Cream: Two glorious cups of heavy cream are the heart of our ice cream. The high fat content is absolutely essential for that luxuriously smooth texture. Don’t skimp and use half-and-half – it won’t deliver the same results.
- Whole Milk: We need one cup of whole milk to balance the richness of the heavy cream and to add the right amount of liquid to the mixture. The fat in the whole milk also contributes to the overall creaminess.
- Granulated Sugar: Three-quarters of a cup of granulated sugar provides the necessary sweetness and also helps to lower the freezing point of the mixture, which helps prevent ice crystals.
- Salt: A seemingly insignificant quarter teaspoon of salt might seem odd, but it plays a crucial role in enhancing the sweetness and balancing the flavors. It’s a flavor amplifier!
- Vanilla Extract: A full tablespoon of pure vanilla extract adds a warm, classic flavor that complements the chocolate chips perfectly. Use a high-quality extract for the best flavor.
- Mini Chocolate Chips: One cup of mini chocolate chips are the star of the show! Their small size ensures they are evenly distributed throughout the ice cream and provide the perfect amount of chocolate in every bite.
Crafting Your Chocolate Chip Ice Cream: Step-by-Step
Ready to transform simple ingredients into a frozen masterpiece? Don’t be intimidated; making ice cream at home is much easier than you might think. The most important thing is to follow each step carefully, especially the chilling process, which is crucial for preventing ice crystals. Let’s get started!
- Combine the Base Ingredients: In a medium-sized saucepan, whisk together the heavy cream, whole milk, granulated sugar, and salt. This ensures that the sugar and salt are evenly dispersed throughout the mixture, which is key to preventing grainy textures.
- Heat Gently, Don’t Boil: Place the saucepan over medium heat, stirring constantly. You want to heat the mixture until the sugar is completely dissolved and the mixture is warm to the touch, but absolutely do not let it boil! Boiling can alter the proteins in the milk and cream, which can affect the final texture of the ice cream.
- Infuse with Vanilla: Once the sugar is dissolved, remove the saucepan from the heat and stir in the vanilla extract. Adding the vanilla off the heat prevents some of the delicate flavors from cooking away.
- Chill Thoroughly: Pour the cream mixture into a bowl. Now, here’s a key trick: cover the surface of the mixture directly with plastic wrap. Press the plastic wrap down so it’s touching the cream. This prevents a skin from forming on top, which can lead to a less-than-perfect texture. Chill the mixture in the refrigerator for at least 4 hours, but preferably overnight. This extended chilling time is vital for allowing the mixture to fully cool and for the fat molecules to stabilize, which is essential for preventing ice crystal formation.
- Churn According to Instructions: Once the mixture is thoroughly chilled, pour it into your ice cream maker. Follow the manufacturer’s instructions for your specific model. Every ice cream maker is different, so it’s important to adhere to their guidelines.
- Add Chocolate Chips at the End: In the last few minutes of churning, add the mini chocolate chips. Adding them too early can cause them to sink to the bottom or become overly soft.
- Final Freeze for Perfection: Transfer the churned ice cream to an airtight container and freeze for at least 2 hours to harden further. Again, ensure the ice cream is well-covered to prevent ice crystals from forming during this final freezing stage. The extra time in the freezer allows the ice cream to reach the perfect scoopable consistency.
Tips for Perfect Chocolate Chip Ice Cream Every Time
Want to take your homemade ice cream game to the next level? Here are a few extra tips and tricks to ensure success:
- Don’t Skip the Chilling Time: Seriously, this is the most important step for preventing ice crystals. A well-chilled base will churn into a much smoother ice cream.
- Use an Ice Cream Maker: While there are no-churn ice cream recipes out there, an ice cream maker will give you the best texture.
- Pre-Chill Your Ice Cream Maker Bowl: Make sure your ice cream maker bowl is thoroughly frozen according to the manufacturer’s instructions. This is usually at least 24 hours.
- Don’t Overchurn: Overchurning can result in a grainy or buttery texture. Churn until the ice cream reaches a soft-serve consistency.
- Storage is Key: Store your homemade ice cream in an airtight container in the coldest part of your freezer to maintain its creamy texture. Consider pressing a piece of plastic wrap directly onto the surface of the ice cream before sealing the container.
What to Serve With Chocolate Chip Ice Cream
Chocolate Chip Ice Cream is a classic for a reason – it’s delicious on its own! But if you’re looking to elevate your dessert experience, here are a few serving suggestions:
- Classic Cones: Serve it in a waffle cone or a sugar cone for a nostalgic treat.
- Sundae Bar: Create a sundae bar with various toppings like hot fudge, caramel sauce (perhaps inspired by our easy caramel nut dessert jars recipe), sprinkles, nuts, and whipped cream.
- Alongside Cake: Pair it with a slice of warm chocolate sheet cake or a piece of pie for an extra decadent dessert.
- Ice Cream Sandwiches: Sandwich it between two chocolate chip cookies for an irresistible ice cream sandwich.
Your Chocolate Chip Ice Cream Questions Answered (FAQ)
Can I use a different type of milk?
While whole milk is recommended for the best texture, you can experiment with other types of milk. However, keep in mind that using lower-fat milk will result in a less creamy ice cream. Avoid using skim milk, as it will likely produce an icy texture.
Can I use different extracts besides vanilla?
Absolutely! Feel free to get creative with the flavorings. Almond extract, peppermint extract, or even a hint of citrus zest would all be delicious additions. Adjust the amount to your preference, starting with a smaller amount and adding more to taste.
Why did my ice cream turn out icy?
The most common reason for icy ice cream is insufficient chilling time. Make sure to chill the base mixture for at least 4 hours, or preferably overnight. Other potential causes include using low-fat milk, overchurning, or improper storage. Also, ensuring the mixture is well-covered during chilling and freezing is important.
Can I make this recipe without an ice cream maker?
While an ice cream maker is recommended for the best texture, you can try making it without one. Pour the chilled mixture into a freezer-safe container and freeze for about 2-3 hours, or until partially frozen. Then, use a fork to break up any ice crystals that have formed. Repeat this process every 30 minutes for a few hours, or until the ice cream reaches a scoopable consistency. This method requires more effort and may not result in the same creamy texture, but it can work in a pinch. For an ice cream cake you could try this decadent chocolate topped cream cake recipe.
Enjoy Your Homemade Chocolate Chip Ice Cream!
There you have it – a foolproof recipe for incredibly Creamy Chocolate Chip Ice Cream that will impress your family and friends. So ditch the store-bought stuff and experience the joy of homemade ice cream. It’s a labor of love that’s definitely worth the effort. Now, grab a spoon and dig in! Don’t forget to leave a comment below and let me know how your ice cream turned out!
Creamy Chocolate Chip Ice Cream (Stops Ice Crystals Forming!)
Ingredients
- 2 cups heavy cream
- 1 cup whole milk
- 3/4 cup granulated sugar
- 1/4 teaspoon salt
- 1 tablespoon vanilla extract
- 1 cup mini chocolate chips
Directions
- In a saucepan, combine heavy cream, whole milk, granulated sugar, and salt.
- Heat over medium heat, stirring constantly, until sugar is completely dissolved and the mixture is warm, but do not boil.
- Remove from heat and stir in vanilla extract.
- Pour the mixture into a bowl, cover with plastic wrap, pressing the wrap directly onto the surface of the cream mixture. This prevents a skin from forming.
- Chill in the refrigerator for at least 4 hours, or preferably overnight. This is crucial for preventing ice crystals.
- Pour the chilled mixture into your ice cream maker and churn according to the manufacturer’s instructions.
- In the last few minutes of churning, add the mini chocolate chips.
- Transfer the ice cream to an airtight container and freeze for at least 2 hours to harden further. Again, ensuring the ice cream is well-covered prevents ice crystals.

