Have you ever been let down by a tuna pasta salad where the sauce separates, leaving you with a watery mess? I have, and it’s incredibly disappointing! That’s why I dedicated myself to creating the perfect creamy tuna pasta salad – one where the sauce clings beautifully to every piece of pasta, and the flavors meld into a symphony of deliciousness. This recipe is the result, and I’m so excited to share it with you!
Why You’ll Love This Tuna Pasta Salad
This isn’t your average tuna pasta salad. Here’s why you’ll absolutely adore it:
- Creamy and Dreamy Texture: The secret is in preventing a watery sauce, resulting in a luxuriously creamy texture that stays that way.
- Bursting with Flavor: The combination of tuna, crunchy vegetables, and tangy dressing is simply irresistible.
- Quick and Easy to Make: Perfect for a weeknight meal, potluck, or picnic.
- Make-Ahead Friendly: The flavors actually improve as it sits, making it ideal for prepping in advance.
Gathering Your Ingredients for Creamy Tuna Salad
Before we dive into the recipe, let’s talk about the ingredients that make this creamy tuna pasta salad so special. This isn’t just about throwing things together; it’s about crafting a flavor experience. The dressing, with its bright lemon notes, works in perfect harmony with the tuna, while the vegetables add a delightful crunch and freshness. It’s a symphony of textures and tastes!
Here’s what you’ll need:
- Rotini Pasta: 1 pound. I love rotini because its spirals grab onto the sauce beautifully. Other pasta shapes like penne, farfalle (bow tie), or elbow macaroni would also work well.
- Tuna in Water: 2 cans (5 ounces each), drained. Opt for tuna packed in water rather than oil for a lighter flavor. The most important part: thoroughly drain it.
- Mayonnaise: 1/2 cup. This is the base of our creamy dressing. Use your favorite brand!
- Celery: 1/4 cup, chopped. Celery adds a wonderful crispness and subtle flavor.
- Red Onion: 1/4 cup, chopped. Red onion provides a bit of bite and visual appeal.
- Yellow Bell Pepper: 1/4 cup, chopped. Bell pepper contributes sweetness and another layer of crunch.
- Lemon Juice: 2 tablespoons. Freshly squeezed lemon juice is key for adding brightness and balancing the richness of the mayonnaise.
- Dijon Mustard: 1 teaspoon. Dijon mustard adds a tangy depth of flavor.
- Salt: 1/2 teaspoon. Enhances all the flavors.
- Black Pepper: 1/4 teaspoon. Adds a touch of spice.
Crafting Your Creamy Tuna Pasta Salad: Step-by-Step
Now, let’s get to the fun part: making the salad! Don’t be intimidated – this recipe is incredibly simple. The key to success lies in a few simple techniques that prevent a watery sauce and ensure a perfectly creamy result. Let’s get started!
- Cook the Pasta: Cook the rotini pasta according to the package directions until al dente. This means it should be firm to the bite, not mushy. Overcooked pasta will release too much starch and contribute to a watery sauce. Once cooked, drain the pasta very well and immediately rinse it with cold water. This stops the cooking process and removes excess starch. Let it sit in the colander to drain completely while you prepare the other ingredients.
- Prep the Tuna: This is the most important step in preventing a watery salad! Drain the tuna from the cans, then press it between several layers of paper towels to remove as much excess moisture as possible. You’ll be surprised how much water comes out! This step is crucial for a creamy, non-watery sauce.
- Make the Dressing: In a large bowl, whisk together the mayonnaise, chopped celery, chopped red onion, chopped yellow bell pepper, lemon juice, Dijon mustard, salt, and pepper. Make sure everything is well combined. Tasting the dressing at this point allows you to adjust the seasonings to your liking.
- Combine Everything: Add the thoroughly drained pasta and the pressed tuna to the bowl with the dressing.
- Gently Stir: Gently stir until everything is evenly coated with the dressing. Be careful not to overmix, as this can break down the pasta and tuna.
- Chill: Cover the bowl and refrigerate for at least 30 minutes before serving. This allows the flavors to meld together beautifully and the salad to chill thoroughly. The longer it chills, the better it tastes! You can even make this a day ahead of time. This creamy tuna pasta salad is also a great dish to bring to picnics or potlucks. And speaking of easy to make recipes, have you ever tried our slow cooker cheesy potatoes?
Tips for Perfect Tuna Pasta Salad Every Time
Want to take your tuna pasta salad to the next level? Here are a few tips to ensure success every time:
- Don’t Overcook the Pasta: Al dente pasta is key to a good texture.
- Drain, Drain, Drain: Thoroughly draining the pasta and pressing the tuna is essential for preventing a watery sauce.
- Taste and Adjust: Don’t be afraid to taste the dressing and adjust the seasonings to your liking. Add more lemon juice for extra tang, or more Dijon mustard for a deeper flavor.
- Add Other Vegetables: Feel free to add other vegetables like chopped pickles, green peas, or even some chopped hard-boiled eggs.
- Spice it Up: Add a pinch of red pepper flakes for a little heat.
- Storage: Store leftover tuna pasta salad in an airtight container in the refrigerator for up to 3 days.
- Fresh Herbs: A sprinkle of fresh dill or parsley adds a beautiful touch of freshness.
What to Serve With Creamy Tuna Pasta Salad
This tuna pasta salad is a versatile dish that pairs well with a variety of sides. It’s perfect as a light lunch on its own, or as a side dish at a barbecue or picnic. Consider serving it alongside a simple green salad, some crusty bread, or even a cup of soup. For another great salad option, check out our recipe for a Roasted Sweet Potato Chicken Power Bowl!
Your Tuna Pasta Salad Questions Answered (FAQ)
Can I use tuna packed in oil instead of water?
While you can use tuna packed in oil, it will result in a richer, heavier salad. If you do use oil-packed tuna, be sure to drain it very well and you may want to reduce the amount of mayonnaise in the dressing.
Can I make this tuna pasta salad ahead of time?
Absolutely! In fact, I highly recommend it. The flavors meld together beautifully as it sits in the refrigerator. Just be sure to store it in an airtight container.
Can I use a different type of pasta?
Yes, you can use other pasta shapes like penne, farfalle (bow tie), or elbow macaroni. Just make sure to cook it al dente.
What if I don’t have Dijon mustard?
You can substitute yellow mustard, but it will have a slightly different flavor. You can also use a small amount of horseradish for a similar tangy kick.
Can I freeze tuna pasta salad?
I don’t recommend freezing tuna pasta salad, as the mayonnaise can separate and the pasta can become mushy.
Enjoy Your Homemade Creamy Tuna Pasta Salad!
There you have it – a creamy, dreamy tuna pasta salad that’s guaranteed to be a hit! Say goodbye to watery sauces and hello to a perfectly textured, flavorful salad that everyone will love. I hope you enjoy this recipe as much as I do. Give it a try and let me know what you think in the comments below! And don’t forget to share this recipe with your friends and family!
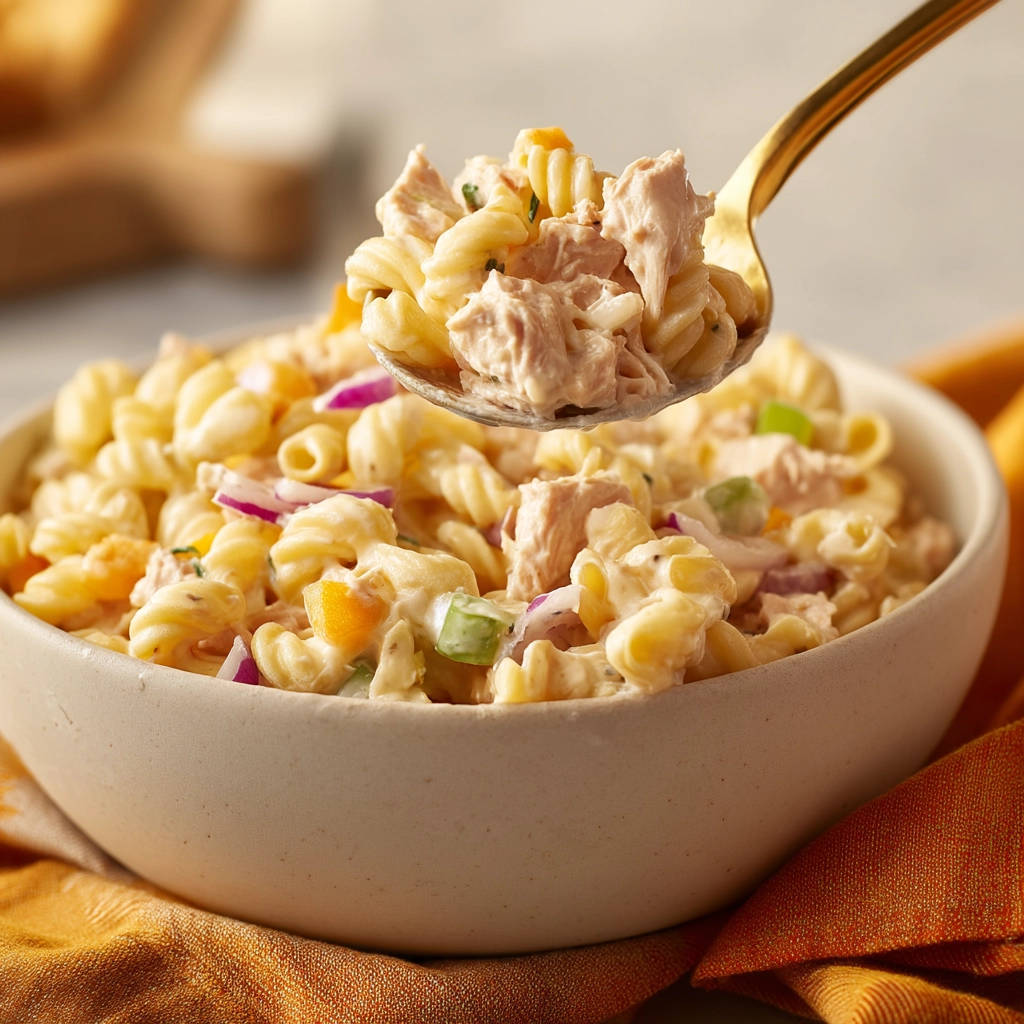
Creamy Tuna Pasta Salad (Never Watery Sauce)

Ingredients
- 1 pound rotini pasta
- 2 cans (5 ounces each) tuna in water, drained
- 1/2 cup mayonnaise
- 1/4 cup chopped celery
- 1/4 cup chopped red onion
- 1/4 cup chopped yellow bell pepper
- 2 tablespoons lemon juice
- 1 teaspoon Dijon mustard
- 1/2 teaspoon salt
- 1/4 teaspoon black pepper
Directions
- Cook pasta according to package directions. Drain well and rinse with cold water. Let it sit in the colander.
- Press the drained tuna between paper towels to remove excess moisture. This is key to preventing a watery sauce.
- In a large bowl, combine mayonnaise, celery, red onion, yellow bell pepper, lemon juice, Dijon mustard, salt, and pepper.
- Add the drained pasta and the pressed tuna to the bowl.
- Gently stir until everything is evenly coated.
- Refrigerate for at least 30 minutes before serving to allow the flavors to meld.