Craving that satisfying crunch of perfectly cooked chicken tenders? Let’s face it, homemade chicken tenders can be a gamble. All too often, they emerge from the oven (or pan) pale, soggy, and far from the crispy perfection we envision. But fear not! With a few simple techniques and quality ingredients, you can achieve chicken tender nirvana – golden, crunchy, and utterly delicious. This recipe will guide you to chicken tender success, ensuring a delightful bite every single time. Get ready to say goodbye to soggy chicken forever, and hello to your new family favorite: crispy chicken tenders!
Why You’ll Love These Crispy Chicken Tenders
These aren’t just any chicken tenders; they’re a game-changer! Here’s why you’ll keep coming back to this recipe:
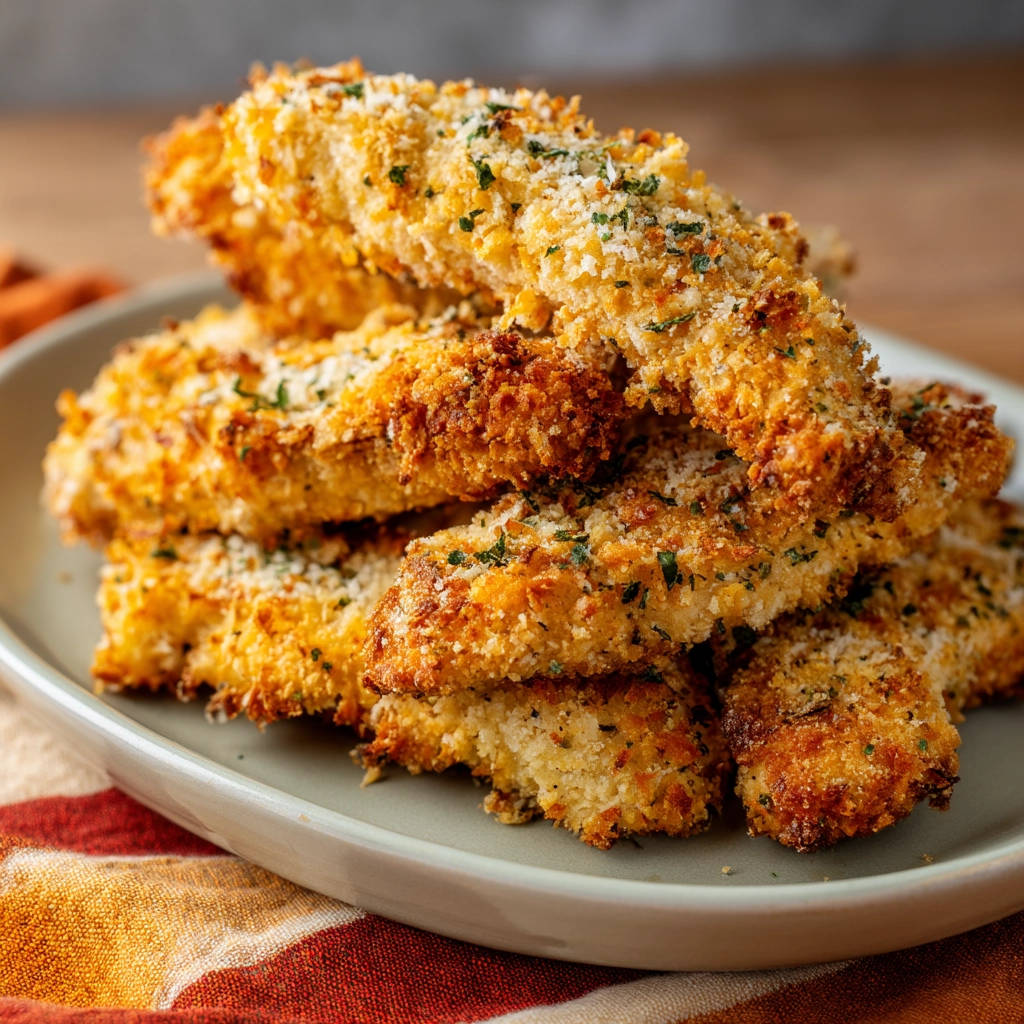
- Unbelievably Crispy: Thanks to the double-coating breading technique, these tenders achieve a level of crispiness that rivals your favorite restaurant.
- No More Soggy Bottoms: We tackle the sogginess issue head-on with a few key steps to ensure ultimate crunch.
- Packed with Flavor: Forget bland chicken! Our seasoning blend infuses every bite with savory goodness.
- Kid-Friendly (and Adult-Approved!): These crispy chicken tenders are a guaranteed crowd-pleaser, perfect for picky eaters of all ages.
- Easy to Make: Despite the amazing results, this recipe is surprisingly simple and straightforward.
Gathering Your Ingredients for Crispy Chicken Tenders
The secret to truly spectacular chicken tenders lies not just in the method, but also in the quality and combination of ingredients. We’re aiming for a flavorful, crunchy coating that perfectly complements the tender chicken within. The blend of spices adds a warm, savory note that elevates these tenders far beyond the ordinary. Let’s break down what you’ll need:
- 1.5 lbs Chicken Tenders: Fresh, high-quality chicken tenders are the foundation of this recipe. Look for tenders that are plump and evenly sized for consistent cooking. Patting them dry is crucial for the breading to stick!
- For the Breading:
- 1 cup All-Purpose Flour: This first layer of breading helps the egg wash adhere properly, creating a better base for the panko. You can substitute with gluten-free all-purpose flour for a gluten-free version.
- 2 Large Eggs & 1/4 cup Milk: This mixture acts as the “glue” that binds the flour and panko breadcrumbs to the chicken. Whisking them together ensures a smooth, even coating.
- 2 cups Panko Breadcrumbs: Panko breadcrumbs are the key to ultimate crispiness. Their light and airy texture creates a wonderfully crunchy coating that stays crisp even after baking.
- 1/2 cup Grated Parmesan Cheese: Parmesan adds a salty, savory depth to the breading that complements the chicken perfectly. Use finely grated Parmesan for the best texture.
- Spice Blend: This is where the flavor magic happens!
- 1 teaspoon Garlic Powder & 1 teaspoon Onion Powder: These staples provide a savory, aromatic base for the seasoning blend.
- 1/2 teaspoon Paprika: Paprika adds a touch of color and a subtle smoky sweetness.
- 1/4 teaspoon Salt & 1/4 teaspoon Black Pepper: These are essential for seasoning the chicken and enhancing the other flavors.
- Olive Oil Spray: A generous spray of olive oil helps the breadcrumbs brown and crisp up beautifully in the oven. Don’t skimp on this step!
- Fresh Parsley, Chopped (for garnish): A sprinkle of fresh parsley adds a touch of color and freshness to the finished dish.
Crafting Your Crispy Chicken Tenders: Step-by-Step
Now for the fun part: turning these ingredients into crispy, golden chicken tender perfection! Don’t be intimidated by the breading process; we’ll break it down into easy-to-follow steps, ensuring that you understand the ‘why’ behind each technique. This will help you achieve consistently perfect results every time!
- Prepare the Chicken: Patting Dry is Key! The very first step, and arguably one of the most important, is to pat the chicken tenders completely dry with paper towels. This removes any excess surface moisture, which would prevent the breading from adhering properly and lead to soggy tenders. Think of it as creating a blank canvas for the breading.
- Set Up Your Breading Station: The Assembly Line. Arrange three shallow dishes in a row. In the first dish, place the all-purpose flour. In the second, you’ll put the egg wash (we’ll make that next). And in the third, the panko mixture (we’ll make that one too!). This organized setup makes the breading process much smoother and more efficient.
- Make the Egg Wash: The Binding Agent. In the second shallow dish, whisk together the eggs and milk until well combined. The egg wash acts as a glue, helping the flour and panko breadcrumbs stick to the chicken. Make sure the mixture is smooth and without any streaks of egg white.
- Make the Panko Mixture: The Crunch Factor. In the third shallow dish, combine the panko breadcrumbs, grated Parmesan cheese, garlic powder, onion powder, paprika, salt, and pepper. Mix everything together thoroughly until the spices are evenly distributed. This flavorful mixture is what will give your chicken tenders their signature crispy coating.
- Bread the Chicken: The Double-Coating Technique. This is where the magic happens! Dredge each chicken tender in the flour, making sure to coat it completely. Shake off any excess flour – this prevents a pasty coating. Next, dip the floured chicken tender into the egg wash, ensuring it’s fully submerged. Finally, press the chicken into the panko mixture, making sure the breadcrumbs adhere to all sides. Press firmly to ensure a good coating. Repeat this process for all the chicken tenders. This layering technique – flour, egg, panko – is the key to achieving maximum crispiness!
- Arrange and Oil: Ready for the Oven. Arrange the breaded chicken tenders on a baking sheet lined with parchment paper. Parchment paper prevents the chicken from sticking and makes cleanup a breeze. Spray the tops of the breaded chicken tenders generously with olive oil spray. The oil helps the breadcrumbs to brown and crisp up nicely in the oven, giving them that beautiful golden color.
- Bake to Perfection: Golden and Cooked Through. Bake the chicken tenders in a preheated oven at 400°F (200°C) for 15-20 minutes, flipping halfway through, until golden brown and cooked through. The internal temperature should reach 165°F (74°C). Use a meat thermometer to check the temperature at the thickest part of a tender. Flipping halfway ensures even browning on both sides.
- Garnish and Serve: The Finishing Touch. Garnish with chopped fresh parsley and serve immediately. The parsley adds a pop of color and freshness, complementing the savory flavors of the chicken tenders. Enjoy!
Tips for Perfect Crispy Chicken Tenders Every Time
Want to take your crispy chicken tender game to the next level? Here are a few pro tips to ensure success every single time:
- Don’t Overcrowd the Baking Sheet: Give the chicken tenders enough space on the baking sheet so they can crisp up properly. Overcrowding will cause them to steam instead of bake, resulting in soggy tenders.
- Preheat Your Oven: Make sure your oven is fully preheated to 400°F (200°C) before baking the chicken tenders. This ensures even cooking and prevents them from drying out.
- Use a Meat Thermometer: The best way to ensure that your chicken tenders are cooked through is to use a meat thermometer. Insert the thermometer into the thickest part of a tender and make sure it reaches 165°F (74°C).
- Let the Chicken Rest: After baking, let the chicken tenders rest for a few minutes before serving. This allows the juices to redistribute, resulting in more tender and flavorful chicken.
- Spice it Up!: For a spicier version, add a pinch of cayenne pepper or red pepper flakes to the panko mixture.
What to Serve With Crispy Chicken Tenders
These crispy chicken tenders are incredibly versatile and pair well with a variety of sides and dipping sauces. For a classic combination, serve them with your favorite dipping sauce, such as ketchup, honey mustard, or ranch dressing. They’re also fantastic with a side of creamy spiced potatoes for a comforting and satisfying meal. Alternatively, consider serving them with a fresh salad for a lighter option. A golden vegetable rice pilaf also makes a delightful and complementary side dish. For a fun and interactive meal, set up a “chicken tender bar” with a variety of dipping sauces and toppings, allowing everyone to customize their own creations.
Your Crispy Chicken Tenders Questions Answered (FAQ)
Can I use chicken breasts instead of chicken tenders?
Yes, you can! Simply cut the chicken breasts into strips that are similar in size and shape to chicken tenders. Keep in mind that chicken breasts may require a slightly longer cooking time than chicken tenders, so be sure to check the internal temperature with a meat thermometer.
Can I freeze these crispy chicken tenders?
Yes, you can freeze the breaded chicken tenders before baking. Arrange the breaded tenders on a baking sheet and freeze them for about 2-3 hours, or until solid. Then, transfer them to a freezer-safe bag or container. When ready to bake, you can bake them directly from frozen, but add a few extra minutes to the cooking time.
Can I air fry these chicken tenders?
Absolutely! Air frying is a great way to achieve even crispier chicken tenders. Preheat your air fryer to 400°F (200°C). Place the breaded chicken tenders in the air fryer basket in a single layer, being careful not to overcrowd them. Air fry for 10-12 minutes, flipping halfway through, until golden brown and cooked through.
Enjoy Your Homemade Crispy Chicken Tenders!
There you have it – a foolproof recipe for crispy chicken tenders that are guaranteed to be a hit with everyone! These tenders are perfect for a quick and easy weeknight dinner, a fun party appetizer, or a satisfying snack. Now that you know the secrets to achieving ultimate crispiness, get ready to ditch the store-bought tenders and enjoy homemade goodness every time. Don’t forget to leave a comment below and let us know how your chicken tenders turned out! We love hearing from you. And if you enjoyed this recipe, be sure to share it with your friends and family!
Crispy Chicken Tenders (Never Soggy Again!)

Ingredients
- 1.5 lbs Chicken tenders
- 1 cup All-purpose flour
- 2 Large eggs
- 1/4 cup Milk
- 2 cups Panko breadcrumbs
- 1/2 cup Grated Parmesan cheese
- 1 teaspoon Garlic powder
- 1 teaspoon Onion powder
- 1/2 teaspoon Paprika
- 1/4 teaspoon Salt
- 1/4 teaspoon Black pepper
- Olive oil spray
- Fresh parsley, chopped (for garnish)
Directions
- Prepare the chicken: Pat the chicken tenders dry with paper towels. This crucial step removes excess moisture that prevents the breading from adhering properly.
- Set up your breading station: In three separate shallow dishes, place the flour, the egg mixture, and the panko mixture.
- Make the egg wash: In the second dish, whisk together the eggs and milk.
- Make the panko mixture: In the third dish, combine the panko breadcrumbs, Parmesan cheese, garlic powder, onion powder, paprika, salt, and pepper. Mix well.
- Bread the chicken: Dredge each chicken tender in the flour, shaking off any excess. Next, dip it into the egg wash, ensuring it’s fully coated. Finally, press the chicken into the panko mixture, making sure the breadcrumbs adhere to all sides. This layering technique is key to achieving maximum crispiness.
- Arrange the breaded chicken tenders on a baking sheet lined with parchment paper. Spray the tops of the breaded chicken tenders generously with olive oil spray. The oil helps the breadcrumbs to brown and crisp up nicely in the oven.
- Bake the chicken tenders in a preheated oven at 400°F (200°C) for 15-20 minutes, flipping halfway through, until golden brown and cooked through. The internal temperature should reach 165°F (74°C).
- Garnish with chopped fresh parsley and serve immediately.