Hey there, fellow food lovers! Let’s talk about one of my favorite cheeses: halloumi. That glorious, squeaky, grillable, fryable cheese from Cyprus. It’s got this incredible texture and salty flavor that’s just made for savory dishes. Sounds easy to cook, right? Just slice and fry? Well, if you’re anything like I was for ages, you might have run into the dreaded sticky halloumi problem. You put it in the pan, expecting golden perfection, and instead, you get a cheesy mess stubbornly welded to the surface. Frustrating, I know!
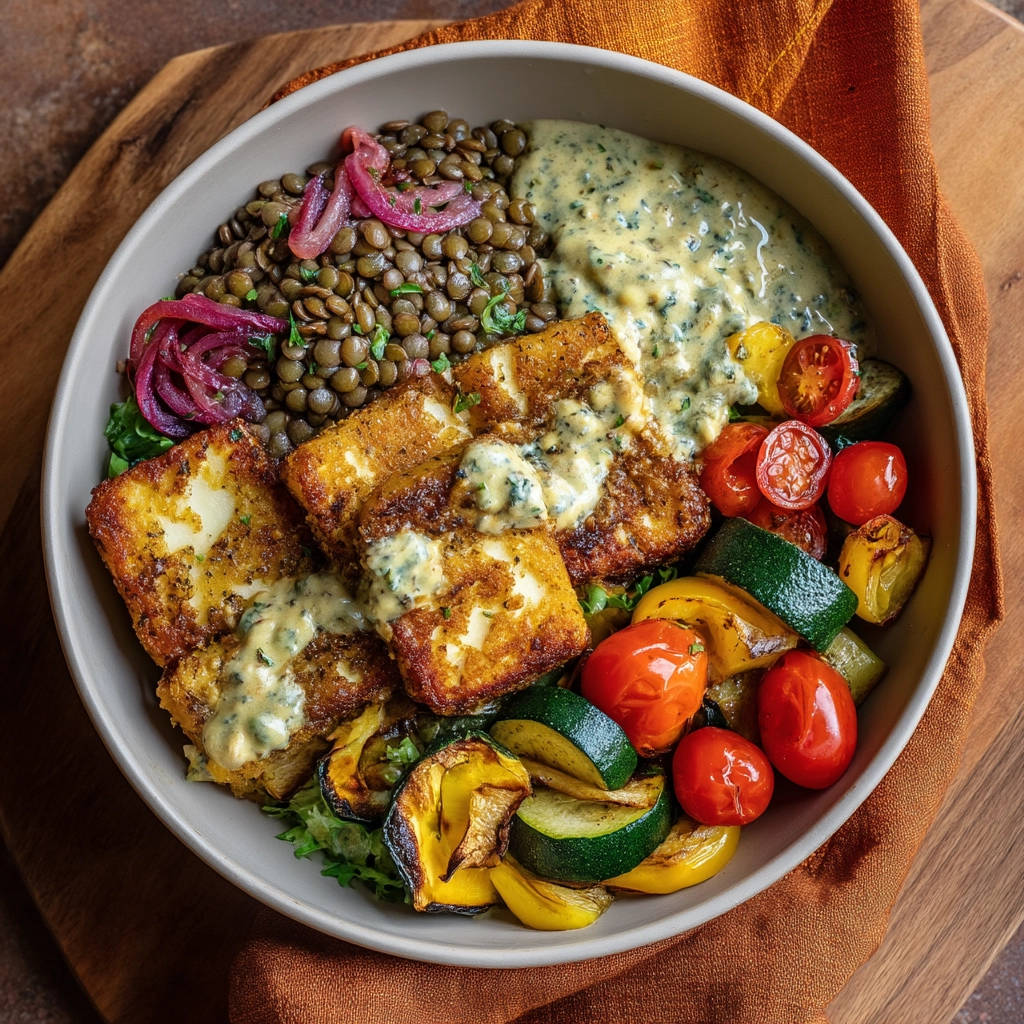
But guess what? I finally cracked the code! There’s one simple, little trick that guarantees beautiful, golden, non-stick halloumi every single time. And this Halloumi Power Bowl recipe is the absolute perfect way to showcase its crispy, glorious potential. Packed with hearty lentils, sweet roasted vegetables, bright quick-pickled onions, and drizzled with a creamy herb sauce, this bowl is a nutritional powerhouse that tastes like a treat. Ready to transform your halloumi game and make the most delicious, satisfying bowl ever?
Why You’ll Love This Halloumi Power Bowl Recipe
This isn’t just another grain bowl; it’s a symphony of textures and flavors that makes healthy eating genuinely exciting. Here’s why this Halloumi Power Bowl is about to become a regular in your meal rotation:
- Say Goodbye to Sticky Halloumi! That secret technique I mentioned? It’s a game-changer. No more scraping sad, stuck cheese off the pan.
- A Symphony of Flavors & Textures: You get the creamy lentils, tender roasted veggies, tangy pickled onions, crispy halloumi, and a cool, creamy sauce all in one bite. It’s incredibly satisfying.
- Nutrient-Packed: Lentils provide plant-based protein and fiber, vegetables bring vitamins and antioxidants, and halloumi adds more protein and healthy fats. It’s a truly balanced meal.
- Customizable: Easily swap in your favorite vegetables or greens.
- Visually Stunning: This bowl is vibrant and colorful, making it a feast for the eyes as well as the stomach!
What You’ll Need for This Vibrant Power Bowl
Building this Halloumi & Roasted Veggie Power Bowl involves bringing together several simple components, each playing a crucial role in the final delicious result. While the full list is below, let’s talk about some key players and why they work so well together.
At the heart of the bowl are our stars: the halloumi cheese and a medley of vibrant roasted vegetables. We use about 8 ounces of halloumi, sliced about half an inch thick – thick enough to get a great sear but not so thick it stays rubbery inside. For the vegetables, a mix of zucchini, yellow bell pepper, and cherry tomatoes provides color, sweetness, and tender bites once roasted. Tossing them with olive oil, salt, and pepper before roasting helps them caramelize beautifully in the oven. If you’re looking for other amazing roasted veggie ideas, don’t miss our guide to making perfect roasted vegetables.
The foundation of the bowl is built on hearty green or brown lentils. Cooked simply in vegetable broth or water, they provide a wonderful earthy base and a significant boost of plant-based protein and fiber, making the bowl truly filling. The cooking liquid adds a layer of savory flavor to the lentils as they simmer.

To add brightness and cut through the richness, we quick-pickle thinly sliced red onion in apple cider vinegar and a touch of sugar. This simple step transforms the onion from pungent to pleasantly tangy and slightly sweet, offering a fantastic pop of flavor in each bite. A drizzle of good olive oil ties everything together.
Finally, a creamy, tangy herb sauce is essential for bringing all the components together. Plain unsweetened yogurt (dairy or a dairy-free alternative works wonderfully) is whisked with fresh chopped parsley or other herbs, and optionally, a tiny bit of minced garlic and a squeeze of lemon juice. This creates a cool, refreshing counterpoint to the warm vegetables and crispy halloumi. You might add a splash of water to get just the right drizzle consistency.
Here’s the full list of ingredients you’ll need:
- 8 ounces halloumi cheese, sliced 1/2 inch thick
- 1 cup dry green or brown lentils
- 3 cups vegetable broth or water
- 1 small zucchini, cut into 1/2 inch chunks
- 1 yellow bell pepper, cut into 1 inch pieces
- 1 cup cherry tomatoes, halved
- 1/2 red onion, thinly sliced
- 2 tablespoons apple cider vinegar
- 1 tablespoon sugar
- 1/4 cup olive oil, divided
- Salt and freshly ground black pepper to taste
- 1/4 cup plain unsweetened yogurt or dairy-free alternative
- 1 tablespoon fresh chopped parsley or other herbs
- 1 small clove garlic, minced (optional)
- Juice of 1/4 lemon (optional)
- Mixed greens for serving (optional)
Crafting Your Halloumi Power Bowl: Detailed Steps
Let’s walk through putting this delicious bowl together. The beauty of this recipe is that several components cook simultaneously, making the overall process efficient. We’ll start with the parts that take the longest and work our way to the grand assembly, including that crucial halloumi step!
-
Roast the Vegetables: Get your oven nice and hot first – preheat it to 400 degrees F (200 degrees C). Grab a large baking sheet; you want your veggies to have space so they roast, not steam. Toss your zucchini chunks, bell pepper pieces, and halved cherry tomatoes directly on the sheet. Drizzle them with about half of your olive oil (that’s 2 tablespoons) and sprinkle generously with salt and pepper. Use your hands or a spatula to make sure everything is evenly coated. Spread them out in a single layer. Pop the pan into the preheated oven and roast for 20 to 25 minutes. You’re looking for them to become tender and slightly browned and caramelized on the edges. This caramelization brings out their natural sweetness!
-
Cook the Lentils: While the vegetables are happily roasting, turn your attention to the lentils. Give them a quick rinse under cold water in a sieve – this helps remove any dust or debris. Transfer the rinsed lentils to a medium pot and pour in the vegetable broth or water. Bring this to a rolling boil over medium-high heat. Once boiling, immediately reduce the heat to low, cover the pot with a lid, and let them gently simmer. They’ll need about 20 to 25 minutes to cook through. You want them tender but still holding their shape, not mushy. If there’s any excess liquid left after they’re cooked, just drain it off.
-
Make the Quick-Pickled Onions: While the other components are cooking, prepare your quick pickles. Thinly slice your half red onion. The thinner the slices, the faster they’ll pickle. Place the slices in a small bowl. Pour the apple cider vinegar over the onions and stir in the sugar. Give it a good stir to dissolve the sugar. Let this mixture sit while you finish preparing everything else; the acidity will soften the onion and infuse it with that lovely tangy flavor.
-
Whip Up the Creamy Herb Sauce: In another small bowl, combine the plain unsweetened yogurt (use dairy or your preferred dairy-free alternative), the fresh chopped parsley or other herbs like dill or chives, and the optional minced garlic and lemon juice. Season with a pinch of salt and pepper. Whisk everything together until smooth and well combined. If the sauce is too thick for drizzling, add just a tiny splash of water (about a teaspoon at a time) and whisk until you reach your desired consistency.
-
Prepare the Halloumi (The Non-Stick Secret!): This is the moment we’ve been waiting for! To prevent sticking and get that perfect golden crust, you must pat the halloumi slices very, very dry. Place the sliced halloumi on a few layers of paper towels and gently press down to absorb as much moisture as possible. Flip and repeat on the other side. This dryness is the key! Next, heat a nonstick pan or a well-seasoned cast iron pan over medium-high heat. Add the remaining 2 tablespoons of olive oil. Let the oil get hot – you’ll see it start to shimmer slightly. Carefully place the dried halloumi slices into the hot pan in a single layer. Don’t overcrowd the pan, or the cheese will steam instead of fry; cook in batches if necessary. Here’s the critical part: Do NOT move the halloumi for the first 3 to 4 minutes. Let it develop that beautiful golden-brown crust on the bottom. You’ll know it’s ready to flip when it releases easily from the pan. Flip each slice and cook for another 3 to 4 minutes on the second side until it’s equally golden brown and cooked through. Remove the crispy halloumi from the pan immediately.
-
Assemble the Power Bowls: Now for the fun part – building your bowls! If using, start with a base of fresh mixed greens. Add a generous portion of your cooked lentils. Spoon the roasted vegetables alongside the lentils. Drain the quick-pickled red onions (you can discard the pickling liquid or save it for dressings) and add them to the bowl. Finally, add the star: the crispy, golden halloumi slices. Finish by drizzling generously with the creamy herb sauce. Serve immediately and enjoy your perfectly crafted Halloumi Power Bowl!
Tips for Success & Tasty Variations
Making this Halloumi Power Bowl is straightforward, but a few tips can elevate your experience and make it even easier or more delicious. Plus, there are plenty of ways to switch things up!
- The Halloumi Trick is Non-Negotiable: Seriously, drying the halloumi is the MOST important step for that crispy, non-stick result. Don’t skip it! Also, make sure your pan and oil are hot before adding the cheese.
- Vary Your Veggies: This bowl is super flexible. Feel free to swap the zucchini, pepper, and tomatoes for other roasting-friendly vegetables like broccoli florets, cauliflower, red onion wedges (roasted instead of pickled), sweet potato cubes, or asparagus. Roasting times may vary slightly depending on the vegetable.
- Herb Swaps: Not a fan of parsley? Use fresh dill, chives, mint, or a mix of your favorite soft herbs in the creamy sauce.
- Add Some Heat: For a bit of a kick, add a pinch of red pepper flakes to the roasted vegetables or the creamy sauce.
- Make it a Meal Prep Star: Cook the lentils and roast the vegetables ahead of time and store them separately in the fridge. The quick-pickled onions can also be made a day or two in advance. Reheat the lentils and veggies gently, cook the halloumi fresh just before serving (it’s best crispy!), and assemble your bowl.
- Boost the Protein: If you wanted to add a different kind of protein, cooked chicken or grilled shrimp would also pair well with these flavors. We have a fantastic recipe for Juicy Chicken Quinoa Bowls if you like the bowl format with chicken!
- Change the Base: Instead of or in addition to mixed greens, you could serve this over quinoa (which offers another protein boost!), brown rice, or even couscous.
Serving Up Your Power Bowl
Presentation matters! While you can just pile everything into a bowl and dig in (which is totally fine!), taking a moment to arrange the different components makes for a more appealing meal. Start with your greens or grain base, then create little sections for the lentils, roasted vegetables, pickled onions, and those beautiful golden halloumi slices. A generous drizzle of the creamy sauce over the top is the perfect finishing touch. You could also add a sprinkle of sesame seeds, some toasted nuts or seeds for crunch, or extra fresh herbs.
Your Halloumi Power Bowl Questions Answered (FAQ)
Have a few lingering questions about making the best Halloumi Power Bowl? Let’s address some common queries.
Can I make parts of this Halloumi Power Bowl ahead of time?
Absolutely! This bowl is great for meal prep. You can cook the lentils, roast the vegetables, and make the quick-pickled onions and the creamy sauce a day or two in advance. Store each component separately in airtight containers in the refrigerator. When you’re ready to eat, gently reheat the lentils and roasted vegetables (the oven or a skillet works well for the veggies), cook the halloumi fresh for the best texture, and then assemble your bowl. The halloumi really is best cooked right before serving.
What if I don’t have a nonstick pan for the halloumi?
While a nonstick pan is ideal, a well-seasoned cast iron skillet can also work very well. The key, regardless of the pan, is ensuring it’s properly heated along with the oil before adding the halloumi, and most importantly, patting the halloumi very dry. Once the halloumi is in the hot pan, resist the urge to move it until that first side is truly golden brown and has naturally released from the surface. Patience is your friend here!
Can I use different lentils?
Yes, green and brown lentils hold their shape well, making them great for bowls. You could potentially use black lentils (Beluga lentils) for a similar result. Red lentils tend to break down and become mushier, which isn’t ideal for a bowl where you want distinct textures, but they’d be fine if you prefer that consistency.
Are there any good substitutions for halloumi cheese?
Halloumi’s unique texture is hard to replicate exactly. However, if you need a substitute, extra-firm tofu pressed very well and then pan-fried until crispy can offer a similar protein boost and browned exterior. Other options might include pan-fried paneer cheese (which also doesn’t melt easily) or even chunks of roasted portobello mushrooms for a meaty texture, though neither will mimic halloumi’s salty, squeaky bite precisely.
Is this recipe vegetarian? Can it be made vegan?
Yes, as written with either dairy or a dairy-free yogurt alternative, this Halloumi Power Bowl is vegetarian. To make it completely vegan, ensure you use a dairy-free yogurt alternative for the sauce and cook the lentils in vegetable broth or water (as specified in the recipe). Halloumi cheese itself is not vegan as it is made from milk.
Enjoy Your Homemade Halloumi Power Bowl!
There you have it – a truly satisfying, healthy, and incredibly flavorful Halloumi Power Bowl that conquers the sticky halloumi challenge once and for all! The combination of textures and tastes in every bite is just wonderful. It’s the perfect recipe for a delicious lunch or a light, yet filling, dinner.
Give this recipe a try and let me know how it turns out! Did the halloumi trick work wonders for you too? Share your experience in the comments below, or snap a picture and tag me on social media. Happy cooking!
Halloumi & Roasted Veggie Power Bowl

Ingredients
- 8 ounces halloumi cheese, sliced 1/2 inch thick
- 1 cup dry green or brown lentils
- 3 cups vegetable broth or water
- 1 small zucchini, cut into 1/2 inch chunks
- 1 yellow bell pepper, cut into 1 inch pieces
- 1 cup cherry tomatoes, halved
- 1/2 red onion, thinly sliced
- 2 tablespoons apple cider vinegar
- 1 tablespoon sugar
- 1/4 cup olive oil, divided
- Salt and freshly ground black pepper to taste
- 1/4 cup plain unsweetened yogurt or dairy-free alternative
- 1 tablespoon fresh chopped parsley or other herbs
- 1 small clove garlic, minced (optional)
- Juice of 1/4 lemon (optional)
- Mixed greens for serving (optional)
Directions
- Preheat oven to 400 degrees F (200 degrees C). On a large baking sheet, toss zucchini, bell pepper, and cherry tomatoes with 2 tablespoons of olive oil, salt, and pepper. Spread in a single layer. Roast for 20-25 minutes, or until tender and slightly caramelized.
- While vegetables roast, rinse lentils under cold water. In a medium pot, combine lentils and vegetable broth or water. Bring to a boil, then reduce heat, cover, and simmer for 20-25 minutes, or until lentils are tender but not mushy. Drain excess liquid if needed.
- In a small bowl, combine sliced red onion, apple cider vinegar, and sugar. Stir and let sit while preparing other components to quick pickle.
- For the creamy sauce, whisk together yogurt, chopped parsley, minced garlic (if using), lemon juice (if using), a pinch of salt, and pepper in a small bowl. Add a tiny splash of water if needed to reach desired consistency.
- Prepare the Halloumi (The Non-Stick Secret!): Pat the sliced halloumi cheese very dry on both sides using paper towels. This is key! Heat a nonstick or well-seasoned pan over medium-high heat. Add the remaining 2 tablespoons of olive oil. Let the oil heat up until it shimmers. Carefully place the dried halloumi slices in the hot pan in a single layer, making sure not to overcrowd the pan (cook in batches if necessary). Do not move the halloumi for 3-4 minutes until a beautiful golden-brown crust forms on the bottom and it releases easily from the pan. Flip each slice and cook for another 3-4 minutes on the second side until golden brown and cooked through. Remove from pan.
- Assemble bowls: Start with a base of mixed greens (if using). Add a portion of cooked lentils, roasted vegetables, quick pickled red onions, and the crispy halloumi slices. Drizzle generously with the creamy herb sauce. Serve immediately.