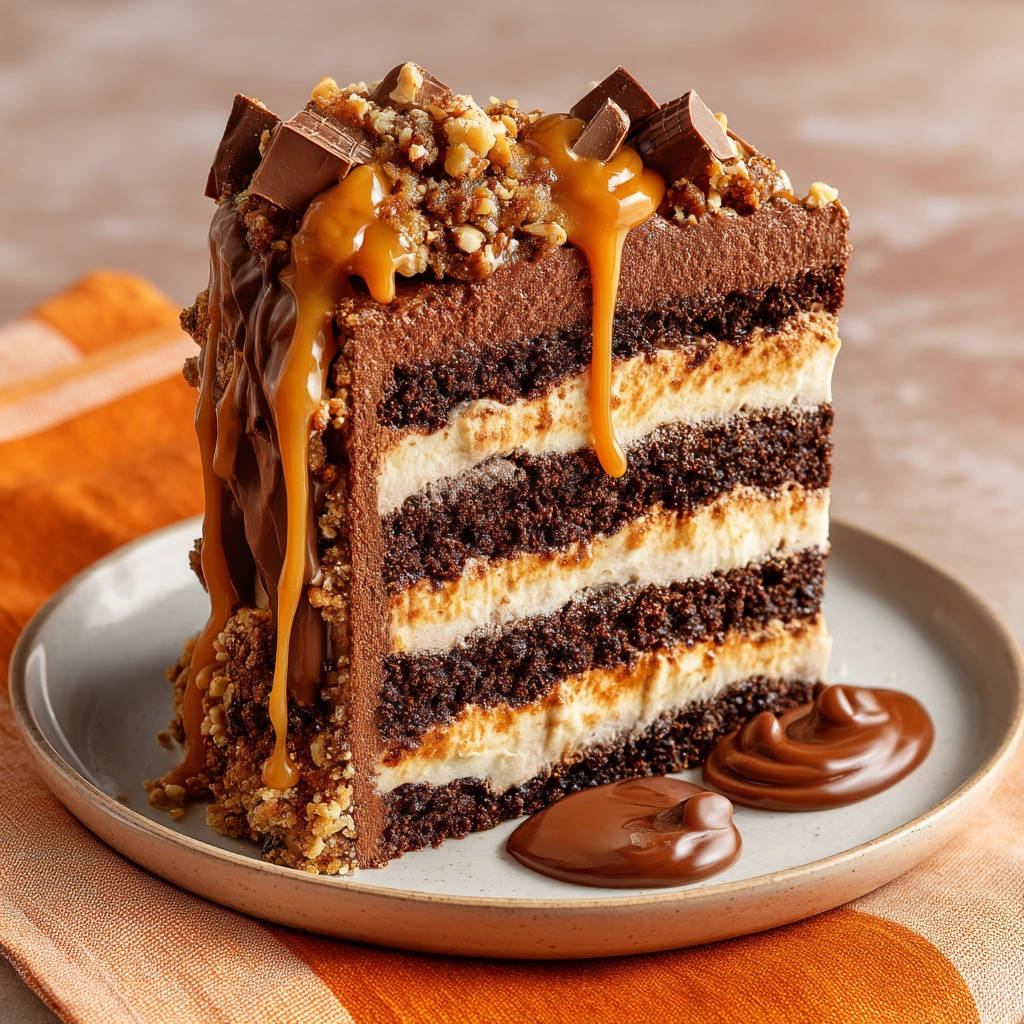
Have you ever dreamt of a chocolate cake so rich, so moist, and so perfectly layered with caramel, that it stops you in your tracks? A cake that not only tastes divine but also rises beautifully every single time? Well, prepare to have your cake dreams come true! This Decadent Chocolate Caramel Layer Cake recipe is exactly that – a show-stopping dessert that’s surprisingly easy to master, even if you’ve struggled with sunken cakes in the past.
Why You’ll Love This Chocolate Caramel Layer Cake
This isn’t just another chocolate cake recipe. It’s a guaranteed success story, and here’s why:
- Perfectly Risen Layers: Say goodbye to sunken middles! This recipe includes a simple trick to ensure your cakes bake evenly and rise beautifully.
- Intense Chocolate Flavor: The combination of cocoa powder and a special technique results in a deep, rich chocolate flavor that will satisfy any chocolate craving.
- Buttery Vanilla Buttercream: Light, fluffy, and perfectly sweet, the vanilla buttercream frosting complements the chocolate perfectly.
- Homemade Caramel Sauce: The star of the show! Our easy caramel sauce recipe adds a touch of elegance and irresistible sweetness. Plus, you can easily adapt this caramel recipe for other treats too, like these Easy Caramel Nut Dessert Jars.
- Crowd-Pleasing Dessert: Perfect for birthdays, holidays, or any special occasion, this cake is guaranteed to impress.
Gathering Your Ingredients for Decadent Chocolate Caramel Layer Cake
Let’s talk ingredients! This cake is all about balancing rich chocolate with sweet caramel and creamy frosting. Each component plays a crucial role in achieving that perfect bite. The foundation of our cake relies on quality baking staples combined in a way that makes the cake rise evenly and taste amazing.
- For the Decadent Chocolate Cake Layers:
- All-Purpose Flour: The backbone of our cake, providing structure. Be sure to measure it accurately using the spoon-and-level method for best results.
- Granulated Sugar: Adds sweetness and moisture, helping to create a tender crumb.
- Unsweetened Cocoa Powder: This is where the chocolate magic happens! Use a good quality cocoa powder for the most intense chocolate flavor.
- Baking Powder & Baking Soda: Our leavening agents, working together to create a light and airy texture. Make sure they’re fresh!
- Salt: Enhances the flavors of all the other ingredients, balancing the sweetness.
- Buttermilk: Adds tanginess and moisture, creating a tender cake. If you don’t have buttermilk, you can make a quick substitute by adding 1 tablespoon of white vinegar or lemon juice to 1 cup of milk. Let it sit for 5 minutes before using.
- Vegetable Oil: Keeps the cake moist and tender.
- Large Eggs: Provide structure and richness.
- Vanilla Extract: Enhances the chocolate flavor and adds a touch of warmth.
- Boiling Water: This is the secret ingredient! Adding boiling water to the batter helps to bloom the cocoa powder, intensifying the chocolate flavor and creating a moist cake.
- For the Vanilla Buttercream Frosting:
- Unsalted Butter: The base of our frosting, providing richness and flavor. Make sure it’s softened to room temperature for a smooth and creamy frosting.
- Powdered Sugar: Sweetens and thickens the frosting.
- Vanilla Extract: Adds a touch of vanilla flavor.
- Milk: Helps to adjust the consistency of the frosting.
- For the Luscious Caramel Sauce:
- Granulated Sugar: The foundation of our caramel, creating that sweet, caramelized flavor.
- Water: Helps to dissolve the sugar and create a smooth caramel.
- Heavy Cream: Adds richness and creaminess to the sauce.
- Unsalted Butter: Contributes to the sauce’s smooth texture and adds a buttery flavor.
- Salt: Balances the sweetness and enhances the caramel flavor.
- For the Garnish:
- Chopped Walnuts: Adds a nutty crunch and visual appeal.
- Milk Chocolate Squares: Completes the decadent look and adds an extra touch of chocolate.
Crafting Your Chocolate Caramel Layer Cake: Step-by-Step
Ready to bake? Don’t be intimidated by the multiple components – we’ll break it down into manageable steps. The key to success with this chocolate caramel layer cake, besides the ingredients, lies in following the instructions carefully and paying attention to detail, especially when it comes to the “secret trick” that prevents sinking! So preheat that oven, and let’s get baking!
- Preheat and Prep: Start by preheating your oven to 350 degrees F (175 degrees C). This ensures even baking. While the oven heats, grease and flour three 8-inch round cake pans. This prevents the cakes from sticking and makes them easy to remove after baking. A light coating of cooking spray followed by a dusting of flour works perfectly.
- Whisk the Dry Ingredients: In a large bowl, whisk together the flour, sugar, cocoa powder, baking powder, baking soda, and salt. Whisking ensures that all the dry ingredients are evenly distributed, which is crucial for a consistent texture.
- Combine the Wet Ingredients: In a separate bowl, combine the buttermilk, oil, eggs, and vanilla extract. Mixing the wet ingredients separately ensures that they are fully emulsified before being added to the dry ingredients.
- Combine Wet and Dry: Add the wet ingredients to the dry ingredients and mix until just combined. Be careful not to overmix! Overmixing can develop the gluten in the flour, resulting in a tough cake.
- Add the Boiling Water: Gradually stir in the boiling water until the batter is thin. Don’t be alarmed by the thin consistency – this is what helps create a moist and tender cake. The hot water also helps to bloom the cocoa powder, intensifying the chocolate flavor.
- Divide the Batter: Divide the batter evenly among the prepared cake pans. Using a kitchen scale is the best way to ensure that each layer is the same thickness, resulting in a more even and professional-looking cake.
- The Secret Trick: Bake and Cool Correctly: Bake for 30-35 minutes, or until a wooden skewer inserted into the center comes out clean. This is the standard test for doneness. IMMEDIATELY after removing the cakes from the oven, place them on a wire rack and let them cool COMPLETELY in the pans. Do not try to remove them while warm. This slow cooling process in the pan is crucial as it allows the cake structure to set fully, preventing the sinking issue. This is the magic step that ensures your cakes remain perfectly risen.
- Invert and Release: Once the cakes are completely cool, invert them onto a serving plate or cake stand. If they don’t release easily, gently run a thin knife around the edges of the pan.
- Frost Each Layer: Frost each layer generously with the vanilla buttercream. A rotating cake stand makes this process much easier and helps to create smooth, even layers of frosting.
- Drizzle with Caramel: Drizzle the entire cake with the homemade caramel sauce. Don’t be shy with the caramel!
- Garnish and Serve: Garnish with chopped walnuts and milk chocolate squares. This adds a touch of elegance and completes the decadent look.
Making the Vanilla Buttercream Frosting
- Cream Butter and Sugar: In a large bowl, cream together the softened butter and powdered sugar until light and fluffy. This step is crucial for creating a smooth and airy frosting.
- Add Flavor and Milk: Beat in the vanilla extract and milk until smooth. Adjust the amount of milk as needed to reach your desired consistency.
Making the Caramel Sauce
- Melt the Sugar: In a medium saucepan, combine the sugar and water. Cook over medium heat, stirring until the sugar dissolves.
- Caramelize: Bring to a boil and cook without stirring until the mixture turns a deep amber color. Keep a close eye on the sugar, as it can burn quickly.
- Add Cream, Butter, and Salt: Remove from heat and carefully whisk in the heavy cream, butter, and salt. Be careful, as the mixture will bubble vigorously.
- Cool: Let cool slightly before using. The sauce will thicken as it cools.
Tips for Perfect Chocolate Caramel Layer Cake Every Time
Want to ensure your chocolate caramel layer cake is a showstopper? Here are a few extra tips and tricks:
- Don’t Overmix: Overmixing the cake batter develops the gluten in the flour, resulting in a tough cake. Mix until just combined.
- Accurate Measurements: Baking is a science! Use accurate measurements, especially for the flour and leavening agents.
- Room Temperature Ingredients: Using room temperature ingredients, especially the butter and eggs, helps to create a smooth and emulsified batter.
- Cool Completely: This is the most important tip! Make sure the cakes are completely cool before frosting them, or the frosting will melt.
- Chill Before Serving: Chilling the cake for at least 30 minutes before serving allows the frosting and caramel to set, making it easier to slice and serve.
- Nut Allergy? If you have a nut allergy, simply omit the walnuts or substitute with chocolate shavings or sprinkles.
- If you want to try another decadent chocolate recipe, check out this Easy Delicious Chocolate Sheet Cake Recipe.
What to Serve With Chocolate Caramel Layer Cake
This decadent cake is rich and satisfying on its own, but if you’re looking to create a complete dessert spread, here are a few suggestions:
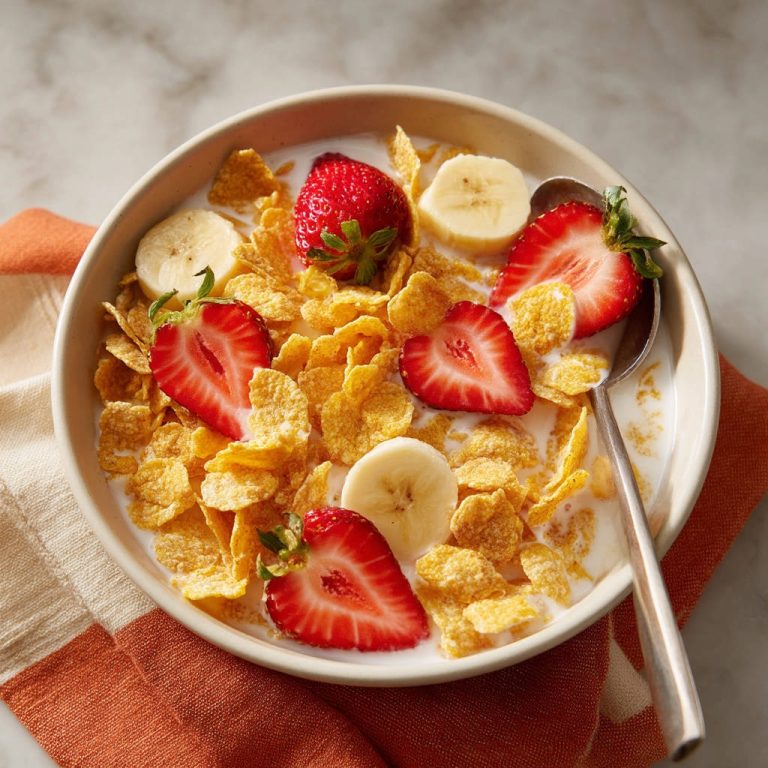
- Fresh Berries: A simple and elegant addition that adds a touch of freshness.
- Vanilla Ice Cream: A classic pairing that complements the chocolate and caramel perfectly.
- Whipped Cream: A light and airy topping that adds a touch of sweetness.
Your Chocolate Caramel Layer Cake Questions Answered (FAQ)
Why did my cake sink in the middle?
The most common reason for a sunken cake is a sudden temperature change. This recipe addresses that by having you cool the cakes completely in their pans. Other factors include overmixing the batter, using old baking powder, or opening the oven door too frequently during baking. It is also useful to make sure your oven temperature is accurate; an oven thermometer can help.
Can I make this cake ahead of time?
Yes! You can bake the cake layers and make the caramel sauce a day or two in advance. Wrap the cake layers tightly in plastic wrap and store them at room temperature. Store the caramel sauce in an airtight container in the refrigerator. Make the buttercream frosting on the day you plan to assemble the cake.
Can I freeze this cake?
Yes, you can freeze the unfrosted cake layers for up to 2 months. Wrap them tightly in plastic wrap and then in foil. Thaw them overnight in the refrigerator before frosting. You can also freeze the entire frosted cake, but the frosting may change texture slightly upon thawing.
Can I use a different size cake pan?
Yes, but you may need to adjust the baking time. If you use smaller cake pans, the cakes will bake faster. If you use a larger cake pan, the cakes will bake slower. Keep an eye on the cakes and test for doneness with a wooden skewer.
Enjoy Your Homemade Chocolate Caramel Layer Cake!
There you have it – a show-stopping Decadent Chocolate Caramel Layer Cake that’s guaranteed to impress! This recipe combines rich chocolate, luscious caramel, and creamy frosting into one unforgettable dessert. With our simple trick for preventing sunken cakes, you can bake with confidence and create a masterpiece every time. Now, it’s your turn to bake this delectable treat and share the joy with your loved ones! We can’t wait to see your creations – be sure to leave a comment below and let us know how it turned out. Don’t forget to rate the recipe and share it with your friends!
Decadent Chocolate Caramel Layer Cake (Stops Cakes Sinking!)

Ingredients
- 2 cups all-purpose flour
- 2 cups granulated sugar
- 3/4 cup unsweetened cocoa powder
- 1 1/2 teaspoons baking powder
- 1 1/2 teaspoons baking soda
- 1 teaspoon salt
- 1 cup buttermilk
- 1/2 cup vegetable oil
- 2 large eggs
- 2 teaspoons vanilla extract
- 1 cup boiling water
- 1 batch vanilla buttercream frosting (recipe follows)
- 1 batch caramel sauce (recipe follows)
- Chopped walnuts for garnish
- Milk chocolate squares for garnish
Directions
- Preheat oven to 350 degrees F (175 degrees C). Grease and flour three 8-inch round cake pans.
- In a large bowl, whisk together the flour, sugar, cocoa, baking powder, baking soda, and salt.
- In a separate bowl, combine the buttermilk, oil, eggs, and vanilla extract.
- Add the wet ingredients to the dry ingredients and mix until just combined.
- Gradually stir in the boiling water until the batter is thin.
- Divide the batter evenly among the prepared cake pans.
- The Trick: Bake for 30-35 minutes, or until a wooden skewer inserted into the center comes out clean. IMMEDIATELY after removing the cakes from the oven, place them on a wire rack and let them cool COMPLETELY in the pans. Do not try to remove them while warm. This slow cooling process in the pan is crucial as it allows the cake structure to set fully, preventing the sinking issue.
- Once the cakes are completely cool, invert them onto a serving plate.
- Frost each layer with vanilla buttercream.
- Drizzle with caramel sauce.
- Garnish with chopped walnuts and chocolate squares.
- Vanilla Buttercream Frosting:
- cup (2 sticks) unsalted butter, softened
- cups powdered sugar
- teaspoon vanilla extract
- -3 tablespoons milk
- Directions for Buttercream:
- In a large bowl, cream together the softened butter and powdered sugar until light and fluffy.
- Beat in the vanilla extract and milk until smooth.
- Caramel Sauce:
- cup granulated sugar
- /4 cup water
- /2 cup heavy cream
- tablespoons unsalted butter
- /2 teaspoon salt
- Directions for Caramel Sauce:
- In a medium saucepan, combine the sugar and water. Cook over medium heat, stirring until the sugar dissolves.
- Bring to a boil and cook without stirring until the mixture turns a deep amber color.
- Remove from heat and carefully whisk in the heavy cream, butter, and salt. Be careful, as the mixture will bubble vigorously.
- Let cool slightly before using.