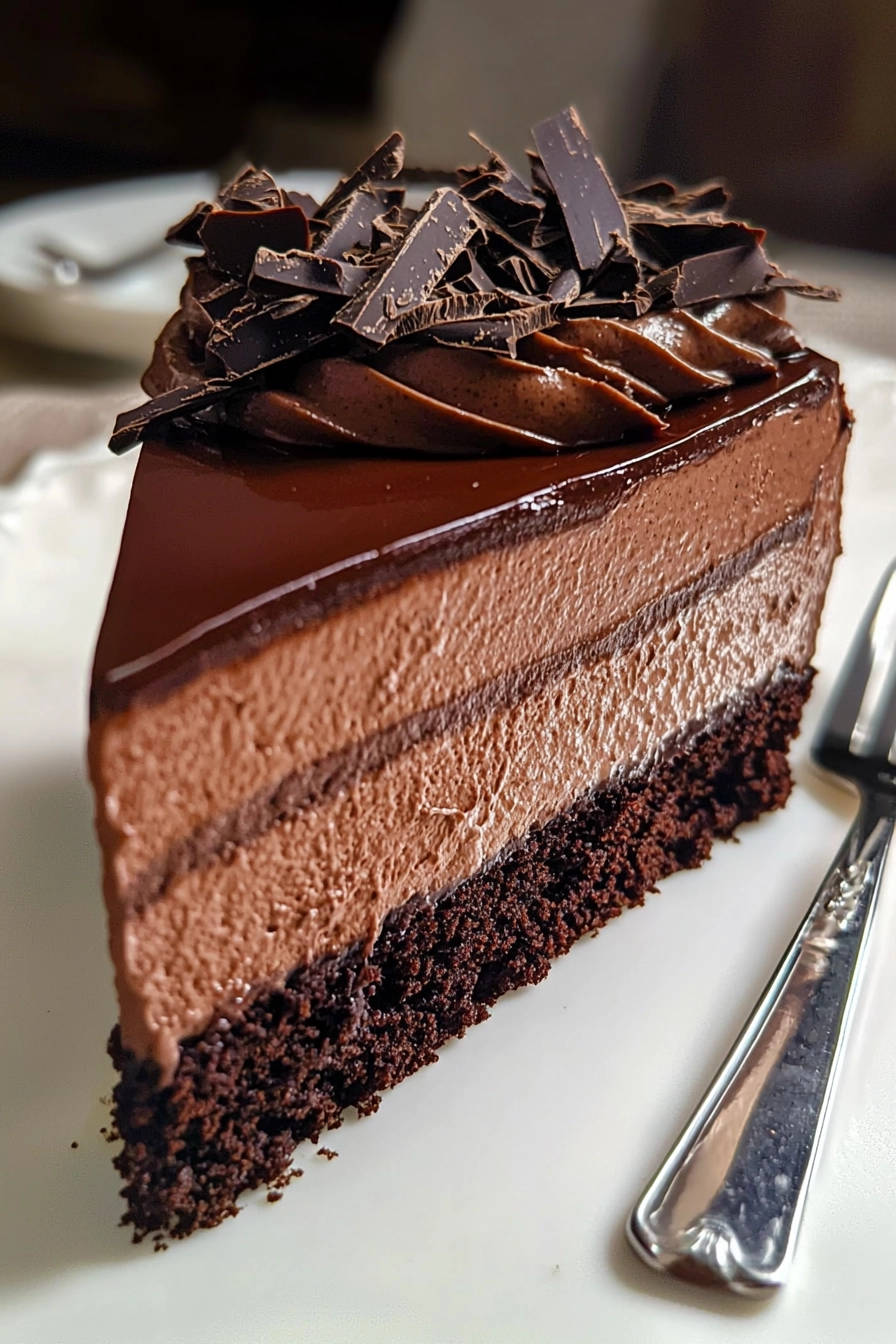
Imagine sinking your fork into a slice of pure chocolate bliss. That’s exactly what you’ll experience with this Decadent Chocolate Dream Cake. This isn’t just any chocolate cake; it’s an experience, a journey into layers of rich, moist chocolate cake, a velvety smooth vanilla bean infused chocolate mousse, and a stunning mirror glaze that will leave everyone in awe. Remember those moments in your grandmother’s kitchen, filled with warmth and the aroma of freshly baked goods? This cake evokes that same feeling of comfort and joy, making it perfect for celebrations, holidays, or simply a special treat for yourself. Are you ready to embark on a baking adventure?
Why You’ll Love This Chocolate Dream Cake
This Decadent Chocolate Dream Cake is more than just a dessert; it’s a showstopper. Here’s why you’ll absolutely adore it:
- Layers of Flavor: The combination of rich chocolate cake, creamy vanilla bean mousse, and a glossy mirror glaze creates a symphony of flavors that dance on your palate.
- Impressive Presentation: The mirror glaze finish makes this cake look like it came straight from a professional bakery. Perfect for impressing guests!
- Make-Ahead Friendly: You can prepare different components of the cake ahead of time, making it less stressful to assemble on the day you want to serve it.
- Perfect for Any Occasion: Whether it’s a birthday, anniversary, or just a cozy night in, this cake elevates any event.
Ingredients for Decadent Chocolate Perfection
Let’s gather the ingredients for this amazing Decadent Chocolate Dream Cake. Quality ingredients are key to achieving the best flavor and texture.
For the Chocolate Cake Base:
- 1 cup all-purpose flour: Provides structure and tenderness to the cake.
- 1/2 cup unsweetened cocoa powder: Delivers that intense chocolate flavor we all crave. Dutch-processed cocoa powder will give a darker, richer flavor.
- 1 teaspoon baking soda: Helps the cake rise and become light and airy.
- 1/2 teaspoon baking powder: Works in tandem with baking soda to ensure a perfect rise.
- 1/4 teaspoon salt: Enhances the flavors of the other ingredients and balances the sweetness.
- 3/4 cup granulated sugar: Adds sweetness and moisture to the cake.
- 1/2 cup vegetable oil: Keeps the cake moist and tender. Canola or sunflower oil also work well.
- 1 cup buttermilk: Adds a tangy flavor and tenderizes the cake. If you don’t have buttermilk, you can make your own by adding 1 tablespoon of lemon juice or vinegar to 1 cup of milk and letting it sit for 5 minutes.
- 1 teaspoon vanilla extract: Enhances the overall flavor profile of the cake. Use pure vanilla extract for the best results.
- 1 large egg: Binds the ingredients together and adds richness.
For the Chocolate Mousse Filling:
- 1 cup heavy cream: Provides richness and creaminess to the mousse. Make sure it’s cold for optimal whipping.
- 8 ounces semi-sweet chocolate, finely chopped: Use high-quality semi-sweet chocolate for the best flavor. Finely chopping ensures it melts evenly.
- 1/4 cup granulated sugar: Adds sweetness to the mousse and helps stabilize it.
- 1 teaspoon vanilla extract: Complements the chocolate flavor and adds a touch of warmth.
- 1 vanilla bean (for infusion): This is the secret ingredient! Infusing the cream with vanilla bean adds an incredible depth of flavor that elevates the mousse to another level.
For the Mirror Glaze:
- 1/2 cup granulated sugar: Creates the base for the glaze.
- 1/4 cup water: Helps dissolve the sugar and create a smooth syrup.
- 1/3 cup unsweetened cocoa powder: Adds chocolate flavor and color to the glaze.
- 1/4 cup heavy cream: Adds richness and shine to the glaze.
- 1 teaspoon gelatin powder: Helps the glaze set and achieve that signature mirror-like finish.
- 2 tablespoons cold water: Used to bloom the gelatin.
For Garnish:
- 2 ounces dark chocolate, shaved: Adds a beautiful finishing touch and enhances the chocolate flavor.
Step-by-Step Guide to Baking Your Dream Cake
Now, let’s get to the fun part – baking this Decadent Chocolate Dream Cake! Follow these step-by-step instructions for a perfect result.
- Preheat and Prep: Preheat your oven to 350°F (175°C). Grease and flour a 9-inch round cake pan. This will prevent the cake from sticking and ensure easy removal. Dusting with cocoa powder instead of flour will prevent a white film on the cake.
- Combine Dry Ingredients: In a large bowl, whisk together the flour, cocoa powder, baking soda, baking powder, salt, and sugar. Whisking ensures that the ingredients are evenly distributed and prevents lumps.
- Combine Wet Ingredients: In a separate bowl, combine the oil, buttermilk, vanilla extract, and egg. Whisk until well combined.
- Mix Wet and Dry: Add the wet ingredients to the dry ingredients and mix until just combined. Be careful not to overmix, as this can result in a tough cake. A few streaks of flour are okay.
- Bake the Cake: Pour the batter into the prepared cake pan and bake for 30-35 minutes, or until a toothpick inserted into the center comes out clean. Start checking for doneness around 30 minutes to avoid overbaking.
- Cool Completely: Let the cake cool completely in the pan before inverting it onto a wire rack. This prevents the cake from breaking apart.
- Prepare the Mousse: While the cake cools, prepare the chocolate mousse. Heat the heavy cream and sugar in a saucepan over medium heat.
- Infuse with Vanilla Bean: Split the vanilla bean lengthwise, scrape out the seeds, and add both the pod and seeds to the cream. Bring to a simmer, then remove from heat and let steep for 15 minutes. This infuses the cream with a beautiful vanilla flavor. Remember to remove the vanilla bean pod before proceeding.
- Melt the Chocolate: Pour the hot cream over the finely chopped chocolate in a bowl. Let it sit for 1 minute to allow the chocolate to melt.
- Whisk Until Smooth: Whisk the mixture until smooth and glossy. Add the vanilla extract.
- Assemble and Chill: Allow the mousse to cool slightly, then pour it over the cooled chocolate cake base. Refrigerate for at least 4 hours, or preferably overnight, to allow the mousse to set completely. This is crucial for a stable and delicious mousse layer.
- Prepare the Glaze: In a saucepan, combine the sugar, water, and cocoa powder. Bring to a boil, stirring constantly, until smooth.
- Add Cream: Remove from heat and stir in the heavy cream.
- Bloom the Gelatin: Bloom the gelatin powder in cold water for 5 minutes. This softens the gelatin and allows it to dissolve properly.
- Incorporate Gelatin: Add the bloomed gelatin to the chocolate mixture and stir until dissolved.
- Cool the Glaze: Let the glaze cool slightly until it thickens enough to coat the back of a spoon. This is important for achieving the perfect consistency for pouring.
- Glaze the Cake: Remove the cake from the refrigerator. Carefully pour the mirror glaze over the top of the mousse, allowing it to drip down the sides. A rotating cake stand can be helpful for achieving an even glaze.
- Final Chill: Refrigerate for another 30 minutes to allow the glaze to set completely.
- Garnish and Serve: Garnish with dark chocolate shavings before serving.
Expert Tips & Serving Suggestions for Your Dream Cake
Want to take your Decadent Chocolate Dream Cake to the next level? Here are some expert tips and serving suggestions:
Advanced Preparation Tips:
- Make the Cake Ahead: The chocolate cake base can be made a day or two in advance and stored tightly wrapped at room temperature.
- Prepare the Mousse: The chocolate mousse can also be made a day in advance and stored in the refrigerator.
- Assemble Just Before Serving: While the mousse and cake can be prepared in advance, it’s best to assemble the cake and apply the mirror glaze on the day you plan to serve it for the freshest taste and appearance.
Serving Suggestions:
- Classic Pairing: Serve chilled with a scoop of vanilla ice cream or a dollop of whipped cream. The cool creaminess complements the rich chocolate flavors perfectly.
- Berrylicious: Garnish with fresh berries, such as raspberries or strawberries, for a touch of acidity that balances the sweetness.
- Coffee Kick: Serve with a cup of strong coffee or espresso to enhance the chocolate flavor.
Storage Recommendations:
- Refrigerate: Store leftover cake in an airtight container in the refrigerator for up to 3 days.
- Freezing: While the cake can be frozen, the mirror glaze may lose some of its shine and texture. If you do freeze it, wrap it tightly in plastic wrap and then foil. Thaw in the refrigerator overnight before serving.
Reheating Techniques:
This cake is best served chilled, so reheating is not recommended.
Chef’s Secret:
To ensure a perfectly smooth mirror glaze, strain it through a fine-mesh sieve before pouring it over the cake. This will remove any lumps and create a flawlessly glossy finish. This small step makes a huge difference in the final presentation!
Ready to try this incredible recipe? We’d love to hear about your experience! Share your photos and feedback in the comments below or on social media.
Frequently Asked Questions About the Chocolate Dream Cake
1. Can I use a different type of chocolate for the mousse?
Yes, you can definitely experiment with different types of chocolate for the mousse. Milk chocolate will create a sweeter, milder mousse, while dark chocolate will result in a richer, more intense flavor. Just be sure to adjust the sugar level accordingly to your taste preferences. Also, the higher the cacao percentage, the more stable and less prone to melting your mousse will be.
2. I don’t have a vanilla bean. Can I still make the mousse?
Absolutely! While a vanilla bean adds a wonderful depth of flavor, you can substitute it with 1-2 teaspoons of high-quality vanilla extract. Add the vanilla extract to the hot cream mixture after you remove it from the heat. Keep in mind that the flavor won’t be quite as complex, but it will still be delicious. Alternatively, you can also use vanilla bean paste for a slightly closer approximation to the real deal.
3. My mirror glaze is too thick/thin. What do I do?
If your mirror glaze is too thick, add a tablespoon or two of water and stir until it reaches the desired consistency. If it’s too thin, simmer it over low heat for a few minutes, stirring constantly, until it thickens slightly. Remember that the glaze will thicken as it cools, so don’t overdo it.
4. Can I make this cake gluten-free?
Yes, you can adapt this recipe to be gluten-free by using a gluten-free all-purpose flour blend. Look for a blend that contains xanthan gum, as this will help to bind the ingredients and provide structure. You may also need to add a bit more liquid, as gluten-free flours tend to absorb more moisture. Monitor the batter consistency and add a tablespoon of milk or water at a time until it resembles the original batter.
5. Can I make this cake vegan?
Making this cake vegan requires a few substitutions. Use a plant-based milk alternative (such as almond or soy milk) in place of buttermilk. You can make vegan buttermilk by adding 1 tablespoon of lemon juice or vinegar to 1 cup of plant-based milk. Replace the egg with a flax egg (1 tablespoon ground flaxseed mixed with 3 tablespoons water, let sit for 5 minutes). Use vegan chocolate and a vegan cream alternative for the mousse. For the mirror glaze, ensure the gelatin is replaced with a vegan alternative like agar-agar. Be aware that the texture and flavor may differ slightly from the original recipe.
6. How do I prevent the cake from sticking to the pan?
Greasing and flouring the cake pan is crucial to prevent sticking. Use a solid vegetable shortening or baking spray to grease the pan thoroughly, making sure to get into all the nooks and crannies. Dust the pan with flour (or cocoa powder for a chocolate cake) and tap out any excess. For extra insurance, you can line the bottom of the pan with parchment paper.
7. My cake is dry. What went wrong?
A dry cake can be caused by several factors, including overbaking, using too much flour, or not enough liquid. Make sure to measure your ingredients accurately, especially the flour. Avoid overmixing the batter, as this can develop the gluten and result in a tough, dry cake. Check the cake for doneness at the minimum baking time to avoid overbaking. An oven thermometer can also help ensure your oven temperature is accurate.
8. How do I get a smooth, even mirror glaze?
To achieve a smooth, even mirror glaze, make sure the glaze is at the right consistency – thick enough to coat the back of a spoon but still pourable. Strain the glaze through a fine-mesh sieve to remove any lumps. Pour the glaze over the chilled cake in one smooth, even motion. A rotating cake stand can be helpful for achieving an even coating. Avoid touching the glaze once it’s poured, as this can create imperfections.
9. Can I add other flavors to the mousse?
Absolutely! Feel free to experiment with different flavor extracts, such as peppermint, orange, or almond. You can also add a tablespoon or two of your favorite liqueur to the mousse for an extra kick (although we aren’t using alcohol in this recipe). Another option is to add a pinch of espresso powder to enhance the chocolate flavor.
10. How long does the mirror glaze last?
The mirror glaze will maintain its shine and texture for about 2-3 days when stored properly in the refrigerator. After that, it may start to dull slightly. To keep it looking its best, store the cake in an airtight container to prevent it from drying out.
11. Can I use a different size cake pan?
Yes, you can use a different size cake pan, but you may need to adjust the baking time accordingly. If you use a smaller pan, the cake will be thicker and may require a longer baking time. If you use a larger pan, the cake will be thinner and may bake more quickly. Monitor the cake closely and adjust the baking time as needed.
12. Is it necessary to use gelatin in the mirror glaze?
Gelatin is what gives the mirror glaze its signature shine and allows it to set properly. While you can try using a vegetarian alternative like agar-agar, the results may not be exactly the same. Agar-agar can be a bit tricky to work with and may not produce as glossy a finish. If you’re looking for a truly mirror-like glaze, gelatin is the best option.
The Grand Finale: Your Decadent Chocolate Dream Cake Awaits!
Congratulations! You’ve made it to the end of this delicious journey. The Decadent Chocolate Dream Cake is more than just a recipe; it’s an invitation to create a memorable experience for yourself and those you share it with. From the moist chocolate cake base to the velvety vanilla bean mousse and the stunning mirror glaze, every element is designed to delight your senses.
Don’t be afraid to experiment with your own variations! Try different chocolate types, add a hint of spice, or incorporate your favorite fruits. The possibilities are endless. Remember, the most important ingredient is love.
Now, go ahead and bake your dream cake! And don’t forget to share your creations with us in the comments or on social media. We can’t wait to see what you come up with!
Decadent Chocolate Dream Cake with Hidden Vanilla Bean Infusion

Ingredients
- For the Chocolate Cake Base:
- 1 cup all-purpose flour
- 1/2 cup unsweetened cocoa powder
- 1 teaspoon baking soda
- 1/2 teaspoon baking powder
- 1/4 teaspoon salt
- 3/4 cup granulated sugar
- 1/2 cup vegetable oil
- 1 cup buttermilk
- 1 teaspoon vanilla extract
- 1 large egg
- For the Chocolate Mousse Filling:
- 1 cup heavy cream
- 8 ounces semi-sweet chocolate, finely chopped
- 1/4 cup granulated sugar
- 1 teaspoon vanilla extract
- 1 vanilla bean (for infusion)
- For the Mirror Glaze:
- 1/2 cup granulated sugar
- 1/4 cup water
- 1/3 cup unsweetened cocoa powder
- 1/4 cup heavy cream
- 1 teaspoon gelatin powder
- 2 tablespoons cold water
- For Garnish:
- 2 ounces dark chocolate, shaved
Directions
- 1. 1. Preheat oven to 350°F (175°C). Grease and flour a 9-inch round cake pan.
- 2. 2. In a large bowl, whisk together flour, cocoa powder, baking soda, baking powder, salt, and sugar.
- 3. 3. In a separate bowl, combine oil, buttermilk, vanilla extract, and egg. Add wet ingredients to dry ingredients and mix until just combined.
- 4. 4. Pour batter into the prepared cake pan and bake for 30-35 minutes, or until a toothpick inserted into the center comes out clean. Let cool completely.
- 5. 5. While the cake cools, prepare the chocolate mousse: Heat heavy cream and sugar in a saucepan over medium heat. Split vanilla bean lengthwise, scrape seeds, and add both pod and seeds to the cream. Bring to a simmer, then remove from heat and let steep for 15 minutes. Remove vanilla bean pod.
- 6. 6. Pour hot cream over chopped chocolate in a bowl. Let sit for 1 minute, then whisk until smooth and glossy. Add vanilla extract.
- 7. 7. Allow the mousse to cool slightly, then pour over the cooled chocolate cake base. Refrigerate for at least 4 hours, or preferably overnight, to set.
- 8. 8. Prepare the mirror glaze: In a saucepan, combine sugar, water, and cocoa powder. Bring to a boil, stirring constantly, until smooth. Remove from heat and stir in heavy cream.
- 9. 9. Bloom gelatin powder in cold water for 5 minutes. Add bloomed gelatin to the chocolate mixture and stir until dissolved.
- 10. 10. Let the glaze cool slightly until it thickens enough to coat the back of a spoon.
- 11. 11. Remove the cake from the refrigerator. Carefully pour the mirror glaze over the top of the mousse, allowing it to drip down the sides.
- 12. 12. Refrigerate for another 30 minutes to set the glaze.
- 13. 13. Garnish with dark chocolate shavings before serving.
- 14. Tip/Pairing:
- 15. Serve chilled with a scoop of vanilla ice cream or a dollop of whipped cream.
- 16. Chef Tip:
- 17. To ensure a smooth mirror glaze, strain it through a fine-mesh sieve before pouring over the cake. This will remove any lumps and create a perfectly glossy finish.