Welcome back to the kitchen! Today, we’re tackling a dessert dilemma I’ve heard from so many of you: the dreaded soggy cake layer in layered, no-bake treats. You know the kind – beautiful layers when you start, but after chilling, the cake just turns into a mushy, unappetizing mess. Ugh!
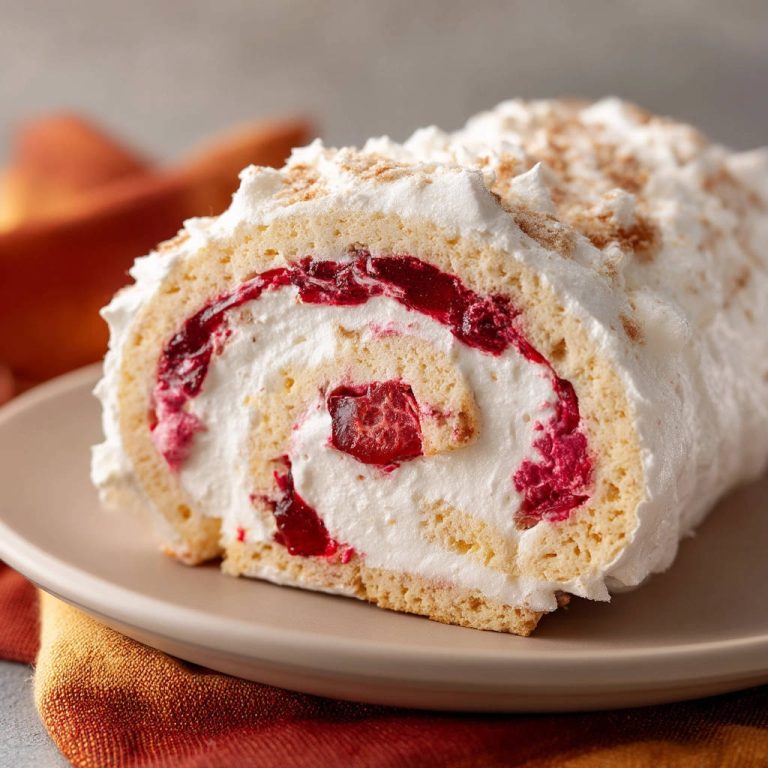
Well, I’m thrilled to share that I’ve finally cracked the code on how to create a stunning, delicious, no-bake layered berry dessert where the cake stays tender, not watery. This isn’t some overly complicated culinary magic; it comes down to one key trick that ensures a perfect texture balance every single time. Say hello to the Easy Berry Swirl Delight, your new go-to stress-free dessert.
Reasons This Easy Berry Swirl Delight is a Keeper
Why should this recipe jump to the top of your “must-make” list? Let me count the ways!
- Lightning Fast Prep: Seriously, we’re talking 20 minutes from start to layering. That’s less time than it takes to decide what movie to watch!
- No Oven Required: Keep your kitchen cool, especially during warmer months. This is a true no-bake wonder, just like our popular Easy No-Bake Chocolate Cream Loaf.
- Foolproof Texture: The core problem of sogginess is completely solved with a simple technique I’ll share. Get ready for tender cake and creamy filling.
- Crowd-Pleaser: The combination of rich cream cheese, fluffy whipped topping, and vibrant berry swirl is universally loved.
- Simple Ingredients: You won’t need to hunt for exotic items; everything is readily available at your local grocery store.
- Beautiful Presentation: The swirl effect makes this dessert look much fancier than the effort involved!
Gathering Your Ingredients for This Delightful Dessert
Creating this dreamy Easy Berry Swirl Delight starts with selecting the right components. Each ingredient plays a specific role in building those delicious layers and achieving that coveted perfect texture. Think of these as the building blocks for your no-soggy success!
For the structural base of our dessert, you’ll need your choice of cake. The recipe calls for:
- 1 package ladyfingers or pound cake, sliced: This is your foundation layer. Ladyfingers are light and designed to absorb moisture gracefully without becoming mushy. They offer a slightly crisp start that softens just right. Sliced pound cake is another excellent option, providing a richer, more substantial base. The key is having a readily available, pre-baked cake component ready to go.
Next up, the star of our creamy, dreamy filling. This is where the magic happens:
- 2 blocks (8 ounces each) cream cheese, softened: Using full-fat cream cheese is essential for achieving a rich, stable, and thick creamy layer. Make sure it’s fully softened at room temperature before you start mixing. This is crucial for achieving a smooth consistency without lumps.
- 1 cup powdered sugar: Also known as confectioners’ sugar, this fine sugar dissolves easily into the cream cheese, ensuring a silky smooth texture. It adds just the right amount of sweetness to balance the tang of the cream cheese and the tartness of the berries.
- 1 teaspoon vanilla extract: A touch of pure vanilla extract elevates the flavors, adding warmth and depth to the creamy layer. Don’t skip this!
- 1 container (8 ounces) whipped topping, thawed: This ingredient lightens the heavy cream cheese mixture, making it wonderfully airy and easy to spread. Using a thawed store-bought whipped topping makes this step incredibly simple. Ensure it’s fully thawed but still cold from the refrigerator for the best result.
Finally, the vibrant pop of color and flavor that gives our dessert its name:
- 1 can (21 ounces) cherry or raspberry pie filling or fruit sauce: The convenience of canned pie filling or fruit sauce is unbeatable here. These options are typically thicker than homemade fruit sauces or fresh berries, which is a key factor in preventing excess moisture from seeping into your cake layers. Cherry and raspberry are classic pairings, but feel free to experiment with other thick fruit fillings like blueberry or strawberry if you prefer, keeping that consistency in mind. The thickness provides a gorgeous swirl without introducing too much liquid.
Gather all these simple items, and you’re well on your way to creating a beautiful and perfectly textured dessert!
Crafting Your Easy Berry Swirl Delight: Step-by-Step
Now that you have your simple lineup of ingredients ready to go, let’s assemble this beauty. The process is incredibly straightforward, and I’ll walk you through each step, highlighting the little details that make all the difference in achieving that perfect, non-soggy result.
-
Prepare the Creamy Base: Start by placing your two blocks of softened cream cheese into a large mixing bowl. You want to beat this until it’s completely smooth and free of any lumps. Using an electric mixer on medium speed works wonders here, ensuring a truly luxurious texture. Getting it smooth now is the first step to a gorgeous, spreadable cream layer.
-
Sweeten and Enhance: Once the cream cheese is smooth, gradually add the powdered sugar, a little at a time, while continuing to beat. This allows the sugar to fully incorporate without creating a dusty cloud or leaving grainy bits. Follow this with the vanilla extract. Keep beating until the mixture is thoroughly combined, thick, and wonderfully creamy. This forms the rich backbone of your filling.
-
Lighten Things Up (Carefully!): Here’s a crucial step for texture! Gently fold in the thawed whipped topping. Use a spatula and a gentle hand, using an up-and-over motion, rather than beating it in. The goal is to incorporate the whipped topping without deflating it. Continue folding just until you see no more white streaks of whipped topping and the mixture is uniform. The consistency should be smooth and thick – this thickness is absolutely key to preventing the liquid from the fruit and the potential moisture from the whipped topping from migrating into your cake layer too quickly. Take your time with this step; it truly makes a difference!
-
Lay the Foundation: Grab your 9×13 inch baking dish. Arrange a single layer of ladyfingers or sliced pound cake on the bottom of the dish. Don’t worry if they don’t fit perfectly; you’ll likely need to break some pieces to fill in any gaps and create a relatively solid cake layer across the entire bottom of the pan.
-
Spread the Creamy Goodness: Now, take half of your beautifully prepared cream cheese mixture. Carefully spoon dollops of it over the cake layer, then gently spread it evenly across the top. Take care not to press down too hard on the cake layer below. You want a nice, uniform blanket of creaminess.
-
Add the Berry Burst: Spoon about half of your chosen fruit filling (cherry or raspberry are fantastic!) over the cream layer. If you want that signature “swirl” look, take a knife or a spoon and gently swirl the fruit filling through the cream layer. Don’t overmix; just a few gentle passes will create lovely ribbons of color and flavor. This step adds visual appeal and that essential fruity taste.
-
Repeat the Layers: Time to build the second tier! Add another layer of ladyfingers or sliced cake on top of the fruit and cream. Again, break pieces to fit and cover the area. Then, spread the remaining cream cheese mixture evenly over this second cake layer. Finish by spooning the remaining fruit filling on top, swirling again if you like.
-
Prepare for Chilling: Once your layers are complete and looking gorgeous, cover the baking dish tightly with plastic wrap. Ensure the wrap is touching the surface of the dessert or creating a good seal around the edges of the dish to prevent any unwanted odors from the refrigerator from affecting its flavor, and to minimize moisture loss (or gain!).
-
The Secret to No Soggy Cake: Chill, Chill, Chill! This is THE trick I mentioned earlier. Place the covered dish in the refrigerator and chill it for at least 4 hours. However, for the absolute best texture, I strongly recommend chilling it overnight. This extended chilling time is magical! It allows the cream cheese mixture to set up firmly and stabilize, creating a barrier. Crucially, it also gives the cake layers just enough time to soften to that perfect, tender, cake-like consistency without becoming waterlogged or mushy. Rushing this step is the most common reason for soggy no-bake desserts, so be patient! This is the key to your success.
-
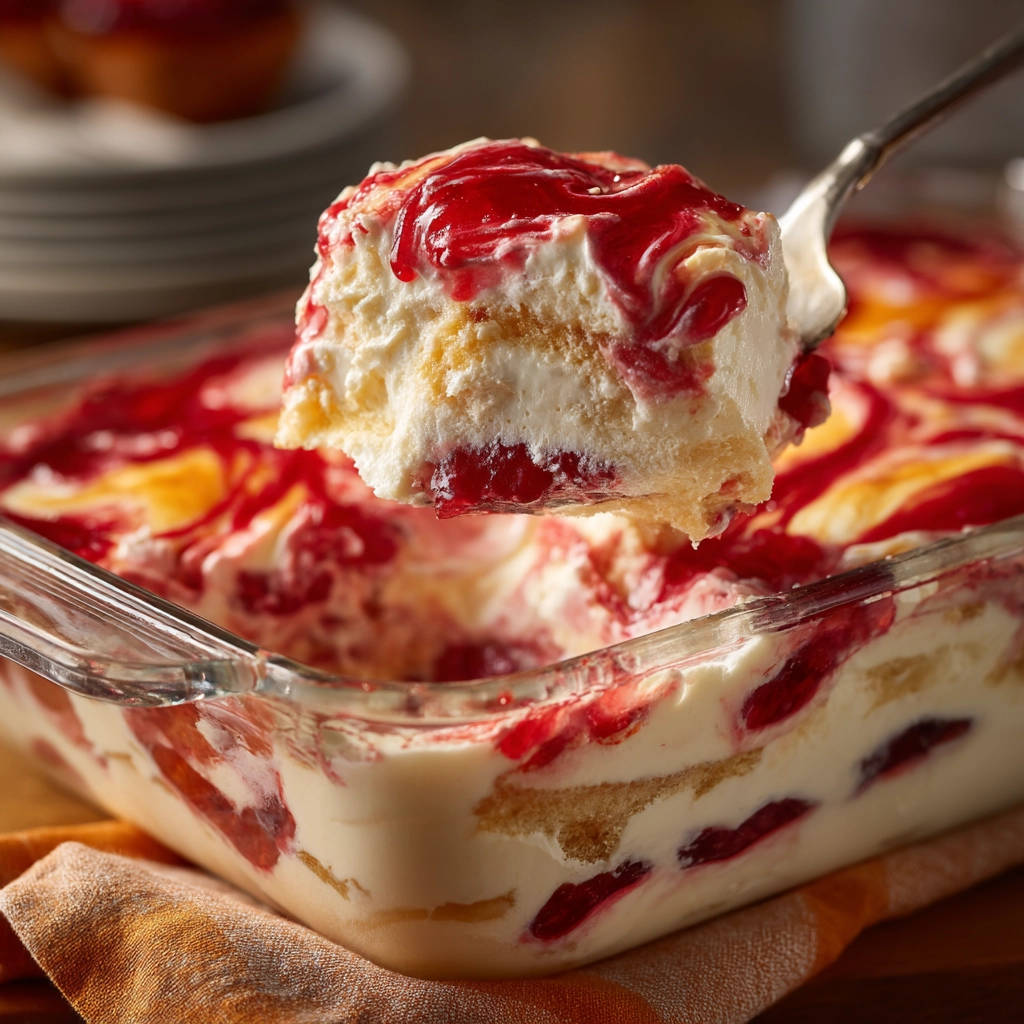
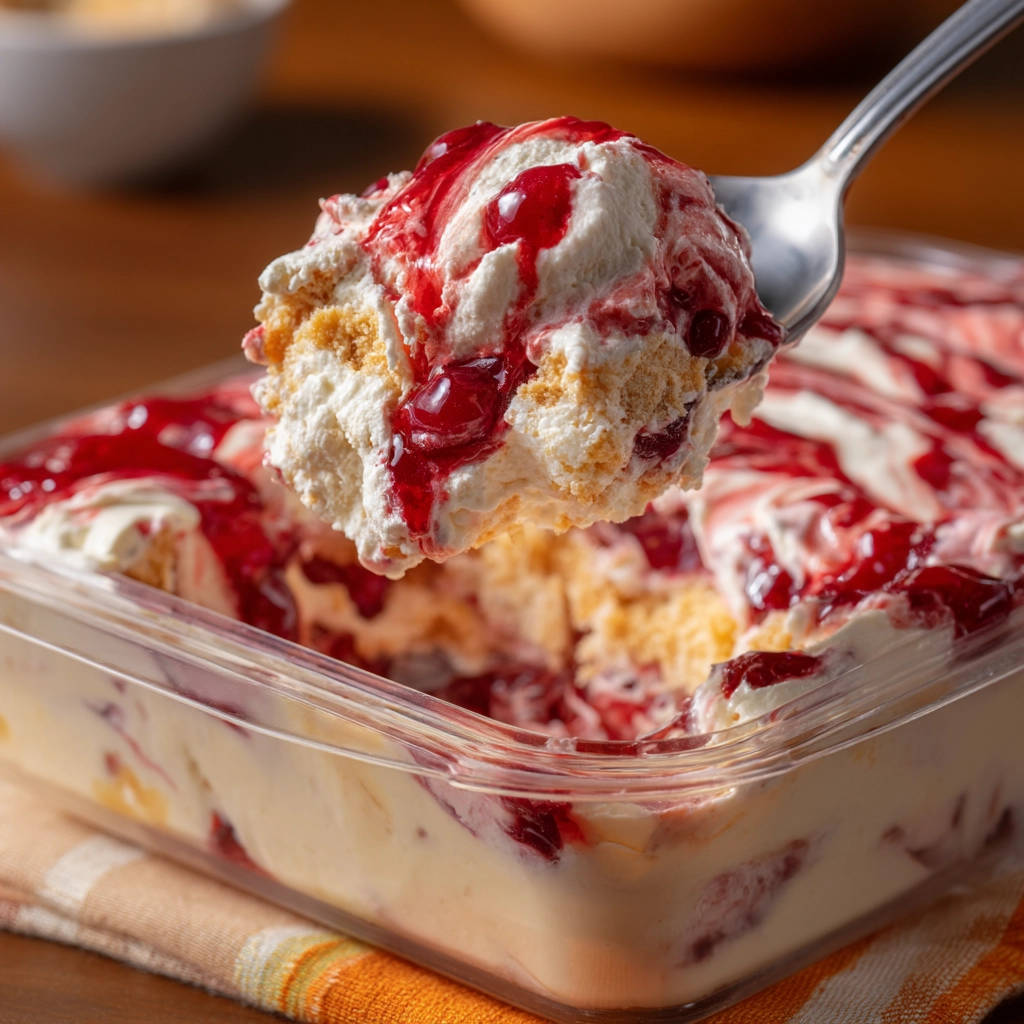
Serve Cold and Enjoy: Once properly chilled, your Easy Berry Swirl Delight is ready! Scoop individual portions from the dish and serve them cold. The layers will be distinct, the cream will be set, the cake tender, and the berry swirl vibrant and delicious.
Tips for Perfect Easy Berry Swirl Delight Every Time
Making this no-bake layered dessert is quite simple, but a few expert tips can elevate your creation from delicious to absolutely perfect. Keep these in mind as you assemble your treat:
- Cream Cheese Temperature is Key: Ensure your cream cheese is genuinely softened to room temperature. Cold cream cheese will result in a lumpy mixture, which won’t spread smoothly and can compromise the texture of your creamy layer.
- Gentle Folding Wins: When incorporating the whipped topping, be as gentle as possible. Overmixing will deflate the whipped topping, making your cream layer less airy and potentially contributing to sogginess. Think “folding,” not “beating.”
- Thick Fruit Filling is Your Friend: While fresh fruit is lovely, canned pie filling or fruit sauce is specifically formulated to be thick and gelled. This reduces the amount of free liquid introduced into your dessert, which is a major factor in preventing soggy cake layers. Stick to the recommendations in the recipe for the best result.
- Don’t Skimp on Chilling Time: I cannot stress this enough! The 4 hours is a minimum, but overnight chilling is truly transformative. It allows the flavors to meld and, more importantly, gives the structure of the dessert time to stabilize and the cake to absorb just the right amount of moisture.
- Cover Tightly: Properly covering the dish during chilling prevents the surface from drying out and forming a skin, while also protecting it from absorbing refrigerator odors.
- Clean Cuts (Optional): If you want cleaner scoops or slices, you can briefly run a knife under hot water and dry it before cutting each portion. However, this dessert is typically scooped directly from the pan for a more rustic look.
What to Serve With Your Berry Delight
This Easy Berry Swirl Delight is fantastic all on its own, a complete dessert experience with its creamy, cakey, and fruity layers. However, if you’re looking to complement it or serve it as part of a larger spread, here are a few ideas:
For an extra touch of decadence, you could add a little extra whipped topping or a sprinkle of fresh berries on top of each serving. A light dusting of powdered sugar can also add a lovely visual finish.
If you’re serving this dessert for a special occasion or brunch, pairing it with a simple beverage like coffee or tea is classic. For something refreshing, a glass of milk or even sparkling cider would be delightful.
While this dessert is the star, if you were building a dessert table, consider complementing the berry flavors with something chocolatey, perhaps mini portions of a Decadent Chocolate Layer Cake or some easy Easy Chocolate Clusters for contrast.
Your Easy Berry Swirl Delight Questions Answered (FAQ)
Let’s address some common questions you might have about making this Easy Berry Swirl Delight.
Can I use fresh berries instead of canned pie filling?
While fresh berries are wonderful, for this specific recipe designed to prevent sogginess, it’s highly recommended to stick to canned pie filling or fruit sauce. These products contain thickeners that help manage the moisture content. Fresh berries will release too much liquid as the dessert chills, almost guaranteeing a soggy cake layer.
What if my cream cheese isn’t soft enough?
If you forget to take your cream cheese out ahead of time, you can try softening it quickly. Cut the blocks into smaller cubes and let them sit at room temperature for 15-20 minutes, or place the unwrapped blocks on a microwave-safe plate and microwave on 50% power for 10-15 second intervals, just until slightly soft to the touch (be careful not to melt it!).
How long will this dessert keep in the refrigerator?
Properly covered, the Easy Berry Swirl Delight will keep well in the refrigerator for 3-4 days. The flavors will continue to meld, and the texture should remain fantastic thanks to the proper chilling technique.
Can I freeze this dessert?
Freezing layered desserts like this can be tricky because the texture of the cream cheese mixture and the softened cake can change upon thawing, sometimes becoming watery or grainy. While technically possible, it’s best enjoyed fresh from the refrigerator after its initial chill time for optimal texture.
Can I use a different flavor of pie filling?
Absolutely! Cherry and raspberry are suggested in the recipe, but you could easily substitute with other thick fruit pie fillings like blueberry, strawberry, or even apple. The principle remains the same: ensure the filling is thick enough not to introduce excessive liquid.
Why did my cake layer still get mushy?
The most common culprit is insufficient chilling time. The extended chill (preferably overnight) is critical for the cream layer to set and the cake to absorb just the right amount of moisture. Another reason could be using a fruit filling that was too thin or trying to use fresh fruit. Ensure your cream cheese mixture was thick after folding in the whipped topping as well.
Enjoy Your Homemade Easy Berry Swirl Delight!
There you have it – the secret weapon against soggy no-bake cake layers! This Easy Berry Swirl Delight is a true triumph of simplicity and technique, delivering beautiful layers, creamy texture, and bright berry flavor without the common pitfalls.
It’s the perfect dessert for potlucks, holidays, weeknight cravings, or anytime you need a stunning treat without turning on the oven. Give it a try, practice that crucial chilling step, and prepare to be amazed by the perfectly tender cake and delightful layers.
If you make this recipe, I’d absolutely love to hear about it! Leave a comment below and let me know how it turned out and what fruit filling you chose. Happy baking (or should I say, happy no-baking)!
Easy Berry Swirl Delight

Ingredients
- 1 package ladyfingers or pound cake, sliced
- 2 blocks (8 ounces each) cream cheese, softened
- 1 cup powdered sugar
- 1 teaspoon vanilla extract
- 1 container (8 ounces) whipped topping, thawed
- 1 can (21 ounces) cherry or raspberry pie filling or fruit sauce
Directions
- In a large bowl, beat the softened cream cheese until smooth.
- Gradually add the powdered sugar and vanilla extract, beating until well combined and creamy.
- Gently fold in the thawed whipped topping until no streaks remain. Ensure the mixture is smooth and thick. This is key to preventing sogginess.
- Arrange a single layer of ladyfingers or cake slices in the bottom of a 9×13 inch baking dish, breaking pieces to fit if necessary.
- Carefully spread half of the cream cheese mixture evenly over the cake layer.
- Spoon about half of the fruit filling over the cream layer, swirling it gently with a knife or spoon if desired.
- Repeat the layers: a second layer of cake, the remaining cream cheese mixture, and the remaining fruit filling swirled on top.
- Cover the dish tightly with plastic wrap.
- This is the trick for perfect texture: Chill in the refrigerator for at least 4 hours, or preferably overnight. The long chilling time allows the cream mixture to set firmly and the cake layers to soften to a tender consistency without becoming mushy. Do not rush this step!
- Scoop and serve cold.