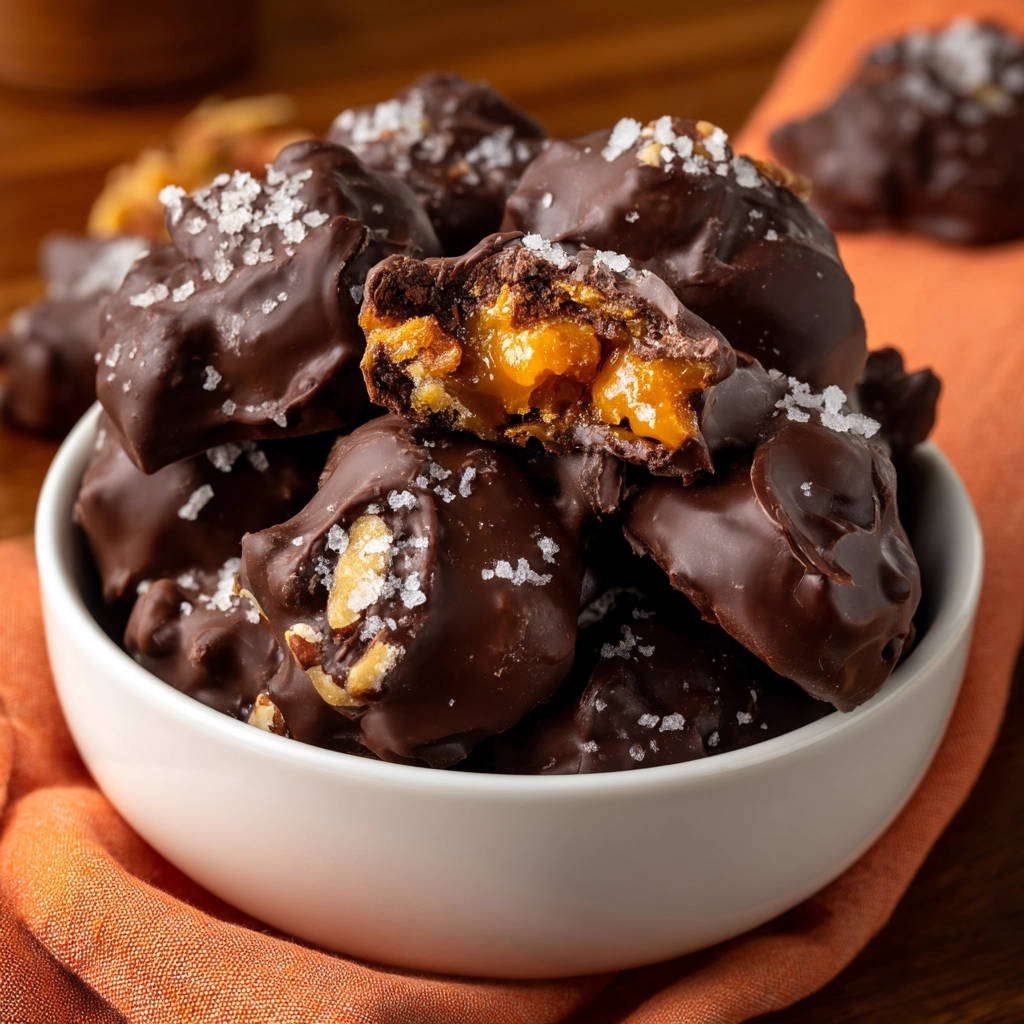
There’s something truly magical about biting into a homemade candy creation. That initial snap of chocolate, the satisfying crunch of nuts, and then – the moment of truth – the perfect, soft, chewy caramel that stretches just right. It’s a symphony of textures and flavors that can be absolutely divine!
But if you’ve ever tried making chocolate-covered caramel clusters before, you know the potential heartbreak. Sometimes, that beautiful caramel layer decides to stage a rebellion, turning hard, brittle, and frankly, a bit disappointing instead of wonderfully gooey and yielding.
Trust me, I’ve been there! After numerous batches that were more “caramel snap” than “caramel chew,” I finally cracked the code. There’s a simple, yet crucial, trick that guarantees those lovely centers stay perfectly soft and gooey every single time. And I’m so excited to share it with you today in this guide to making the most delicious easy chocolate clusters!
Why You’ll Fall in Love with These Gooey Chocolate Clusters
Beyond solving the age-old hard caramel dilemma, these easy chocolate clusters are destined to become a staple in your treat repertoire. Why, you ask?
- Effortlessly Easy: Seriously, the process is incredibly straightforward, requiring no special candy-making skills.
- Guaranteed Gooeyness: The secret technique we’ll cover ensures that perfect, soft caramel center every single time. No more brittle disappointment!
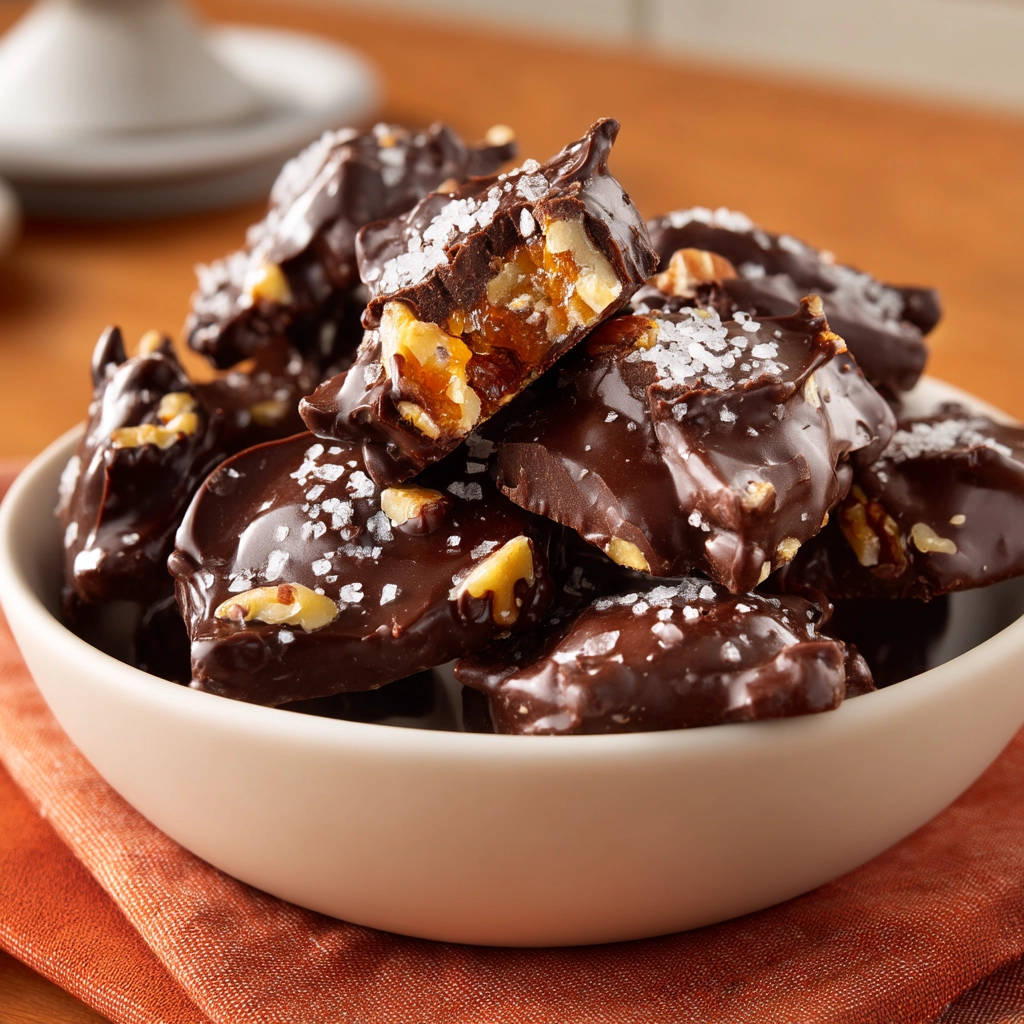
- Perfect Balance: They hit all the right notes – rich chocolate, crunchy nuts, and that unforgettable chewy caramel with a hint of sea salt.
- Versatile: Great for gifting, holiday trays, parties, or just a little pick-me-up sweet treat any day of the week.
- Quick to Make: While there’s chilling time involved, the active hands-on time is surprisingly minimal.
These easy chocolate clusters truly deliver on taste, texture, and simplicity. Ready to ditch the hard caramel blues forever?
Gathering Your Sweet Building Blocks: Ingredients for Gooey Chocolate Clusters
One of the best things about this recipe is how few ingredients you need to create such a luxurious-tasting treat. Each component plays a vital role in building that perfect bite – from the gooey heart to the chocolatey shell.
Here’s what you’ll need:
- Soft Chewy Caramels: You’ll need 1 pound of individually wrapped soft, chewy caramels. The key here is soft caramels to begin with. These are the foundation of our gooey center, so choose a brand you know is reliably soft.
- Milk or Heavy Cream: Just 2 tablespoons of either will do the trick. Adding a touch of liquid helps the caramels melt smoothly and, more importantly, helps maintain their soft texture once cooled. Heavy cream will give a slightly richer result, but milk works perfectly well too.
- Chopped Pecans or Walnuts (or a mix): You’ll need 4 cups total. Chopped nuts add that essential crunch and nutty flavor contrast to the sweet caramel and chocolate. Pecans offer a buttery richness, while walnuts have a slightly more earthy note. Feel free to use your favorite or combine them! Ensure they are roughly chopped – not too fine, as you want noticeable pieces.
- Flaky Sea Salt: A tablespoon might sound like a lot, but hear me out! Sprinkling flaky sea salt over the finished clusters provides that irresistible sweet and salty combination that elevates these from simple candy to something truly special. Flaky sea salt dissolves slower than table salt, providing little bursts of salinity. Don’t skip this!
- Melting Chocolate or Chocolate Chips: You’ll need 1 pound. Choosing the right chocolate is key for a smooth coating. Melting chocolate (like chocolate almond bark or confectionery coating) is designed to melt easily and set smoothly without needing tempering. Chocolate chips can work, but they contain stabilizers that can sometimes make the melted chocolate a bit thicker and harder to work with for dipping. If using chocolate chips, high-quality ones will yield better results.
That’s it! Simple, right? These foundational ingredients are all you need to create a batch of delectable, gooey chocolate clusters.
Crafting Your Perfect Chocolate Clusters: Step-by-Step Guidance
Now for the fun part – bringing it all together! The process is quite simple, but paying attention to a couple of key steps, especially how you melt the caramel, will ensure your success and that coveted gooey center.
- Prepare Your Workspace: Start by getting your landing zone ready for the finished clusters. Line a large baking sheet with parchment paper. This prevents sticking and makes cleanup a breeze. Having this ready before you melt the caramel is essential because you’ll need to work relatively quickly.
- Initiate the Caramel Transformation: Place your 1 pound of soft chewy caramels into a heatproof bowl. Add the 2 tablespoons of milk or heavy cream to the bowl with the caramels. This liquid is crucial for the gooey texture we’re aiming for!
- Melt the Caramel Gently (The Secret’s Out!): Here is the absolute key to a gooey center: melt the caramel gently. You have two excellent options. You can place the heatproof bowl over a small pot of simmering water (a classic double boiler setup). Ensure the bottom of the bowl doesn’t touch the water, as the steam is what does the work. Stir occasionally until the caramels are completely smooth and glossy. Alternatively, you can microwave the mixture in 30-second intervals, stirring thoroughly after each interval. The critical part is to use low, consistent heat and avoid high heat. High heat can cause the sugar in the caramel to seize or become brittle when it cools, exactly what we want to avoid! Continue until every last bit of caramel is melted and you have a silky smooth mixture.
- Incorporate the Crunch: Once your caramel is perfectly melted and smooth, remove it immediately from the heat source. Add the 4 cups of chopped pecans or walnuts (or your chosen nut mix) to the bowl. Stir everything together with a sturdy spoon or spatula until the nuts are completely coated in the warm, melted caramel. You should see a rich, sticky, nutty mass forming.
- Form the Clusters: Now, you need to work relatively quickly before the caramel cools and becomes too firm. Using two spoons, drop spoonfuls of the caramel-nut mixture onto your prepared parchment-lined baking sheet. Aim to form distinct clusters. The size is up to you, but try to make them relatively uniform so they chill and coat evenly later.
- Give Them a Chill: Place the baking sheet with your freshly formed clusters into the refrigerator. Let them chill for about 15 to 20 minutes. You want them to be firm enough to handle without losing their shape or falling apart when you dip them into the chocolate. Don’t let them get rock hard yet.
- Prepare the Chocolate Bath: While your caramel clusters are chilling, it’s time to melt the chocolate. Just like the caramel, melting the chocolate gently is best for a smooth, dippable consistency and a nice finish. Use a double boiler setup (bowl over simmering water) or microwave the chocolate in 30-second bursts, stirring well after each, until it’s completely smooth and glossy. Avoid overheating the chocolate, as this can cause it to seize or burn.
- Dip and Coat: Take the chilled caramel clusters out of the refrigerator. Using a fork, carefully drop one cluster at a time into the melted chocolate. Submerge it completely, ensuring it’s fully coated. Lift the cluster out with the fork, letting any excess chocolate drip back into the bowl. This helps prevent a thick “foot” of chocolate around the base. Gently slide the coated cluster back onto the parchment-lined baking sheet.
- Sprinkle with Salt (The Finishing Touch): Immediately after placing each chocolate-coated cluster back on the parchment paper, sprinkle the top with a pinch of flaky sea salt. The melted chocolate acts like glue, holding the salt in place as it sets. The salt provides that beautiful visual appeal and, of course, that necessary salty counterpoint to the sweetness.
- Let Them Set: Allow the chocolate clusters to set completely. You can do this at room temperature, which might take an hour or two depending on how warm your kitchen is, or speed things up by placing them back in the refrigerator until the chocolate is firm, usually 30-60 minutes. Once set, peel them off the parchment paper and store them in an airtight container at room temperature.
And there you have it! Beautiful, easy chocolate clusters with that perfect, guaranteed gooey caramel center, ready to be enjoyed.
Expert Tips for the Gooey Goodness
Even though these are “easy” chocolate clusters, a few insider tips can make the process even smoother and the results even more spectacular.
- Choosing Caramels: Not all soft caramels are created equal. Look for brands known for being quite soft and pliable right out of the wrapper. Supermarket bulk caramels or brands specifically labeled “soft chewy” are usually good candidates. Stiffer caramels will be harder to work with and may not achieve the desired gooeyness even with the milk/cream.
- Don’t Rush the Melt: As stressed in the steps, gentle heat is paramount for the caramel. If you see it starting to look grainy or stiffen up as it melts, you might be using heat that’s too high. Slow and steady wins the gooey race here.
- Chocolate Quality Matters: While chocolate chips work, using high-quality melting chocolate or a good couverture chocolate will give you the smoothest melt, easiest dipping, and best finish. If using chocolate chips, adding a tiny bit of vegetable shortening or coconut oil (about 1/2 to 1 teaspoon per pound of chocolate) can help thin it slightly for easier dipping.
- Work Smart, Not Just Fast: The caramel-nut mixture does firm up as it cools. If you find it getting too stiff to scoop easily, you can briefly return the bowl to the double boiler or microwave for just a few seconds to soften it slightly. Don’t overheat it, just loosen it enough to scoop.
- Nut Prep: Ensure your nuts are properly chopped. Pieces that are too large can make the clusters fall apart, while pieces that are too small might get lost. A rough chop works best. If you want extra flavor, you can lightly toast the nuts before adding them to the caramel – this enhances their nutty depth!
- Salt Selection: Flaky sea salt like Maldon or Fleur de Sel is ideal for the sprinkle. Its larger crystals and irregular shape look beautiful and provide that satisfying pop of saltiness. If you only have finer sea salt, use a bit less. Avoid regular table salt.
- Storage Sweet Spot: Store these clusters in an airtight container at room temperature. The refrigerator is great for setting the chocolate quickly, but prolonged refrigeration can sometimes make the caramel slightly firmer than ideal. Room temperature storage (as long as it’s not excessively hot) keeps the caramel wonderfully gooey. They should last a couple of weeks, though they rarely stick around that long!
Applying these simple tips will ensure your easy chocolate clusters turn out perfectly every single time!
What About Variations?
While the classic caramel and nut combination is divine, you can absolutely play with this recipe! Consider swapping out pecans and walnuts for roasted almonds, cashews, or even a mix of nuts and seeds like pumpkin seeds for a different texture and flavor profile. You could also try dipping them in white chocolate or even a combination of chocolates for a striped effect. For an extra touch, a drizzle of contrasting chocolate after the main coating has set can look beautiful.
If you enjoy experimenting with simple sweet treats, you might also love our guide to making easy Graham Cracker Toffee or perhaps even trying your hand at Salted Caramel Pecan Turtles which are a close cousin to these clusters!
Your Easy Chocolate Clusters Questions Answered (FAQ)
Got questions? I’ve got answers! Here are some common queries about making chocolate clusters, especially when aiming for that perfect gooey center.
Why did my caramel turn hard and brittle?
This is the most common issue, and almost always it’s because the caramel was melted using too high heat. High heat can cause the sugar molecules to crystalize or become brittle once they cool. The key is melting gently, either with a double boiler or slow, stirred bursts in the microwave, and adding that touch of milk or cream.
Can I use caramel sauce instead of chewy caramels?
No, this recipe specifically calls for soft, chewy caramels that are melted down. Caramel sauce has a different consistency and moisture level and will not set up correctly to hold the nuts in a cluster shape or maintain the desired chewy texture.
Do I have to use pecans or walnuts?
Not at all! While pecans and walnuts are classic for their texture and flavor complementary to caramel and chocolate, you can absolutely substitute other nuts like almonds, peanuts, or cashews. Just make sure they are chopped to a similar size.
Can I use chocolate chips instead of melting chocolate?
Yes, you can use chocolate chips. However, they may require a little more care to melt smoothly, and the final coating might be slightly less fluid for dipping. Melting them gently in 30-second intervals in the microwave, stirring well, or using a double boiler is crucial. Adding a small amount of vegetable shortening or coconut oil (about 1/2 to 1 teaspoon per pound) can help achieve a smoother consistency for dipping if needed.
How long do these chocolate clusters last?
When stored in an airtight container at cool room temperature, they should stay fresh and delicious for up to two weeks. For best texture, keep them out of excessive heat or direct sunlight.
Is the flaky sea salt necessary?
While you can technically omit the salt, I strongly recommend against it! The flaky sea salt provides a critical balance to the sweetness of the caramel and chocolate. That hint of saltiness enhances all the other flavors and makes these clusters truly addictive. Plus, the visual appeal is lovely.
Can I freeze chocolate clusters?
Yes, you can freeze them! Once fully set, place the clusters in a single layer on a baking sheet and freeze until solid. Then transfer them to an airtight, freezer-safe container or bag, layering with parchment paper if needed. They should keep for 2-3 months. Thaw them in the refrigerator or at cool room temperature before serving.
Enjoy Your Homemade Gooey Chocolate Clusters!
There you have it – the simple secret to creating easy chocolate clusters with a consistently gooey caramel center. This recipe is straightforward enough for a novice baker but yields results impressive enough for any special occasion (or just a quiet treat for yourself!). The combination of smooth chocolate, crunchy nuts, and that perfect chewy caramel with a touch of sea salt is truly irresistible.
Give these a try, and you’ll never go back to brittle caramel again! I’d love to hear how yours turn out and what you think of that amazing gooey center. Leave a comment below and let me know!
Happy candy making!
Easy Chocolate Clusters

Ingredients
- 1 pound soft chewy caramels
- 2 tablespoons milk or heavy cream
- 4 cups chopped pecans or walnuts (or a mix)
- 1 tablespoon flaky sea salt
- 1 pound melting chocolate or chocolate chips
Directions
- Prepare a baking sheet by lining it with parchment paper.
- Combine the soft chewy caramels and milk or cream in a heatproof bowl.
- Place the bowl over a small pot of simmering water (a double boiler method) or microwave in 30 second intervals, stirring after each, until the caramels are completely melted and smooth. This gentle melting is key to keeping the caramel soft later. Avoid high heat which can make it seize or harden.
- Remove the melted caramel from the heat and stir in the chopped nuts until they are fully coated.
- Working quickly, drop spoonfuls of the mixture onto the prepared baking sheet, forming clusters.
- Chill the clusters in the refrigerator for about 15-20 minutes, or until firm enough to handle.
- While the clusters are chilling, melt the chocolate. You can do this in a double boiler or carefully in the microwave, stirring frequently until smooth and glossy.
- Dip each chilled cluster into the melted chocolate, ensuring it’s fully coated. Lift with a fork, letting excess chocolate drip off, and return to the parchment-lined sheet.
- Immediately sprinkle the top of each chocolate-coated cluster with flaky sea salt before the chocolate sets.
- Let the clusters set completely at room temperature or in the refrigerator until the chocolate is firm. Store in an airtight container.