Welcome back to the blog! Today, I’m diving into a topic that has caused collective frustration for many of us busy snack-makers: the dreaded sticky energy bite mixture. You know the scene – you whip up a batch of what promises to be a healthy, portable snack, only to find yourself covered head-to-toe in a gooey, clingy mess when you try to roll them. It’s enough to make you want to buy those overpriced store-bought versions! But what if I told you there was one simple, foolproof trick that changes the game entirely? Get ready to say goodbye to sticky hands and hello to perfectly rollable easy energy bites!
For years, I struggled with this exact problem. My easy energy bites tasted great, but the rolling process was a sticky nightmare. Through trial and error (and a lot of hand washing), I discovered the secret, and it’s so simple you’ll wonder why you didn’t think of it sooner. This recipe incorporates that key step right into the process, guaranteeing bites that hold their shape and leave your hands clean. It’s a total game-changer for anyone who relies on these nutrient-packed little spheres to power through their day.
Why You’ll Absolutely Love This Easy Energy Bites Recipe
Beyond the magical no-stick trick, there are so many reasons these particular energy bites will become a staple in your kitchen:
- They are incredibly quick to prepare. We’re talking maybe 10 minutes of actual hands-on time before they head to chill.
- No baking required! That means a cool kitchen and less fuss. If you love no-bake treats as much as I do, you might also enjoy our easy no-bake chocolate cream loaf or simple chocolate clusters for different moods.
- Packed with wholesome ingredients like oats, seeds, and nut butter, they offer sustained energy without the sugar crash.
- They are easily customizable. While this base recipe is fantastic, you can totally make it your own.
- Perfect for meal prep. Make a batch on Sunday, and you’ll have grab-and-go snacks all week.
- Did I mention they aren’t sticky to roll? Seriously, this is the biggest win!
These little powerhouses are perfect for a pre-workout boost, a mid-afternoon slump buster, or even a quick breakfast on the run. They satisfy that craving for something sweet while providing valuable fiber, protein, and healthy fats.
Gathering Your Ingredients for These Perfectly Rollable Energy Bites
Crafting the ideal energy bite starts with selecting the right components. This recipe keeps things relatively simple, relying on pantry staples to build a foundation that’s both nutritious and delicious. Each ingredient plays a specific role in creating the perfect texture and flavor profile for our non-sticky bites.
The base structure comes from humble yet mighty rolled oats. Using rolled oats (sometimes called old-fashioned oats) is key here. They have a larger flake than instant oats and absorb liquid more slowly, which is essential for our chilling step. They provide body, fiber, and that classic chewy texture.
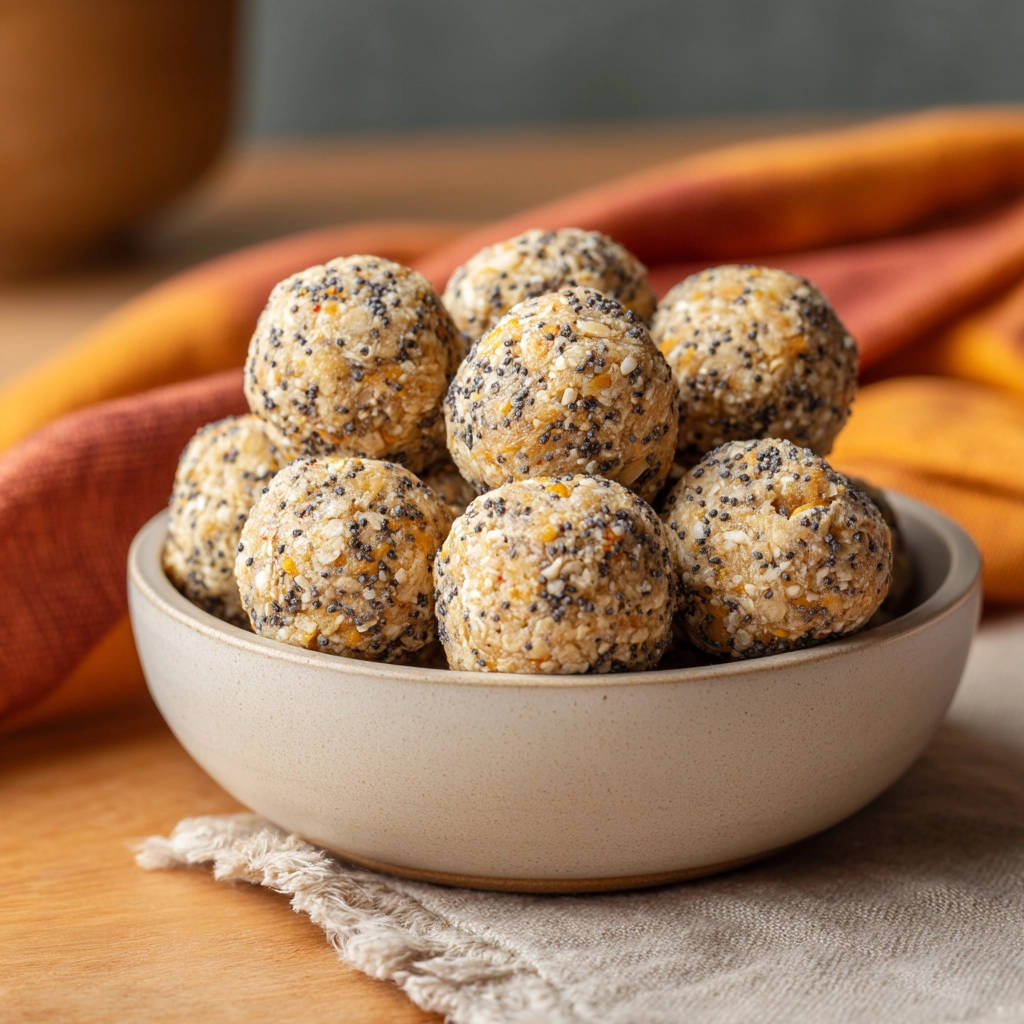
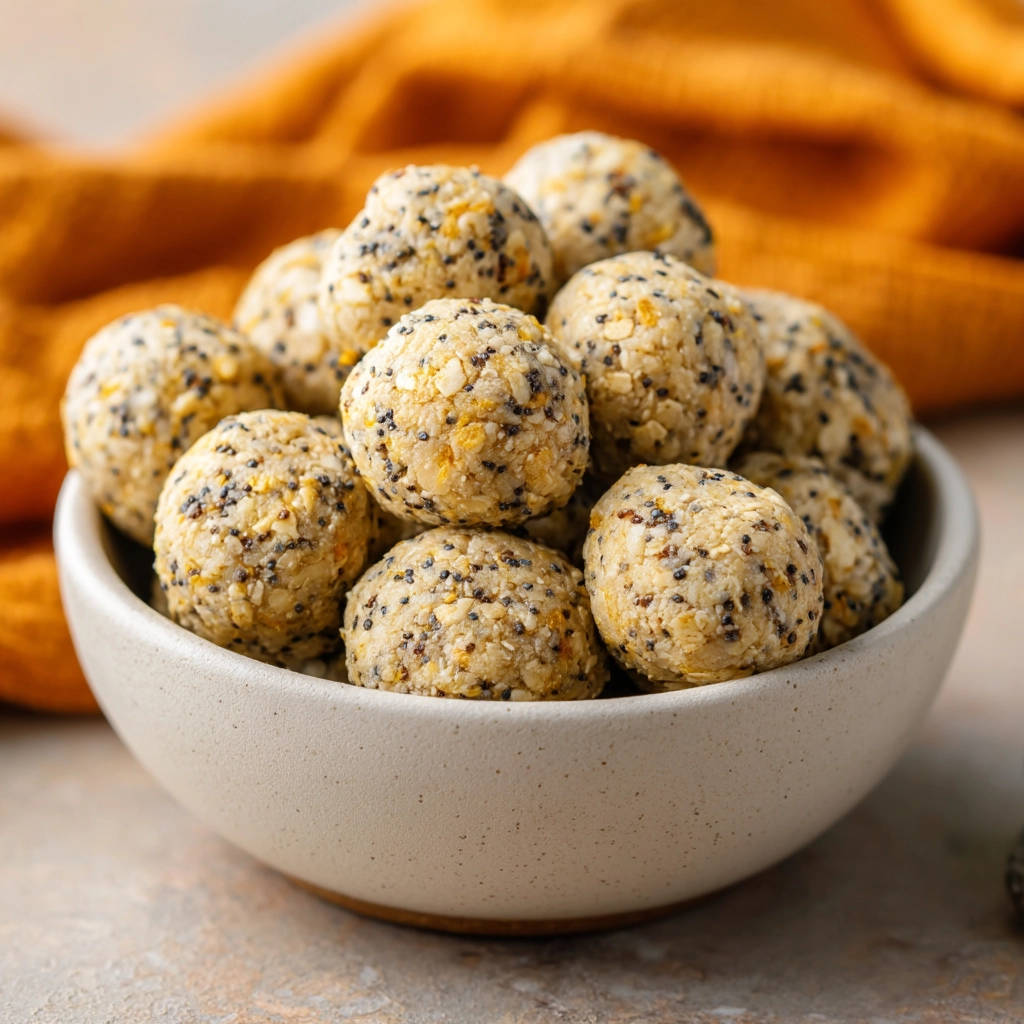
Next, we bring in the nutritional powerhouses: chia seeds and poppy seeds. Chia seeds are superstars, known for their ability to absorb liquid and form a gel, contributing to the binding while adding omega-3s and fiber. Poppy seeds add a delightful subtle crunch and unique speckled appearance. Together, the seeds boost the nutrient density significantly.
For a touch of subtle sweetness and texture, shredded unsweetened coconut is added. Unsweetened is preferred to avoid making the bites overly sugary, letting the natural flavors shine. Coconut also adds a lovely chewiness and a hint of tropical flavor that pairs wonderfully with the other ingredients.
The crucial binder that holds everything together and provides richness is natural peanut butter. Make sure to use natural peanut butter, which typically contains just peanuts and maybe salt, sometimes a little oil. Its natural oils and stickiness are essential for binding the dry ingredients. If you have a peanut allergy or prefer a different flavor, any natural nut butter like almond butter or cashew butter works beautifully here. The fat content in the nut butter is another key player in achieving that non-sticky consistency once chilled.
Finally, we add sweetness and moisture with maple syrup or agave nectar. Both are liquid sweeteners that help bind the ingredients and provide just the right amount of sweetness. You can adjust the amount slightly to your preference, but the specified amount is balanced for flavor and texture.
Here’s a quick list of what you’ll need:
- 1 cup rolled oats
- 1/4 cup chia seeds
- 2 tablespoons poppy seeds
- 1/4 cup shredded unsweetened coconut
- 1/2 cup natural peanut butter (or other preferred natural nut butter)
- 1/4 cup maple syrup or agave nectar
Ensuring your ingredients are fresh is always a good idea for the best flavor. Natural peanut butter can sometimes separate; just give it a good stir before measuring.
Crafting Your Easy Energy Bites: Step-by-Step to No More Stick!
Alright, let’s get to the fun part! Making these energy bites is incredibly straightforward, and with our special technique, it’s mess-free. Follow these steps carefully, paying extra attention to the chilling process, and you’ll be rolling perfect bites in no time.
-
Combine the Dry Foundation: Grab a spacious medium-sized mixing bowl. You’ll want plenty of room to stir easily. Add your dry ingredients first: the rolled oats, chia seeds, poppy seeds, and shredded unsweetened coconut. Give everything a good stir with a spoon or spatula to make sure these different components are well distributed. You want the seeds and coconut to be evenly mixed throughout the oats so each bite has a little bit of everything good.
-
Introduce the Wet Binders: Now it’s time to add the ingredients that will bring everything together. Spoon the natural peanut butter (or your chosen nut butter) directly into the bowl with the dry mixture. Follow that with the maple syrup or agave nectar. Don’t worry if it looks like a lot of liquid or sticky stuff compared to the dry ingredients at this point; that’s exactly how it should look.
-
Mix Until Just Combined: This step requires a bit of elbow grease! Use a sturdy spoon or a firm spatula to start mixing everything together. Begin by folding the dry ingredients into the wet, then stir vigorously. Keep going until all the dry bits are coated in the peanut butter and syrup. The mixture will transition from looking crumbly to clumping together. You’re aiming for a thick, slightly sticky, uniform consistency that resembles a soft dough or a very thick cookie dough. Scrape down the sides of the bowl as needed to ensure everything gets incorporated.
-
The Magic Chilling Step (THE Secret!): This is the crucial step that makes all the difference! Once your mixture is thoroughly combined and looks like that thick dough, stop stirring. Cover the bowl tightly. Plastic wrap works perfectly – press it down onto the surface of the mixture or just cover the top of the bowl snugly. Place the covered bowl into the refrigerator for at least 30 minutes. This chilling time is non-negotiable for easy rolling. During this rest, the oats and seeds soak up some of the moisture from the syrup and nut butter, while the fats in the nut butter firm up in the cold. This process transforms the overly sticky mixture into something much more pliable and easy to handle. Don’t rush this part!
-
Assess the Mixture After Chilling: After the minimum 30 minutes (or longer, if you forget about it – that’s fine too!), pull the bowl out of the fridge. Poke the mixture with your finger. It should feel significantly firmer and less sticky than it did before chilling. It will still be soft enough to scoop, but it shouldn’t aggressively cling to your fingers. If it still feels too soft or sticky, pop it back in for another 15-20 minutes.
-
Time to Roll (Easily!): Now for the satisfying part! Take a small amount of the chilled mixture. A standard tablespoon or even a cookie scoop that holds about 1 to 1.5 tablespoons is ideal for consistent sizing. Scoop out a portion and then gently roll it between your palms. Because of the chilling step, the mixture should now cooperate beautifully, forming smooth, compact balls without leaving half the mixture stuck to your hands. Roll them firmly enough so they hold their shape. If you encounter a tiny bit of stickiness (sometimes it happens if your hands are warm or the mixture hasn’t chilled quite long enough), a very slight dampen of your hands with water can help, but you shouldn’t need much, if any.
-
Store and Enjoy: As you roll each perfect energy bite, place it on a plate or directly into an airtight container. Once you’ve rolled the whole batch, seal the container and store it in the refrigerator. Keeping them chilled helps them maintain their firm, non-sticky texture. They are ready to grab and enjoy whenever you need a quick burst of energy!
See? That chilling step is pure magic! It takes something that can be frustrating and makes it a breeze. You’ll be done rolling in minutes, not wrestling with stubborn goo.
Tips for Perfect Energy Bites Every Time
While the chilling step is the absolute key, here are a few extra tips to ensure your energy bites turn out perfectly:
- Ingredient Quality Matters: Using natural peanut butter (or nut butter) is important for texture as it doesn’t contain added hydrogenated oils that can make mixtures overly stiff or crumbly. Rolled oats provide the best base texture.
- Don’t Skip the Chill: I know I’ve said it, but it bears repeating. That 30 minutes in the fridge is non-negotiable for easy rolling. You can even chill it longer, like overnight, if that fits your schedule better.
- Scoop Consistently: Using a cookie scoop makes your bites uniform in size, which is nice for portion control and aesthetics. Aim for roughly the size of a golf ball or a bit smaller.
- Adjust Consistency: If for some reason your mixture still seems too dry after chilling (unlikely with this recipe, but possible with ingredient variations), you could add a tiny splash more maple syrup or a half teaspoon of liquid coconut oil, mix it in, and chill again briefly. If it’s somehow too wet, a tablespoon or two more oats or shredded coconut can help, followed by re-chilling.
- Flavor Boosters: Feel free to add other ingredients after the main mixing but before chilling! Mini chocolate chips (dairy or non-dairy), a pinch of cinnamon, a tiny bit of vanilla extract, or some finely chopped dried cranberries or apricots would be delicious additions. Just don’t go overboard with extra add-ins, or they might not hold together as well.
Making Variations on Your Easy Energy Bites
Once you master the base recipe, feel free to experiment! You can swap the peanut butter for almond or cashew butter. Use honey instead of maple syrup or agave if you prefer (though honey can sometimes be a little stickier). Add different seeds like flax seeds or sesame seeds. Swap the shredded coconut for cocoa powder for a chocolatey version. The possibilities are endless once you have this perfectly rollable base!
Your Easy Energy Bites Questions Answered (FAQ)
Got questions? I’ve got answers! Here are some common queries about making and storing energy bites.
How long do these easy energy bites last?
When stored in an airtight container in the refrigerator, these energy bites will last for about 1-2 weeks. The ingredients are quite stable when kept cold.
Can I freeze energy bites?
Absolutely! Energy bites freeze beautifully. Place them in a single layer on a plate or baking sheet lined with parchment paper until solid, then transfer them to a freezer-safe airtight container or zip-top bag. They will last for 2-3 months. Thaw them in the refrigerator for a few hours or enjoy them straight from the freezer for a firmer texture!
What can I use instead of peanut butter due to allergies?
Any natural nut butter like almond butter, cashew butter, or sunflower seed butter (for a nut-free option) can be used as a direct substitute for the peanut butter in this recipe. Ensure the consistency is similar (thick and a little oily) for best results.
Can I make these energy bites gluten-free?
Yes! Simply use certified gluten-free rolled oats to ensure the recipe is gluten-free. All other ingredients listed are naturally gluten-free.
Why are my energy bites still sticky even after chilling?
This usually means the chilling time wasn’t quite long enough, or your particular nut butter/sweetener combination was a little wetter than average. Ensure you chill for the full 30 minutes or longer. If they are still slightly sticky, try chilling for another 15-20 minutes. As a last resort during rolling, lightly dampening your hands with water can help, but the primary solution is adequate chilling.
Can I reduce the amount of sweetener?
You can slightly reduce the amount of maple syrup or agave nectar if you prefer them less sweet. However, the sweetener also acts as a binder, so don’t reduce it too drastically (e.g., no more than by half), or the bites might not hold together as well, even with chilling.
Are energy bites a good breakfast?
While they make a quick bite, energy bites are often better enjoyed as a snack alongside a meal or as a part of a larger breakfast (like with yogurt or fruit) rather than a complete breakfast on their own. They provide energy but might not be as filling as something with more bulk or protein, like a scramble or oatmeal (though these do contain oats!).
Enjoy Your Homemade Easy Energy Bites!
Making your own energy bites is a fantastic way to control exactly what goes into your snacks and save some money along the way. With this recipe’s secret chilling step, you can finally enjoy the process of making them without the frustrating mess.
Whip up a batch today and experience the magic for yourself! Whether you’re prepping for a busy week, fueling up for an activity, or just need a little treat that’s better for you than reaching for a cookie (though if you’re craving cookies, check out our chewy peanut butter cookies!), these easy energy bites are the perfect solution. They’re nutritious, delicious, and thanks to our little trick, a joy to make.
Give this recipe a try and let me know how it goes in the comments below! What are your favorite additions to energy bites? Happy rolling!
Easy Energy Bites

Ingredients
- 1 cup rolled oats
- 1/4 cup chia seeds
- 2 tablespoons poppy seeds
- 1/4 cup shredded unsweetened coconut
- 1/2 cup natural peanut butter (or other nut butter)
- 1/4 cup maple syrup or agave nectar
Directions
- In a medium bowl, combine the rolled oats, chia seeds, poppy seeds, and shredded coconut. Stir to mix the dry ingredients evenly.
- Add the peanut butter and maple syrup to the bowl.
- Use a sturdy spoon or spatula to mix everything together. Stir well until all the dry ingredients are coated and the mixture starts to come together in a thick, dough-like consistency.
- This is the key step to avoid sticky hands: Cover the bowl tightly with plastic wrap and place it in the refrigerator for at least 30 minutes. Chilling the mixture allows the oats and seeds to absorb some of the liquid, and the fats in the peanut butter to firm up, making the mixture much easier to handle and roll without sticking.
- Once chilled, remove the bowl from the refrigerator. The mixture should feel much firmer.
- Scoop small amounts of the mixture (about 1 to 1.5 tablespoons) and roll it between your palms to form compact balls. They should roll easily without excessive sticking thanks to the chilling step. If needed, you can lightly dampen your hands with water if any stickiness persists, but chilling should prevent this.
- Place the finished energy bites on a plate or in an airtight container. Store in the refrigerator for a quick snack anytime.