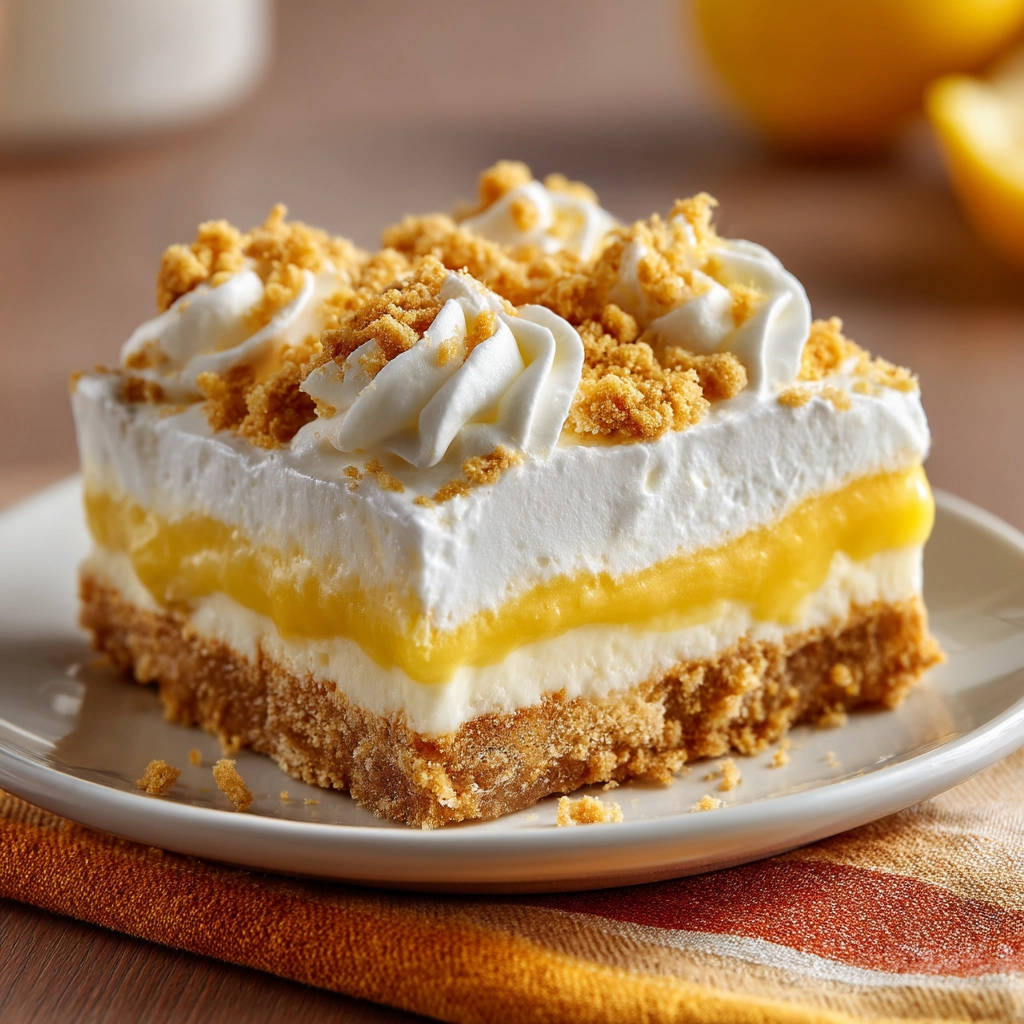
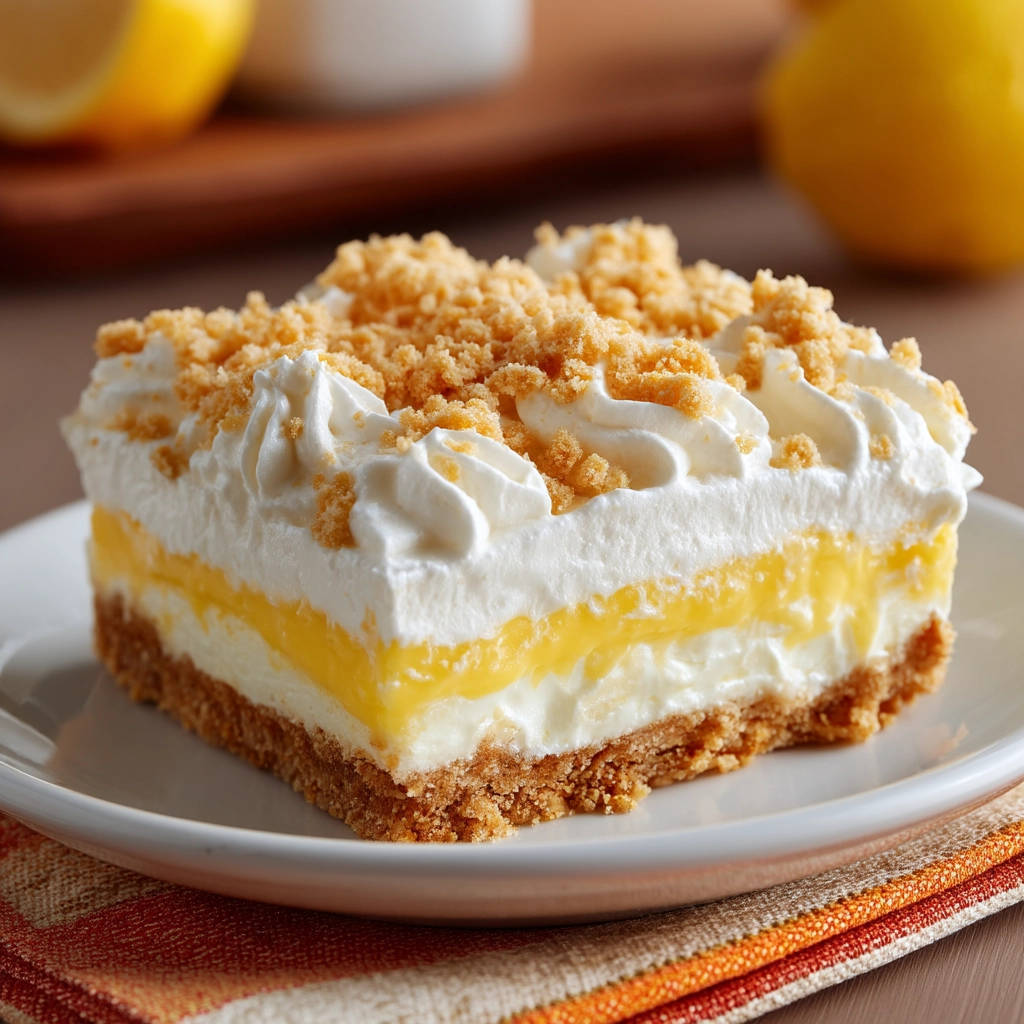
This Easy Lemon Lush is not just a recipe; it’s a solution to your layered dessert woes. It’s the perfect make-ahead treat for potlucks, holidays, or just a bright pick-me-up any day of the week. The combination of creamy and tart is simply irresistible, and with my perfected method, it’s easier to achieve than you think.
Why You’ll Absolutely Adore This Lemon Lush Recipe
Beyond solving the soggy layer problem, there are so many reasons this Easy Lemon Lush will become a staple in your dessert repertoire. It’s more than just simple; it’s a symphony of textures and flavors that come together in harmonious perfection.
- No More Mushy Layers: This recipe focuses on the critical steps needed to ensure every layer stays right where it belongs, offering a clean cut and beautiful presentation.
- Bright & Refreshing: The zesty lemon cuts beautifully through the richness of the cream cheese and whipped topping, creating a light, airy, and wonderfully refreshing dessert.
- Surprisingly Simple: Despite its impressive appearance, this is largely a no-bake dessert (aside from a quick bake for the crust), making it perfect for beginners and experienced bakers alike.
- Make-Ahead Marvel: This is the ideal dessert to prepare in advance, as it requires significant chill time. In fact, it gets better as it sits!
- Crowd Pleaser: It’s hard to find someone who doesn’t love the combination of creamy, crunchy, and tart. This lush disappears quickly at any gathering.
If you love simple yet impressive no-bake desserts, you might also enjoy our Easy No-Bake Chocolate Cream Loaf or the delightful No-Bake Chocolate Layer Bars. They share that wonderful ease and layered goodness.
Gathering Your Ingredients for This Vibrant Treat
Putting together this Easy Lemon Lush requires a few key components that work together to build those distinct, delicious layers. Think of them as the building blocks for dessert success!
Let’s walk through what you’ll need and why each ingredient plays a crucial role. Having your ingredients at the right temperature and measured correctly is the first step towards perfect layers.
- Graham Cracker Crumbs: These form the essential base of our layered dessert. You can buy pre-crushed crumbs or make your own by pulsing graham crackers in a food processor. About 10-12 full sheets usually yield the required amount.
- Unsalted Butter (melted): The melted butter binds the graham cracker crumbs together, creating a firm, stable crust. Using unsalted butter allows you to control the small amount of salt in the dessert.
- Cream Cheese (softened): Make sure this is fully softened to room temperature! Cold cream cheese will result in a lumpy layer, no matter how much you beat it. Its tanginess balances the sweetness of the other layers and provides the rich, creamy body for the second layer.
- Powdered Sugar: Also known as confectioners’ sugar, this dissolves easily into the cream cheese, ensuring a smooth, non-gritty texture for the creamy layer.
- Frozen Whipped Topping (thawed, divided): This provides the airy, light texture for both the cream cheese layer and the top layer. Thaw it gently in the refrigerator – don’t microwave it, or it will lose its structure.
- Instant Lemon Pudding Mix: The star flavor! Using instant pudding is key for this no-bake style dessert as it sets quickly with cold milk. We use two boxes to ensure the lemon layer is thick and flavorful, not watery.
- Cold Milk: Crucial for activating the instant pudding and helping it set properly. Make sure your milk is very cold straight from the refrigerator.
- Additional Graham Cracker Crumbs (optional, for topping): A little sprinkle of extra crumbs on top adds a lovely textural contrast and visual appeal right before serving.
Crafting Your Easy Lemon Lush: Step-by-Step Guide
Now for the fun part – assembling this gorgeous dessert! Each step is important, but pay special attention to the chilling times and the handling of your layers to prevent that dreaded mushiness. Remember, patience is your friend here!
- Prepare for Success: Begin by preheating your oven to 350 degrees F (175 degrees C). This is solely for setting the crust. While the oven heats, ensure your cream cheese is softened and your whipped topping is thawed but still cold.
- Build the Foundation (The Crucial Crust): In a medium-sized bowl, thoroughly combine the graham cracker crumbs with the melted unsalted butter. Stir until the crumbs are evenly moistened – they should resemble wet sand. Pour this mixture into the bottom of a 9×13 inch baking dish. Use the bottom of a glass or a flat measuring cup to press the mixture down firmly and evenly across the bottom and slightly up the sides if you like a side crust. This firm press is vital for a sturdy base. Bake the crust in your preheated oven for 8 to 10 minutes. Baking the crust for a short time helps it set and become more resistant to absorbing moisture from the layers above, a key step in preventing sogginess. Once baked, remove the dish from the oven and place it on a wire rack to cool completely. This cooling step is non-negotiable – putting creamy layers on a warm crust is an express ticket to mushy layers! If you’ve struggled with soggy crusts in other layered desserts like fruit tarts, focusing on this cooling step, as we do in our guide to a Perfected Fruit Tart, is a game-changer.
- Create the Creamy Cloud Layer: While the crust cools, prepare the first creamy layer. In a large bowl, beat the softened cream cheese with the powdered sugar using an electric mixer until the mixture is wonderfully smooth and there are no lumps. It should be light and creamy. Now, gently fold in half of your thawed whipped topping. Use a spatula and a light hand, incorporating the whipped topping just until no white streaks of whipped topping remain. Overmixing can deflate the whipped topping, affecting the layer’s texture. Carefully spread this cream cheese mixture evenly over the completely cooled graham cracker crust. Take your time to get an even layer from edge to edge.
- Whip Up the Lemon Dream: In a separate large bowl, whisk together the two packages of instant lemon pudding mix with the four cups of cold milk. Whisk vigorously for about 2 minutes until everything is well combined and the mixture begins to thicken. Do not overmix, as instant pudding can become grainy if overworked. Let the pudding mixture stand undisturbed for 5 minutes. This resting period is essential for the instant pudding to thicken properly and reach the right consistency for layering. A properly thickened pudding layer is another key defense against layers bleeding into each other.
- Layer with Care: Once the pudding has thickened after its rest, carefully pour and spread the lemon pudding layer over the cream cheese layer. Be gentle so you don’t disturb the creamy layer underneath. A good technique is to spoon dollops of pudding over the surface and then gently spread them together.
- Top it Off: Take the remaining half of the thawed whipped topping and gently spread it evenly over the lemon pudding layer, creating the final, fluffy top.
- The Most Critical Chill Time: This step is the ultimate secret weapon against mushy layers and for achieving perfectly set, distinct slices. Cover the baking dish tightly with plastic wrap, ensuring it doesn’t directly touch the whipped topping if possible (or use toothpicks to tent it slightly if you’re worried, though tight contact is usually fine). Refrigerate the Lemon Lush for a minimum of 4 to 6 hours. However, for truly optimal results – firm layers and a fully set crust that resists sogginess – chilling it overnight (8 hours or more) is highly recommended. This extended chilling time allows all the layers to meld in flavor and, more importantly, set up firmly enough to be sliced cleanly.
- Finishing Touches: Just before you’re ready to serve, remove the plastic wrap. If desired, sprinkle additional graham cracker crumbs lightly over the top for extra texture and a visual cue to the crust below. Use a sharp knife run under hot water and wiped clean between cuts to slice the lush into clean squares.
Expert Tips for the Ultimate Easy Lemon Lush
Making this dessert is straightforward, but a few pro tips can elevate it from good to absolutely unforgettable:
- Temperature Matters: Ensure your cream cheese is fully softened and your milk is very cold. This makes a significant difference in the texture and setting of your layers.
- Don’t Rush the Chill: I cannot stress this enough – the chilling time is paramount. Cutting into the lush too early will result in disappointment. Plan ahead!
- Gentle Folding is Key: When incorporating the whipped topping into the cream cheese, fold gently. This keeps the layer light and airy.
- Measuring Graham Crumbs: If making your own, measure the crumbs after crushing the crackers.
- Clean Slices: For the prettiest squares, use a sharp knife and clean it by running it under hot water and wiping it dry between each cut.
Delicious Variations (No Alcohol Included!)
While the classic Easy Lemon Lush is perfect, feel free to experiment! Just be mindful of keeping the ingredient ratios similar to ensure proper setting.
- Citrus Swap: Not a lemon fanatic? Try using instant lime pudding or even orange pudding for a different citrus twist.
- Cookie Crust: Instead of graham crackers, try using crushed vanilla wafers, shortbread cookies, or even lemon sandwich cookies for the crust.
- Add Fruit: A thin layer of fresh raspberries or sliced strawberries could be pressed lightly into the cream cheese layer before adding the pudding.
- Topping Twists: Instead of graham crumbs, top with finely grated lemon zest, white chocolate shavings, or toasted coconut.
Serving Your Delightful Lemon Lush
This Easy Lemon Lush is best served chilled, straight from the refrigerator. It’s a fantastic dessert on its own, but it also pairs wonderfully with other light options. Consider serving it after a light lunch, perhaps alongside a refreshing kale salad, or as the sweet finish to a simple dinner. The bright, tart flavor is a perfect palate cleanser.
It’s also an absolute hit at potlucks, picnics, and summer gatherings because it holds up well (thanks to that crucial chilling!) and is easy to transport. Just keep it cool!
Your Easy Lemon Lush Questions Answered
Got questions? Chances are, someone else does too! Here are some common queries about making the perfect Easy Lemon Lush.
Can I use homemade whipped cream instead of frozen whipped topping?
While delicious, homemade whipped cream is generally less stable than frozen whipped topping and can sometimes weep or deflate over time. For guaranteed structure and to prevent layer bleed, especially with the pudding, thawed frozen whipped topping (like Cool Whip) is highly recommended for this particular recipe. It’s engineered to hold its shape longer.
Can I use cook-and-serve pudding instead of instant?
No, this recipe specifically relies on the quick-setting properties of instant pudding when mixed with cold milk. Cook-and-serve pudding requires cooking and cooling and won’t set up correctly in this layered, no-bake context. Stick to instant pudding mixes for the best results.
How long does Easy Lemon Lush last in the refrigerator?
When stored properly, tightly covered in the refrigerator, your Easy Lemon Lush will typically stay fresh and delicious for 3-4 days. The crust may soften slightly over time, but the layers should remain distinct if adequately chilled initially.
Can I freeze Lemon Lush?
Yes, you can freeze Lemon Lush! Freeze individual portions or the whole dessert (tightly wrapped in plastic wrap and then foil) for up to 1-2 months. Thaw it overnight in the refrigerator before serving. The texture might change slightly upon thawing, but it will still be tasty.
Why did my layers turn out mushy or blended?
The most common culprits are not cooling the crust completely before adding layers, not allowing the pudding to thicken for the full 5 minutes before spreading, or most frequently, not chilling the assembled dessert for a long enough time (at least 4-6 hours, preferably overnight). Ensure your ingredients are at the correct temperatures (softened cream cheese, very cold milk) as well.
Can I make this dessert gluten-free?
Yes, you can! The easiest way is to use gluten-free graham cracker crumbs or a gluten-free shortbread cookie for the crust. Ensure all other ingredients, like the pudding mix, are certified gluten-free if needed for dietary restrictions.
Enjoy Your Homemade Easy Lemon Lush!
You’ve done it! With these simple steps and crucial chilling tips, you are now equipped to make an Easy Lemon Lush that is not only incredibly delicious but also beautifully layered and structurally sound. The bright, tangy lemon, the creamy filling, and the sturdy graham cracker crust come together in a dessert that’s sure to impress everyone who tries it.
Give this recipe a try for your next gathering or just to brighten your own day. It’s simple, satisfying, and utterly delightful.
Did you make this Easy Lemon Lush? I’d love to hear how it turned out! Leave a comment below and let me know your favorite part. Happy baking (and chilling)!
Easy Lemon Lush

Ingredients
- 1 1/2 cups graham cracker crumbs
- 1/2 cup unsalted butter melted
- 1 (8 ounce) package cream cheese softened
- 1 cup powdered sugar
- 1 (8 ounce) container frozen whipped topping thawed divided
- 2 (3.4 ounce) packages instant lemon pudding mix
- 4 cups cold milk
- Additional graham cracker crumbs for topping if desired
Directions
- Preheat oven to 350 degrees F (175 degrees C).
- In a medium bowl combine graham cracker crumbs and melted butter. Press firmly into the bottom of a 9×13 inch baking dish. Bake for 8 10 minutes then let cool completely on a wire rack. Cooling the crust completely is the first step to preventing sogginess.
- In a large bowl beat the softened cream cheese and powdered sugar until smooth and creamy. Fold in half of the thawed whipped topping gently until no streaks remain. Spread this mixture evenly over the cooled graham cracker crust.
- In another large bowl whisk together the instant lemon pudding mixes and the cold milk until well combined and slightly thickened. Let stand for 5 minutes to thicken further. Ensuring the pudding is properly thickened before layering is key.
- Carefully pour and spread the thickened lemon pudding layer evenly over the cream cheese layer.
- Spread the remaining half of the thawed whipped topping over the pudding layer.
- Here is the most critical step to avoid mushy layers: Cover the dish tightly with plastic wrap and refrigerate for at least 4 6 hours, or preferably overnight. This extended chilling time is essential for all the layers to set up firmly and for the flavors to meld without the crust becoming saturated.
- Just before serving, sprinkle additional graham cracker crumbs over the top if desired. Cut into squares and serve chilled.