Oh, homemade candy. There’s a certain magic to it, isn’t there? The rich aroma filling your kitchen, the promise of sweet, melt-in-your-mouth goodness… But let’s be honest, there’s also the potential for total disaster. If you’ve ever tried making pecan pralines only to end up with a sticky, gooey puddle that refuses to set, you know the frustration I’m talking about.
For years, I struggled with this exact problem. Batch after batch of what should have been perfect Southern pecan pralines turned into sad, unset messes. I was ready to give up on homemade candy altogether! But then, I stumbled upon one simple, game-changing trick. And let me tell you, it makes all the difference.
This recipe for Easy Pecan Pralines is now my absolute go-to. Thanks to this one little tweak, they come out perfectly firm yet wonderfully creamy every single time. No more sticky disasters, just beautiful, delicious candy that’s actually easy to make. You’re going to love how simple this is, and how impressive the results are!
Reasons This Easy Pecan Pralines Recipe is a Keeper
Aside from the obvious win (they actually set!), there are so many reasons these homemade pecan pralines will become your favorite candy recipe:
-
Guaranteed Success: That secret step really works, eliminating the common problem of unset pralines.
-
Classic Flavor & Texture: They have that signature balance of sweet, buttery richness with the delightful crunch of pecans, hitting that perfect soft-ball candy stage texture.
-
Quick & Easy: With just about 10 minutes of prep and 15 minutes of cooking, you can have a batch cooling in less than half an hour!
-
Simple Ingredients: No fancy or hard-to-find items here, just pantry staples and plenty of pecans.
-
Perfect for Gifting: Homemade pralines are always a welcome treat during the holidays or anytime you want to share something special.
Whether you’re a candy-making novice or someone who’s been burned by sticky pralines before, this recipe is designed for success.
Gathering Your Ingredients for Perfect Pecan Pralines
One of the joys of making classic pecan pralines is that they require just a handful of common ingredients. However, the quality and type of these ingredients play a significant role in achieving that ideal flavor and texture. Let’s look at what you’ll need and why these specific choices work best.
At the heart of any praline is sugar, and this recipe uses a combination for the best results. We start with:
-
2 cups granulated sugar: This is your standard white sugar, providing the primary structure and sweetness for the candy. It’s the backbone of the praline.
-
1 cup light brown sugar, packed: Don’t skip the brown sugar! The molasses content in light brown sugar adds depth and a subtle caramel note to the flavor. It also contributes moisture, which helps create a creamier texture compared to using only white sugar. Make sure to pack it firmly when measuring.
Next, we add richness and creaminess with dairy and fat:
-
1/2 cup evaporated milk: This is where a lot of the magic happens in getting a smooth praline. Evaporated milk is simply cow’s milk that has had about 60% of its water removed. This concentrated form is richer and creamier than regular milk and gives the pralines their characteristic smooth, almost fudgy consistency once set. Using evaporated milk is often the key difference between a grainy praline and a creamy one.
-
1/2 cup unsalted butter: Butter adds essential richness and helps carry the flavors. Using unsalted butter allows you to control the salt content in the recipe. You’ll melt this right into the sugar and milk mixture.
Flavor is crucial, and a little bit goes a long way:
-
1 teaspoon vanilla extract: Pure vanilla extract adds warmth and enhances all the other sweet and nutty flavors. Stirring it in off the heat ensures its delicate flavor doesn’t evaporate.
-
1/2 teaspoon salt: A touch of salt is vital in sweet recipes like this. It balances the intense sweetness and actually makes the other flavors, especially the caramel notes from the brown sugar and the nuttiness of the pecans, pop. Don’t omit it!
And finally, the star of the show!
-
2 cups pecan halves or pieces: You can use either halves or pieces, depending on your preference. Halves look beautiful, while pieces distribute more evenly throughout the candy. Ensure your pecans are fresh; stale nuts can ruin the flavor of the entire batch. Toasting them lightly beforehand isn’t strictly necessary for pralines, but it can enhance their flavor even more.
Crafting Your Easy Pecan Pralines: Step-by-Step Guide to Perfection
Making candy at home can feel intimidating, especially when dealing with hot sugar. But by following these steps carefully, paying attention to temperatures, and incorporating that one crucial trick, you’ll be dropping perfect pralines onto your baking sheet in no time. Here’s a detailed walkthrough:
-
Prepare Your Workspace: Before you even turn on the heat, get your landing zone ready. Line a large baking sheet (or two, if needed) with parchment paper or wax paper. Have it placed conveniently nearby. Once the candy reaches the right stage, it sets quickly, so you need to be ready to move fast!
-
Combine Base Ingredients in the Pot: Reach for a large, heavy-bottomed saucepan. This is important because the heavy base distributes heat more evenly, reducing the risk of your sugar mixture burning on the bottom. Add the granulated sugar, light brown sugar, evaporated milk, unsalted butter (you can just add it in chunks, it will melt), and the salt to the pot. Combining them cold before heating helps everything integrate smoothly.
-
Initial Heating and Dissolving: Place the saucepan over medium heat. Grab a sturdy wooden spoon or heatproof spatula and begin stirring. Stir continuously as the mixture heats up. Your goal here is to completely dissolve the sugars. You’ll feel the bottom of the pan with your spoon; you shouldn’t feel any grainy sugar crystals sticking there. Keep stirring until the butter is fully melted and the mixture comes to a full, rolling boil. Consistent stirring during this phase prevents scorching and ensures a smooth texture later.
-
Boiling Without Stirring (mostly): Once the mixture is boiling vigorously, stop stirring the body of the candy. However, as it boils, you might notice sugar crystals forming on the sides of the pan above the candy line. To prevent these from falling back in and seeding undesirable crystallization (which causes graininess), dip a pastry brush in clean water and gently brush down the sides of the pan occasionally. Just a light touch to dissolve those crystals is all you need.
-
Reaching the Soft Ball Stage: This is the most critical stage for texture! Continue boiling the mixture, monitoring its temperature with a candy thermometer. The goal is to reach precisely 240 degrees F (116 degrees C). This temperature corresponds to the “soft ball” stage, meaning if you were to drop a small amount of the hot candy into cold water, it would form a soft, pliable ball. Hitting this exact temperature ensures your pralines will set properly – too low and they won’t set, too high and they’ll be hard or brittle. Be patient and watch that thermometer closely!
-
Removing from Heat & Adding Flavor/Nuts: The very moment your thermometer hits 240 degrees F, carefully remove the saucepan from the heat. Take it completely off the burner. Immediately add the vanilla extract and your pecans to the hot candy mixture. Give it a very brief stir to combine everything, just enough to distribute the vanilla and nuts.
-
The Secret to Setting: The Crucial Rest! Here it is – the step that guarantees your pralines set beautifully every time! After adding the vanilla and pecans and giving that quick initial stir, STOP. Let the mixture sit undisturbed in the hot pan, off the heat, for approximately 2 to 3 minutes. Do NOT touch it, do NOT stir it. This resting period allows the temperature to drop slightly and the sugar structure to stabilize before you initiate crystallization. It’s the key to preventing graininess and ensuring that perfect, firm-yet-creamy set.
-
Initiating the Set: The Stirring Phase: After the 2 to 3 minute rest, pick up your wooden spoon or heatproof spatula and begin stirring the mixture. Stir consistently with a rhythmic motion. At first, it will still look glossy. As you stir, you will see a visible change – the mixture will start to thicken, lose its bright shine, and become slightly cloudy or opaque. You will also feel it thickening as you stir. This is the point where you are incorporating air and encouraging the sugar to crystallize into the praline structure. Stir just until you see and feel this change – usually within a minute or two of starting to stir after the rest. Do not over-stir, as this can result in dry or crumbly pralines.
-
Working Quickly to Drop: Once the mixture has noticeably thickened and lost its high gloss, you must work fast! The candy is now setting. Use a spoon or a small scoop to quickly drop dollops of the praline mixture onto your prepared baking sheet. They will spread slightly, so leave some space between each one. If the mixture in the pan starts to get too thick to scoop, you can return it to the heat for just a few seconds (literally, maybe 5-10 seconds) to loosen it up slightly, but be careful not to overheat and make it grainy. Work as efficiently as you can until all the candy is portioned out.
-
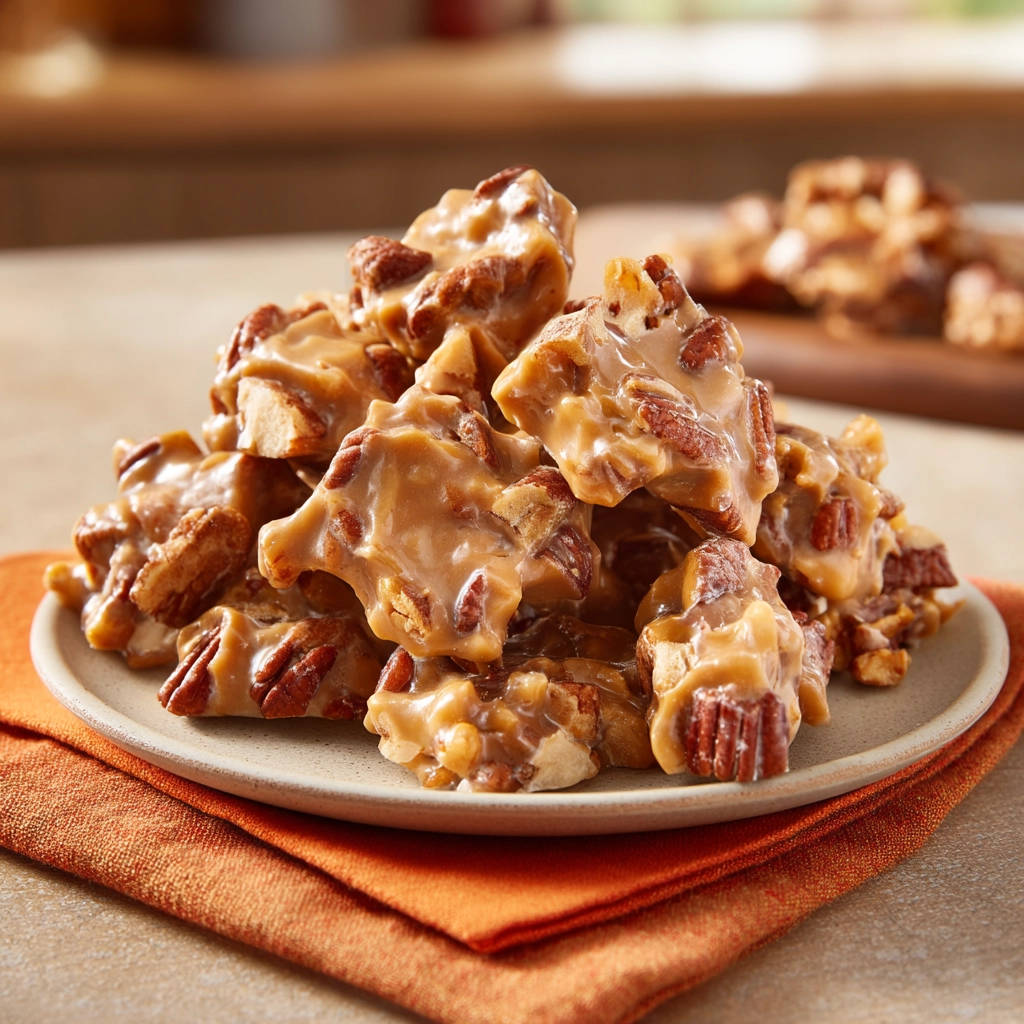
Cooling and Setting: Now comes the easy part: waiting! Let the pralines cool completely and undisturbed on the baking sheet. This usually takes about 30 minutes to an hour. As they cool, they will firm up. Once they are completely set and firm to the touch, they should lift easily off the parchment or wax paper. Now they are ready to be devoured!
Tips for Perfect Pecan Pralines Every Time
Even with the guaranteed-set trick, a few extra tips can help ensure your pecan pralines turn out beautifully:
-
Calibrate Your Thermometer: Candy thermometers can lose accuracy over time. Test yours in boiling water – it should read 212°F (100°C) at sea level. Adjust the target temperature (240°F) based on your altitude if necessary.
-
Humidity Matters: Candy making is sensitive to humidity. It’s best to make candy on a dry day. High humidity can make it harder for the candy to reach the proper temperature and set correctly.
-
Use a Heavy Pot: As mentioned in the steps, a heavy-bottomed saucepan is essential for even heat distribution and preventing burning.
-
Don’t Double the Batch (Initially): If you’re new to this recipe, make a single batch first. Doubling candy recipes can sometimes affect the cooking time and setting process. Master the single batch, then try doubling if you like.
-
Consider Pecan Size: While halves or pieces work, using smaller pieces might make the candy easier to scoop and ensure pecans are distributed throughout every bite.
-
Cooling Surface: Parchment paper is ideal as it’s non-stick. Wax paper also works but can sometimes stick slightly depending on the brand and humidity. A silicone baking mat is another excellent option for non-stick cooling.
Serving Your Delicious Easy Pecan Pralines
Once your easy pecan pralines are cooled and set, the best part begins – enjoying them! They are absolutely divine simply eaten on their own as a sweet treat. The combination of creamy caramel and crunchy pecans is incredibly satisfying.
They also make fantastic edible gifts. Stack them in pretty tins or bags tied with ribbon. Homemade pralines are always a hit during the holiday season or for special occasions.
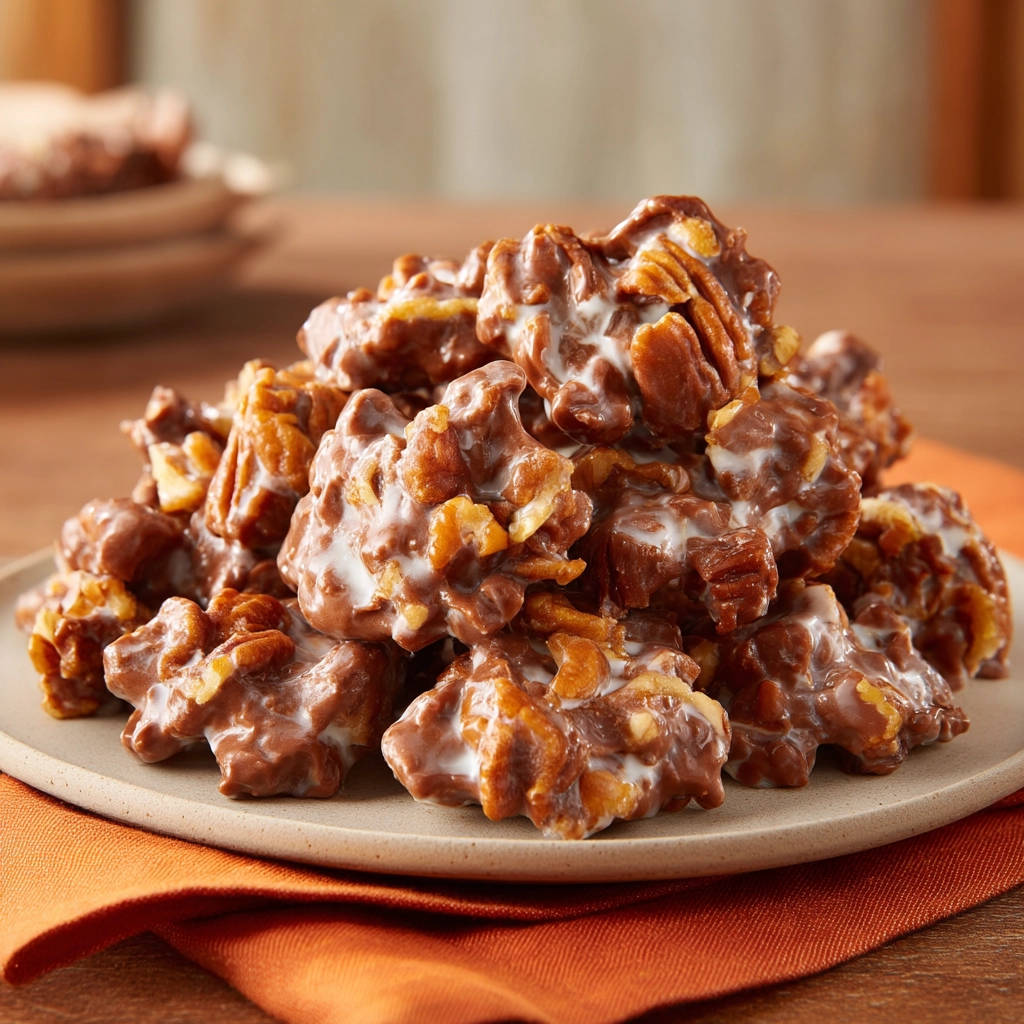
Think beyond just eating them straight! You could roughly chop a few and sprinkle them over a scoop of vanilla ice cream for an easy, decadent dessert. Or, for a different kind of sweet treat, consider pairing them with a simple fruit dessert. If you’re looking for more ways to use nuts in your baking or desserts, you might enjoy trying our recipe for Salted Caramel Pecan Turtles, another delightful treat featuring those wonderful nuts and a similar flavor profile!
Your Pecan Pralines Questions Answered (FAQ)
Making candy can bring up a few common questions. Here are some answers to help you on your way to perfect pecan pralines:
Why didn’t my pralines set?
The most common reasons are not cooking the mixture to the correct temperature (240°F / soft ball stage) or skipping that crucial 2-3 minute resting period off the heat before stirring. Over-stirring in the final stage can also sometimes prevent proper setting or make them crumbly instead of creamy.
My pralines are grainy. What went wrong?
Graininess is usually caused by sugar crystals that didn’t dissolve properly in the initial heating phase, or by crystals forming on the sides of the pan and falling back into the mixture. Ensuring all sugar is dissolved before boiling, using that wet pastry brush to clean the sides, and employing the 2-3 minute resting trick are key to preventing graininess.
How should I store homemade pecan pralines?
Store completely cooled pralines in an airtight container at room temperature. Layer them between sheets of parchment or wax paper to prevent sticking. They will stay fresh for about 1-2 weeks. Avoid refrigerating or freezing, as this can affect their texture and sometimes cause them to become sticky.
Can I make this recipe without a candy thermometer?
While some experienced candy makers can tell by the look and consistency, a candy thermometer is highly recommended for consistent results, especially for ensuring the correct soft ball stage (240°F). Without it, it’s very difficult to guarantee the pralines will set correctly.
Can I use different nuts?
Certainly! While these are classic pecan pralines, you could experiment with other nuts like walnuts or almonds. The cooking method would remain the same. Just ensure they are fresh and of good quality. However, for the authentic taste and texture of a praline, pecans are the traditional choice.
The mixture hardened in the pot before I could scoop it all. What can I do?
This means the candy cooled and started setting too much. As mentioned in the steps, you can very briefly return the pot to low heat for just a few seconds (5-10 seconds, MAX) and stir gently to loosen it up enough to scoop the rest. Work quickly after doing this, as it will set again fast.
Enjoy Your Homemade Pecan Pralines!
There you have it! With this easy recipe and that simple yet effective trick, you can banish sticky, unset pralines from your kitchen forever. Get ready to enjoy these wonderfully rich, nutty, and perfectly set candies.
Whether you’re making them for a special occasion, a homemade gift, or just because you’re craving something sweet, these easy pecan pralines are sure to become a favorite. Give this recipe a try and taste the difference that one little step can make!
Did you try this recipe? Let me know how your pralines turned out in the comments below! Happy candy making!
Easy Pecan Pralines

Ingredients
- 2 cups granulated sugar
- 1 cup light brown sugar, packed
- 1/2 cup evaporated milk
- 1/2 cup unsalted butter
- 1 teaspoon vanilla extract
- 1/2 teaspoon salt
- 2 cups pecan halves or pieces
Directions
- Line a baking sheet with parchment paper or wax paper. Have it ready nearby.
- In a large heavy-bottomed saucepan, combine the granulated sugar, brown sugar, evaporated milk, butter, and salt.
- Place the saucepan over medium heat. Stir constantly until the sugars are dissolved and the mixture comes to a boil.
- Stop stirring once the mixture boils. Let it boil without stirring, scraping down the sides of the pan occasionally with a wet pastry brush to prevent sugar crystals from forming.
- Continue to boil until the candy reaches 240 degrees F on a candy thermometer, which is the soft ball stage. This temperature is crucial for the pralines to set correctly.
- Carefully remove the pan from the heat. Add the vanilla extract and the pecans.
- This is the key step for guaranteeing they set: Let the mixture stand undisturbed in the pan for about 2 to 3 minutes off the heat. Do NOT stir it during this time. Allowing it to cool slightly helps prevent graininess and encourages the proper setting structure.
- After 2 to 3 minutes, begin stirring the mixture with a wooden spoon or heatproof spatula. Stir with a rhythmic motion until the mixture starts to thicken and lose some of its glossy shine, becoming slightly cloudy or opaque. You will feel it thickening as you stir. This stirring incorporates air and initiates the setting process. Do not over-stir, just stir until it starts to thicken noticeably.
- Working quickly, drop spoonfuls of the mixture onto the prepared baking sheet.
- Let the pralines cool completely until firm, which takes about 30 minutes to an hour. Once set, they should be easy to peel off the paper and enjoy.