For years, I struggled with making pierogi at home, often ending up with a sticky, gummy mess instead of the tender, delightful dumplings I craved. It was frustrating, but through trial and error, I uncovered the simple secrets to truly perfect, never-gummy Easy Pierogi every single time.
This recipe isn’t just about cooking pierogi; it’s about mastering a foolproof method that ensures they are always tender, flavorful, and incredibly satisfying, transforming a classic comfort food into a stress-free weeknight triumph.
Beyond Sticky: The Magic Behind Our Easy Pierogi Recipe
Say goodbye to disappointing, sticky pierogi! This recipe delivers a consistently tender and flavorful experience, making it a reliable favorite.
A Gummy-Proof Promise: How This Recipe Delivers
The most common complaint about pierogi is their tendency to turn gummy. This recipe actively prevents that through precise cooking techniques.
We ensure ample boiling water and avoid overcrowding the pot, which maintains a consistent temperature. This simple but critical step prevents the pierogi from clumping and cooking unevenly.
Furthermore, the precise timing after the pierogi float to the surface is meticulously outlined. This short window is vital for achieving that perfect tender chew without veering into gumminess.
Quick Comfort: Your Weeknight Easy Pierogi Solution
In just 15-20 minutes, you can have a comforting, hearty meal on the table. This recipe prioritizes efficiency without sacrificing flavor or quality.
It’s the ideal solution for busy weeknights when you crave homemade goodness but are short on time. The streamlined process means less fuss and more enjoyment.
Simple Ingredients, Exceptional Results
You don’t need a pantry full of exotic items to create deliciousness. This Easy Pierogi recipe relies on a few humble ingredients.
The magic truly happens in the method, transforming basic components into a dish that tastes complex and utterly satisfying. Quality ingredients, even simple ones, make a world of difference.
Gathering Your Simple Ingredients for Easy Pierogi
Creating delightful pierogi starts with understanding the role of each key ingredient. Here’s what you’ll need, and why each matters.
The Heart of the Dish: Your Chosen Pierogi
The foundation of this recipe is, of course, the pierogi themselves. You’ll need a one-pound package, and both frozen or fresh varieties work beautifully.
For the classic comfort experience, potato and cheese-filled pierogi are a fantastic choice, but feel free to select your favorite flavor profile. Opt for a reputable brand to ensure good dough quality.
Essential Flavor Enhancers: Butter & Onion
Butter brings a rich, golden finish to the pierogi, preventing sticking and adding a luxurious mouthfeel. It’s truly indispensable for that classic pan-fried touch.
The finely chopped onion, though optional, caramelizes in the butter, adding a layer of savory sweetness and depth that perfectly complements the pierogi’s hearty filling. Don’t skip it if you love an extra burst of savory flavor.
The Foundation: Water & Seasoning
Plenty of water is crucial for boiling the pierogi. It allows them to move freely and cook evenly, preventing them from clumping together.
A touch of salt in the boiling water subtly seasons the pierogi from the inside out, enhancing their inherent flavor. It’s a small addition with a big impact.
Your Essential Toolkit for Perfect Pierogi
Having the right tools on hand makes the cooking process smooth and effortless. Here’s what you’ll need for these Easy Pierogi.
Must-Have Kitchen Gear for Boiling & Finishing
Large Pot: A spacious pot is crucial for boiling the pierogi without overcrowding them, ensuring even cooking and preventing stickiness.
Slotted Spoon: This tool allows you to easily and safely transfer the cooked pierogi from the boiling water to the skillet, leaving excess water behind.
Small Skillet: Perfect for melting the butter and sautéing the onions, it’s also where your pierogi will get their final, delicious coating.
Boil, Sauté, Serve: Your Easy Pierogi Method
Follow these straightforward steps to achieve perfectly cooked, never-gummy Easy Pierogi that will impress every time.
Setting the Stage: The Boiling Water Ritual
Begin by filling a large pot with 8 cups of water and adding 1 teaspoon of salt. Bring this salted water to a rapid, rolling boil over high heat.
Using a large pot with ample water is critical; it provides enough space for the pierogi to circulate freely, ensuring they cook uniformly and prevents them from sticking together.
The Gentle Drop: Preventing Overcrowding
Once the water is boiling vigorously, carefully add the pierogi, one by one, into the pot. It’s vital not to overcrowd the pot, as this will significantly drop the water’s temperature, leading to undercooked or sticky pierogi.
If you’re cooking a large batch, it’s best to divide them and cook in two or more smaller batches. This ensures each pierogi has enough space to cook properly without becoming a gummy mess.
Keeping Them Apart: A Gentle Stir
Immediately after adding the pierogi, gently stir them with a wooden spoon or spatula. This initial stir is important to prevent them from sticking to the bottom of the pot or to each other as they begin to cook.
Continue to stir occasionally for the first minute or so, just to ensure they remain separated.
The Float Test & Beyond: Timing is Everything
Watch closely as your pierogi cook; they will eventually float to the surface. This indicates they are mostly cooked through.
For fresh pierogi, continue to boil for just 1 to 2 minutes more after they float. For frozen pierogi, allow them to boil for 3 to 5 minutes more after floating. This brief additional cooking time is the absolute key to achieving a perfectly tender texture and avoiding any gumminess. Remember, do not overcook!
The Golden Touch: Butter & Onion Prep
While your pierogi are boiling, melt 2 tablespoons of butter in a small skillet over medium heat. If you’re using it, add the 1/4 cup of finely chopped onion to the skillet.
Sauté the onion until it softens and turns lightly browned, which typically takes about 5-7 minutes. This step creates a fragrant, savory base for your finished pierogi.
The Grand Transfer: Coating for Flavor
Using a slotted spoon, carefully remove the perfectly cooked pierogi from the boiling water. Let any excess water drain off briefly.
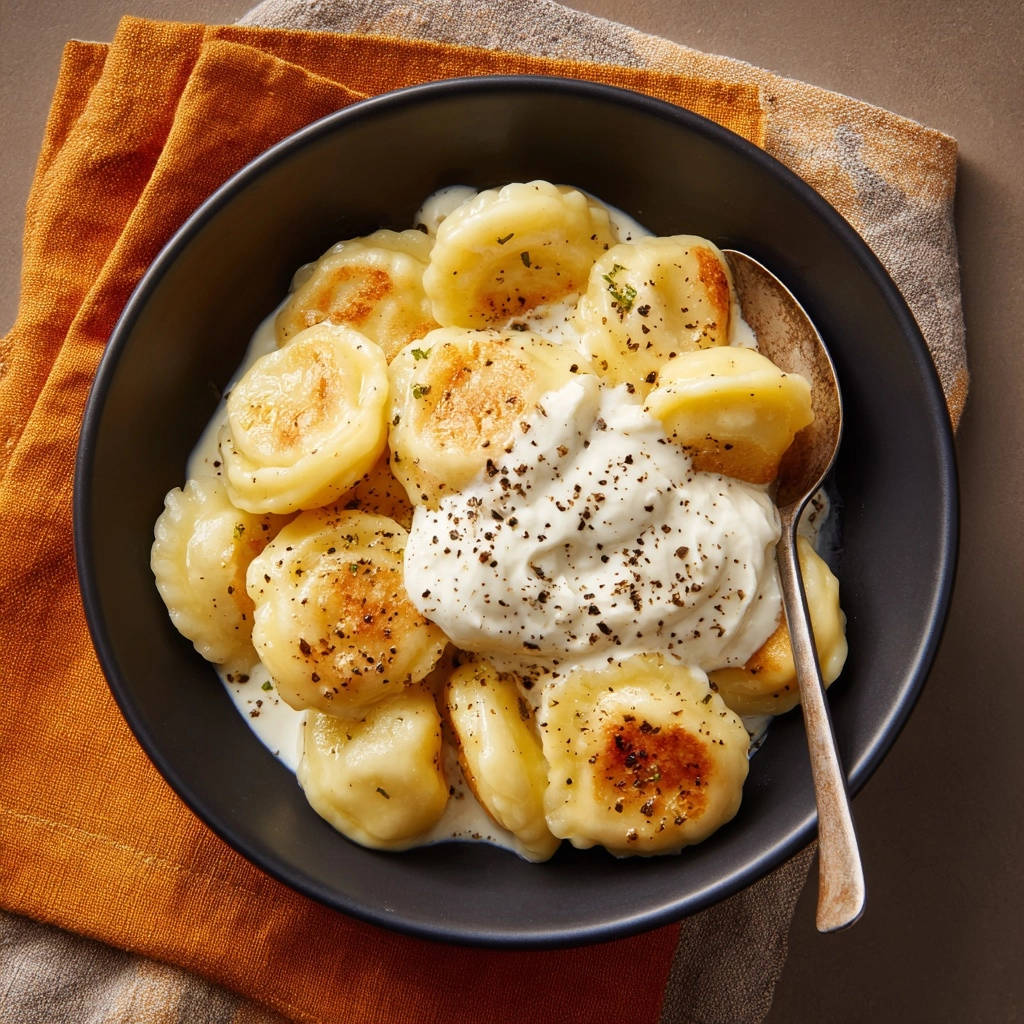
Immediately transfer the hot pierogi directly into the skillet with the melted butter and sautéed onions. Gently toss them to coat evenly in the buttery goodness. Alternatively, you can transfer them directly to serving plates if you prefer a lighter coating.
The Final Flourish: Serving Your Easy Pierogi Masterpiece
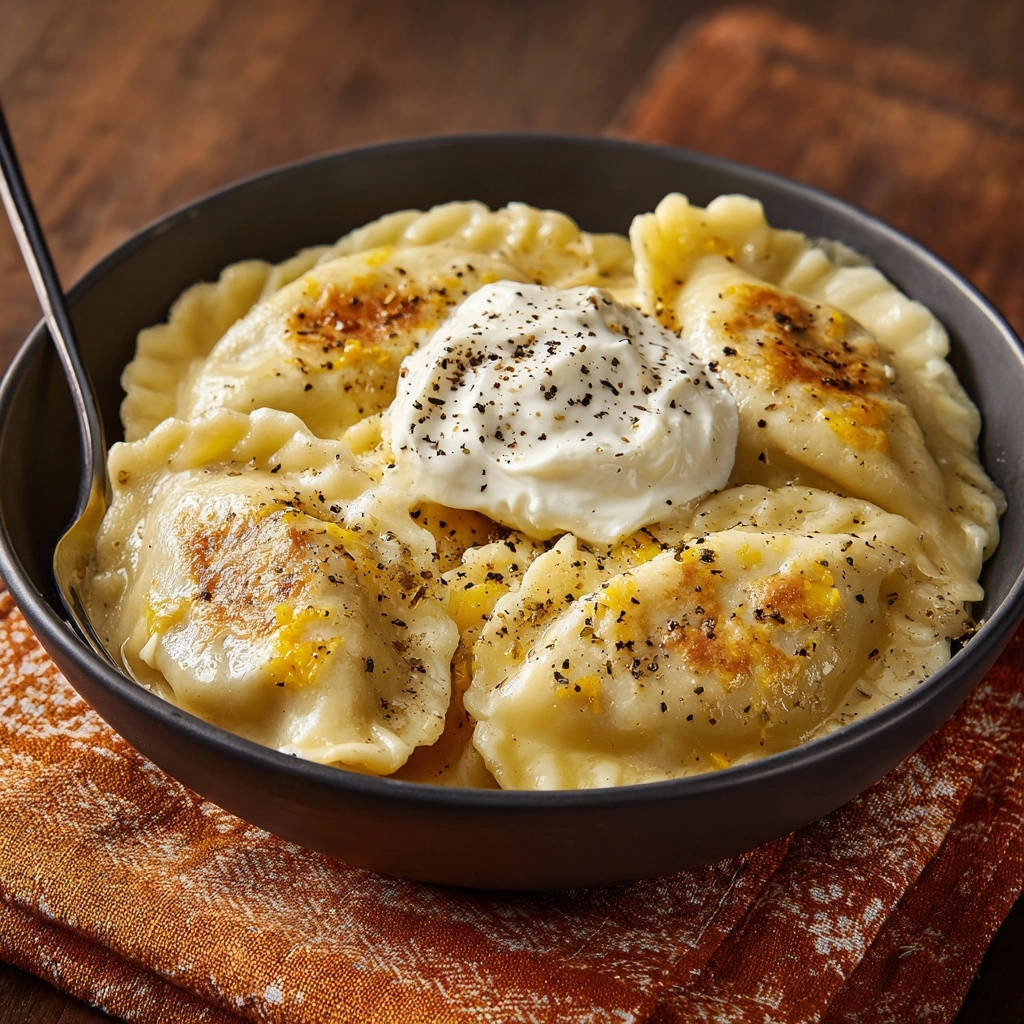
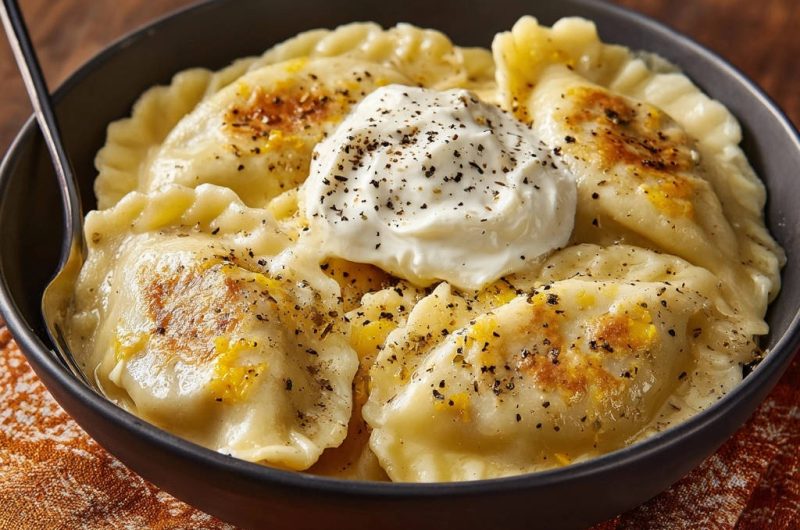
Serve your Easy Pierogi immediately while they are hot and fresh. Top each serving with a generous dollop of cool sour cream.
Finish with a liberal grinding of fresh black pepper for an aromatic flourish. The creamy tang of the sour cream and the peppery kick are the perfect complements to the savory pierogi.
Chef’s Secrets for Flawless Easy Pierogi Every Time
Elevate your pierogi game with these expert tips, ensuring a perfect batch of Easy Pierogi every time.
The Golden Rule of Pierogi: Avoiding the Overcook
Overcooking is the primary culprit behind gummy pierogi. The dough continues to absorb water and break down, leading to a sticky texture.
Once your pierogi float, set a timer for the exact recommended duration (1-2 minutes for fresh, 3-5 for frozen) and remove them promptly. They should feel tender but still have a slight chew.
Strategic Batch Cooking for Optimal Results
Resist the urge to dump all your pierogi into a small pot at once. Overcrowding drastically lowers the water temperature and prevents uniform cooking.
If your pot isn’t large enough to comfortably hold all pierogi with plenty of swimming room, cook them in smaller batches. This small effort ensures a consistent, tender texture throughout.
Draining Done Right: No Soggy Pierogi Here
After boiling, use your slotted spoon to lift the pierogi out, allowing excess water to drip off for a moment. Don’t rinse them under cold water, as this can make them gummy and wash away starch needed for the butter to adhere.
Transfer them quickly to the hot skillet with butter to maximize flavor absorption and prevent sogginess.
Flavor Customization: Elevate Your Easy Pierogi Toppings
While butter, onion, and sour cream are classic, don’t hesitate to get creative with your toppings. Consider adding crispy bacon bits for a salty crunch, or fresh dill and chives for herbal brightness.
Sautéed mushrooms, a sprinkle of sharp cheddar cheese, or even a dollop of apple sauce offer delightful variations that truly elevate your Easy Pierogi experience.
Beyond the Plate: Creative Ways to Enjoy Your Easy Pierogi
These Easy Pierogi are versatile! Here are some ideas to make them a star at your table.
Classic Comfort Combinations
The traditional pairing of rich melted butter, caramelized onions, tangy sour cream, and a generous grind of black pepper is a timeless winner. It highlights the savory goodness of the potato and cheese filling.
Some even enjoy a sprinkle of crispy fried breadcrumbs for added texture. Don’t underestimate the simple perfection of these classic accompaniments.
Savory Additions & Side Dish Inspiration
For a heartier meal, consider serving your pierogi alongside sautéed mushrooms or pan-fried kielbasa slices. The savory notes of the sausage beautifully complement the creamy filling.
For a lighter touch, a crisp green salad with a bright vinaigrette provides a refreshing contrast. Alternatively, a side of crispy roasted Brussels sprouts or other seasonal roasted vegetables would be a fantastic addition.
Making it a Complete Meal: Hearty Pairings
Transform your Easy Pierogi into a full, satisfying meal. They pair wonderfully with roasted chicken or a tender pork loin, soaking up any delicious pan drippings.
For a truly comforting experience, serve them alongside a simple vegetable or chicken soup. You might even find inspiration in creating a comforting beef and noodles dish as a hearty companion, creating a family-style feast.
Troubleshooting Your Easy Pierogi: Common Questions Answered
Even with the best instructions, sometimes things don’t go as planned. Here are solutions to common pierogi issues.
Why Are My Pierogi Sticky or Gummy?
This is almost always due to overcrowding the pot or overcooking. Too many pierogi at once lowers the water temperature, causing them to cook unevenly and stick together.
Overcooking breaks down the delicate dough, leading to a gluey texture. Always cook in batches if necessary, and strictly adhere to the suggested cooking times after they float.
What if My Pierogi Fall Apart in the Water?
Pierogi falling apart can be a sign of overcooking, excessively vigorous stirring, or sometimes an issue with the quality of the pierogi dough itself (if it’s too thin or poorly sealed).
Ensure gentle handling and accurate cooking times. If store-bought, try a different brand next time.
My Pierogi Aren’t Floating – What’s Wrong?
If your pierogi aren’t floating, it usually means the water isn’t at a rolling boil, or they simply need more time. Ensure your water is bubbling vigorously before adding them.
Frozen pierogi especially may take a few minutes longer to thaw and fully cook before they naturally rise to the surface.
Frequently Asked Questions About Easy Pierogi
Get quick answers to your burning questions about these delightful dumplings.
Can I Pan-Fry My Pierogi Instead of Boiling?
Yes, absolutely! While this recipe focuses on boiling for optimal texture, you can certainly pan-fry pre-cooked pierogi for a crispy exterior.
Simply sauté them in butter or oil until golden brown and heated through after boiling them per the instructions. This creates a wonderful textural contrast.
How Can I Store Leftover Cooked Pierogi?
Leftover cooked pierogi should be stored in an airtight container in the refrigerator. They will remain fresh for up to 3-4 days.
Reheat gently in a skillet with a little butter or in the microwave until warmed through.
Can I Freeze Cooked Pierogi?
While you can freeze cooked pierogi, their texture may change slightly upon reheating, becoming a bit softer. It’s generally best to cook them fresh.
If you do freeze, place them in a single layer on a baking sheet until solid, then transfer to a freezer-safe bag for up to 2-3 months. Reheat directly from frozen in a skillet or by re-boiling briefly.
Are There Gluten-Free Pierogi Options Available?
Yes, many specialty grocery stores and brands now offer gluten-free pierogi. These are typically made with alternative flours like rice flour or potato starch.
They cook very similarly to traditional pierogi, though it’s always wise to follow the specific package instructions for best results. If you love a hearty side, consider making a creamy, cheesy potato bake to pair with any pierogi!
Your Easy Pierogi Adventure Awaits!
Share Your Culinary Triumph!
Now that you’re armed with the secrets to perfect, never-gummy Easy Pierogi, it’s time to create your own culinary triumph! I encourage you to try this recipe tonight.
Once you’ve tasted the difference, share your amazing results on social media or leave a comment below. I’d love to hear how these pierogi transformed your cooking experience!
Explore More Delicious Recipes!
If you loved the simplicity and deliciousness of these Easy Pierogi, I invite you to explore more of our collection. We have a wealth of other comforting, flavorful, and easy-to-follow recipes waiting to become your next family favorite. Happy cooking!
Easy Pierogi
Course: Main CourseCuisine: Eastern European cuisineDifficulty: easy4
servings5
minutes10
minutes15
minutesEastern European cuisine
Ingredients
1 pound package frozen or fresh pierogi (potato and cheese or similar filling)
8 cups water
1 teaspoon salt
2 tablespoons butter
1/4 cup finely chopped onion (optional, from image)
1/2 cup sour cream
Freshly ground black pepper
Directions
- Fill a large pot with 8 cups of water. Add the salt. Bring the water to a rolling boil over high heat. Using a large pot with plenty of water prevents overcrowding and helps the pierogi cook evenly.
- Carefully add the pierogi to the boiling water. Do not overcrowd the pot; cook in batches if necessary. Overcrowding lowers the water temperature too much and can lead to sticky or gummy pierogi.
- Stir gently with a wooden spoon or spatula to prevent them from sticking to the bottom of the pot or to each other.
- Once the pierogi float to the surface, continue to boil for only 1 to 2 minutes more for fresh pierogi, or 3 to 5 minutes more for frozen pierogi. This short cooking time after floating is key to avoiding gumminess. Do not overcook.
- While the pierogi cook, melt the butter in a small skillet over medium heat. If using, add the chopped onion and cook until softened and lightly browned, about 5-7 minutes.
- Use a slotted spoon to carefully remove the cooked pierogi from the boiling water and transfer them directly to the skillet with the melted butter and onions (if using). Gently toss to coat, or transfer directly to serving plates.
- Serve immediately topped with a dollop of sour cream and a generous grinding of fresh black pepper, as shown in the image.
Notes
- Do not overcook to avoid gumminess. Cook in batches if necessary.