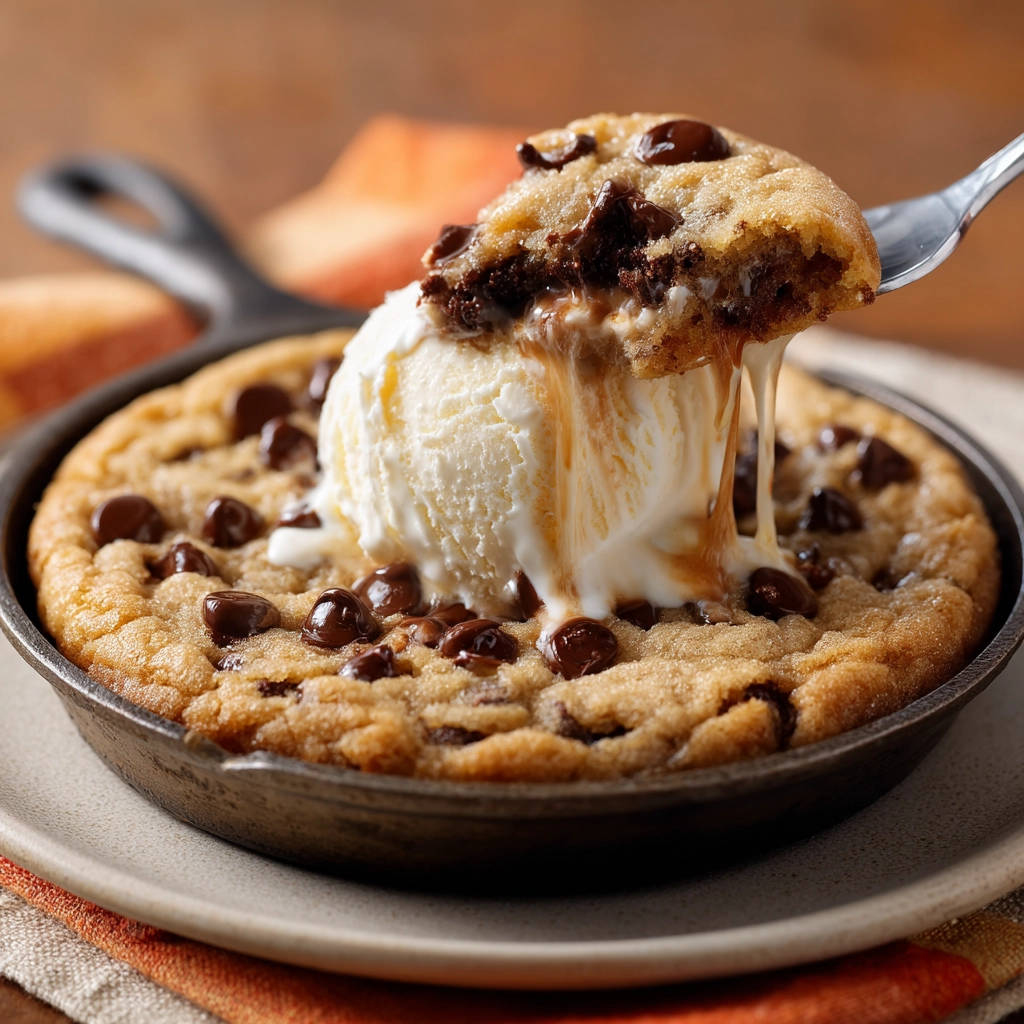
Okay, let’s be real. Is there anything better than a warm, gooey chocolate chip cookie? Now, imagine that but supersized, served right in the pan, maybe with a scoop (or three) of melting vanilla ice cream on top. That’s the dream of a Giant Skillet Chocolate Chip Cookie! But if you’ve ever tried making one, you might have faced the ultimate baking disappointment: edges that are perfectly done, but a middle that’s still raw and disappointingly gummy. Ugh, the worst!
I’ve been there. Many times! It took some experimenting, but I finally cracked the code to getting that absolutely perfect texture – a slightly crispy edge that gives way to a molten, truly gooey, but fully cooked center. No more gummy centers here! This recipe is deceptively simple and delivers that craveable, decadent dessert experience every single time. It’s quick enough for a weeknight treat but impressive enough for sharing (if you can bear to!).
Why You’ll Fall in Love With This Skillet Cookie
This isn’t just another cookie recipe; it’s an experience. Here are just a few reasons why this giant skillet chocolate chip cookie is about to become your new favorite indulgence:
-
The Texture Magic: We’re talking golden, slightly crisp edges melting into a perfectly set, but incredibly soft and gooey center. It’s cookie perfection in every bite.
-
No More Guesswork: The secret technique for avoiding that dreaded gummy middle is foolproof once you know it. Trust the process!
-
Speedy Satisfaction: With just 10 minutes of prep and around 20 minutes in the oven, you can have warm, fresh cookie ready to devour in under 30 minutes. Perfect for sudden cravings.
-
Shareable Fun: Baked in a skillet, this cookie is practically designed for sharing. Just grab spoons and dig in! Though, zero judgment if you want it all to yourself.
-
Simple Ingredients: You likely have most of these pantry staples on hand right now.
Gathering Your Ingredients for the Ultimate Skillet Cookie
Creating this blissful dessert doesn’t require a long list of exotic items. The magic comes from the combination of classic cookie ingredients and a simple technique. The base of our cookie relies on the power duo of butter and sugar, elevated by other key players to build that signature chocolate chip cookie flavor and texture.
For the richest flavor and best texture, quality ingredients make a difference. Here’s what you’ll need, along with a little insight into their role:
- Unsalted Butter, Softened: Using unsalted butter gives you control over the saltiness. Ensure it’s properly softened (you should be able to dent it easily with your finger, but it shouldn’t be greasy or melted) for optimal creaming with the sugars. This step incorporates air, contributing to the cookie’s structure and tenderness. You’ll need 1/2 cup.
- Granulated Sugar: Provides sweetness and helps with the spread and crispiness of the cookie edges. We’ll use 1/2 cup.
- Packed Light Brown Sugar: This is crucial for that classic chewy texture and adds a lovely depth of flavor thanks to the molasses content. Packing it ensures you get the correct amount; spoon it into the measuring cup and press it down firmly. You’ll need 1/4 cup.
- Large Egg: Acts as a binder, holding everything together and contributing to the richness and structure. Make sure it’s a large egg for consistency. You’ll need 1 large egg.
- Vanilla Extract: A teaspoon of good quality vanilla extract enhances all the other flavors, especially the chocolate. Don’t skip this!
- All Purpose Flour: The structural backbone of our cookie. Using all-purpose flour provides the right balance for spread and chewiness. You’ll need 1 cup.
- Baking Soda: This leavening agent helps the cookie spread out and gives it a little lift, contributing to the desired texture. We use 1/2 teaspoon.
- Salt: Essential for balancing the sweetness and bringing out the depth of the chocolate. A mere 1/4 teaspoon makes a big difference.
- Chocolate Chips: The stars of the show! Use your favorite kind – milk, semi-sweet, or dark. You can even mix them! The recipe calls for 1 cup, but feel free to be generous if you’re a true chocolate lover. For another delightful chocolate treat, you might also enjoy making our fudgy brownies.
Crafting Your Skillet Chocolate Chip Cookie: Step-by-Step
Ready to bake? This process is straightforward, but paying attention to a couple of key steps will ensure your cookie turns out perfectly gooey and fully cooked in the center, not gummy.
-
Prep Your Oven and Skillet: Start by getting your oven ready. Preheat it to 350 degrees F (175 degrees C). While it’s heating, grab a 6-inch cast iron skillet. A cast iron skillet is ideal because it holds and distributes heat exceptionally well, which is key to getting those perfect edges and helping the center finish cooking as it rests. Lightly grease the inside of the skillet. This prevents sticking and helps the cookie release cleanly.
-
Creaming the Wet Base: In a medium-sized mixing bowl, combine your softened unsalted butter, granulated sugar, and packed light brown sugar. Beat these together using an electric mixer or a whisk and some elbow grease. You want to beat them until the mixture is light and fluffy. This process is called creaming, and it’s important because it incorporates air into the dough, leading to a more tender cookie.
-
Adding Egg and Vanilla: Once your butter and sugars are light and fluffy, crack in the large egg and add the teaspoon of vanilla extract. Beat these into the mixture until everything is well combined and smooth. Scrape down the sides of the bowl if needed to ensure everything is incorporated.
-
Combining the Dry Ingredients: In a separate, smaller bowl, whisk together the all-purpose flour, baking soda, and salt. Whisking them together ensures the leavening agent and salt are evenly distributed throughout the flour, which means they’ll work their magic uniformly in the cookie.
-
Adding Dry to Wet (The Gentle Mix): Now, gradually add the whisked dry ingredients into the wet ingredients. Mix on low speed, or use a spatula, until the dry ingredients are just combined with the wet. You’ll still see some streaks of flour, and that’s okay! The most important part of this step is to not overmix. Overmixing can develop too much gluten in the flour, resulting in a tough, rather than tender, cookie.
-
Fold in the Chocolate Chips: This is the moment the magic happens! Stir in your cup of chocolate chips. Make sure they’re distributed fairly evenly throughout the dough so you get chocolatey goodness in every bite.
-
Press into the Skillet: Take your cookie dough and gently press it evenly into the prepared 6-inch cast iron skillet. Make sure it reaches the edges and is relatively flat on top so it bakes consistently.
-
Bake to (Looks Like) Perfection: Place the skillet in your preheated oven and bake for 18 to 20 minutes. Keep an eye on it. The edges should look set and be lightly golden brown. Here is the critical step for avoiding that gummy center: the middle of the cookie will still look quite soft, maybe even a little glossy or slightly underbaked. This is exactly what you want! It won’t look fully cooked through in the very center when it comes out of the oven.
-
The Essential Resting Period: This is the secret weapon! Carefully remove the hot skillet from the oven (use oven mitts!) and place it on a wire rack. Now, here’s the crucial part: let it rest for 10 minutes. Do not cut into it immediately. The residual heat retained by the cast iron skillet is significant, and it will continue to cook the center of the cookie gently as it rests. This carryover cooking is what transforms that seemingly underbaked middle into a perfectly gooey, soft, and fully cooked (but not raw!) texture.
-
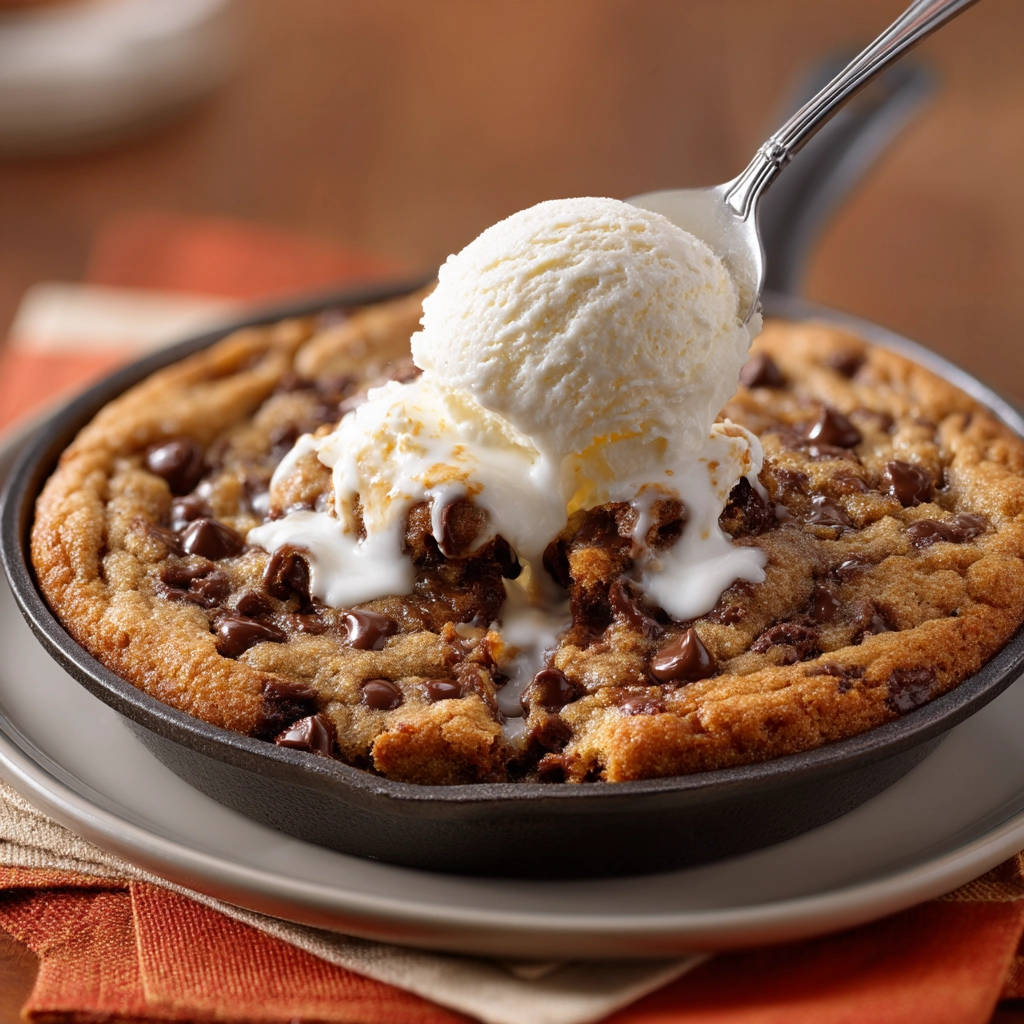
Serve and Indulge: After the 10-minute rest, your giant skillet cookie is ready! The edges will have set up nicely, and the center will be that glorious, molten consistency you’ve been dreaming of. Serve it warm, straight from the skillet. The absolute best way to enjoy this is topped with generous scoops of vanilla ice cream. The cold, melting ice cream cascading over the warm, gooey cookie is pure dessert heaven!
Tips for Making Your Skillet Cookie Spectacular
While the recipe is simple, a few extra tips can elevate your giant skillet chocolate chip cookie from great to absolutely unforgettable:
- Room Temperature Ingredients: Ensure your butter and egg are at room temperature before you start. This helps them cream together properly and incorporate smoothly into the dough, leading to a better texture.
- Don’t Over-Grease: A light greasing is enough. Too much grease can make the edges greasy instead of crisp.
- Know Your Oven: Oven temperatures can vary. It’s a good idea to trust the visual cues in step 8 (set, golden edges, soft center) over strict timing initially, especially the first time you make it.
- Skillet Size Matters: This recipe is designed for a 6-inch skillet. If you use a larger skillet (like an 8-inch or 10-inch), the cookie will be thinner and bake faster – you’ll need to reduce the baking time significantly. If you use a smaller skillet, it will be thicker and may need a little longer, plus more resting time, but be careful not to burn the edges.
- Chocolate Chip Choices: While semi-sweet is classic, try milk chocolate for a sweeter cookie, dark chocolate for richness, or a mix of chips and chocolate chunks for varying melt textures. For serious chocolate lovers, consider trying our gooey chocolate chunk cookies for inspiration on using different types of chocolate!
- Add Ins: Feel free to stir in some chopped nuts (pecans or walnuts), a sprinkle of sea salt over the top before baking, or a swirl of caramel or peanut butter through the dough (sparingly!).
Serving Suggestions
Honestly, this giant skillet chocolate chip cookie is a showstopper all on its own, especially fresh and warm. But pairing it takes it to the next level.
The classic pairing is, of course, vanilla ice cream. The contrast of cold, creamy ice cream against the warm, gooey cookie is unbeatable. For extra indulgence, drizzle with chocolate sauce, caramel sauce, or a sprinkle of flaky sea salt.
If you’re serving it for a special occasion, consider adding some fresh berries on the side for a pop of freshness.
Your Skillet Cookie Questions Answered (FAQ)
Let’s tackle some common questions you might have about whipping up this incredible giant skillet cookie.
What kind of skillet is best for a giant chocolate chip cookie?
A cast iron skillet is truly the best for this recipe. It retains heat incredibly well, which is essential for that crucial resting step that cooks the center perfectly. A 6-inch cast iron skillet is the size used in this recipe, resulting in a nice thick cookie. If you don’t have cast iron, you could try another oven-safe skillet (like stainless steel with a thick bottom), but you’ll need to watch the baking time closely and the results on the center texture might vary as other materials don’t retain heat as effectively.
My cookie still looks really underbaked in the middle after resting. What did I do wrong?
Did you let it rest for the full 10 minutes? The resting time is the key! If it still seems too soft after resting, it might need a minute or two longer in the oven next time, or ensure your oven temperature is accurate (an oven thermometer is handy!). It should be set enough that it doesn’t seem raw dough, but still very soft and molten.
Can I use a different size skillet?
Yes, but you will need to adjust the baking time. As mentioned in the tips, a larger skillet means a thinner cookie that bakes faster. A smaller skillet means a thicker cookie that might need slightly longer baking time AND possibly a longer resting time. Keep an eye on the edges and use the “soft center” visual cue as your primary indicator.
Can I make the dough ahead of time?
Absolutely! You can make the dough, press it into the greased skillet, cover it tightly with plastic wrap, and refrigerate it for up to 2-3 days. When ready to bake, you might need to add a few minutes to the baking time, as the skillet and dough will be cold. Keep an eye on those edges!
What’s the best way to store leftover skillet cookie?
Let the cookie cool completely in the skillet. Once cool, you can cover the skillet tightly with plastic wrap or transfer slices to an airtight container. Store at room temperature for 2-3 days. Reheat individual portions gently in the microwave for that gooey texture!
Enjoy Your Homemade Giant Skillet Chocolate Chip Cookie!
Say goodbye to disappointing, gummy centers and hello to skillet cookie bliss! This recipe is simple, quick, and delivers on that promise of perfectly baked edges and a wonderfully gooey middle. It’s comfort food at its finest, perfect for sharing a moment (and a spoon!) with loved ones.
Give this Giant Skillet Chocolate Chip Cookie a try tonight. I promise you won’t regret it! If you love quick and satisfying desserts, be sure to check out our easy no-bake chocolate cream loaf for another simple sweet treat. Don’t forget to leave a comment below and let me know how yours turned out!
Giant Skillet Chocolate Chip Cookie

Ingredients
- 1/2 cup unsalted butter, softened
- 1/2 cup granulated sugar
- 1/4 cup packed light brown sugar
- 1 large egg
- 1 teaspoon vanilla extract
- 1 cup all purpose flour
- 1/2 teaspoon baking soda
- 1/4 teaspoon salt
- 1 cup chocolate chips
Directions
- Preheat oven to 350 degrees F (175 degrees C). Lightly grease a 6-inch cast iron skillet.
- In a medium bowl, cream together the softened butter, granulated sugar, and brown sugar until light and fluffy.
- Beat in the egg and vanilla extract until well combined.
- In a separate small bowl, whisk together the all purpose flour, baking soda, and salt.
- Gradually add the dry ingredients to the wet ingredients, mixing until just combined. Do not overmix.
- Stir in the chocolate chips.
- Press the dough evenly into the prepared skillet.
- Bake for 18 to 20 minutes. The edges should be set and lightly golden brown, but here is the crucial part for avoiding a gummy center: the middle will still look quite soft and even a little underbaked. This is exactly what you want.
- Remove the skillet from the oven and place it on a wire rack. Let it rest for 10 minutes. The residual heat in the skillet will continue to cook the center through to that perfect gooey-but-not-raw texture.
- Serve warm, straight from the skillet, topped with scoops of vanilla ice cream.