Are you tired of carrots that are either rock-hard or complete mush? Cooking carrots to that perfect tender-crisp state can feel like a culinary tightrope walk. But what if I told you there’s a simple technique that guarantees beautifully Glazed Carrots, cooked to perfection every single time? Get ready to transform your carrot game and enjoy this easy, delicious side dish!
Why You’ll Love These Glazed Carrots
These aren’t your average boiled carrots! Here’s why this recipe is a winner:
- Perfect Texture: Say goodbye to mushy carrots! This method delivers a delightful tender-crisp bite.
- Sweet & Savory: The honey glaze adds a touch of sweetness that perfectly complements the natural earthiness of the carrots.
- Easy to Make: With just a few simple ingredients and minimal effort, you can have a stunning side dish on the table in minutes.
- Elevated Flavor: The glazing technique caramelizes the carrots, enhancing their sweetness and creating a beautiful sheen.
- Versatile: Glazed Carrots pair well with so many main courses, making them a go-to side dish for any occasion.
Gathering Your Ingredients for Glazed Carrots
Before you begin, let’s talk about the ingredients we’ll be using to create these irresistible Glazed Carrots. We’re aiming for a balance of sweetness, savory notes, and that gorgeous glossy glaze. Here’s a breakdown of what you’ll need:
- 1 pound baby carrots, peeled: Baby carrots are convenient and readily available, ensuring a uniform size for even cooking. If you prefer, you can use regular carrots, peeled and cut into similarly sized pieces.
- 2 tablespoons unsalted butter: Butter adds richness and helps to create that beautiful glaze. Using unsalted butter allows you to control the saltiness of the dish.
- 2 tablespoons honey: The star of our glaze! Honey provides sweetness and helps the carrots caramelize, creating that signature glossy finish.
- 1 tablespoon water: A little water helps to steam the carrots initially, ensuring they cook evenly.
- 1/4 teaspoon salt: Salt enhances the natural sweetness of the carrots and balances the overall flavor.
- 1/4 teaspoon black pepper: A touch of pepper adds a subtle warmth and complexity to the glaze.
- 1 tablespoon chopped fresh parsley, for garnish: Fresh parsley adds a pop of color and a fresh, herbaceous note to finish the dish.
Crafting Your Glazed Carrots: Step-by-Step
Ready to transform ordinary carrots into a delightful side dish? Don’t be intimidated! This method is straightforward, and the results are truly impressive. The most important technique to master here is the glazing, which is where the magic truly happens. Follow these simple steps, and you’ll have perfectly Glazed Carrots every single time.
- Prepare the carrots for success: Start by ensuring your baby carrots are peeled and roughly the same size. This is crucial for even cooking. If using regular carrots, peel them and cut them into approximately 1-inch pieces.
- Melt the butter in a skillet: Place a large skillet over medium heat. Add the unsalted butter and allow it to melt completely. The melted butter creates a delicious base for the glaze. Make sure the heat isn’t too high, or the butter will burn.
- Add carrots and begin building the glaze: Add the prepared carrots to the skillet with the melted butter. Stir in the honey, water, salt, and pepper. The combination of these ingredients will create a sweet and savory glaze that coats the carrots beautifully.
- The Chef’s Technique: Glazing to perfection: This is where the magic happens! Cook the carrots, stirring occasionally to prevent burning, for approximately 8-10 minutes. You’re looking for the carrots to become tender-crisp. This means they should be easily pierced with a fork but still have a slight bite. As they cook, the glaze will thicken and coat the carrots evenly, creating a beautiful sheen. The key is to let the carrots lightly caramelize in the honey and butter. Don’t rush this step; the caramelization is what enhances their natural sweetness and creates that signature glazed look.
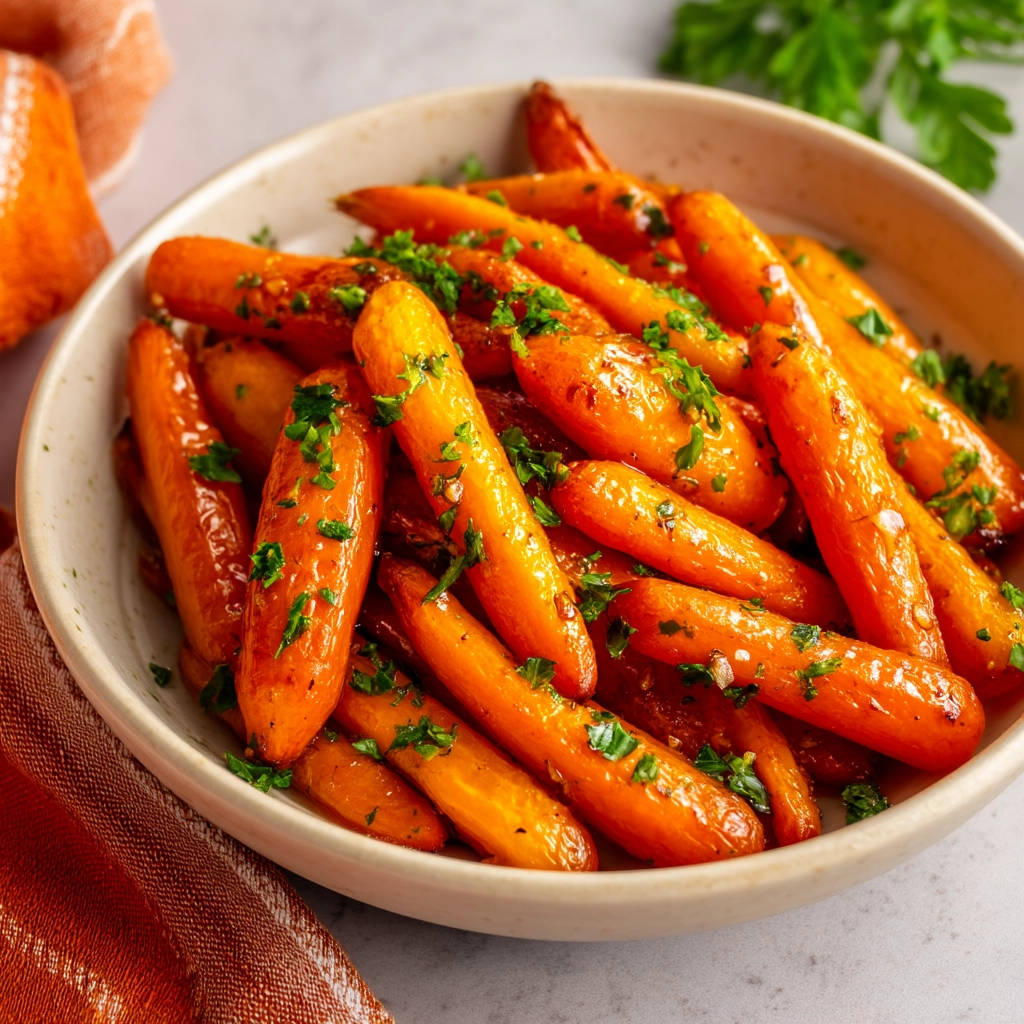
- Garnish and serve immediately: Once the carrots are perfectly glazed and tender-crisp, transfer them to a serving dish. Garnish with freshly chopped parsley for a pop of color and fresh flavor. Serve immediately while they’re warm and the glaze is still glossy.
Tips for Perfect Glazed Carrots Every Time
Want to ensure your Glazed Carrots are a guaranteed success? Here are a few extra tips and tricks to keep in mind:
- Don’t overcrowd the pan: If you’re making a large batch, work in batches to avoid overcrowding the skillet. Overcrowding will steam the carrots instead of allowing them to caramelize.
- Adjust cooking time as needed: Cooking times may vary depending on the size and thickness of your carrots. Use a fork to test for doneness; they should be tender-crisp.
- Spice it up! For a touch of heat, add a pinch of red pepper flakes along with the salt and pepper.
- Add a squeeze of citrus: A squeeze of fresh lemon or orange juice at the end adds brightness and acidity to balance the sweetness.
- Storage: Leftover Glazed Carrots can be stored in an airtight container in the refrigerator for up to 3 days. Reheat gently in a skillet or microwave before serving.
What to Serve With Glazed Carrots
Glazed Carrots are a versatile side dish that pairs well with a variety of main courses. They’re especially delicious alongside roasted meats, poultry, or fish. Consider serving them with Roasted Sweet Potato Chicken Power Bowl for a complete and satisfying meal.
Your Glazed Carrots Questions Answered (FAQ)
Can I use frozen carrots for this recipe?
While fresh carrots are ideal for the best texture and flavor, you can use frozen carrots in a pinch. However, keep in mind that frozen carrots may release more water during cooking, so you may need to adjust the cooking time and reduce the amount of water added to the glaze. Be careful not to overcook them, as they can become mushy more easily.
Can I make this recipe ahead of time?
While Glazed Carrots are best served immediately for the best texture and glaze, you can prepare them ahead of time. Cook the carrots according to the recipe instructions, then cool completely and store in an airtight container in the refrigerator. When ready to serve, reheat gently in a skillet or microwave until warmed through. You may need to add a touch more honey or butter to refresh the glaze.
Can I use a different sweetener instead of honey?
Yes, you can substitute other sweeteners for honey, such as maple syrup or brown sugar. Maple syrup will impart a slightly different flavor, while brown sugar will add a richer, more caramel-like taste. Adjust the amount of sweetener to your liking.
How do I prevent the carrots from burning?
The key to preventing the carrots from burning is to stir them occasionally during cooking. This ensures that they cook evenly and that the glaze doesn’t scorch. If the glaze starts to thicken too quickly, you can add a tablespoon or two of water to the skillet.
Enjoy Your Homemade Glazed Carrots!
There you have it – a foolproof method for creating perfectly Glazed Carrots that are tender-crisp and bursting with flavor! This simple side dish is sure to become a family favorite. Now, it’s your turn to try it out! Don’t forget to leave a comment below and let me know how your Glazed Carrots turned out. And if you enjoyed this recipe, be sure to share it with your friends and family!
Glazed Carrots (Never Mushy Again!)

Ingredients
- 1 pound baby carrots, peeled
- 2 tablespoons unsalted butter
- 2 tablespoons honey
- 1 tablespoon water
- 1/4 teaspoon salt
- 1/4 teaspoon black pepper
- 1 tablespoon chopped fresh parsley, for garnish
Directions
- Prepare the carrots: Ensure the baby carrots are peeled and roughly the same size for even cooking.
- Melt the butter: In a large skillet, melt the butter over medium heat.
- Add carrots and glaze: Add the carrots to the skillet. Stir in the honey, water, salt, and pepper.
- The Chef’s Technique (Glazing): This is where the magic happens. Cook the carrots, stirring occasionally, for about 8-10 minutes, or until they are tender-crisp and the glaze has thickened and coats the carrots evenly. The key is to let the carrots lightly caramelize in the honey and butter, creating a beautiful sheen and enhancing their natural sweetness, this technique is called glazing. Ensure that you stir it so that it doesn’t burn!
- Garnish and serve: Transfer the glazed carrots to a serving dish. Garnish with freshly chopped parsley. Serve immediately.