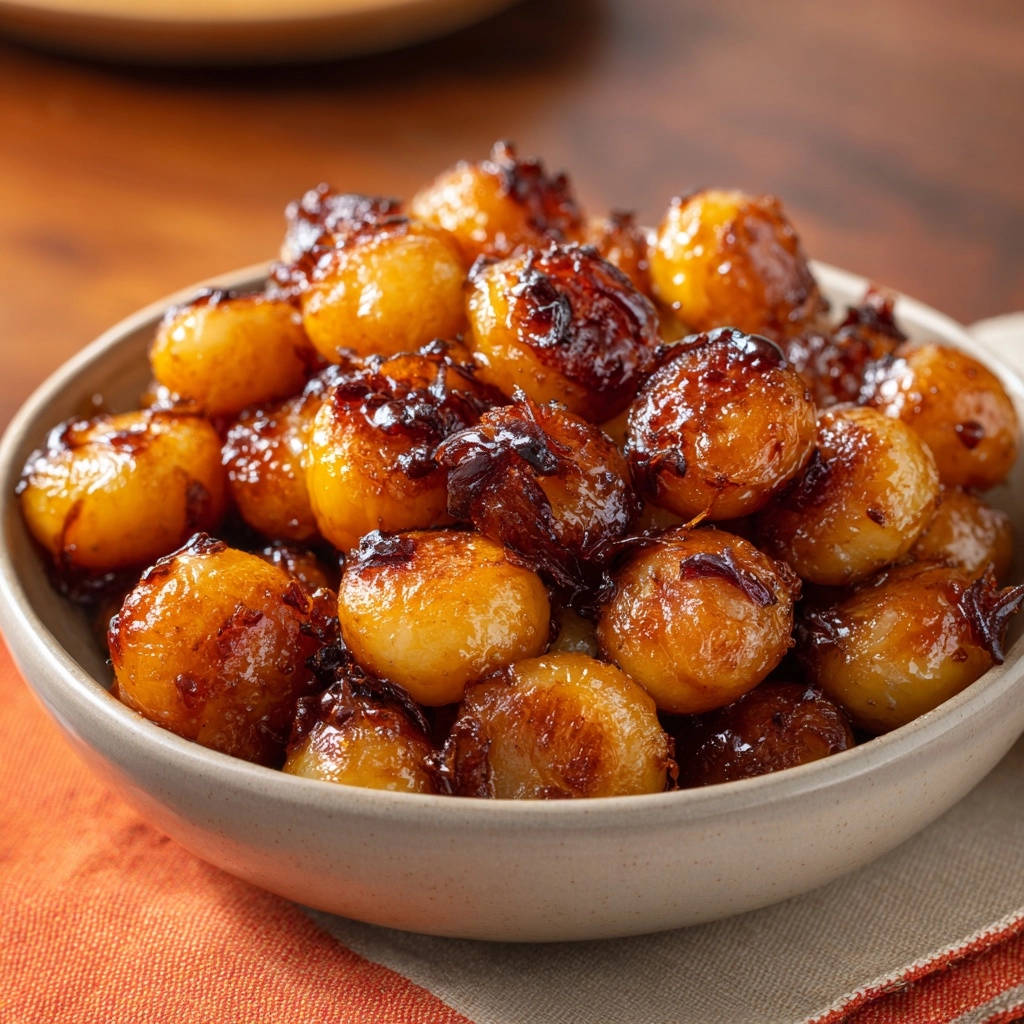
Making truly exceptional glazed pearl onions can feel like a kitchen quest; often, they end up frustratingly tough in the middle despite a beautiful exterior. I’ve spent years perfecting this side dish, and I promise you, this recipe guarantees those elusive perfectly tender and glistening Glazed Pearl Onions every single time.
It’s a simple, reliable method that transforms them into a caramelized, savory-sweet delight, ready to elevate any meal from a holiday feast to a special weeknight dinner.
Why These Glazed Pearl Onions Will Be Your New Go-To Side
This recipe isn’t just about cooking pearl onions; it’s about mastering their potential. You’ll achieve a depth of flavor and an unparalleled tenderness that will make these a star on your table.
The gentle cooking method ensures they are soft throughout, while the simple glaze provides a luxurious sheen and balanced sweetness that’s simply addictive.
The Secret to Perfectly Tender Onions (No More Tough Bites!)
The magic truly happens during a crucial covered simmering phase. This step allows the pearl onions to steam in their own sweet liquid, ensuring they cook through evenly and become wonderfully soft without turning mushy.
It’s the key to banishing those annoying tough centers forever.
Achieving That Irresistible, Glossy Glaze
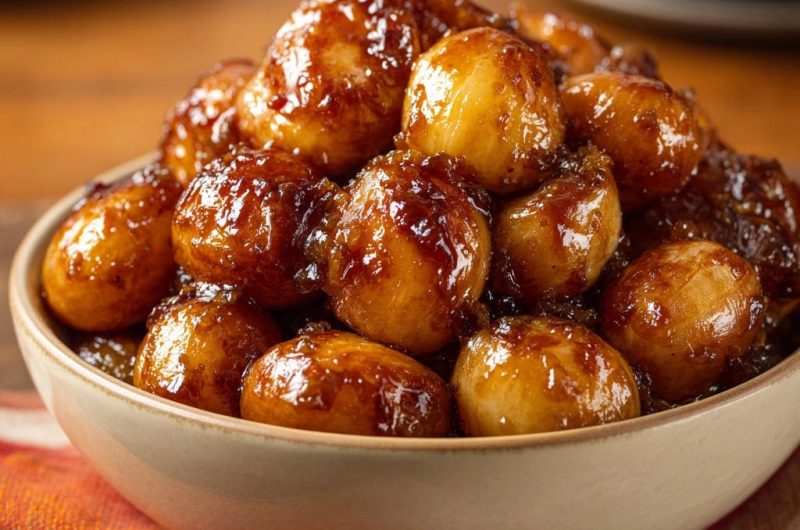
After the onions are tender, we’ll uncover them and allow the liquid to reduce. This process concentrates the flavors and thickens the brown sugar mixture into a rich, syrupy glaze that beautifully coats each onion, giving them that signature irresistible sheen and a delicate caramelized finish.
Essential Ingredients for Stunning Glazed Pearl Onions
The beauty of these Glazed Pearl Onions lies in the simplicity of their ingredients. Quality components, even in a short list, make all the difference.
Choosing the Right Pearl Onions
For the best results, select firm, unblemished pearl onions. Look for those that are roughly uniform in size, as this ensures even cooking.
Both white and red pearl onions work beautifully; choose based on your preference for color and mildness.
Beyond the Basics: Butter, Brown Sugar & Broth
Butter forms the foundational richness, allowing the onions to brown beautifully and absorb a lovely, savory flavor right from the start.
Light brown sugar is essential for the sweet caramelization and the deep, rich color of the glaze. Its molasses notes perfectly complement the onions’ natural sweetness.
Water or vegetable broth provides the necessary liquid for simmering, tenderizing the onions from within. Vegetable broth will add an extra layer of savory depth.
Salt and black pepper are crucial for seasoning, balancing the sweetness of the glaze and enhancing the overall flavor profile of your Glazed Pearl Onions.
Your Kitchen Arsenal: Tools for Glazed Pearl Onions Success
Having the right tools on hand makes the process of creating these Glazed Pearl Onions smooth and enjoyable.
Must-Have Cookware
-
Large Skillet or Pot with Lid: A wide, heavy-bottomed skillet or Dutch oven is ideal. Its large surface area allows the pearl onions to brown evenly, and the tight-fitting lid is essential for the tenderizing simmering step.
-
Small Pot: You’ll need a small saucepan to blanch the pearl onions, making the peeling process incredibly easy.
Helpful Utensils
-
Slotted Spoon: Perfect for easily transferring the blanched onions from hot water to an ice bath.
-
Tongs or Wooden Spoon: Ideal for stirring the pearl onions during browning and glazing, ensuring even cooking and coating.
-
Sharp Paring Knife: Crucial for trimming the ends of the blanched onions before peeling.
Your Path to Glazed Pearl Onions Perfection: A Detailed Guide
Follow these steps closely, and you’ll be rewarded with a side dish that’s both elegant and incredibly flavorful. Each stage is designed for optimal taste and texture.
-
Blanching for Easy Peeling: A Crucial First Step
This is your secret weapon for stress-free pearl onion prep! Bring a small pot of water to a rolling boil.
Carefully add the pearl onions and boil for just 1 minute. Immediately drain them and plunge into a bowl of ice water to stop the cooking process.
Once cool enough to handle, simply snip off the root and stem ends, and the skins will effortlessly slip right off. This step is a game-changer!
-
Browning for Depth of Flavor
In a large skillet or pot, melt the butter over medium heat. Add your beautifully peeled pearl onions to the skillet.
Cook, stirring occasionally, for about 5-7 minutes until they achieve a lovely light brown hue on all sides. This browning step is crucial as it begins the caramelization process, building a rich, savory foundation for your Glazed Pearl Onions.
-
Creating the Sweet Simmering Base
Now, stir in the brown sugar, water or vegetable broth, salt, and pepper. Stir continuously until the brown sugar is completely dissolved and the liquid comes to a gentle simmer.
This creates the flavorful liquid that will tenderize the onions and eventually become your glossy glaze.
-
The Tenderness Turn: Covering and Simmering
Here’s the critical step for achieving that perfect, tender texture: reduce the heat to low, cover the skillet tightly, and let the onions simmer gently for 20 minutes.
This allows the onions to steam in the sweet liquid, cooking them through evenly from the inside out and ensuring no tough centers remain.
-
Unveiling the Glaze: Reducing for Shine
After 20 minutes, uncover the skillet. Increase the heat slightly to medium-low and continue to simmer, uncovered, stirring occasionally.
As the liquid slowly evaporates, it will begin to thicken and transform into a beautiful, glossy glaze that coats each pearl onion. This reduction process takes another 15-20 minutes.
Continue simmering until the onions are easily pierced with a fork and the glaze is thick, syrupy, and beautifully adheres to the onions.
-
Serving Your Glazed Pearl Onions Masterpiece
Once the Glazed Pearl Onions are perfectly tender and shimmering with that gorgeous glaze, they are ready to be served warm.
Transfer them to a serving dish, ensuring you scrape out all that delicious glaze from the bottom of the pan.
Chef’s Secrets: Elevating Your Glazed Pearl Onions
Beyond the steps, a few expert tips can take your Glazed Pearl Onions from great to truly unforgettable.
Don’t Skip the Blanching (Even if You’re Tempted!)
While it might seem like an extra step, blanching is non-negotiable for perfectly peeled pearl onions. It saves significant time and frustration, ensuring uniform size and smoother texture for browning.
Mastering the Browning Stage
Resist the urge to crowd the pan during browning. Work in batches if necessary to ensure each onion has enough space to caramelize properly, developing a deeper, richer flavor.
Patience for the Perfect Glaze
The final reduction phase requires patience. Don’t rush it by increasing the heat too high, as this can cause the glaze to burn or become too thick too quickly.
A gentle simmer allows the flavors to concentrate and the glaze to develop that beautiful, consistent sheen.
Flavor Boosters & Creative Variations
For an extra layer of complexity, add a splash of balsamic vinegar during the last few minutes of simmering to deepen the glaze’s flavor. A pinch of red pepper flakes can introduce a subtle warmth, or a sprinkle of fresh thyme or rosemary at the end adds an aromatic finish.
For another stunning glazed vegetable side, be sure to try our delicious glazed carrots recipe.
Troubleshooting Common Glazed Pearl Onions Dilemmas
Even with the best intentions, sometimes things go awry. Here’s how to fix common issues with your Glazed Pearl Onions.
Why Are My Onions Still Tough?
This usually means they haven’t simmered long enough in the covered stage. Ensure your heat is truly low during the 20-minute covered simmer, allowing the gentle steam to penetrate the onions thoroughly.
If still tough, cover again and simmer for another 5-10 minutes.
My Glaze Isn’t Thickening
The glaze needs more time uncovered to evaporate excess liquid and concentrate. Increase the heat slightly to medium-low and continue simmering, stirring occasionally, until it reaches your desired syrupy consistency.
Onions Burning Before Tender
Your heat is likely too high during the initial browning or the covered simmer. Ensure you’re cooking over medium heat for browning and then low heat for simmering to prevent scorching.
Always add the specified liquid amount to prevent dryness during cooking.
Pairing Perfection: What to Serve with Glazed Pearl Onions
These Glazed Pearl Onions are incredibly versatile, making them a perfect accompaniment to a wide range of dishes.
Classic Holiday Pairings
Glazed Pearl Onions are a quintessential holiday side. They perfectly complement roasted meats like turkey, ham, or prime rib, adding a touch of sweet and savory elegance to your festive spread.
Serve them alongside mashed potatoes, green bean casserole, or a classic stuffing for a complete holiday meal.
Everyday Meal Enhancers
Don’t reserve these gems just for special occasions! They elevate everyday roasted chicken, pan-seared pork chops, or a simple steak dinner.
They also make a fantastic complement to a simple weeknight roast, like our perfectly tender herb-roasted chicken breast.
Smart Prep: Storing & Making Glazed Pearl Onions Ahead
Planning ahead makes entertaining, or simply enjoying these delicious Glazed Pearl Onions, even easier.
Storing Leftovers Safely
Store any leftover Glazed Pearl Onions in an airtight container in the refrigerator for up to 3-4 days. The glaze will thicken further when chilled, but it will loosen upon reheating.
Can You Make Them Ahead?
Absolutely! Glazed Pearl Onions are an excellent make-ahead dish. You can prepare them completely up to 1-2 days in advance, refrigerating them once cooled.
Making them ahead allows the flavors to meld even further, often tasting even better the next day.
Reheating for Best Results
To reheat, transfer the Glazed Pearl Onions to a skillet and warm gently over low-medium heat, stirring occasionally. You may need to add a tablespoon or two of water or broth to loosen the glaze.
Alternatively, you can warm them in a microwave-safe dish until heated through.
Your Glazed Pearl Onions Questions Answered
Here are answers to some common questions about making perfect Glazed Pearl Onions.
Can I Use Frozen Pearl Onions?
Yes, you can! If using frozen pearl onions, there’s no need to blanch them. Simply thaw them completely and pat them dry before proceeding with the browning step.
Cooking times might vary slightly, but the tenderness will still be achieved through the covered simmering.
What if I Don’t Have Brown Sugar?
While brown sugar provides the best flavor and glaze, you can substitute with granulated sugar. However, you might want to add a tiny splash of molasses (if available) to replicate some of the depth brown sugar provides.
The color and richness of the glaze might be slightly lighter with just granulated sugar.
Is This Recipe Gluten-Free or Vegan?
This recipe is naturally gluten-free. It is not vegan due to the butter. To make it vegan, simply substitute the butter with a plant-based butter alternative, ensuring it melts and browns well.
Use vegetable broth instead of water for maximum flavor in the vegan version.
Can I Double or Halve the Recipe?
Yes, this recipe scales well. When doubling, ensure you use a significantly larger skillet or pot to avoid overcrowding, which can hinder proper browning. When halving, keep an eye on the glaze, as it might thicken faster.
Adjust the simmering and reduction times as needed based on the quantity, always relying on the visual and fork-tender cues.
Ready to Impress? Share Your Glazed Pearl Onions Masterpiece!
Now that you have the secrets to perfectly tender and glossy Glazed Pearl Onions, I encourage you to try this recipe for your next gathering or simply as a delightful addition to a weeknight meal. The rich flavor and luxurious texture are sure to impress.
Don’t forget to share your creations and experiences; I love hearing about your kitchen successes! And for more incredible vegetable side dishes that bring a touch of gourmet to any plate, explore our collection of crispy roasted Brussels sprouts and other delightful recipes.
Glazed Pearl Onions
Course: Side DishCuisine: American CuisineDifficulty: easy6
servings15
minutes40
minutes55
minutesAmerican Cuisine
Ingredients
1.5 pounds pearl onions, peeled
2 tablespoons butter
1/4 cup packed light brown sugar
1/2 cup water or vegetable broth
1/4 teaspoon salt
1/8 teaspoon black pepper
Directions
- To easily peel pearl onions, blanch them briefly. Bring a pot of water to a boil, add the onions, and boil for 1 minute. Drain and immediately plunge into ice water. Once cool enough to handle, the skins should slip off easily after trimming the root and stem ends.
- In a large skillet or pot, melt the butter over medium heat. Add the peeled pearl onions and cook, stirring occasionally, until they are lightly browned on all sides, about 5-7 minutes.
- Stir in the brown sugar, water or vegetable broth, salt, and pepper. Stir until the sugar is dissolved and the liquid comes to a simmer.
- Here’s the key for tenderness: Reduce the heat to low, cover the skillet, and let the onions simmer gently for 20 minutes. This allows them to steam and cook through evenly.
- Uncover the skillet. Increase the heat slightly to medium-low and continue to simmer, uncovered, stirring occasionally. As the liquid evaporates, it will thicken into a glossy glaze. This will take another 15-20 minutes. Keep simmering until the onions are easily pierced with a fork and the glaze is thick and coats the onions beautifully.
- Serve warm.